Thingiverse
FT-817 Speaker Mic Plug by DH1ND
by Thingiverse
Last crawled date: 3 years ago
The following instruction is only useful for electrically talented people. No liability is assumed for damages resulting from this!
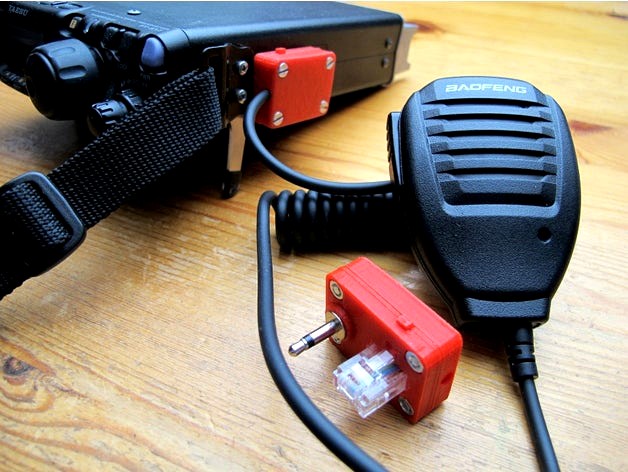
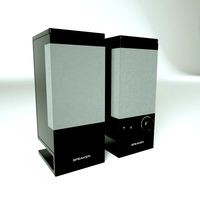
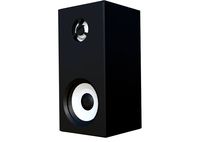
Right from the backpack I would like to operate my radio. An important prerequisite is to guide the loudspeaker outwards. So what is closer than a Speaker Mic to use. However, a microphone with a corresponding plug I could't find. Now a 3 $ Speaker Mic is successfully connected to the FT-817. At the cheap microphone I cut off the original plug and I made further modifications. The existing LED is replaced by the microphone capsule and the series resistor is bridged. Also a 3/4 piece of a paper handkerchief was used inside the Speaker Mic for sound insulation. Of course, there are more high-quality Speaker Mics on the market, but the result is notable after the modifications.
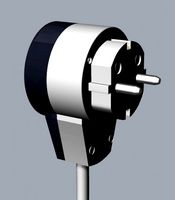
The RJ45 plug and the inner life of the jack plug are fixed with a few drops of super glue from the inside of the Plug. The final wiring with the coupling capacitor and the resistor are soldered in the Speaker Mic Plug (see diagrams). The upper part is assembled with the lower part by four M3x10 screws and nuts. Attention must be paid to the mobility of the Unlock.
WARNING:
Special pliers are required to crimp the wires at the RJ45 connector. Please do not use the plug at the transceiver without crimping or complete wiring with the Speaker Mic. This will inevitably result in damage to the FT-817! The electrical insulation of the contacts and components is a matter of course.
When assembling all parts together, please don't forget the "Unlock"! Otherwise the FT-817 Speaker Mic Plug is very difficult to get out of the socket from the transceiver.
vy 73 es 55 de DH1ND
Right from the backpack I would like to operate my radio. An important prerequisite is to guide the loudspeaker outwards. So what is closer than a Speaker Mic to use. However, a microphone with a corresponding plug I could't find. Now a 3 $ Speaker Mic is successfully connected to the FT-817. At the cheap microphone I cut off the original plug and I made further modifications. The existing LED is replaced by the microphone capsule and the series resistor is bridged. Also a 3/4 piece of a paper handkerchief was used inside the Speaker Mic for sound insulation. Of course, there are more high-quality Speaker Mics on the market, but the result is notable after the modifications.
The RJ45 plug and the inner life of the jack plug are fixed with a few drops of super glue from the inside of the Plug. The final wiring with the coupling capacitor and the resistor are soldered in the Speaker Mic Plug (see diagrams). The upper part is assembled with the lower part by four M3x10 screws and nuts. Attention must be paid to the mobility of the Unlock.
WARNING:
Special pliers are required to crimp the wires at the RJ45 connector. Please do not use the plug at the transceiver without crimping or complete wiring with the Speaker Mic. This will inevitably result in damage to the FT-817! The electrical insulation of the contacts and components is a matter of course.
When assembling all parts together, please don't forget the "Unlock"! Otherwise the FT-817 Speaker Mic Plug is very difficult to get out of the socket from the transceiver.
vy 73 es 55 de DH1ND
Similar models
thingiverse
free

FT817 FT818 YAESU Protector
...ft817 ft818 yaesu protector
thingiverse
here is protection part for transceiver yaesu ft 817 and 818.
thingiverse
free
PC Table microphone with 6mm capsule by ritsudo
...re to microphone capsule
place the capsule inside head and put a cap onto it
tie all parts (base, frame and head+cap) using glue.
grabcad
free

HAMPACK V2
...hampack v2
grabcad
military style case for the transceiver yaesu ft-817/818
thingiverse
free

Yaesu FT-817/818 stand by Brett1974
...rse
yaesu ft-817/818 stand. stand is assembled using 3mm countersunk bolts and nuts. i used velcro strap to hold radio to stand.
free3d
free
Insulated crimp on electrical connector V1
...insulated crimp on electrical connector v1
free3d
insulated crimp on electrical connector v1 printable, low poly model.
grabcad
free

Insulated Ring Terminal
...th ø6mm lug end. blue insulation for cable/wire sizes 1.0mm ~ 2.5mm. both crimped and un-crimped parts included in the step file.
thingiverse
free

Yaesu FT-817 / FT-818 protector + stand
...om 28/12/2019 : please see the remix i've made, more precise and with mic support : https://www.thingiverse.com/thing:4071758
grabcad
free

crimp on for wires
...crimp on for wires
grabcad
it's a crimp-on used for wires in electrical circuits. thought it might come in handy.
thingiverse
free

FT-817 DC-Devil by DH1ND
... dh1nd
special thanks to peter, vk3ye for the inspiration on youtube (less stress for your ft817's external power connector).
thingiverse
free

Icom IC-705 Mic Stand by midlandjack
...r better grip with desk. this design will hold other brands of small microphones, such as the external mic for a kenwood th-d74.
Dh1Nd
thingiverse
free

Jalousie Positioner Replacement by DH1ND
...jalousie positioner replacement by dh1nd
thingiverse
due uv-sunlight the original is broken and had to be replaced.
thingiverse
free

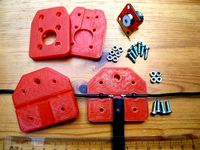
Radio Mounting Plate by DH1ND
...12 - shortened to 10mm) for mounting on handlebars.
please use a finger ptt headset for safety when cycling!
vy 73 es 55 de dh1nd
thingiverse
free
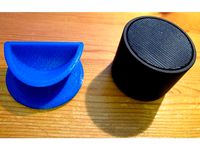
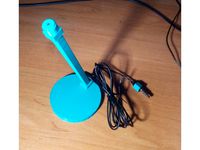
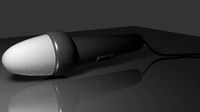
Bluetooth Speaker - Lounger by DH1ND
...tion for the bluetooth loudspeaker (approx. ø 6 x h 5 cm).
now i'm getting the correct sound at my desk.
vy 73 es 55 de dh1nd
thingiverse
free

Pizza cutter from a 2,5" HDD by DH1ND
... the two pla-parts, insert the data disk and fix it with m3x10mm screw and nut.
have fun with sharing pizza!
vy 73 es 55 de dh1nd
thingiverse
free
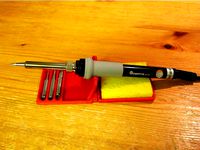
Pocket Soldering Iron Stand by DH1ND
... and from the back side with the middle finger against the top - now you can raise the top without problems.
vy 73 es 55 de dh1nd
thingiverse
free

Digispark USB Development Board - Cable Hood by DH1ND
...n the foreground and hands free).
upon request i provide the source code for the usb-digispark or the addon.
vy 73 es 55 de dh1nd
thingiverse
free
FT-817 DC-Devil by DH1ND
... dh1nd
special thanks to peter, vk3ye for the inspiration on youtube (less stress for your ft817's external power connector).
thingiverse
free
Doublet-Isolators for 300 Ohm Twin Lead by DH1ND
..., the built-in tuner in the transceiver is sufficient. more details you can find under g5rv in the internet.
vy 73 es 55 de dh1nd
thingiverse
free

24 Volts LED interior lighting by DH1ND
...er, all 28 leds should light up. the total current consumption is about 220ma (5,3watt). a suitable fuse is strongly recommended.
817
3d_export
$60

Architecture 817 3D Model
...lege campus max street landscape commercial building medical hospital offices
architecture 817 3d model lotusmodel 49219 3dexport
turbosquid
$119

GKB-817 (Soviet cargo trailer)
...(soviet cargo trailer) for download as 3ds, max, obj, and fbx on turbosquid: 3d models for games, architecture, videos. (1375293)
3d_export
$150

3d building 817 3D Model
...metropolis street block detailed definition realistic skyscraper huge collection
3d building 817 3d model kanhtart 46770 3dexport
3d_export
$50

3D Home 817 3D Model
... chair furniture texture table lamp apartment rug carpet restaurant hotel sitting
3d home 817 3d model richard3015 47221 3dexport
3d_export
$18

collection of decorative plants in white flowerpots 817
...;br>thrinax<br>crassula<br>banana palm<br>ravenala<br>strelitzia<br>calathea lutea - cigar plant
3ddd
$1

Кровать polywood
...кровать polywood 3ddd polywood кровать polywood коллекция gretahttp://www.polywood.it/eng/catalogue/night/greta-white-cd-817aspx ...
3ddd
$1

Venus Large - Wall Lamp
...- wall lamp designer - alberto meda and paola rizzattohttp://www.limn.com/designers/294/alberto-meda-and-paola-rizzatto/817venus-large.html# ...
3ddd
$1

Fiam coffe tables "macrame"
...журнально-кофейных столика от студии lucidipevere. polys: 816 722 verts: 817 ...
3d_export
$5

palm tree 7s
...palm tree 7s<br>formats: 3ds max 2014, obj<br>preview: yes<br>units: centimeters<br>height: 817 ...
cg_studio
$155

3d building 8173d model
...re shop home skyscraper streets
.max - 3d building 817 3d model, royalty free license available, instant download after purchase.
Mic
turbosquid
$5

mic
...mic
turbosquid
royalty free 3d model mic for download as max on turbosquid: 3d models for games, architecture, videos. (1365256)
turbosquid
$2
Mic
...c
turbosquid
royalty free 3d model mic for download as blend on turbosquid: 3d models for games, architecture, videos. (1380620)
3ddd
free

Tyelevic Mic
...tyelevic mic
3ddd
микрофон
tyelevic mic
turbosquid
$49
Mic
...royalty free 3d model mic for download as blend, 3ds, and fbx on turbosquid: 3d models for games, architecture, videos. (1597958)
turbosquid
$70
mic
... available on turbo squid, the world's leading provider of digital 3d models for visualization, films, television, and games.
turbosquid
$42

mic
... available on turbo squid, the world's leading provider of digital 3d models for visualization, films, television, and games.
turbosquid
$20

mic
... available on turbo squid, the world's leading provider of digital 3d models for visualization, films, television, and games.
turbosquid
$10

mic
... available on turbo squid, the world's leading provider of digital 3d models for visualization, films, television, and games.
turbosquid
$5

mic
... available on turbo squid, the world's leading provider of digital 3d models for visualization, films, television, and games.
turbosquid
$4
mic
... available on turbo squid, the world's leading provider of digital 3d models for visualization, films, television, and games.
Ft
3ddd
free
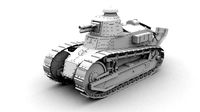
Renault FT-17
...renault ft-17
3ddd
ft-17 , renault , танк
turbosquid
$85

40 ft container
...id
royalty free 3d model 40 ft container for download as max on turbosquid: 3d models for games, architecture, videos. (1154866)
turbosquid
$45
container 40 ft
...id
royalty free 3d model container 40 ft for download as max on turbosquid: 3d models for games, architecture, videos. (1480343)
turbosquid
$85
Renault FT-17
...yalty free 3d model renault ft-17 for download as 3ds and max on turbosquid: 3d models for games, architecture, videos. (1145251)
turbosquid
$5

NVidia FT 03
... 3d model nvidia ft 03 for download as 3ds, max, obj, and fbx on turbosquid: 3d models for games, architecture, videos. (1233064)
turbosquid
$25

Container 20 ft
...l container 20 ft for download as 3ds, max, obj, fbx, and upk on turbosquid: 3d models for games, architecture, videos. (1384306)
turbosquid
$25
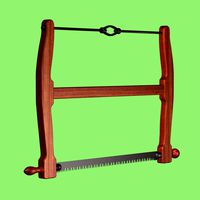
FT Buck Saw
... available on turbo squid, the world's leading provider of digital 3d models for visualization, films, television, and games.
3ddd
free
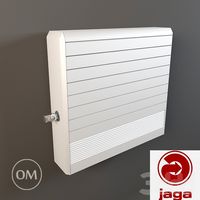
Jaga - Maxi FT-10
... om
радиатор jaga - maxi ft-10
width: 63 cm
depth: 13 cm
height: 59 cm
сайт производителя:http://www.jaga.be/
turbosquid
$45

20 ft container
...ontainer for download as blend, blend, dae, fbx, obj, and stl on turbosquid: 3d models for games, architecture, videos. (1516815)
turbosquid
$35

Yaesu FT-897D Transceiver
...y free 3d model yaesu ft-897d transceiver for download as max on turbosquid: 3d models for games, architecture, videos. (1160274)
Speaker
3d_ocean
$12
Speakers
...speakers
3docean
beautiful customizable customizable speakers
speakers 3d model
3d_ocean
$5

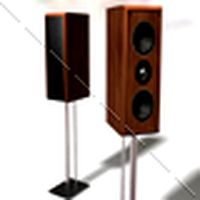
Speaker
...speaker
3docean
audio speaker
minimalist audio speaker for your design.
3d_export
$5
speaker
...speaker
3dexport
speaker
archibase_planet
free

Speaker
...er
archibase planet
acoustic system column speaker loud speaker
speaker 3 - 3d model (*.gsm+*.3ds) for interior 3d visualization.
archibase_planet
free

Speaker
...er
archibase planet
column speaker loud speaker acoustic system
speaker 2 - 3d model (*.gsm+*.3ds) for interior 3d visualization.
archibase_planet
free

Speaker
...er
archibase planet
loud speaker column speaker acoustic system
speaker 1 - 3d model (*.gsm+*.3ds) for interior 3d visualization.
archibase_planet
free

Speaker
...speaker
archibase planet
speaker audio
speaker din - 3d model for interior 3d visualization.
archibase_planet
free

Speakers
...speakers
archibase planet
speaker speakers audio
speakers1 - 3d model for interior 3d visualization.
3d_ocean
$6
Speaker
...speaker
3docean
3d model music sound speaker
model,3d,speaker,sound,best,music
3d_ocean
$4
Speaker
...speaker
3docean
audio computer desktop electronic headphone microphone music pc speaker speakers technology
.
Plug
3d_export
$5
plug
...plug
3dexport
3d_export
$5
plug cover
...plug cover
3dexport
plug cover
3d_export
$5
spark plug
...spark plug
3dexport
spark plug
3d_export
free
spark plug
...spark plug
3dexport
spark plug
turbosquid
$30
plug
... available on turbo squid, the world's leading provider of digital 3d models for visualization, films, television, and games.
turbosquid
$15
plug
... available on turbo squid, the world's leading provider of digital 3d models for visualization, films, television, and games.
turbosquid
$10
Plug
... available on turbo squid, the world's leading provider of digital 3d models for visualization, films, television, and games.
turbosquid
$10
Plug
... available on turbo squid, the world's leading provider of digital 3d models for visualization, films, television, and games.
turbosquid
$1
Plug
... available on turbo squid, the world's leading provider of digital 3d models for visualization, films, television, and games.
turbosquid
free
plug
... available on turbo squid, the world's leading provider of digital 3d models for visualization, films, television, and games.