Thingiverse
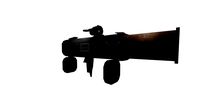
Forearm rocket launcher by JohnFraserBuilds
by Thingiverse
Last crawled date: 3 years ago
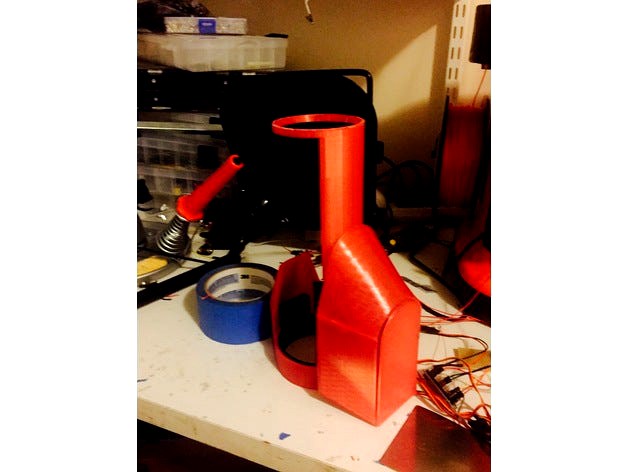
My own 3d printable design of Iron Man's forearm rocket launcher. To build yourself you will need 3 servos, an arduino nano and some jumpers, standard laser diode(optional), toggle switch, battery snap, 2 nails, a drill, super glue or model glue, a bit of aluminum stock, and an inch diameter hole-saw drill bit. the sizes are based on my forearm so you may need to edit the size of the bracer rings to fit your particular wrist.
The arduino code is the attached word doc, the lift servos used to raise the platform are two separate servo motors with all wires joined to act as one servo, whereas tilt servo is a single servo used to increase the angle of launch to around 30 degrees to ensure the rocket clears the launcher. Servo values may vary depending how you build it.
wiring is simple, servos and laser all lead to a common ground on the board, I used the other ground for the battery snaps negative, I used 3v3 to the toggle switch to the laser diode. lift servos trigger wires lead to d10 and tilt servo leads to d9, all servos power comes from the +5vpin, d2 should go to the switch then to ground. battery snap positive of course goes to Vin, i used a rechargeable 9v battery but any suitable arduino power supply should work.
Assembly requires some patience, I used gorilla glue for most parts, first I used a 1 inch hole saw to cut a circular piece of aluminum out of stock (this is the rocket blast plate) then i used the blast plate tool (flat disc with three holes in design) to size where to drill holes, drill two out of the three, make the holes large enough to slip two nails (nails should be as straight as you can manage) into the holes all the way till the end then use the launch guide spacer (two short tubes with arch in design) to align the nails and glue the nails to the blast plate, these are your launch guides, then glue the blast plate servo mount (somewhat circular piece missing two circular sections with a few weird looking protrusions) to the back of the blast plate with the nail heads in the center of the missing sections, so that the servo mounting ring protrudes straight back and the laser mount protrudes to the side. then glue protruding servo mount to servo on the opposite side of the laser diode, then glue this assembly to the lift frame (two axles with a stepped up rear section) glue the servo to the stepped up section such that the guide rails are over top of axles. then slip the movement arms(long rectangular shafts with circles on either ends) onto the axles and slip 4 of the arm caps (six small circular pieces) over top and glue the caps in place so that the arms move freely, then looking at the assembly from behind attach the left two arms to the pegs on the side of the mechanical base (flat plate with two risen pegs otherwise known as the only part that you needed to print with supports) you will want to glue the two lift servos so that their shafts are in line with the pegs from the opposite side, then glue the other two movement arms to the servo shafts, if done right this should complete the mechanical assembly and you should have a parallelogram shaped mechanism that moves up and backwards with a rocket guide that tilts up, at this point if you haven't already wire and code the arduino and make sure your mechanism works. now glue the flat base to the largest flat deck of the forearm base ( large piece with bracer and two flat decks on top and bottom) glue the mechanism such that it is centered but also as far back as possible bearing in mind that the back is where the bracer is. now glue the top shield plate (flat part that resembles a tombstone to the small flat protrusion on top of the blast plate servo mount so that the flat bottom of the "tombstone" lines up with the back of the tilt servo, then when the mechanism is in its collapsed position, glue the front shield plate to the main deck such that it surrounds the curved top of the tombstone then glue the side plates so that they line up with the front plate with the more slanted side facing the back then glue the wrist brace (long piece with smaller bracer) to the front of the main deck, such that if the bracer is on your forearm the wrist bracer would be on your wrist, finally glue the bottom shield (semi complete bracer with large shield looking shell) to the smaller deck of the forearm bracer, this should leave a small gap large enough to slip your battery into while using the gauntlet.
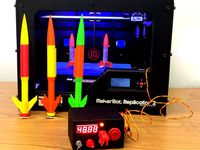
the rocket should slip easily onto the launch guides, if it gets caught on the launch guides then do not fire the rocket, I used an estes A3-4T rocket motor and estes launch controller if you intend to actually launch a rocket off the launcher as I have, bear in mind that model rockets are dangerous and that you USE AT YOUR OWN RISK and that I the author and designer of this project have NO LIABILITY FOR POTENTIAL HARM that was brought on by use or construction of this project and that I the creator of this project in no way condone launching a rocket while wearing the launcher as it is hazardous, please use rocket motors the way they were designed and specified to be used by the manufacturer. And have fun being iron man.
The arduino code is the attached word doc, the lift servos used to raise the platform are two separate servo motors with all wires joined to act as one servo, whereas tilt servo is a single servo used to increase the angle of launch to around 30 degrees to ensure the rocket clears the launcher. Servo values may vary depending how you build it.
wiring is simple, servos and laser all lead to a common ground on the board, I used the other ground for the battery snaps negative, I used 3v3 to the toggle switch to the laser diode. lift servos trigger wires lead to d10 and tilt servo leads to d9, all servos power comes from the +5vpin, d2 should go to the switch then to ground. battery snap positive of course goes to Vin, i used a rechargeable 9v battery but any suitable arduino power supply should work.
Assembly requires some patience, I used gorilla glue for most parts, first I used a 1 inch hole saw to cut a circular piece of aluminum out of stock (this is the rocket blast plate) then i used the blast plate tool (flat disc with three holes in design) to size where to drill holes, drill two out of the three, make the holes large enough to slip two nails (nails should be as straight as you can manage) into the holes all the way till the end then use the launch guide spacer (two short tubes with arch in design) to align the nails and glue the nails to the blast plate, these are your launch guides, then glue the blast plate servo mount (somewhat circular piece missing two circular sections with a few weird looking protrusions) to the back of the blast plate with the nail heads in the center of the missing sections, so that the servo mounting ring protrudes straight back and the laser mount protrudes to the side. then glue protruding servo mount to servo on the opposite side of the laser diode, then glue this assembly to the lift frame (two axles with a stepped up rear section) glue the servo to the stepped up section such that the guide rails are over top of axles. then slip the movement arms(long rectangular shafts with circles on either ends) onto the axles and slip 4 of the arm caps (six small circular pieces) over top and glue the caps in place so that the arms move freely, then looking at the assembly from behind attach the left two arms to the pegs on the side of the mechanical base (flat plate with two risen pegs otherwise known as the only part that you needed to print with supports) you will want to glue the two lift servos so that their shafts are in line with the pegs from the opposite side, then glue the other two movement arms to the servo shafts, if done right this should complete the mechanical assembly and you should have a parallelogram shaped mechanism that moves up and backwards with a rocket guide that tilts up, at this point if you haven't already wire and code the arduino and make sure your mechanism works. now glue the flat base to the largest flat deck of the forearm base ( large piece with bracer and two flat decks on top and bottom) glue the mechanism such that it is centered but also as far back as possible bearing in mind that the back is where the bracer is. now glue the top shield plate (flat part that resembles a tombstone to the small flat protrusion on top of the blast plate servo mount so that the flat bottom of the "tombstone" lines up with the back of the tilt servo, then when the mechanism is in its collapsed position, glue the front shield plate to the main deck such that it surrounds the curved top of the tombstone then glue the side plates so that they line up with the front plate with the more slanted side facing the back then glue the wrist brace (long piece with smaller bracer) to the front of the main deck, such that if the bracer is on your forearm the wrist bracer would be on your wrist, finally glue the bottom shield (semi complete bracer with large shield looking shell) to the smaller deck of the forearm bracer, this should leave a small gap large enough to slip your battery into while using the gauntlet.
the rocket should slip easily onto the launch guides, if it gets caught on the launch guides then do not fire the rocket, I used an estes A3-4T rocket motor and estes launch controller if you intend to actually launch a rocket off the launcher as I have, bear in mind that model rockets are dangerous and that you USE AT YOUR OWN RISK and that I the author and designer of this project have NO LIABILITY FOR POTENTIAL HARM that was brought on by use or construction of this project and that I the creator of this project in no way condone launching a rocket while wearing the launcher as it is hazardous, please use rocket motors the way they were designed and specified to be used by the manufacturer. And have fun being iron man.
Similar models
thingiverse
free

Forearm for InMoov Robot by PRopeG
...;arduino support": it holds the 6v battery (that will suply the servos) and the arduino board with its corresponding shield.
thingiverse
free

Wrist Mounted Rocket Launcher Adapter for Tripod Model Rocket Launchpad by SkyRider
...ary. also see v3 of the rocket for a more stable launching rocket. consider thin pieces of tile to protect the blast deflector.
thingiverse
free

Wrist mounted launcher (Spiderman Inspired) by MGboiii
... used a nylon belt). this is a fun little gadget that i had a blast designing and making, and i hope others can enjoy it as well.
3dwarehouse
free

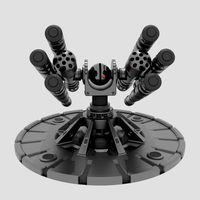
Anarchania Angelclaw (read description)
...l follow the direction of the laser beam (for curving around obstacles). #anarchania #gun #launcher #missile #rocket #rpg #weapon
cg_trader
$30

FZ233 Rocket Launcher
...helicopter use.
the fz233 is equipped with a liu interface (launcher interface unit) for use the fz275 lgr (laser guided rocket).
3dwarehouse
free

NDAF DarkFire Rocket Launcher
...s #btm #ciber_systems #cmm #fcpu #fraidy #natedude888 #ndaf #phat_cat #spyder #the_amazing_baron #thek #thin_smek #uac #uaf #usse
cg_trader
$10

Rocket with electromagnetic launcher
...ile future fixed launch pad electromagnetic launcher spaceship flies start flight technology modern various models various models
thingiverse
free
Arduino Rocket Launcher for 3D Printed Rockets by chall2009
...t launch in slow-mo
rockets that work well 3d printed rocket with forward swept fins by qwyksylverdisposable rocket by kebes22
thingiverse
free

InMoov Remix of Anar's awesome forearm parts. by alansrobotlab
...
forearm_r_rotawrist2v2 servo head aligned from the mounting hole in rotowrist2
2014-10-25: added wristgears3b, rotawrist2v2
3dwarehouse
free

Water Rocket Launcher
...ct. the launch mechanism can be found on youtube as i have supplied the url at the bottom #rocket_launcher #water_rocket_launcher
Forearm
turbosquid
$5
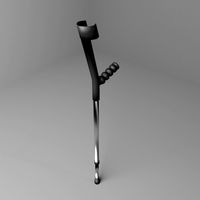
Forearm Walking Cane
...ing cane for download as blend, blend, 3ds, dae, fbx, and obj on turbosquid: 3d models for games, architecture, videos. (1590191)
3d_export
$12
Forearm Crutch 3D Model
...walking cane europe fore arm leg support disabled disable disability medical stick
forearm crutch 3d model firdz3d 73930 3dexport
turbosquid
$230
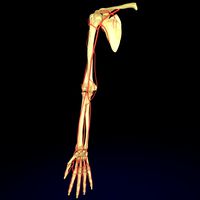
Upper limb arteries axilla arm forearm hand
...mb arteries- axilla, arm, forearm, hand for download as blend on turbosquid: 3d models for games, architecture, videos. (1422686)
cg_studio
$79
Human Forearm Bone and Muscle Structure3d model
...bx .c4d .3ds - human forearm bone and muscle structure 3d model, royalty free license available, instant download after purchase.
3d_export
$79

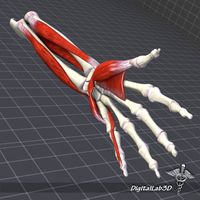
Human Forearm Bone and Muscle Structure 3D Model
...uman forearm bone and muscle structure 3d model download .c4d .max .obj .fbx .ma .lwo .3ds .3dm .stl digitallab3d 106345 3dexport
3d_export
$19
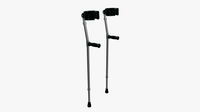
Lightweight walking forearm crutches
...x 7.18" x 36.77"<br>- model parts: 18<br>- material count: 3<br>- xform: yes<br>- boxtrick: yes
3d_export
$28
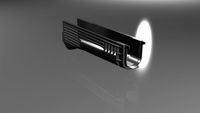
Forestock 3D Model
...forestock 3d model 3dexport rifle stock fore-end forestock forend forearm ak ak-74 74 1974 part item weapons forestock 3d...
3d_export
$14

Realistic hand 3D Model
...texture shader realistic photoreal palm finger fingernails subd wrist forearm realistic hand 3d model trinity23 26324...
3d_export
$49

Realistic hand rigged 3D Model
...texture shader realistic photoreal palm finger fingernails subd wrist forearm realistic hand rigged 3d model trinity23 26405...
3d_ocean
$29

Dibot - Utility Robot
...or utility bot of minimalistic aesthetics with unique rotating forearm joints. it is designed to be extremely tough and...
Launcher
3d_export
free

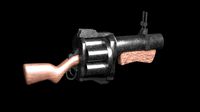
Rocket Grenade Launcher
...rocket grenade launcher
3dexport
rocket grenade launcher with texture
turbosquid
$24
Rocket Launcher
...id
royalty free 3d model rocket launcher for download as obj on turbosquid: 3d models for games, architecture, videos. (1310654)
turbosquid
$15

Chair launcher
...uid
royalty free 3d model chair launcher for download as max on turbosquid: 3d models for games, architecture, videos. (1307461)
turbosquid
$10
grenade launcher
...d
royalty free 3d model grenade launcher for download as max on turbosquid: 3d models for games, architecture, videos. (1564054)
turbosquid
$3

Soda Launcher
...id
royalty free 3d model soda launcher for download as blend on turbosquid: 3d models for games, architecture, videos. (1281755)
turbosquid
$1

Grenade Launcher
...id
royalty free 3d model grenade launcher for download as ma on turbosquid: 3d models for games, architecture, videos. (1661840)
turbosquid
$100

Missile Launcher
...3d model missile launcher for download as obj, fbx, and blend on turbosquid: 3d models for games, architecture, videos. (1174757)
turbosquid
$59
Projectile Launcher
...3d model projectile launcher for download as ma, fbx, and obj on turbosquid: 3d models for games, architecture, videos. (1283954)
turbosquid
$5
Rocket launcher
... 3d model rocket launcher for download as blend, fbx, and obj on turbosquid: 3d models for games, architecture, videos. (1568526)
turbosquid
$3

Rocket launcher
... 3d model rocket launcher for download as 3ds, obj, and blend on turbosquid: 3d models for games, architecture, videos. (1335390)
Rocket
3d_export
$5
rocket
...rocket
3dexport
rocket 3d model low poly
3d_export
$5

rocket
...rocket
3dexport
rocket low poly 3d model cartoon
archibase_planet
free

Rocket
...rocket
archibase planet
rocket toy
rocket tintin's n290813 - 3d model (*.gsm+*.3ds+*.max) for interior 3d visualization.
3d_export
$5

Rocket
...rocket
3dexport
the rocket is made from a cylinder made in blender 3.0
turbosquid
$6

Rocket Baby Rocket Stool
...el rocket baby rocket stool for download as max, obj, and fbx on turbosquid: 3d models for games, architecture, videos. (1502645)
turbosquid
$15

rocket
...ket
turbosquid
royalty free 3d model rocket for download as on turbosquid: 3d models for games, architecture, videos. (1340796)
turbosquid
$10
Rocket
...ket
turbosquid
royalty free 3d model rocket for download as on turbosquid: 3d models for games, architecture, videos. (1247547)
3d_export
$5

scifi rocket
...scifi rocket
3dexport
scifi rocket
turbosquid
$199

rockets
...turbosquid
royalty free 3d model rockets for download as max on turbosquid: 3d models for games, architecture, videos. (1233135)
turbosquid
$30
Rocket
...
turbosquid
royalty free 3d model rocket for download as fbx on turbosquid: 3d models for games, architecture, videos. (1290260)