Thingiverse
Flashforge FFC Pro Vent Kit by ragingrivers
by Thingiverse
Last crawled date: 3 years ago
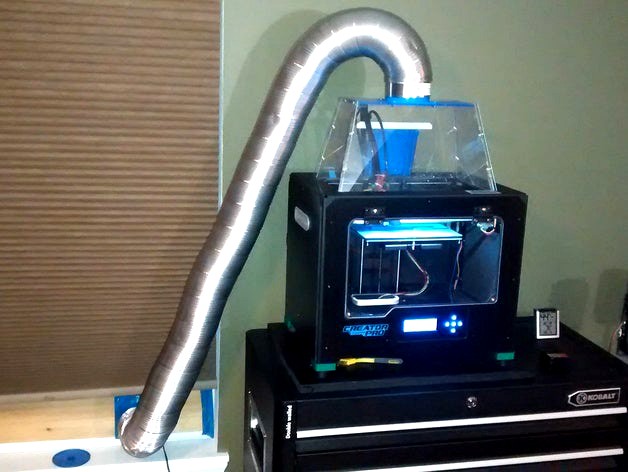
Latest UPDATE 8/14/16 Added a Straight Coupling Adapter for the clear hose listed, see pictures, works with all existing parts but now allows easy plug and unpluging of the hose and I use the Vent plug when ventilation system is not in use.
This is meant to be a full ventilation kit for a Flashforge Creator Pro.
You will need to print:
-Top Replacement pieces for FFC Pro: FFC PRO Vent Top Left and Right (2 pieces total)
-Duct to mount to top of new FFC Pro Top: 4in Vent adapter from ffcp01 file duct.mount (1)
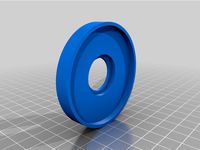
-A 120mm Fan to 4in Vent Hose adapter (1)
Recommended to print but not needed:
-120mm exhaust cap (designed for smooth exhaust directed downward with blocked line of sight, preventing most drafts and rain)
-FFC PRO Hood Plug Remix (Trapping additional heat inside for printing ABS)
-Some form of side plugs, many available on thingiverse (to trap heat)
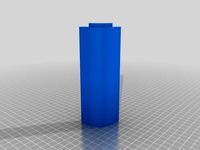
-4in Vent Plug (for when not in use in an air conditioned home, I originally intended for this to be wrapped in a compliant tape like electrical tape but this is not sealing as well as I'd want, and will likely make another version in the future)
You will need to buy:
-1x 120mm fan (you can use more, or use a different fan setup with a different adapter), I used a Corsair SP https://www.amazon.com/Corsair-SP120-High-Performance-Twin/dp/B007RESFYK
-1x 4in Duct hose, I originally purchased https://www.amazon.com/gp/product/B003CLL9V8/ref=oh_aui_detailpage_o01_s00?ie=UTF8&psc=1 and the fittings are currently setup to take both hoses as pictured, but I prefer this: https://www.amazon.com/gp/product/B000DZFTEO/ref=oh_aui_detailpage_o00_s00?ie=UTF8&psc=1 which is more flexible.
-1x 12 volt power supply, anything will do to power one fan, I used: https://www.amazon.com/gp/product/B000MGG6SC/ref=oh_aui_search_detailpage?ie=UTF8&psc=1 (it really can only power two fans and there is a good speed drop)
-4x #8 or #6 screws, depending on how accurate your hole drilling is :) 2.5 to 3in long, and nuts
4x #8 or #6 screws, depending on how accurate your printing is :) 1in long and nuts
-1x piece of 1inx6inxwidth of your window, I used cedar which is recommended, or you will need a painted board or weather resistant material if you want it exposed
Nice to haves:
-Foam and tape to seal the window sash where open above, and stick on foam around the board, mine is sealed pretty tight.
-A way to make this work between my fan and the outside http://www.thingiverse.com/thing:529661 I haven't tried yet but would be a nice solution, short of that there will be a sliding door eventually, for now the plug.
With everything above I am able to print abs without warping, and without any hint of fumes. Note the Exhaust port pictured, that was printed with this setup, without it installed.
I still recommend running a in room hepa filter for any leftover fumes, but at least I don't mind staying in the room while its printing.
There were some great files I remixed from, thanks to BrookTrout, ffcp01, and ADN_NMX for having your good ideas posted for sharing.
Let me know if you have better ideas, and suggestions. This is version 1, will likely be improved, and have an adapter for the rostock max.
UPDATE: 8/8/16 -> Received the clear hose today from amazon (pictured), much easier to work with (if a danger to easy puncture, avoid animals). The fit is a bit off on my current setup of adapters, I may have to remix the linked 4in outlet and the 120 to 4, but it works pretty well. I would recommend getting the clear hose if you don't have a danger of tearing the plastic (there is a pic of both to help you choose, both are $10).
UPDATE 8/14/16 Added a Straight Coupling Adapter for the clear hose listed, see pictures, works with all existing parts but now allows easy plug and unpluging of the hose and I use the Vent plug when ventilation system is not in use.
This is meant to be a full ventilation kit for a Flashforge Creator Pro.
You will need to print:
-Top Replacement pieces for FFC Pro: FFC PRO Vent Top Left and Right (2 pieces total)
-Duct to mount to top of new FFC Pro Top: 4in Vent adapter from ffcp01 file duct.mount (1)
-A 120mm Fan to 4in Vent Hose adapter (1)
Recommended to print but not needed:
-120mm exhaust cap (designed for smooth exhaust directed downward with blocked line of sight, preventing most drafts and rain)
-FFC PRO Hood Plug Remix (Trapping additional heat inside for printing ABS)
-Some form of side plugs, many available on thingiverse (to trap heat)
-4in Vent Plug (for when not in use in an air conditioned home, I originally intended for this to be wrapped in a compliant tape like electrical tape but this is not sealing as well as I'd want, and will likely make another version in the future)
You will need to buy:
-1x 120mm fan (you can use more, or use a different fan setup with a different adapter), I used a Corsair SP https://www.amazon.com/Corsair-SP120-High-Performance-Twin/dp/B007RESFYK
-1x 4in Duct hose, I originally purchased https://www.amazon.com/gp/product/B003CLL9V8/ref=oh_aui_detailpage_o01_s00?ie=UTF8&psc=1 and the fittings are currently setup to take both hoses as pictured, but I prefer this: https://www.amazon.com/gp/product/B000DZFTEO/ref=oh_aui_detailpage_o00_s00?ie=UTF8&psc=1 which is more flexible.
-1x 12 volt power supply, anything will do to power one fan, I used: https://www.amazon.com/gp/product/B000MGG6SC/ref=oh_aui_search_detailpage?ie=UTF8&psc=1 (it really can only power two fans and there is a good speed drop)
-4x #8 or #6 screws, depending on how accurate your hole drilling is :) 2.5 to 3in long, and nuts
4x #8 or #6 screws, depending on how accurate your printing is :) 1in long and nuts
-1x piece of 1inx6inxwidth of your window, I used cedar which is recommended, or you will need a painted board or weather resistant material if you want it exposed
Nice to haves:
-Foam and tape to seal the window sash where open above, and stick on foam around the board, mine is sealed pretty tight.
-A way to make this work between my fan and the outside http://www.thingiverse.com/thing:529661 I haven't tried yet but would be a nice solution, short of that there will be a sliding door eventually, for now the plug.
With everything above I am able to print abs without warping, and without any hint of fumes. Note the Exhaust port pictured, that was printed with this setup, without it installed.
I still recommend running a in room hepa filter for any leftover fumes, but at least I don't mind staying in the room while its printing.
There were some great files I remixed from, thanks to BrookTrout, ffcp01, and ADN_NMX for having your good ideas posted for sharing.
Let me know if you have better ideas, and suggestions. This is version 1, will likely be improved, and have an adapter for the rostock max.
UPDATE: 8/8/16 -> Received the clear hose today from amazon (pictured), much easier to work with (if a danger to easy puncture, avoid animals). The fit is a bit off on my current setup of adapters, I may have to remix the linked 4in outlet and the 120 to 4, but it works pretty well. I would recommend getting the clear hose if you don't have a danger of tearing the plastic (there is a pic of both to help you choose, both are $10).
UPDATE 8/14/16 Added a Straight Coupling Adapter for the clear hose listed, see pictures, works with all existing parts but now allows easy plug and unpluging of the hose and I use the Vent plug when ventilation system is not in use.
Similar models
thingiverse
free

Ikea lack enclosure
...04_s00?ie=utf8&psc=1
magnetshttps://www.amazon.com/gp/product/b07wj6l7w3/ref=ppx_yo_dt_b_asin_title_o06_s00?ie=utf8&psc=1
thingiverse
free

120mm Fan to 4in Vent Hose Adapter (Female) by ragingrivers
... this works well, just an annoying aluminum dentable hose.
full kit: http://www.thingiverse.com/thing:1708681
thanks to wdsparrow
thingiverse
free

Garage door enclosure duct adapter.
...arage door. it does leave a small gap under the door which you might want to cover somehow but it successfully vents those fumes.
thingiverse
free

3D Printer Fume Fan / Duct Coupler 120mm fan to 4-inch duct by addennis
...8&psc=1
use a zip tie or hose clamp to attach the duct; it's a pretty tight fit but will fall off if tugged.
works great!
thingiverse
free

Air Filter
...00?ie=utf8&psc=1
all that is needed extra are bolts to hold the duct to the fan. i just used old bolts i found in the garage.
thingiverse
free

Nema 17 Heatsink and Fan mount by chakkuchan
...1
i'll be adding a second remix of this for the nema 14 on the back of my biqu h2 extruder but with a 40mm fan still i think.
thingiverse
free

Fan mount for FatShark Transformer FPV Goggles by DavidCanfield
...00?ie=utf8&psc=1
wire connector
https://www.amazon.com/gp/product/b01ddhutfm/ref=oh_aui_detailpage_o00_s00?ie=utf8&psc=1
thingiverse
free

K40 Laser, Air Vent, 4in Hose Adapter by wleigh
...following 4in blower:https://tinyurl.com/y7kxsv4t -and used a 4in vinyl hose similar to the...
thingiverse
free

Rotating Modular Hydroponics garden by MuchWick3D
...e_o06_s00?ie=utf8&psc=1
pumphttps://www.amazon.com/gp/product/b08cy28xkw/ref=ppx_yo_dt_b_asin_title_o09_s00?ie=utf8&psc=1
thingiverse
free

Desk Fan by NebNorse
...lpages04?ie=utf8&psc=1
motor control: https://www.amazon.com/gp/product/b01cnl6imc/ref=od_aui_detailpages04?ie=utf8&psc=1
Ragingrivers
thingiverse
free

Ballot Box by ragingrivers
...ballot box by ragingrivers
thingiverse
a simple ballot box.
thingiverse
free

Heart Vase by ragingrivers
...u put a plant in it, and want to water it, make sure to go heavy on the top layers if you are not going to seal it, 4 layers min.
thingiverse
free

Power and Air Tool Hangar by ragingrivers
...power and air tool hangar by ragingrivers
thingiverse
a hangar for my air powered nail guns to hang on a wire rack.
thingiverse
free
Bliss Light Indoor Mount V3 by ragingrivers
...ht indoor mount v3 by ragingrivers
thingiverse
modified for improved robustness and appearance, as well as ease of installation.
thingiverse
free

Dyson Heater Replacement Base by ragingrivers
...ven knows where the original is. print with supports, tear them out, should fit on loose, rotate to snug just like the original.
thingiverse
free

80mm Fan Cabinent Mount by ragingrivers
...ed an extra for my audio video cabinet). i used orings for damping, and a random 80mm fan grill from this site for the backside.
thingiverse
free

Wire Shelf Corner Cap by ragingrivers
...block stops the support bracket from wagging. free cad file attached if you want it more robust or have non standard wire gauge.
thingiverse
free

Flexible Toy Truck Replacement Tires (EN40) by ragingrivers
...ugh, and low and behold some tires were missing. didn't i just get some of that new en40 flexible filaments from makergeeks?
thingiverse
free

Audio Video Cabinent Vent 50mm by ragingrivers
... air flow. this is the first of many mods, and passes the wife test of "must look purchased." free cad file uploaded.
thingiverse
free

Air Tool Inlet Cap (Flexible) by ragingrivers
...to print a nice cap. note this ninja flex stuff sticks ridiculously well to the bed. reheat bed (40c for me) to aid in removal.
Ffc
3d_export
$10

ffc soft flat wire punching machine and ccd visual inspection equipment
...on equipment
3dexport
mobile phone ffc blanking machine, ffc soft flat wire punching machine and ccd visual inspection equipment
3d_export
$20
wire laser cutting peeling cutting machine ffc cutting machine
...and receiving machine, with the structure of this drawing, you don't need to draw by yourself, welcome to collect, thank you.
3dfindit
free

FFC Accessories
...ffc accessories
3dfind.it
catalog: te connectivity
3dfindit
free

FFC Connectors
...ffc connectors
3dfind.it
catalog: te connectivity
3dfindit
free

FFC Contacts
...ffc contacts
3dfind.it
catalog: te connectivity
thingiverse
free

Cable Clip for FFC Cables by nad_22
...cable clip for ffc cables by nad_22
thingiverse
this is a simple clip for mounting ffc cables to what ever ;-)
thingiverse
free

FFC to FFC adapter extension clamp for Geeetech A10 by Deejayshag
... effectively for other ffc cables as well, as long as they have less than 40 pins (think raspberry pi camera, which has 15 pins).
thingiverse
free

V Slot FFC Cable Clamp by firepower9966
...usion.
need this to keep my geeetech lcd interface tidy and safe.
print two stand upright to go on either side of ffc to hold it.
thingiverse
free

Quanum V2 FFC Mount by hpz937
...ount for the crazepony 700tvl fpv camera. mount was then hot glued to quanum v2 monitor.
camera dimensions 12.5mm x 12.5mm x 6mm
thingiverse
free

BCN3D+ cable chain + ffc cable by AlexQuad
...er, solution for cables cuts in the extruder.
the chain is from http://www.thingiverse.com/thing:11978http://youtu.be/ymd8anl5bni
Flashforge
thingiverse
free

Flashforge Logo
...flashforge logo
thingiverse
flashforge logo
thingiverse
free

flashforge logo by morive3d
...flashforge logo by morive3d
thingiverse
this is a flashforge stamphttps://www.youtube.com/channel/ucu6ge9qrju9cpgg6wrlxkqw
thingiverse
free

Flashforge Glass Bed by olo2000pm
...flashforge glass bed by olo2000pm
thingiverse
flashforge glass bed
thingiverse
free
Toolbox for FlashForge Finder by Gringo1970
...toolbox for flashforge finder by gringo1970
thingiverse
smal toolbox for flashforge finder
thingiverse
free
Flashforge / Dremel lid by Disco_Rob
...flashforge / dremel lid by disco_rob
thingiverse
lid extension for the flashforge dreamer
thingiverse
free

Flashforge Dreamer Filamentguide by PeterS1
...de for flashforge dreamer / dremel idea. you need also flashforge dreamer lid spacer (http://www.thingiverse.com/thing:1219953)
thingiverse
free

Flashforge creator legs by cybadigitals
...flashforge creator legs by cybadigitals
thingiverse
these legs gives a clearance of 25mm for flashforge creator series
thingiverse
free

Flashforge Inventor/Dreamer by Iprintr7
...orge inventor/dreamer by iprintr7
thingiverse
this is my first thingiverse project and is a model of the flashforge 3d printer
thingiverse
free

Flashforge Filiment Guide by russellscanlan
...flashforge filiment guide by russellscanlan
thingiverse
my design to feed filament through the door on a flashforge adventure 3
thingiverse
free
Flashforge Winder Adapter by newky2k
...winder adapter by newky2k
thingiverse
adapters for the flashforge 0.5 kg spools to the for the filament spool winder by ssinnott
Vent
archibase_planet
free
Vent
...vent
archibase planet
aeration venting home equipment
diffuser vent - 3d model for interior 3d visualization.
archibase_planet
free
Vent
...vent
archibase planet
cooker hood cooking hood
vent - 3d model for interior 3d visualization.
archibase_planet
free
Vent
...vent
archibase planet
cooker hood cooking hood
vent atlantica - 3d model for interior 3d visualization.
archibase_planet
free

Vent
...vent
archibase planet
cooker hood cooking hood
vent half frame - 3d model for interior 3d visualization.
archibase_planet
free
Vent
...vent
archibase planet
cooker hood cooking hood
vent - 3d model (*.gsm+*.3ds) for interior 3d visualization.
archibase_planet
free

Vent
...vent
archibase planet
cooker hood cooking hood kitchen equipment
vent - 3d model for interior 3d visualization.
archibase_planet
free
Vent
...vent
archibase planet
damper diffuser air gate
vent grate n100807 - 3d model for interior 3d visualization.
archibase_planet
free
Vent
...vent
archibase planet
cooker hood cooking hood
vent - 3d model (*.gsm+*.3ds) for interior 3d visualization.
turbosquid
$10

Vent
...nt
turbosquid
royalty free 3d model vent for download as fbx on turbosquid: 3d models for games, architecture, videos. (1143454)
turbosquid
$2
Vent
...nt
turbosquid
royalty free 3d model vent for download as obj on turbosquid: 3d models for games, architecture, videos. (1323956)
Kit
turbosquid
$3

Bathroom Kit Baño kit
... available on turbo squid, the world's leading provider of digital 3d models for visualization, films, television, and games.
turbosquid
$19

Kit
... available on turbo squid, the world's leading provider of digital 3d models for visualization, films, television, and games.
3d_export
$20

Drift Kit
...drift kit
3dexport
turbosquid
$40

BitCoin Kit
...urbosquid
royalty free 3d model bitcoin kit for download as on turbosquid: 3d models for games, architecture, videos. (1519068)
turbosquid
$9

Industrial kit
...osquid
royalty free 3d model industrial kit for download as on turbosquid: 3d models for games, architecture, videos. (1144117)
turbosquid
$6

Kit Vases
...
turbosquid
royalty free 3d model kit vases for download as on turbosquid: 3d models for games, architecture, videos. (1285114)
turbosquid
free

Survival Kit
...rbosquid
royalty free 3d model survival kit for download as on turbosquid: 3d models for games, architecture, videos. (1637721)
turbosquid
$50

Ninja Kit
...rbosquid
royalty free 3d model ninja kit for download as fbx on turbosquid: 3d models for games, architecture, videos. (1672364)
turbosquid
$35

Brushes Kit
...osquid
royalty free 3d model brushes kit for download as max on turbosquid: 3d models for games, architecture, videos. (1216721)
turbosquid
$19
Medical kit
...osquid
royalty free 3d model medical kit for download as fbx on turbosquid: 3d models for games, architecture, videos. (1486089)
Pro
turbosquid
$29

Pro
...ree 3d model mac pro for download as obj, c4d, fbx, and blend on turbosquid: 3d models for games, architecture, videos. (1505782)
turbosquid
$15

Apple Mac Pro and Pro Display
...ee 3d model apple mac pro and pro display for download as max on turbosquid: 3d models for games, architecture, videos. (1417078)
3d_export
$5

iphone 13 pro max and pro
...3 pro max and 13 pro the model is made in four colors (graphite, gold, silver, and blue), all of which are attached in the files.
3d_export
free

sapphire pro
...sapphire pro
3dexport
sapphire pro 3d printer head mask
3d_export
$4

macbook pro
...macbook pro
3dexport
macbook pro 13" inch 2020 years model
3ddd
free

GentleLase Pro
... syneron , candela
gentlelase pro аппарат для лазерной эпиляции
turbosquid
$25

PRO frame
...rbosquid
royalty free 3d model pro frame for download as max on turbosquid: 3d models for games, architecture, videos. (1148329)
turbosquid
$5

Alien pro
...osquid
royalty free 3d model alien pro for download as blend on turbosquid: 3d models for games, architecture, videos. (1678446)
turbosquid
$5

iphone11 pro
...uid
royalty free 3d model iphone11 pro for download as blend on turbosquid: 3d models for games, architecture, videos. (1562707)
3ddd
$1

Mac Pro (appel)
...mac pro (appel)
3ddd
компьютер , apple
mac pro