Thingiverse
FlashForge Dreamer Thermostat Mount by BaronWilliams
by Thingiverse
Last crawled date: 3 years ago
FlashForge Dreamer Thermostat Mount
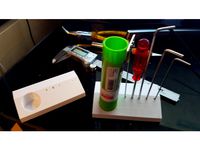
This mount is for adding a custom thermostat to your FlashForge Dreamer for controlling the internal build temperature. I created this project because my FlashForge Dreamer is the version without a thermostat controlled interior temperature, and no fans on the back, so it could overheat when printing with ABS with the lid is on. To solve overheating issues and to improve printing of overhangs I added a custom thermostat to my Dreamer that's used to automatically turn on 4 extra cooling fans I installed (2 on the back and 2 on the sides). I also have my fans connected to a switch so that I can manually turn them on if needed (the switch is not covered in this article). Some versions of the Dreamer already have fans on the back which are thermostatically controlled. If your Dreamer is that version, then this will probably be of little benefit to you.
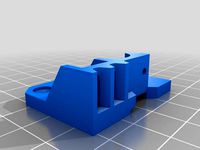
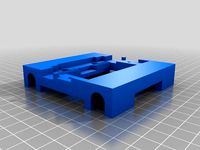
The mount consists of 4 pieces.
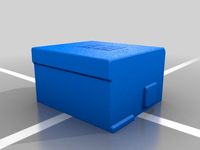
ThermostatMagnetPlate - this mounts on the side of the Dreamer via screws. It's designed to be mounted once and never removed. Magnets are glued to it. These hold attachments in place without the needs for screws. In this case the attachment is the ThermostatMagnetMount.
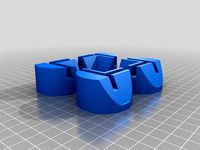
ThermostatMagnetMount - this attaches to the thermostat via M3 nuts and bolts. It's not connected to the Dreamer with nuts or bolts. It's connected via magnets. This allows the part to be easy removed, repaired, etc., without having to deal with tools. The area where this install is difficult to get access to with tools. That's the reason I used magnets instead bolts to attach it to the magnetic ThermostatMagnetPlate.
ThermostatMagnetCover - used to hold magnets inside the ThermostatMagnetMount.
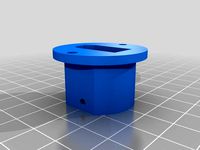
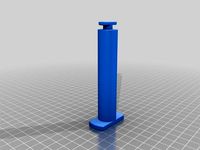
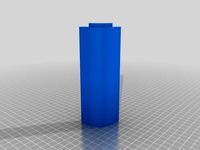
ThermostatSensorHolder - used to hold the thermostat's temperature sensor. The sensor is simply held in place by gravity. This sensor holder puts the senor near the left front top of the Dreamer, and good location for reading internal temperature without interfering with the print head.
Why Use Magnets?
Why use magnets? Why not screws or bolts for everything? The mounting location doesn't allow for the use of bolts because I have no access to the back side between the mounting location and the sidewall of the Dreamer, unless I wanted to drill holes in the side wall, which is not something I wanted to do. The mounting location chosen for the thermostat already contained 4 screw holes which are not used in my FlashForge Dreamer. So I made use of them. By using these existing screw holes, I didn't need to drill any additional holes in the Dreamer's body. However, this location is quite difficult to get access to. If I needed to remove the thermostat for some reason, unscrewing it would be difficult, and would eventually strip the plastic screw holes.
I wanted a convenient way to install and remove the thermostat, but I didn't want to wear out the screw holes on the Dreamer. I could have opted to make a plate that screws into this location that has it's own screw holes for attaching the thermostat to, but that would not solve the problem of the plastic screw holes eventually stripping. It just moves the stripping to a different location. Since I couldn't easily use bolts in this location, I needed another solution.
I decided to design the ThermostatMagnetPlate to be a permanent part of my printer. I never plan to remove it because I don't want to strip the screw holes on the Dreamer. Instead of mounting the thermostat using screws, onto this plate, I decided to use magnets. Magnets will not cause wear on the Dreamer's body.
With this design, using the magnets, I can remove the thermostat dozens of times without needing any tools and I don't need to worry about ever stripping the screw holes. So while the magnets are an extra step to do initially, they are cheap, and they make maintenance work a breeze. The neodymium magnets are extremely strong. They hold the thermostat securely in place. You have to seriously pull the thermostat piece with force before it comes loose from the magnet mount. There's no worry of it coming off on it's own.
Why use neodymium magnets and not other magnets? Neodymium magnets are super strong, they are not the typical magnet most people are used to. They have considerable pulling force. I wouldn't consider using regular magnets for this project. With the neodymium magnets, the thermostat almost feels like its bolted down. It's that strong. You will be surprised how strong they hold the thermostat in place. If the typical ceramic or ferrite magnets were used, it would be possible to shake the thermostat lose with a strong bump to the side of the printer. That's not possible with the neodymium magnets. Unless you forcefully pull off the thermostat, it's staying put!
See Also
For side fan mounts see here: http://www.thingiverse.com/thing:667612
For back fan short filament guide tubing clips see here:
http://www.thingiverse.com/thing:667620
Thermostat Used
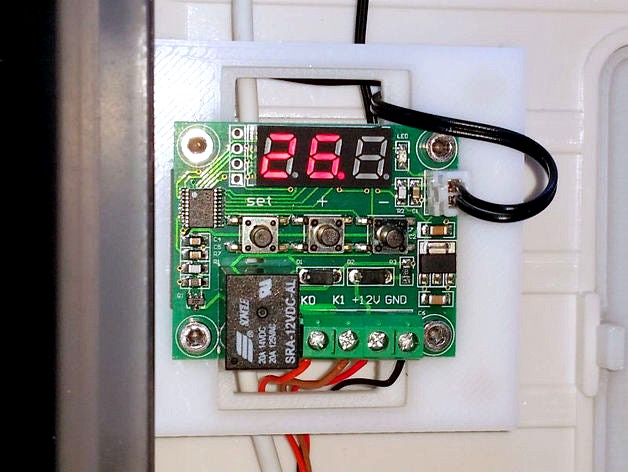
The thermostat I used is a 12v DC thermostat. It can be set to turn on or off at any particular temperature I need between -50-110 °C. I have mine set to turn on fans at 50 C currently. (I have also wired up a switch to bypass the thermostat, but that's not part of this project).
The exact thermostat I used is a cheap generic thermostat found at these locations:
http://www.amazon.com/gp/product/B00GWFK7FA
http://www.amazon.com/RioRand-Thermostat-Temperature-Controller-Waterproof/dp/B00KCCX0EE
There is unfortunately no company name on it. The model number is W1209. It has been working well for many months. It's got quite a bit of settings to tweak using the 3 front buttons. Making temperature changes requires just touch 2 buttons. It's very easy to use.
Step Down Converter Used
For this project I used a SMAKN DC/DC 24V to 12V/6A Step Down Converter. It can be found here:
http://www.amazon.com/gp/product/B00H3YN9H2
Wires Used
All wires were 18 gauge.
Nuts And Bolts Used
The FlashForge Dreamer uses standard M3 nuts and bolts. I used two M3 nuts for attaching the sensor, and step down converter.
For the thermostat mount, I used four #3 x 5/8" screws.
Fans Used
Fans should be 80x80x15mm fans. I used 12 V DC fans, but 24 V DC fans can also be used. The fans altogether should not use more than 1.4 amps.
Magnets Used
Neodymium magnets with a diameter of 1/4" with a thickness of 1/16"
Notes
THERE MAY BE SOME MISSING DETAILS IN THE INSTRUCTIONS. I WILL GO OVER THIS AGAIN LATER WHEN I HAVE TIME TO ENSURE THAT EVERYTHING IS CORRECT.
IF YOU NEED ANY HELP OR NOTICED ANY INSTRUCTIONS MISSING PLEASE LEAVE A COMMENT.
THANKS.
This mount is for adding a custom thermostat to your FlashForge Dreamer for controlling the internal build temperature. I created this project because my FlashForge Dreamer is the version without a thermostat controlled interior temperature, and no fans on the back, so it could overheat when printing with ABS with the lid is on. To solve overheating issues and to improve printing of overhangs I added a custom thermostat to my Dreamer that's used to automatically turn on 4 extra cooling fans I installed (2 on the back and 2 on the sides). I also have my fans connected to a switch so that I can manually turn them on if needed (the switch is not covered in this article). Some versions of the Dreamer already have fans on the back which are thermostatically controlled. If your Dreamer is that version, then this will probably be of little benefit to you.
The mount consists of 4 pieces.
ThermostatMagnetPlate - this mounts on the side of the Dreamer via screws. It's designed to be mounted once and never removed. Magnets are glued to it. These hold attachments in place without the needs for screws. In this case the attachment is the ThermostatMagnetMount.
ThermostatMagnetMount - this attaches to the thermostat via M3 nuts and bolts. It's not connected to the Dreamer with nuts or bolts. It's connected via magnets. This allows the part to be easy removed, repaired, etc., without having to deal with tools. The area where this install is difficult to get access to with tools. That's the reason I used magnets instead bolts to attach it to the magnetic ThermostatMagnetPlate.
ThermostatMagnetCover - used to hold magnets inside the ThermostatMagnetMount.
ThermostatSensorHolder - used to hold the thermostat's temperature sensor. The sensor is simply held in place by gravity. This sensor holder puts the senor near the left front top of the Dreamer, and good location for reading internal temperature without interfering with the print head.
Why Use Magnets?
Why use magnets? Why not screws or bolts for everything? The mounting location doesn't allow for the use of bolts because I have no access to the back side between the mounting location and the sidewall of the Dreamer, unless I wanted to drill holes in the side wall, which is not something I wanted to do. The mounting location chosen for the thermostat already contained 4 screw holes which are not used in my FlashForge Dreamer. So I made use of them. By using these existing screw holes, I didn't need to drill any additional holes in the Dreamer's body. However, this location is quite difficult to get access to. If I needed to remove the thermostat for some reason, unscrewing it would be difficult, and would eventually strip the plastic screw holes.
I wanted a convenient way to install and remove the thermostat, but I didn't want to wear out the screw holes on the Dreamer. I could have opted to make a plate that screws into this location that has it's own screw holes for attaching the thermostat to, but that would not solve the problem of the plastic screw holes eventually stripping. It just moves the stripping to a different location. Since I couldn't easily use bolts in this location, I needed another solution.
I decided to design the ThermostatMagnetPlate to be a permanent part of my printer. I never plan to remove it because I don't want to strip the screw holes on the Dreamer. Instead of mounting the thermostat using screws, onto this plate, I decided to use magnets. Magnets will not cause wear on the Dreamer's body.
With this design, using the magnets, I can remove the thermostat dozens of times without needing any tools and I don't need to worry about ever stripping the screw holes. So while the magnets are an extra step to do initially, they are cheap, and they make maintenance work a breeze. The neodymium magnets are extremely strong. They hold the thermostat securely in place. You have to seriously pull the thermostat piece with force before it comes loose from the magnet mount. There's no worry of it coming off on it's own.
Why use neodymium magnets and not other magnets? Neodymium magnets are super strong, they are not the typical magnet most people are used to. They have considerable pulling force. I wouldn't consider using regular magnets for this project. With the neodymium magnets, the thermostat almost feels like its bolted down. It's that strong. You will be surprised how strong they hold the thermostat in place. If the typical ceramic or ferrite magnets were used, it would be possible to shake the thermostat lose with a strong bump to the side of the printer. That's not possible with the neodymium magnets. Unless you forcefully pull off the thermostat, it's staying put!
See Also
For side fan mounts see here: http://www.thingiverse.com/thing:667612
For back fan short filament guide tubing clips see here:
http://www.thingiverse.com/thing:667620
Thermostat Used
The thermostat I used is a 12v DC thermostat. It can be set to turn on or off at any particular temperature I need between -50-110 °C. I have mine set to turn on fans at 50 C currently. (I have also wired up a switch to bypass the thermostat, but that's not part of this project).
The exact thermostat I used is a cheap generic thermostat found at these locations:
http://www.amazon.com/gp/product/B00GWFK7FA
http://www.amazon.com/RioRand-Thermostat-Temperature-Controller-Waterproof/dp/B00KCCX0EE
There is unfortunately no company name on it. The model number is W1209. It has been working well for many months. It's got quite a bit of settings to tweak using the 3 front buttons. Making temperature changes requires just touch 2 buttons. It's very easy to use.
Step Down Converter Used
For this project I used a SMAKN DC/DC 24V to 12V/6A Step Down Converter. It can be found here:
http://www.amazon.com/gp/product/B00H3YN9H2
Wires Used
All wires were 18 gauge.
Nuts And Bolts Used
The FlashForge Dreamer uses standard M3 nuts and bolts. I used two M3 nuts for attaching the sensor, and step down converter.
For the thermostat mount, I used four #3 x 5/8" screws.
Fans Used
Fans should be 80x80x15mm fans. I used 12 V DC fans, but 24 V DC fans can also be used. The fans altogether should not use more than 1.4 amps.
Magnets Used
Neodymium magnets with a diameter of 1/4" with a thickness of 1/16"
Notes
THERE MAY BE SOME MISSING DETAILS IN THE INSTRUCTIONS. I WILL GO OVER THIS AGAIN LATER WHEN I HAVE TIME TO ENSURE THAT EVERYTHING IS CORRECT.
IF YOU NEED ANY HELP OR NOTICED ANY INSTRUCTIONS MISSING PLEASE LEAVE A COMMENT.
THANKS.
Similar models
thingiverse
free

FlashForge Dreamer Side Panel Fan Mount by BaronWilliams
...hingiverse.com/thing:682667
flashforge dreamer short fan filament guide clip found here:http://www.thingiverse.com/thing:667620
thingiverse
free

FlashForge Dreamer Short Fan Filament Guide Clip by BaronWilliams
...p://www.thingiverse.com/thing:682667
flashforge dreamer side panel fan mount found here:http://www.thingiverse.com/thing:667612
grabcad
free

Flashforge Dreamer Turbofan Mount
... a drop-in replacement for cracked acrylic mounts. insert m3 brass inserts into the 3 holes that don't have the large chamfer
thingiverse
free
Panel mount adapter for XT90 by rwaudio
...the fit is tight but exact. holes for 4-40 screws to secure the connector are included but i haven't needed to use them yet.
thingiverse
free

80mm Fan Mount & Cover
.... you don't have to be super exact when cutting out the hole for the fan, since this covers both sides, cleaning up the look!
thingiverse
free
Hive Thermostat Stand
... the hole beforehand will help with this), but longer bolts with lock nuts can be used for added security.
feedback very welcome.
thingiverse
free
Simple Fan Mount for Makerfarm Prusa i3/Greg's Accessible Extruder by beefinator
... a bit for the models i uploaded here.
there's a scad file if you want to edit it, but i didn't document it at all... :/
thingiverse
free

FlashForge Dreamer Lid Spacer by BaronWilliams
...tp://www.thingiverse.com/thing:667620
also see the flashforge dreamer thermostat mount:http://www.thingiverse.com/thing:682667
thingiverse
free

E61 Portafilter Hanger with Screw Mounts
...del to fill in the magnet holes and add a couple of screw holes instead. #4 or #5 flat socket head screws will work for mounting.
thingiverse
free

Magnetic Knife Strip Template by delsydsoftware
...s intended to make the layout quick and easy. i have provided instructions for making a magnetic knife strip using this template.
Baronwilliams
thingiverse
free
FlashForge Dreamer Lid Spacer by BaronWilliams
...tp://www.thingiverse.com/thing:667620
also see the flashforge dreamer thermostat mount:http://www.thingiverse.com/thing:682667
thingiverse
free
FlashForge Dreamer Anti-Buckling Drive Block for Flexible Filament by BaronWilliams
...and asaptech tpe. i use a print speed of 15-30 mm/sec. 15 is recommended. the drive block base also works with standard filament.
thingiverse
free
FlashForge Dreamer X Axis Carriage by BaronWilliams
...i designed this from scratch using blender. i included the original blender source file so you can easily tweak it using blender.
thingiverse
free
FlashForge Dreamer Side Panel Fan Mount by BaronWilliams
...hingiverse.com/thing:682667
flashforge dreamer short fan filament guide clip found here:http://www.thingiverse.com/thing:667620
thingiverse
free

FlashForge Dreamer Long Filament Spool Holder by BaronWilliams
...werful, and directly supports importing and exporting stl files.
as requested, i added the blender source file for this object.
thingiverse
free
FlashForge Dreamer Short Fan Filament Guide Clip by BaronWilliams
...p://www.thingiverse.com/thing:682667
flashforge dreamer side panel fan mount found here:http://www.thingiverse.com/thing:667612
thingiverse
free

FlashForge Dreamer Large Spool Holder by BaronWilliams
...ide is not recommended because it can cause the filament spool to touch the y axis stepper motor. i am looking into this problem.
thingiverse
free

Dreamer Lid Standoff 7mm by Booglejr
...needed a central lid support after i had printed baronwilliams#39; flashforge dreamer lid spacer. i designed the part in...
thingiverse
free
OmniStand Extra Long Filament Spool Rods by BaronWilliams
...e rod during a print job. i have not had this problem with 0.5 kg spools, or when using the 100 mm spool rod with heavy filament.
Dreamer
3ddd
$1

Desiree dreamer
... dreamer
фабрика - desiree
коллекция - dreamer
описание - кресло
сайт -http://www.euromobil.com
3ddd
$1

Desiree - Dreamer
...коллекция dreamer
кресло
90 cm x 73cm x 66 cm (h)
присутствует файл для cinema 4d с настроенными материалами для corona render.
3d_export
$5

EcoMan Dreamer 3D Model
...rt
ecoman dreamer
ecoman dreamer 3d model download .c4d .max .obj .fbx .ma .lwo .3ds .3dm .stl anatoliy.stil16496 102845 3dexport
turbosquid
$24

L Dreamer Couch.
...model l dreamer couch. for download as max, 3ds, fbx, and obj on turbosquid: 3d models for games, architecture, videos. (1561495)
turbosquid
$20

Porcelain statuette (dreamer)
... available on turbo squid, the world's leading provider of digital 3d models for visualization, films, television, and games.
turbosquid
$10

Eco creatures Dreamer
... available on turbo squid, the world's leading provider of digital 3d models for visualization, films, television, and games.
3ddd
$1

Window "Dreamer"
... подушка
окно "мечтатель" - многофункциональная модель на основе профиля rehau. 3 режима.
3d_export
$8

cyberpunk - dreamer underwear set a
...ontacted through my email and my facebook page. email: azazel_d2@hotmail.com facebook: https://www.facebook.com/reaperproductions
3d_export
$8

cyberpunk - dreamer underwear set b
...ontacted through my email and my facebook page. email: azazel_d2@hotmail.com facebook: https://www.facebook.com/reaperproductions
3d_export
$8

cyberpunk - dreamer underwear set c
...ontacted through my email and my facebook page. email: azazel_d2@hotmail.com facebook: https://www.facebook.com/reaperproductions
Thermostat
turbosquid
free

Thermostat
...id
free 3d model thermostat for download as ma, obj, and fbx on turbosquid: 3d models for games, architecture, videos. (1506243)
archive3d
free

Thermostat 3D Model
...ive3d
thermostat equipment home appliances
thermostat - 3d model for interior 3d visualization.
archive3d
free
Thermostat 3D Model
...tor temperature controller
thermostat 2 - 3d model (*.gsm+*.3ds) for interior 3d visualization.
archive3d
free

Thermostat 3D Model
...controller thermoregulator
thermostat 1 - 3d model (*.gsm+*.3ds) for interior 3d visualization.
archive3d
free
Thermostat 3D Model
...perature controller
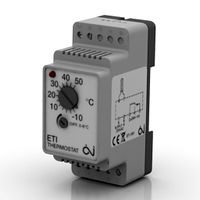
thermostat eti-1551 - 3d model (*.gsm+*.3ds) for interior 3d visualization.
archive3d
free
Thermostat 3D Model
...rature controller
thermostat etf-744-99 - 3d model (*.gsm+*.3ds) for interior 3d visualization.
archive3d
free

Thermostat 3D Model
...ntroller equipment
thermostat etr-1447a - 3d model (*.gsm+*.3ds) for interior 3d visualization.
archive3d
free
Thermostat 3D Model
...ontroller equipment
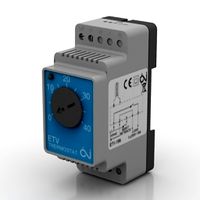
thermostat etv-1991 - 3d model (*.gsm+*.3ds) for interior 3d visualization.
archive3d
free
Thermostat 3D Model
...pment
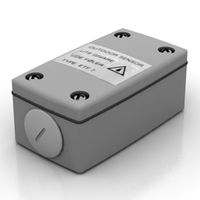
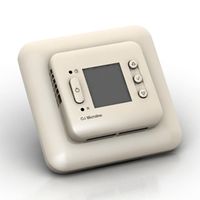
thermostat oj electronics n130913 - 3d model (*.gsm+*.3ds) for interior 3d visualization.
turbosquid
$35

Thermostat - Basin_Mixer
... available on turbo squid, the world's leading provider of digital 3d models for visualization, films, television, and games.
Flashforge
thingiverse
free

Flashforge Logo
...flashforge logo
thingiverse
flashforge logo
thingiverse
free

flashforge logo by morive3d
...flashforge logo by morive3d
thingiverse
this is a flashforge stamphttps://www.youtube.com/channel/ucu6ge9qrju9cpgg6wrlxkqw
thingiverse
free

Flashforge Glass Bed by olo2000pm
...flashforge glass bed by olo2000pm
thingiverse
flashforge glass bed
thingiverse
free
Toolbox for FlashForge Finder by Gringo1970
...toolbox for flashforge finder by gringo1970
thingiverse
smal toolbox for flashforge finder
thingiverse
free
Flashforge / Dremel lid by Disco_Rob
...flashforge / dremel lid by disco_rob
thingiverse
lid extension for the flashforge dreamer
thingiverse
free

Flashforge Dreamer Filamentguide by PeterS1
...de for flashforge dreamer / dremel idea. you need also flashforge dreamer lid spacer (http://www.thingiverse.com/thing:1219953)
thingiverse
free
Flashforge creator legs by cybadigitals
...flashforge creator legs by cybadigitals
thingiverse
these legs gives a clearance of 25mm for flashforge creator series
thingiverse
free
Flashforge Inventor/Dreamer by Iprintr7
...orge inventor/dreamer by iprintr7
thingiverse
this is my first thingiverse project and is a model of the flashforge 3d printer
thingiverse
free

Flashforge Filiment Guide by russellscanlan
...flashforge filiment guide by russellscanlan
thingiverse
my design to feed filament through the door on a flashforge adventure 3
thingiverse
free
Flashforge Winder Adapter by newky2k
...winder adapter by newky2k
thingiverse
adapters for the flashforge 0.5 kg spools to the for the filament spool winder by ssinnott
Mount
3d_export
free

mounting bracket
...mounting plate is the portion of a hinge that attaches to the wood. mounting plates can be used indoors, cabinetry and furniture.
turbosquid
$2

MOUNTING
... available on turbo squid, the world's leading provider of digital 3d models for visualization, films, television, and games.
turbosquid
free

Mounts
... available on turbo squid, the world's leading provider of digital 3d models for visualization, films, television, and games.
turbosquid
free

Mount Fuji
...fuji
turbosquid
free 3d model mount fuji for download as obj on turbosquid: 3d models for games, architecture, videos. (1579977)
3d_export
$5

Headphone mount LR
...headphone mount lr
3dexport
headphone mount l+r
turbosquid
$39

Mount rainier
...quid
royalty free 3d model mount rainier for download as fbx on turbosquid: 3d models for games, architecture, videos. (1492586)
turbosquid
$5

pipe mounting
...quid
royalty free 3d model pipe mounting for download as obj on turbosquid: 3d models for games, architecture, videos. (1293744)
turbosquid
$3

Mounting Tires
...uid
royalty free 3d model mounting tires for download as fbx on turbosquid: 3d models for games, architecture, videos. (1708511)
3d_export
$5

Magnetic GoPro Mount
...pro mount
3dexport
cool magnetic mount for gopro. allows you to mount the camera on flat metal surfaces and get exclusive shots.
turbosquid
$5

Stone Mount
...ty free 3d model stone mount for download as ma, obj, and fbx on turbosquid: 3d models for games, architecture, videos. (1370306)