Thingiverse
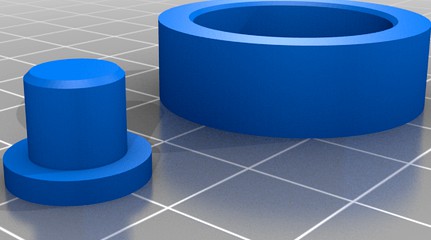
Fixed Flying Tourbillon Model Mark 2
by Thingiverse
Last crawled date: 4 years, 2 months ago
Update 11/19/19
I added 2 alternate pieces for the main spring assembly. The Main Spring Lug 2 Bolt Hole v2 and New Frame B Bolt Hole v5. Like the name implies, there is a hole in the Frame B shaft sized to be able to tap a 8-32 thread and an angled recess in the Main Spring Lug for a flat head 8-32 bolt 1/2" long. This keeps the spring in place so it doesn't fall out when handling. Just be sure not to overtighten and pull the shaft apart on the Frame B piece.
Update 11/18/19
Timed at 21min and 30 seconds maxing out the spring. That was with the .006 shim stock around 12' long.
Update 11/16/19
Success! For shim stock, go with .006 thick 1/2" wide. The brand I purchase was from Precisionbrand.com . It comes in a 25' roll. I used almost 12'. I did a test run and it ran for 10 minutes! This was not maxing out the spring so it will run longer. 80 clicks of the spring yielded a 10min 21sec run time.
Also, the new winder tool is up to the task. I use .125 diameter by 1/2" long dowel pins. I had purchase these from McMasterCarr.com, Item # 90145A471 18-8 stainless steel pins, $8.44 for 50pcs.
I also uploaded an alternate base replacement with a little more style. ;)
Update 11/15/19
First test went extremely well. With 15 clicks on the spring it ran for 1min 57sec. I think going with a thinner shim stock for the spring would be better as the .010 is pretty stiff and this model doesn't need much pressure to run. I initially went with 48" of shim stock. I think the same amount but thinner should work better and allow you to wind it further. I will test this as soon as I get different shim stock.
I've updated the New Base Replacement, New Main Spring, Main Spring Lug, and Winder tool/base. I found that the winder pins were extremely weak. I updated it with holes to press in 1/8" metal pins and updated the main spring with the appropriate hole size. I also changed the main spring lug to a better attachment slot similar to the main spring housing.
**Note: To bend the shim stock to a 90 deg without snapping it, heat the end to reduce the temper of the metal.
Original: 11/14/19
I attempted to print the original with very limited success. Parts that you wanted tight were extremely loose and others that you wanted loose or slip fit were tight. So in redrawing some of the parts, I decided to redesign a few things. Mainly the main spring and base.
This model uses 2 608 bearings for stability and a main spring made with .010 x .500 shim stock. I also designed a winding tool with the new spring housing being more enclosed.
**I've included a 608 bearing test print. Print this and fine tune the fit instead of having to reprint all the pieces and waste time. The fit should be snug but not press fit or sloppy. I used my Horizontal Expansion setting in Cura to fine tune this. Once you have your setting, print all the parts and they should fit pretty well.
The most difficult item to print is the base and supports. Be sure to have your support settings fine tuned to be able to remove it without damaging the spring locking fins. My settings from Cura were as listed below. To remove it, I first separated the support rim from the main spring bell housing. I then used a pair of needle nose pliers to grab between the center hole and in between the outer support and spring fins. It popped out in one piece. Make sure not to grab the spring fins and snap it off.
Placement : Touching Build Plate
Support Overhang Angle : 50
Pattern : Zig Zag
Density : 20%
Support Z Distance : 0.2
Support X/Y Distance : 1.0
I printed these items as a solid 100% infill. The rest were 20%
Main spring lug
Balancewheel
Balancewheel Spring
12T Sprocket Gear
60T ID Gear
This requires metal pins for the pivot points. The previous designs used 2mm diameter but I found those to be a little loose. I wound up using #43 dill bits (.089) and cut the shanks off to length. The you can still use the 2mm, it's up to you. The lengths I cut were 19mm (.760), 2 at 16.65mm (.655), and 1 at 6.55mm (.258). The last one for the pin to hold the fly wheel spring in place.
https://youtu.be/kZ-iBDkrOng
Similar models
thingiverse
free

Wakeboard Fin by scorch
...e my stock thumbscrew if one of the 3d printed fins break. i made my fins out of pla (100% fill) and they are holding up so far.
thingiverse
free

Ball Vise Remix by ihsjepsen
...rts. thanks again to gavitka for the original design.
pin 3 is an attempt to improve the "gripping" power of the pins.
thingiverse
free

Cone for Yarn Winder, small skeins
...in https://www.thingiverse.com/thing:1963818
i printed 6 prototypes, refining and correcting the design to get what you see here.
thingiverse
free

Clothespeg(pin) Spring Rep2 Extruder by MakeALot
...replicator 2 extruder upgrade" move the bottom spring support so that i could use the spring from a clothes peg (clothespin)
grabcad
free

Spring Latch
... for 1/2" dia. hole with life like spring action. loosely modeled based on b07fnwq5z7 from amazon.
created in inventor 2019.
thingiverse
free

Ender 3/Pro Extruder Spring Shim by coolikot
...clean)
you can adjust the tension based on the m3 screw that you're gonna put this in to.
refer to pictures for installation.
thingiverse
free

Dyson attachment adapter by stillsupping
...o hold the button in. you will need to open the hole out to suit what you use.
you will need 2 springs to fit behind the buttons.
thingiverse
free

Arduino Mega Pin Base and Cover by mastersapo
...016 - elongated base plate to account for ramps lcd connectors and thinned cover connectors on base plate to allow for shrinkage.
thingiverse
free

Mavic by mwilmar front arms w/ less supports by Hyprmtr
...m pleased with the "washer" version without the washer added.
i also added the landing leg "glue piece" file.
thingiverse
free

Tourbillon by mikeaj
...d the nozzle to prevent damage removing. i like the precision for holes, gears, etc. i don't plan to go back to 0.4mm soon.
Tourbillon
turbosquid
free

Tourbillon (simple)
... available on turbo squid, the world's leading provider of digital 3d models for visualization, films, television, and games.
3ddd
$1

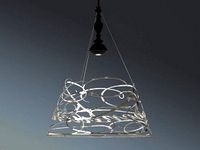
Panzeri | Tourbillon
...panzeri | tourbillon
3ddd
panzeri
модель выполнена по каталогу,3ds max 2009 vray
turbosquid
$10

Tourbillon round table
... available on turbo squid, the world's leading provider of digital 3d models for visualization, films, television, and games.
cg_studio
$129
AkriviA Tourbillon Monopusher Chronograph3d model
...watch
.max - akrivia tourbillon monopusher chronograph 3d model, royalty free license available, instant download after purchase.
cg_studio
$129

Tourbillon Skull RM0523d model
...urbillon clock stopwatch
.max - tourbillon skull rm052 3d model, royalty free license available, instant download after purchase.
turbosquid
$9

Tourbillon coffee table 3
... available on turbo squid, the world's leading provider of digital 3d models for visualization, films, television, and games.
turbosquid
$9

Tourbillon coffee table 2
... available on turbo squid, the world's leading provider of digital 3d models for visualization, films, television, and games.
cg_studio
$99

Tourbillon Skull RM052 no textures3d model
...ck stopwatch
.max - tourbillon skull rm052 no textures 3d model, royalty free license available, instant download after purchase.
3d_export
$129
Tourbillon Skull RM052 3D Model
...llon clock stopwatch
tourbillon skull rm052 3d model download .c4d .max .obj .fbx .ma .lwo .3ds .3dm .stl fabelar 108890 3dexport
cg_studio
$129

Harry Winston Historie Tourbillon 33d model
...k stopwatch
.max - harry winston historie tourbillon 3 3d model, royalty free license available, instant download after purchase.
Mark
3ddd
$1
MARK - Ribbon
...mark - ribbon
3ddd
mark , ribbon
mark - ribbon
turbosquid
$20

mark
...squid
royalty free 3d model mark for download as 3ds and stl on turbosquid: 3d models for games, architecture, videos. (1445786)
3d_export
$5

road markings
...road markings
3dexport
construction of road markings
turbosquid
$99

Mark
... available on turbo squid, the world's leading provider of digital 3d models for visualization, films, television, and games.
3ddd
$1
Кресло Mark
...кресло mark
3ddd
mark , david casadesus
760x850x800
david casadesus · 2008
3d_export
$5

check mark and cross mark
...max 2015,cinema4d obj fbx stl dwg dxf warning:dont forget to active turbosmooth after final modeling. enjoy 3d modeling good luck
3ddd
free
Mark Albrecht Chair
...mark albrecht chair
3ddd
mark albrecht
mark albrecht chair
design_connected
$16

Question Mark
...question mark
designconnected
tonon question mark chairs computer generated 3d model. designed by stefan heiliger.
turbosquid
$20
Bed Mark
...d
royalty free 3d model bed mark for download as max and obj on turbosquid: 3d models for games, architecture, videos. (1565907)
turbosquid
$60

Mark IV
...oyalty free 3d model mark iv for download as ma, obj, and fbx on turbosquid: 3d models for games, architecture, videos. (1515462)
Flying
design_connected
$13
Fly-Fly
...fly-fly
designconnected
foscarini fly-fly computer generated 3d model. designed by palomba, ludovica.
3ddd
$1

Foscarini FLY-FLY
...foscarini fly-fly
3ddd
foscarini , fly-fly
foscarini fly-fly
полигонов: 73 022
3ddd
$1

Foscarini Fly-Fly
...foscarini fly-fly
3ddd
foscarini
люстра fly-fly
3d_export
free
fly
...fly
3dexport
fly
turbosquid
$15

fly fishing fly
... available on turbo squid, the world's leading provider of digital 3d models for visualization, films, television, and games.
design_connected
free

Fly
...fly
designconnected
free 3d model of fly by alias designed by acerbis, marco.
turbosquid
$49

Fly Fly Maya Rig
...turbosquid
free 3d model fly fly maya rig for download as ma on turbosquid: 3d models for games, architecture, videos. (1182393)
design_connected
$13
Fly
...fly
designconnected
zanotta fly computer generated 3d model. designed by robson , mark .
design_connected
$13

Fly
...fly
designconnected
kartell fly computer generated 3d model. designed by laviani, ferruccio.
3d_ocean
$10
3D Fly
...3d fly
3docean
3d fly 3ds max fly
this is a 3d fly model.
Fixed
3ddd
$1
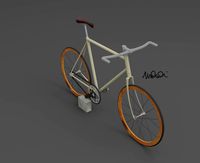
Fixed Gear Велосипед
... fixed , bicycle
классический шоссейный велосипед, переделанный под fixed gear.
design_connected
$16
Idée fixe
...idée fixe
designconnected
jacco maris idée fixe computer generated 3d model. designed by maris , jacco.
3d_export
$5
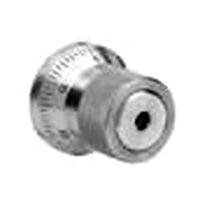
fixing scale knob
...fixing scale knob
3dexport
fixing scale knob
turbosquid
$10

Mini Fix
...bosquid
royalty free 3d model mini fix for download as sldas on turbosquid: 3d models for games, architecture, videos. (1581558)
turbosquid
$49
fixed bike
... available on turbo squid, the world's leading provider of digital 3d models for visualization, films, television, and games.
turbosquid
$39

Fixed Bicycle
... available on turbo squid, the world's leading provider of digital 3d models for visualization, films, television, and games.
3ddd
$1
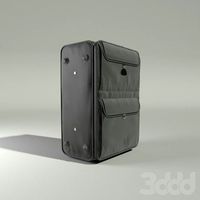
Bag Fixed
...bag fixed
3ddd
чемодан
a bag model by me
3ddd
$1
Кресло BEAU FIXE
...fixe
3ddd
beau fixe , ligne roset
кресло beau fixe:
w 80 cm d 106 cm h 97 cm sh 43,5 cm
turbosquid
free

Crowbar "Fixed"
... available on turbo squid, the world's leading provider of digital 3d models for visualization, films, television, and games.
3ddd
$1
Fixed gear
...fixed gear
3ddd
велосипед
шоссейный велосипед с фиксированной передачей
2
design_connected
$11

No 2
...no 2
designconnected
sibast no 2 computer generated 3d model. designed by sibast, helge.
turbosquid
$6

Cliff Rock 2-2
...uid
royalty free 3d model cliff rock 2-2 for download as obj on turbosquid: 3d models for games, architecture, videos. (1619161)
turbosquid
$29

Book variation 2 2
...3d model book variation 2 2 for download as max, obj, and fbx on turbosquid: 3d models for games, architecture, videos. (1366868)
turbosquid
$22

Classic baluster (2) (2)
...assic baluster (2) (2) for download as max, obj, fbx, and stl on turbosquid: 3d models for games, architecture, videos. (1483789)
turbosquid
$99

Smilodon 2 Pose 2
... available on turbo squid, the world's leading provider of digital 3d models for visualization, films, television, and games.
turbosquid
$20

Barrel Barricade 2-2
... available on turbo squid, the world's leading provider of digital 3d models for visualization, films, television, and games.
turbosquid
$6

Wall Trophy (2) (2)
... available on turbo squid, the world's leading provider of digital 3d models for visualization, films, television, and games.
turbosquid
free

Tire label 2 of 2
... available on turbo squid, the world's leading provider of digital 3d models for visualization, films, television, and games.
3ddd
$1

Кровать, 2 тумбочки, 2 светильника
...кровать, 2 тумбочки, 2 светильника
3ddd
кровать, 2 тумбочки, 2 светильника
нормальное качество
формат 3ds max
без текстур
3ddd
free

Кровать, 2 тумбочки, 2 светильника
...кровать, 2 тумбочки, 2 светильника
3ddd
кровать, 2 тумбочки, 2 светильника
нормальное качество
формат 3ds max
без текстур