Thingiverse
Figment by reddadsteve
by Thingiverse
Last crawled date: 2 years, 11 months ago
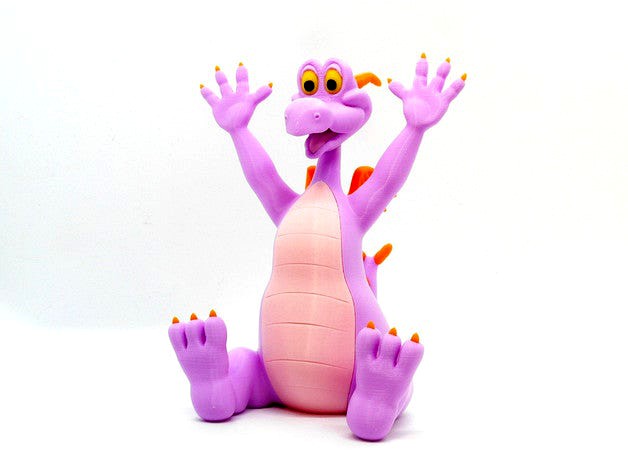
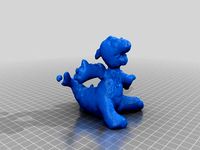
Figment, a small purple dragon, is the mascot of the "Imagination!" pavilion at the Epcot theme park at Walt Disney World Resort.
Dreamfinder, a jolly wizard-like scientist, teaches Figment how to use his imagination. Figment is meant to be the literal embodiment of the phrase "figment of the imagination". He is composed of various elements Dreamfinder found in his travels including two tiny wings, large yellow eyes, the horns of a steer, a crocodile's snout, and the childish delight found at a birthday party.
No supports are required. One piece contains built-in supports, an optional part without the built-in supports is also supplied if you want to use your slicer supports (see notes below). If you have the proper filament colors, no painting is needed.
The assembled Figment model is 175mm tall.
Enjoy!
...........................................................................................................
Print Instructions:
Supports: No
Resolution: .2mm
Infill: 10%
Notes:**
Refer to the notes below for a few helpful printing and assembly instructions.
...........................................................................................................
Building the model
Colors
Black: (Paramount3D PLA - Black)
eye_black_right
eye_black_left
..
Light Pink: (CookieCad PLA - Pale Pink)
tongue
body_bottom_pink
..
Yellow: (Paramount3D PLA - Simpson Yellow)
eye_yellow_right
eye_yellow_left
..
Purple: (CookieCad PLA - Lavender)
head
head_without_supports (optional piece)
body_bottom_purple
..
Orange: (Paramount3D PLA - McLaren Orange)
wing_right
wing_left
horn_right
horn_left
tail_tip_right
tail_tip_left
head_spike
spikes (contains 11 identical pieces)
claws_feet (contains 6 identical parts)
claws_hand (contains 8 identical parts)
..
...........................................................................................................
Printing and assembly tips
Printing tips
1 - No supports are required. The head piece is presented with built-in supports as well as an optional part without supports if you want to use your slicer supports. Due to the curves for the area that requires supports, printing at a lower layer height will produce a better print. Using slicer supports with the lower layer height is also a viable option for a cleaner print.
2 - There are some pieces that may need brims or rafts, use your discretion. When setting up my prints I prefer to be conservative, especially since the base of many parts are hidden when inserted into another part. For the smaller parts, a good first layer is helpful.
*I used brims on:
All orange parts (a bit overkill)
3 - Figment's colors vary. My wife chose the colors that matched the cartoon look. She specifically bought two rolls of filament from CookieCad to get this color combo.
4 - The claws_hand are quite small and there is a good chance of losing some when assembling the model. You may want to print extras to avoid the dreaded 'I dropped one and can't find it' syndrome.
5 - When removing parts from the printer bed, it's a good idea to place left/right parts into separate containers to help with the assembly process.
..
Assembly tips:
1 - Take your time gluing the model together and enjoy the process.
2 - I used E6000 sticky craft glue to put this model together. The sticky glue allows more time to position the parts than a fast drying superglue. I have 'fat fingers' and a shaky hand, so the sticky glue works out best for me, especially with small pieces. Just remember to leave enough time for the glue to set before combining too many parts.
3 - Be sure to fully clean off the first layer of each claws_hand, even sanding down at an angle a bit. Depending on the quality of your print, the holes for the claws may need to be cleaned out as well. Everything fits, providing the claws bases are clean.
4 - The built-in supports are a bit tight. There are handles attached to the supports for easy removal. As noted above, due to the curve, this area is not as smooth printed at .2mm as I would have preferred.
5 - Glue the head_spike into the head and then glue that to the body. I tried the other way around and it was not as convenient.
6 - One side of the spikes is longer than the other for inserting into the body part. Orient this longer side into the deeper part of the slot in the body. It should be obvious, however pay attention as the direction changes as the curve of the body changes.
6 - Both the orange parts for the tail and horns can accidentally be put in incorrectly. Refer closely to the pictures and diagram for the correct positioning (even I had to refer to my own diagram!). Modeling for no supports sometimes results in situations like this.
7 - Refer to the assembly diagrams in the pictures section as well as the uploaded pictures for putting the model together. The model is meant to be glued.
Do not hesitate to ask questions, feedback is essential to making better models.
Similar models
thingiverse
free
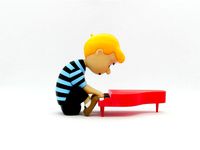
Schroeder by reddadsteve
... model together. the model is meant to be glued.
do not hesitate to ask questions, feedback is essential to making better models.
thingiverse
free

Old Hag by reddadsteve
... model together. the model is meant to be glued.
do not hesitate to ask questions, feedback is essential to making better models.
3dwarehouse
free

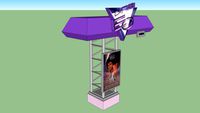
JII Follow Figment Sign
...urney into imagination ride. #dreamfinder #epcot #epcot_center #figment #imagination #journey_into_imagination #walt_disney_world
thingiverse
free
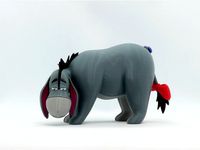
Eeyore by reddadsteve
... model together. the model is meant to be glued.
do not hesitate to ask questions, feedback is essential to making better models.
thingiverse
free

Prickle by reddadsteve
... model together. the model is meant to be glued.
do not hesitate to ask questions, feedback is essential to making better models.
thingiverse
free
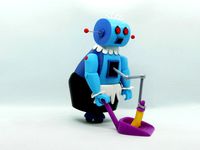
Rosie the Robot by reddadsteve
... model together. the model is meant to be glued.
do not hesitate to ask questions, feedback is essential to making better models.
3dwarehouse
free
JII Captain EO Kiosk
...urney into imagination ride. #dreamfinder #epcot #epcot_center #figment #imagination #journey_into_imagination #walt_disney_world
3dwarehouse
free

JII Upstairs Lobby Bench
...urney into imagination ride. #dreamfinder #epcot #epcot_center #figment #imagination #journey_into_imagination #walt_disney_world
3dwarehouse
free

JII EO Moon Sign
...urney into imagination ride. #dreamfinder #epcot #epcot_center #figment #imagination #journey_into_imagination #walt_disney_world
thingiverse
free

Eyeball Father in a teacup by reddadsteve
... model together. the model is meant to be glued.
do not hesitate to ask questions, feedback is essential to making better models.
Figment
3d_export
$10

reptile-fish
...saw, swim in the water? joke. this is a figment of my imagination;)<br>a hybrid of fish with a dragon,...
3d_export
$7

Katana New Era
...some models will be real, some will be a figment of the imagination.<br>--------<br>communication with the creator of the model...
3d_export
free

Flying car
...160 objects.<br>this machine doesn't exist, and it's just a figment of my imagination.<br>you can use it and change it...
thingiverse
free
Disney World's Figment kind of by jennworks
...disney world's figment kind of by jennworks
thingiverse
a 3d scan of a small plush figment
thingiverse
free

Figmented Z-Axes Support Replacement by The_Great_Dano
...ounting on side masts.
3: install the center braces
i have also included a model spaces properly so you can build your own.
glhf
thingiverse
free

Screw Top Hockey Puck by ThisVersion
...screws off and on. this creation was entirely a figment of my imagination. any resemblance to existing designs is...
thingiverse
free
the scare crow murderer - underhiver - t-model
...thingiverse this is meant as an effigy of a figment that underhivers tell their disobedient/bratty children, that a scare...
thingiverse
free

Pocket VR by utopiah
...in your backpack required. basically an open fork of https://www.kickstarter.com/projects/quantumbakery/figmentvr-virtual-reality-in-your-pocket ...
thingiverse
free

Creality CR-10 E3D Aero assembly by agniusm
...bed probe mount for duet3d probe. tested mount, untested figment of aero and ir probe. print at your own...
Reddadsteve
thingiverse
free

Dilbert by reddadsteve
...required. if you have the right filament colors, no painting is needed.
the completed model is 225mm tall after assembly.
enjoy!
thingiverse
free

Dogbert by reddadsteve
...assembly. this model is in proportion to the dilbert, wally and pointy haired boss models that i've previously posted.
enjoy!
thingiverse
free

Hagar the Horrible by reddadsteve
...printing the pieces in the suggested colors. no supports are required.
hagar may look fierce but he is really a pussycat.
enjoy!
thingiverse
free

Rat by reddadsteve
...all after assembly. this model is in proportion to the pig and crocodile models from the comic that i've also posted.
enjoy!
thingiverse
free
Pig by reddadsteve
...tall after assembly. this model is in proportion to the pig and crocodile models from the comic that i've also posted.
enjoy!
thingiverse
free

Crocodile by reddadsteve
...tall after assembly. this model is in proportion to the pig and crocodile models from the comic that i've also posted.
enjoy!
thingiverse
free
Alice by reddadsteve
...n proportion to the dilbert, wally, pointy haired boss and dogbert models from the comic that i've previously posted.
enjoy!
thingiverse
free

Wally by reddadsteve
... is 200mm tall after assembly. this model is in proportion to the dilbert and pointy haired boss models previously posted.
enjoy!
thingiverse
free

Charlie Brown by reddadsteve
...ad luck.
no supports are required. if you have the proper filament colors, no painting is needed.
the model is 140mm tall.
enjoy!
thingiverse
free

Kermit the Frog by reddadsteve
...o supports are required. if you have the proper filament colors, no painting is needed.
the assembled model is 140mm tall.
enjoy!