Thingiverse
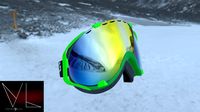
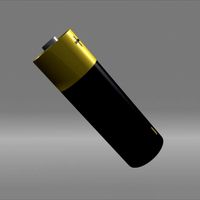
Fat Shark FPV Goggle Battery with ON/OFF Switch and Power Indicator by jellofrog
by Thingiverse
Last crawled date: 3 years ago
Back Story
In between flights as I am switching out packs on my model I unplug the barrel jack from the goggles so as not to waste the power while they are just resting on my forehead. I am sure many of you do the same. My problem comes when it is time to blindly plug it back in while it is on my face. I will grope around with my fingers, misidentify the headphone jack as my target and struggle in vain for an embarrassingly long time to force the battery connector into it. A case could be made that if I am this clumsy with my hands, perhaps I should not be piloting drones. You may have a point. I will ponder this later.
Functionality
I decided to make a battery pack that I could leave plugged in and simply switch off when I don't need to draw power from it. While I was at it, I added a power indicator LED. The LED works differently than you might expect but you are free to build it any way you like or just omit it altogether.
Build Details
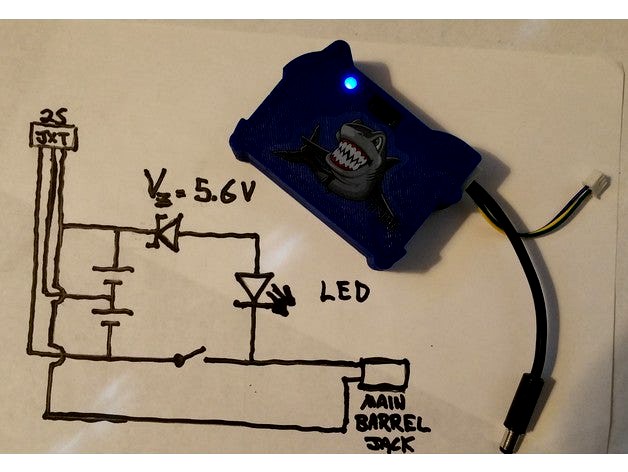
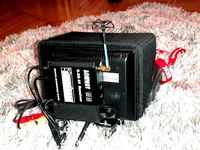
In my build, when the pack is switched "ON" it glows brightly when the pack is at 8.2V and gets dimmer all the way down to going out at around 7V. At its brightest the LED only draws a negligible 1mA of current when turned on. The wiring diagram is attached but I basically added a Zener diode in series with the LED to create the dimming behavior described above. These are just soldered point-to-point. I arrived at the Vz value experimentally and found 5.6V to be a good fit. If you don't want to go to the trouble just put an appropriately sized current limiting resistor in place of the zener diode. There is enough room for all the wiring but it is a tight fit in order to keep the overall size of the unit down.
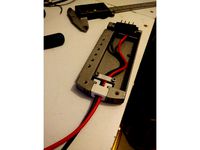
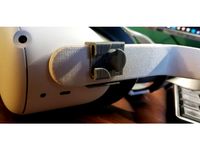
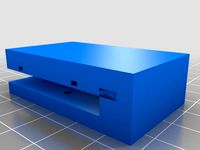
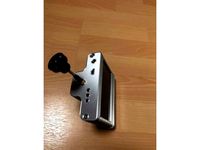
Four M3x14mm screws are used to fasten the front and back pieces from the back side. I made the front and back cover from PETG and the strain relief block out of TPU. TPU or TPE is recommended for this particular part. As you will see in the images, the inside of the strain relief block is meant to be cinched down upon the cables with a small zip tie that will stay concealed inside the case when the project is complete. For this reason, the part was designed with the expectation of a reasonably flexible material. The stuff I used has a Shore hardness of 95A and it worked very well but I would not go any higher.
Happy building and please post your makes!
Parts List:
2S JST-XH cable
18650 Li-ion Cells
Two Position Switch
Zener Diodes (optional)
5mm Blue LED
M3x14mm Thread Button Head Hex Screws
Hatchbox Blue PETG Filament (used for cover)
SainSmart White Flexible TPU (used for the strain relief block)
In between flights as I am switching out packs on my model I unplug the barrel jack from the goggles so as not to waste the power while they are just resting on my forehead. I am sure many of you do the same. My problem comes when it is time to blindly plug it back in while it is on my face. I will grope around with my fingers, misidentify the headphone jack as my target and struggle in vain for an embarrassingly long time to force the battery connector into it. A case could be made that if I am this clumsy with my hands, perhaps I should not be piloting drones. You may have a point. I will ponder this later.
Functionality
I decided to make a battery pack that I could leave plugged in and simply switch off when I don't need to draw power from it. While I was at it, I added a power indicator LED. The LED works differently than you might expect but you are free to build it any way you like or just omit it altogether.
Build Details
In my build, when the pack is switched "ON" it glows brightly when the pack is at 8.2V and gets dimmer all the way down to going out at around 7V. At its brightest the LED only draws a negligible 1mA of current when turned on. The wiring diagram is attached but I basically added a Zener diode in series with the LED to create the dimming behavior described above. These are just soldered point-to-point. I arrived at the Vz value experimentally and found 5.6V to be a good fit. If you don't want to go to the trouble just put an appropriately sized current limiting resistor in place of the zener diode. There is enough room for all the wiring but it is a tight fit in order to keep the overall size of the unit down.
Four M3x14mm screws are used to fasten the front and back pieces from the back side. I made the front and back cover from PETG and the strain relief block out of TPU. TPU or TPE is recommended for this particular part. As you will see in the images, the inside of the strain relief block is meant to be cinched down upon the cables with a small zip tie that will stay concealed inside the case when the project is complete. For this reason, the part was designed with the expectation of a reasonably flexible material. The stuff I used has a Shore hardness of 95A and it worked very well but I would not go any higher.
Happy building and please post your makes!
Parts List:
2S JST-XH cable
18650 Li-ion Cells
Two Position Switch
Zener Diodes (optional)
5mm Blue LED
M3x14mm Thread Button Head Hex Screws
Hatchbox Blue PETG Filament (used for cover)
SainSmart White Flexible TPU (used for the strain relief block)
Similar models
thingiverse
free
Hailong battery bracket - fitting and strain relief by fluffgummi
...ic hole where the cables come out.
to remedy this i printed a fitting for the hole/cable exit and a strain relief for the cables.
thingiverse
free

Baofeng Battery pack model by jameslee522
...back when i made it. was going to make an 18650 pack but never did. included the step file so you can do what you want with it.
thingiverse
free

Cover Powersupply by mowi
...my prusa. the cover has a switch , a power connector, a strain relief and lots of holes to attach it to something with tie wraps
thingiverse
free
Oculus Quest 2 cable strain relief by DesplaG
... fit the quest 2 stock headband and a 5mm cable. i have included the .f3d file in case you want to improve it.
no support needed.
thingiverse
free

Microsoft Surface Pro LED cover and cable strain relief by Dingo42
...ically. i have no idea if this is necessary, but it was easy to add, so why not?
scad file included for customization if you want
thingiverse
free

Byte Frost Goggle Strap Mount for Ground Station
... progress and does require you use antennas on the gs with long pigtail, soomething like the lumenier axii 2 long range antennas.
thingiverse
free

From Standard 120VAC power connector to Strain Relief for Hard Wired Cable by Link555
...ower connector on the panel to standard strain relief. this is a hand plug. i used tpu. i think pla might be hard to press in.
thingiverse
free
FPV Ground Station Switch and Fuse by AdamHelbing
... -> ground station and goggles power up
switch off -> ground station and goggles power down
fuck things up -> fuse blows
thingiverse
free

Alunar M508 Strain relief bracket for heated bed cable
...p ties in the slots, as shown in the pictures. install the wiring bundle in the 90 degree slot and use zip ties to hold it down.
thingiverse
free

FPV goggle battery rear strap mount by ToddF
...er balances the goggles both side to side and front to back. it also gives a nice "handle" to help put on the goggles.
Jellofrog
thingiverse
free

15 Series T-Slot Aluminum Extrusion Model by jellofrog
...use it in my models to visualize more complete assemblies which will make use of t-slot members.
hope you find it useful as well.
thingiverse
free
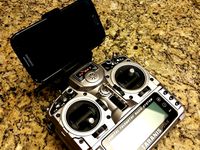
Adjustable Smartphone Holder for FrSky Taranis X9D by jellofrog
...embly to give it a bit firmer grip on the handle without necessarily having to crank down very hard on the screws that secure it.
thingiverse
free

Garage Door Opener End Stop Replacement Arm by jellofrog
... the part is designed to re-use the original spring. i printed mine in tpu and this one seems very unlikely to break ever again.
thingiverse
free

Wall Dock for J1772 EV Charge Cable by jellofrog
...s a very small section for the latch receiver at the very top. hope you get some use out of it and post your makes and comments.
thingiverse
free

ESP-12E Breadboard-Friendly Pin Converter by jellofrog
... about 35 minutes but i developed a rhythm with fishing the wires thru so i imagine things will go quite a bit quicker next time.
Goggle
3ddd
$1

Goggle desk
...goggle desk
3ddd
goggle desk , стол
goggle desk стол для современных и амбициозных
3ddd
$1

Goggle Desk
... goggle desk , стол
goggle desk – стол для амбициозных и современных
turbosquid
$74

Goggles
... available on turbo squid, the world's leading provider of digital 3d models for visualization, films, television, and games.
turbosquid
$30

Goggles
... available on turbo squid, the world's leading provider of digital 3d models for visualization, films, television, and games.
3d_ocean
$17
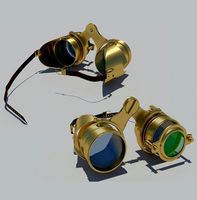
Steampunk Goggles
...bj and max 10,11 and 13 version format. materials are included and it is based on mental ray renderer. also, main file include...
3d_ocean
$5

Goggle Desk
...al design by danny venlet for babini • all objects are properly named and grouped • model is fully textured with all materials...
3d_export
$20

safety goggles glasses
...safety goggles glasses
3dexport
safety goggles glasses
turbosquid
$10
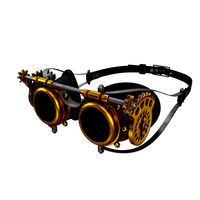
Steampunk Goggles
...d
royalty free 3d model steampunk goggles for download as ma on turbosquid: 3d models for games, architecture, videos. (1537373)
turbosquid
$25
Steampunk Goggles
...el steampunk goggles for download as max, obj, fbx, and blend on turbosquid: 3d models for games, architecture, videos. (1490759)
turbosquid
$15
Ski goggles
...3d model ski goggles for download as 3ds, obj, fbx, and blend on turbosquid: 3d models for games, architecture, videos. (1271456)
Fat
design_connected
$11

Fat Fat - Lady Fat
...t
designconnected
b & b italia fat fat - lady fat coffee tables computer generated 3d model. designed by patricia urquiola.
design_connected
$9
Fat Fat
...fat fat
designconnected
b&b italia fat fat computer generated 3d model. designed by urquiola, patricia.
turbosquid
$2

BeB Italia Fat Fat table set
...alia fat fat table set for download as max, max, obj, and fbx on turbosquid: 3d models for games, architecture, videos. (1634521)
design_connected
$16
Fat Beauty
...fat beauty
designconnected
gamma-arredamenti fat beauty tables computer generated 3d model. designed by anton kobrinetz design.
design_connected
$20
Fat FS91A
...fat fs91a
designconnected
b & b italia fat fs91a armchairs computer generated 3d model. designed by patricia urquiola.
design_connected
$18
Fat FS91B
...fat fs91b
designconnected
b & b italia fat fs91b armchairs computer generated 3d model. designed by patricia urquiola.
design_connected
$7

Fat Ottoman
...fat ottoman
designconnected
b & b italia fat ottoman poufs computer generated 3d model. designed by patricia urquiola.
3ddd
$1
B&B Italia Fat Fat Table
... круглый
tableset fat fat by b&b; italia.
three center tables included: tf42, tf62, tf92.
turbosquid
$160

Baby Fat
...urbosquid
royalty free 3d model baby fat for download as max on turbosquid: 3d models for games, architecture, videos. (1315897)
turbosquid
$12

Fat plants
...squid
royalty free 3d model fat plants for download as blend on turbosquid: 3d models for games, architecture, videos. (1540000)
Shark
3d_export
$5
shark
...shark
3dexport
animated shark
3d_export
$5

shark
...shark
3dexport
cute shark modeling
3d_export
$5

shark
...shark
3dexport
3d model of a shark (sculpting)
3ddd
free
Edra Shark
...edra shark
3ddd
shark , edra
диван edra shark
материалы vray
max2010, fbx, obj
turbosquid
$808

shark
...k
turbosquid
royalty free 3d model shark for download as 3ds on turbosquid: 3d models for games, architecture, videos. (1291856)
turbosquid
$40

Shark
...turbosquid
royalty free 3d model shark for download as blend on turbosquid: 3d models for games, architecture, videos. (1385567)
turbosquid
$39

Shark
...k
turbosquid
royalty free 3d model shark for download as max on turbosquid: 3d models for games, architecture, videos. (1197792)
turbosquid
$36

Shark
...k
turbosquid
royalty free 3d model shark for download as ztl on turbosquid: 3d models for games, architecture, videos. (1234052)
turbosquid
$25

shark
...k
turbosquid
royalty free 3d model shark for download as fbx on turbosquid: 3d models for games, architecture, videos. (1598411)
turbosquid
$25

Shark
...k
turbosquid
royalty free 3d model shark for download as obj on turbosquid: 3d models for games, architecture, videos. (1298866)
Fpv
turbosquid
$1
FPV VTX Antenna
...e 3d model fpv vtx antenna for download as obj, fbx, and stl on turbosquid: 3d models for games, architecture, videos. (1230317)
3d_export
$9
Fpv logo 3D Model
...onogram vehicle part of auto transport 3d model logo emblem detailed high quality badge
fpv logo 3d model rmodeler 59628 3dexport
3d_export
$8
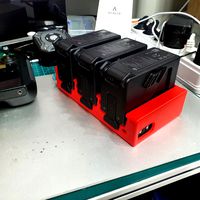
dji fpv battery slot holder
...er for 3 dji fpv batteries. holds perfectly without shaking. need 1 m3 countersunk head bolt. need to print 6 pin, 1 case, 1 cap.
3d_export
$10
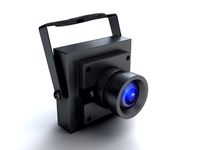
fpv camera hd 700tvl
...aterials are logically named<br>the main format is in 3ds max 2009.<br>satisfcation garranteed..<br>thank you !
thingiverse
free
FpV Mount (SOPORTE FPV) by elborjas1987
...fpv mount (soporte fpv) by elborjas1987
thingiverse
this is a fpv mount with the same holes of naza base.
thingiverse
free
fpv by tbutera
...fpv by tbutera
thingiverse
fpv
thingiverse
free
fpv by tbutera
...fpv by tbutera
thingiverse
fpv
thingiverse
free
FPV DRONE ROOSTER DJI FPV PART
...fpv drone rooster dji fpv part
thingiverse
fpv drone rooster dji fpv install part
thingiverse
free
FPV monitor
...tml?rmmds=myorder&cur_warehouse=cn
link for download : https://cults3d.com/fr/mod%c3%a8le-3d/divers/fpv-monitor-ecran-fpv-faf
thingiverse
free
FPV receiver mount for FPV display by petrex
...eceiver mount for fpv display by petrex
thingiverse
aomway receiver mount for field view 777 fpv monitor. with small cable tray.
Indicator
3ddd
$1
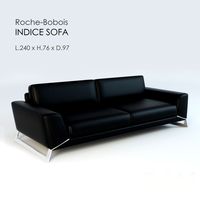
Indice Sofa
...indice sofa
3ddd
indice sofa , roche bobois
indice sofa roche bobois
archive3d
free
Indicator 3D Model
...sor indicator pointer
indicator n130508 - 3d model (*.gsm+*.3ds) for interior 3d visualization.
turbosquid
$26
Km indicator
...squid
royalty free 3d model km indicator for download as max on turbosquid: 3d models for games, architecture, videos. (1153786)
turbosquid
free

Road Indicator
...d
royalty free 3d model road indicator for download as blend on turbosquid: 3d models for games, architecture, videos. (1299938)
turbosquid
$30
Dial Indicator
...ree 3d model dial indicator for download as 3ds, max, and obj on turbosquid: 3d models for games, architecture, videos. (1302779)
3d_export
$7
dial indicator
...r is any of various instruments used to accurately measure small distances and angles, and amplify them to make them more obvious
turbosquid
$3

Power Indicator
...ree 3d model power indicator for download as ma, obj, and fbx on turbosquid: 3d models for games, architecture, videos. (1143828)
turbosquid
$50

Digital Indicator
... available on turbo squid, the world's leading provider of digital 3d models for visualization, films, television, and games.
turbosquid
$50

altitude indicator
... available on turbo squid, the world's leading provider of digital 3d models for visualization, films, television, and games.
turbosquid
$25
Dial Indicator
... available on turbo squid, the world's leading provider of digital 3d models for visualization, films, television, and games.
Battery
3d_ocean
$2
Battery
...battery
3docean
battery electronic
a high quality battery .
3d_export
free
battery
...battery
3dexport
battery
3d_ocean
$5
Battery
...battery
3docean
battery electronics
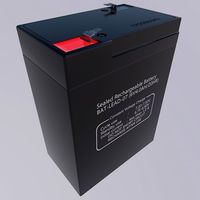
a classic 6 v battery, high poly with materials
3d_ocean
$3
Batteries
...batteries 3docean aa aaa batteries battery d electronics energy materials power subdivision uv unwrapped aa,...
3d_export
$19
Lead-acid battery storage battery lithium battery
...ttery storage battery lithium battery
3dexport
1.lead-acid battery storage battery lithium battery 2.files include 3dmax obj fbx
3d_ocean
$7
Battery Model
...battery model
3docean
big battery car battery vehicle battery
car battery, big battery, vehicle battery.
3ddd
free
battery energier
...battery energier
3ddd
battery energier , батарейка
battery energier
turbosquid
free
battery
...battery
turbosquid
free 3d model battery for download as obj on turbosquid: 3d models for games, architecture, videos. (1151676)
3d_ocean
$1
Battery Model
...lack minus plus white yellow
this is battery model is about 1000 triangles. turntable preview is smoothed version of the battery.
3d_export
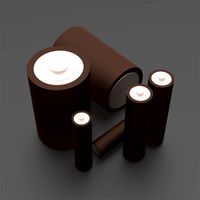
$10
battery 18650
...battery 18650
3dexport
battery 18650
Switch
archibase_planet
free
Switch
...switch
archibase planet
switch cluster switch
light switch 1 - 3d model for interior 3d visualization.
archibase_planet
free
Switch
...switch
archibase planet
switches switch
switch 1 - 3d model (*.gsm+*.3ds) for interior 3d visualization.
archibase_planet
free
Switch
...switch
archibase planet
closer button switch cluster switch
switch - 3d model (*.3ds) for interior 3d visualization.
archibase_planet
free
Switch
...switch
archibase planet
switch closer
light switch 2 - 3d model for interior 3d visualization.
archibase_planet
free
Switch
...switch
archibase planet
closer button switch
switch n300808 - 3d model (*.gsm+*.3ds) for interior 3d visualization
archibase_planet
free
Switch
...switch
archibase planet
closer button switch
switch n141108 - 3d model (*.gsm+*.3ds) for interior 3d visualization.
archibase_planet
free

Switch
...switch
archibase planet
cluster switch closer
switch n260609 - 3d model (*.gsm+*.3ds) for interior 3d visualization.
archibase_planet
free

Switch
...switch
archibase planet
button switch closer
switch 2 - 3d model (*.gsm+*.3ds) for interior 3d visualization.
archibase_planet
free

Switch
...switch
archibase planet
button switch closer
switch n070510 - 3d model (*.gsm+*.3ds) for interior 3d visualization.
3d_export
$5

switch
...switch
3dexport
3d model of a low-poly switch
Power
turbosquid
$100

power
...ower
turbosquid
royalty free 3d model power for download as on turbosquid: 3d models for games, architecture, videos. (1421990)
3d_export
$5

Power
...power
3dexport
3d_export
$5

power outlets
...power outlets
3dexport
power outlets
3ddd
$1

lion power
...lion power
3ddd
лев , статуя
lion power gold sculpture
3ddd
$1

Sea Power
...
компас , море , часы
часы с компасом sea power
3ddd
free

Meridiani / Power
...power
3ddd
meridiani , круглый
стол power производитель meridiani, диаметр 120,высота 67
3d_export
$5

Power Surge
...power surge
3dexport
the power surge is a all mesh carnival ride to lower in game part count and lag
turbosquid
$8

Airport Ground Power Unit (AXA Power )
... available on turbo squid, the world's leading provider of digital 3d models for visualization, films, television, and games.
turbosquid
$50

Power Houser
...rbosquid
royalty free 3d model power houser for download as on turbosquid: 3d models for games, architecture, videos. (1333800)
3d_export
$5

power outlet
...power outlet
3dexport
power outlet<br>format file maya 2018, 3d max 2017, obj, fbx