Thingiverse
EzFly Trainer Wing Leading-Edge
by Thingiverse
Last crawled date: 5 years, 11 months ago
Motivation:
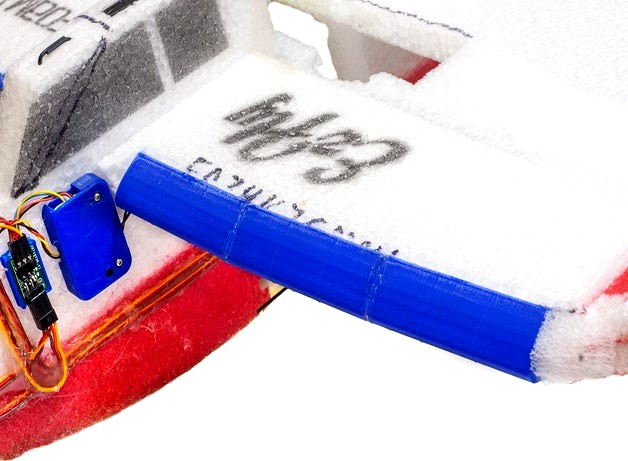
My Fancy Foam EzFly Trainer didn't seem to fly very well.
My hypothesis is that the blunt wing leading-edge isn't contributing to good airflow over the wing.
To help I decided to try applying an air-foil leading-edge to see if that would help things.
I choose the NACA 2414 section since it is a good airfoil for model planes.
I got the coordinates in OpenSCAD format from: http://chaaawa.com/airfoils/export.cgi?f=n2414
With the new leading-edge, the plane seems to fly much better. It climbs much more easily at a lower throttle-setting.
Slicing:
You may need to fiddle with the perimeter parameters in your slicer to get rid of gaps in the exterior.
I've uploaded the Cura profile I used. I wasn't able to get the model to slice properly in Slic3r for some reason.
Installation:
To mount the sections, you need trim the top-surface of the wing's foam from about 6mm up from the bottom surface and back about 19mm on the top surface. Then trim about a 45 degree angle on the lower leading edge from the point where the top cut ends on the wind leading-edge (i.e. don't make the wing narrower).
Start near the wing root and cut a slot into the wing about 19mm back. Hold a section of leading-edge and mark the outside. Cut another slot there.
Push the first leading-edge piece onto the foam. You may need to open up the slots for it to fit all the way back.
Do the same thing with the two outboard sections.
Align the sections so the "point" of the section is about 4-6mm upp from the bottom surface of the wing.