Thingiverse

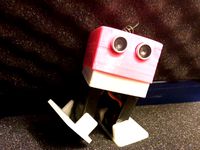
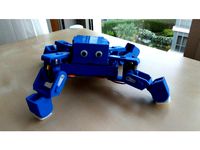
Ez Arduino 8 DOF Quadruped Robot - MiniKame Mk2 by manic-3d-print
by Thingiverse
Last crawled date: 3 years, 1 month ago
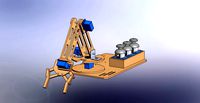
This is an inexpensive 3D printed 8 DOF quadruped robot using Arduino kind control board. It has two playing modes. One is autonomous pilot mode which the robot walks and performs actions randomly. This is the default. The other is control mode where the robot is controlled by iPhone or Android phone via BLE technology. It is the update version of our design thing:2317065 with enhancement in couples of way including design, electronics, software and better guiding instructions to make. Hopefully, it is more fun to make and play.
Full Instructions of making this robot can be found in the Instructables page. It includes assembly videos (also shown at below) that should guide everyone to make one easily.
We have another 12 DOF quadruped robot. You may be interested too. Check here for the robot dog we design.
Video Demos:
https://youtu.be/b-8nd_EcfXo
https://youtu.be/TkpbPcAXuUo
https://youtu.be/mUIyPMDtPAU - we develop a gamepad to play, see here if you like to make one.
Software:
Robot Code -
Arduino code on githup
Control Apps -
goBLE iOS app on Apple Store; for Bluetooth LE module
playBLE Android app on Google Play; for Bluetooth LE module
virtual-gamepad-BLE Android app contributed by a supporter for Bluetooth LE module; compatible to Android 5.0 and above;
virtual-gamepad-SPP Android app contributed by a supporter for HC-06, HC-05 and SPP-CA classic Bluetooth 4.0 SPP module; compatible to Android 4.0 and above
Hardware:
The components can be found in ebay, amazon, aliexpress, DX and etc online stores.
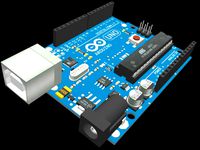
a HuaDuino board, it is Arduino Nano compatible with enhanced features. It integrates everything on a single PCB. It's a lot easier for people to make a bot with it. Embedded battery charging circuit, battery charging is more convenient. It can be found on Amazon. See full product description here.
a single 3.7V 18650 lithium ion battery or battery pack with XH2.54 connector, if you want longer running time getting a pack with two 18650 in parallel. For this robot, you may like to use our design 18650 battery holder. However, it is also fine to use 3.7V 10440 lithium ion and 3.7V lithium polymer battery dimension not bigger than W35mm, L70mm & T60mm.
8 x tower pro MG90s or compatible servos
a female-female dupoint wire or anything you can figure out for connecting two pins
some m2x6 tapping screws
Bluetooth Module
a HC-06, HC-05 and SPP-CA classic Bluetooth 4.0 SPP module, if you use this type of Bluetooth module; must use the virtual-gamepad-SPP Android app for control; baud rate must be set to 115200; see this tutorial to configure the baud rate using AT commands;
Or
a BT-05 CC2540 Bluetooth LE module - this is optional if you don't need App control. In fact, there are many BLE modules named differently, but they are built with CC254x chip. Examples such as HM-10 and CC41-A are the typical you can find in the market. Since the firmware is different, the AT command set may vary too. You may use this code to identify them. To work with the robot code and the apps, baud rate is required to set to 115200; service UUID must set to 0xDFB0 and characteristic UUID must set to 0xDFB1 using the AT commands. Below is the code intended to do that automatically, but it may not work if you have different one. The reference of the AT command set to configure BT-05 BLE can be downloaded here. You don't need this module if you like to make this gamepad to control and play this robot.
Below only required for Bluetooth LE module
The following stand alone Arduino program issues AT commands setting BLE module UUID, characteristic and baud rate, assuming the BLE default baud rate is 9600. For running this program in HuaDuino with the module onto it, the S1 switch must be set to the BT position.
void setup() {
Serial.begin(9600); //change to fit your ble initial baud_rate
Serial.println("AT+UUID0xDFB0\r"); // set service UUID
delay(50);
Serial.println("AT+CHAR0xDFB1\r"); // set characteristic UUID
delay(50);
Serial.println("AT+BAUD8\r"); // set baud rate to 115200
}
void loop() {}
The steps you should do of uploading the Arduino sketch to HuaDuino for BLE control are as following
1) insert the BLE module, switch S1 to USB side, turn on huaduino,
2) uploading the above ble module setup program
3) turn off huaduino, switch S1 to BT side
4) turn on huaduino, let the ble module setup program run in few seconds.
5) switch S1 to USB side
6) uploading the robot code by open "firmware.ino"
7) switch S1 back to BT side, the robot now can be controlled by BLE
for HuaDuino, in Arduino IDE software:
the board selection should be "Arduino Nano", processor "ATmega328" for AVR Boards support version 1.6.20 or older.
the board selection should be "Arduino Nano", processor "ATmega328 (Old Bootloader)" for AVR Boards support version 1.6.21 or newer.
Full Instructions of making this robot can be found in the Instructables page. It includes assembly videos (also shown at below) that should guide everyone to make one easily.
We have another 12 DOF quadruped robot. You may be interested too. Check here for the robot dog we design.
Video Demos:
https://youtu.be/b-8nd_EcfXo
https://youtu.be/TkpbPcAXuUo
https://youtu.be/mUIyPMDtPAU - we develop a gamepad to play, see here if you like to make one.
Software:
Robot Code -
Arduino code on githup
Control Apps -
goBLE iOS app on Apple Store; for Bluetooth LE module
playBLE Android app on Google Play; for Bluetooth LE module
virtual-gamepad-BLE Android app contributed by a supporter for Bluetooth LE module; compatible to Android 5.0 and above;
virtual-gamepad-SPP Android app contributed by a supporter for HC-06, HC-05 and SPP-CA classic Bluetooth 4.0 SPP module; compatible to Android 4.0 and above
Hardware:
The components can be found in ebay, amazon, aliexpress, DX and etc online stores.
a HuaDuino board, it is Arduino Nano compatible with enhanced features. It integrates everything on a single PCB. It's a lot easier for people to make a bot with it. Embedded battery charging circuit, battery charging is more convenient. It can be found on Amazon. See full product description here.
a single 3.7V 18650 lithium ion battery or battery pack with XH2.54 connector, if you want longer running time getting a pack with two 18650 in parallel. For this robot, you may like to use our design 18650 battery holder. However, it is also fine to use 3.7V 10440 lithium ion and 3.7V lithium polymer battery dimension not bigger than W35mm, L70mm & T60mm.
8 x tower pro MG90s or compatible servos
a female-female dupoint wire or anything you can figure out for connecting two pins
some m2x6 tapping screws
Bluetooth Module
a HC-06, HC-05 and SPP-CA classic Bluetooth 4.0 SPP module, if you use this type of Bluetooth module; must use the virtual-gamepad-SPP Android app for control; baud rate must be set to 115200; see this tutorial to configure the baud rate using AT commands;
Or
a BT-05 CC2540 Bluetooth LE module - this is optional if you don't need App control. In fact, there are many BLE modules named differently, but they are built with CC254x chip. Examples such as HM-10 and CC41-A are the typical you can find in the market. Since the firmware is different, the AT command set may vary too. You may use this code to identify them. To work with the robot code and the apps, baud rate is required to set to 115200; service UUID must set to 0xDFB0 and characteristic UUID must set to 0xDFB1 using the AT commands. Below is the code intended to do that automatically, but it may not work if you have different one. The reference of the AT command set to configure BT-05 BLE can be downloaded here. You don't need this module if you like to make this gamepad to control and play this robot.
Below only required for Bluetooth LE module
The following stand alone Arduino program issues AT commands setting BLE module UUID, characteristic and baud rate, assuming the BLE default baud rate is 9600. For running this program in HuaDuino with the module onto it, the S1 switch must be set to the BT position.
void setup() {
Serial.begin(9600); //change to fit your ble initial baud_rate
Serial.println("AT+UUID0xDFB0\r"); // set service UUID
delay(50);
Serial.println("AT+CHAR0xDFB1\r"); // set characteristic UUID
delay(50);
Serial.println("AT+BAUD8\r"); // set baud rate to 115200
}
void loop() {}
The steps you should do of uploading the Arduino sketch to HuaDuino for BLE control are as following
1) insert the BLE module, switch S1 to USB side, turn on huaduino,
2) uploading the above ble module setup program
3) turn off huaduino, switch S1 to BT side
4) turn on huaduino, let the ble module setup program run in few seconds.
5) switch S1 to USB side
6) uploading the robot code by open "firmware.ino"
7) switch S1 back to BT side, the robot now can be controlled by BLE
for HuaDuino, in Arduino IDE software:
the board selection should be "Arduino Nano", processor "ATmega328" for AVR Boards support version 1.6.20 or older.
the board selection should be "Arduino Nano", processor "ATmega328 (Old Bootloader)" for AVR Boards support version 1.6.21 or newer.
Similar models
thingiverse
free

Ez Arduino 12 DOF Quadruped Robot - Spidey by manic-3d-print
...uld be "arduino nano", processor "atmega328 (old bootloader)" for avr boards support version 1.6.21 or newer.
grabcad
free

Android Controlled Robot
... will be controlled by arduino. bluetooth module is attached with arduino. android sends and receive signal via bluetooth module.
thingiverse
free
Bobwi - Cheap, dancing robot. (with BT and easy to print) by galile0
.....
for the source code (3d parts and arduino code) to make bobwi dance, or be controlled from android.
https://github.com/g4lile0
thingiverse
free

LED Matrix Display 8x24 by isaac879
...t the text to be displayed.
arduino nano code: https://github.com/isaac879/led-matrix-display
video: https://youtu.be/auglqu87xkq
thingiverse
free

ARDROID: Arduino/Android Demo Robot by LoboCNC
.../thing:1673549
also see: https://github.com/seamonsters-2605/ardroid for a more complete example of the arduino and android code.
thingiverse
free

Ez Arduino 8 DOF Quadruped Robot by manic-3d-print
...ooth connector
all servos initial angles must set to 90° as the photo showing initial posture. hc-sr04 power input is to 5v pin.
grabcad
free

Self balancing robot based on Arduino
...bot based on arduino
grabcad
self balancing robot bluetooth controlled using a developed android app.
for more info contact me.
3dwarehouse
free

Bluetooth Module SPP (HC-05)
... simple model. dimensions from manufacturer: http://www.wavesen.com/ #bluetooth #bluetooth_module #bluetooth_rs232 #hc #hc05 #spp
grabcad
free

Hummingbird BLE Bluetooth Module
...ule
grabcad
bluetooth module intended for use with hummingbird robotics boards.
see my profile for more hummingbird components.
thingiverse
free

BT05-A by dTom
...previously used a bluetooth serial module as easily without changing the pcb and lower computer program upgrade to bluetooth 4.0!
Minikame
thingiverse
free

Ez Arduino MiniKame - 8 DOF Quadruped Robot (Normals Repaired) by flodejr
...- 8 dof quadruped robot (normals repaired) by flodejr
thingiverse
repairing the stl models so that supports can be easily added.
thingiverse
free
Ez Arduino MiniKame - 8 DOF Quadruped Robot (Arduino Nano with Shield) by Bhm93
...youtu.be/z36ekf0ifoa
i used:
8 servos sg90
1 arduino nano
1 shield arduino nano v3
1 bluetooth hc-05
1 lipo battery 7,5v
1 lm2596
thingiverse
free

wltoys A959 air suspension by rossitamiya
...suspension by rossitamiya thingiverse u can combine it with minikame spider robot and connect it to channel 3 to...
thingiverse
free

Ez Arduino 8 DOF Quadruped Robot - MiniKame by manic-3d-print
...to front left leg
9) d12 for setup mode (see the assemble video)
10) bluetooth uart module to the board's bluetooth connector
thingiverse
free
PoorKame by owenlab
...owenlab thingiverse poorkame is a cheaper version of awesome minikame by javier isabel! i modified some parts to use...
thingiverse
free

Scary 1.2 by muddyboots
...based on work by javier isabel hernandes and his minikame the body was modified to hold different electronics, but...
thingiverse
free

Quadruped Changeable size using Servo 9g by squadzone
...all files is inside rar include modified code from https://github.com/manic-3dprint/ez-arduino-minikame all you need: bolt m3 10mm ( 6pcs, 10...
thingiverse
free

FatKame by Blomdoft
...the github repository which is a fork of the minikame repository: https://github.com/blomdoft/fatkame so the idea is to have this...
grabcad
free

MINIKAME ROBOT
...minikame robot
grabcad
minikame robot design
Manic
3ddd
$1

подушки Manic
...dd
подушки manic , подушка , сова
подушки manic
3d_sky
$8

Manic pillows
...manic pillows
3dsky
pillow
manic pillows
thingiverse
free

Manic Miner's Willy character by Artemisio
...willy character by artemisio
thingiverse
the main character of the infamous manic miner game for zx spectrum
back from the 1983.
thingiverse
free

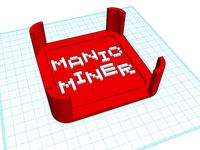
Box that fits in the bag for manic mini 2 by Loop7500
...box that fits in the bag for manic mini 2 by loop7500
thingiverse
box that fits in the bag for manic mini 2
thingiverse
free
ZX Spectrum Manic Miner Coaster Set by mattstroud
... have a dual head extruder, print the character on each coaster with a different colour to really make them stand out.
enjoy!!!
thingiverse
free

Manic Miner Character - Miner Willy by Dorchester3D
...e is a 3d model of miner willy from the zx spectrum game manic miner! can be printed laying flat without needing to use supports.
thingiverse
free

Ez Wii Nunchuk Adaptor Housing by manic-3d-print
...ez wii nunchuk adaptor housing by manic-3d-print
thingiverse
for convenience to use wii nunchuck in projects
thingiverse
free

Box that fits in the bag/lid for manic mini 2 by Loop7500
...that fits in the bag/lid for manic mini 2 by loop7500
thingiverse
a box that fits in the lid of the bag that the mini 2 comes in
thingiverse
free

Ez 18650 Battery Clip by manic-3d-print
... a rubber band. be caution and make sure you are aware of which is positive and negative terminals when is used in your project.
thingiverse
free

Ez TT motor Hub For Pololu Wheel 42×19mm by manic-3d-print
...19mm is for motor having 3mm d output shafts. this hub replaces white plastic hub so that the wheel can used with cheap tt motor.
Quadruped
turbosquid
$15

Quadruped Creature
...ree 3d model quadruped creature for download as fbx and blend on turbosquid: 3d models for games, architecture, videos. (1362679)
turbosquid
$99

Bunny Rabbit Quadruped
...model bunny rabbit quadruped for download as ma, obj, and fbx on turbosquid: 3d models for games, architecture, videos. (1412410)
3d_export
$15
Cow Model with UVs 3D Model
...with uvs 3d model 3dexport cow model animal mammal quadruped cow model with uvs 3d model zeta 58962...
3d_export
$99

Donkey 3D Model
...3d model 3dexport donkey shrek character dreamworks sony animal quadruped peolpe male fantasy game movie motion picture cartoon photorealistic...
3d_export
$49
Camel 3D Model
...camel 3d model 3dexport camel egypt africa hump humpbacked quadruped mammal animal dromedary desert walking arabia egypt arabian camels...
3d_ocean
$8

Low Poly Horse Base Mesh
...3docean animal base games horse low mammal mesh poly quadruped this is a low poly base mesh of a...
3d_export
$5
robot pack
...and uploaded with maya. it includes:<br>- three head types.<br>- quadruped robots.<br>- three-legged robots.<br>- six-legged...
3d_export
$179

SHREK DONKEY 3D Model
...3d model 3dexport donkey shrek character dreamworks sony animal quadruped peolpe male fantasy game movie motion picture cartoon photorealistic...
3d_ocean
$65
Stegosaurus
...stegosaurus 3docean dinosaur herbivore herbivorous prehistoric quadraped quadruped roof lizard stegasaurus stegosaurus this package contains a high...
3d_export
$99
Donkey std mat 3D Model
...3d model 3dexport donkey shrek character dreamworks sony animal quadruped peolpe male fantasy game movie motion picture cartoon photorealistic...
Dof
turbosquid
free
hallway-DOF
... available on turbo squid, the world's leading provider of digital 3d models for visualization, films, television, and games.
3d_ocean
$4
DVD Cases with DOF
...th c4d r10 or later. great for displaying your dvds. i added proper depth of field which you will see when you render the scen...
3ddd
$1
interior column
...interior column 3ddd колонна classic column dof ...
3d_ocean
$8
3d model lacy umbrella and render scene
...model lacy umbrella and render scene 3docean 3d accessory dof lacy model render scene umbrella vray 3d model lacy...
3d_ocean
$18
Realistic Headphones
...headphones, great for interior visualization. highly detailed, great for dof ...
3d_ocean
$15
Ready collection V-ray tileable materials
...ready collection v-ray tileable materials 3docean cameras collection concrete dof fabric glass grid light max2010 metal black gloss mix...
3d_ocean
$12

Umbrella
...umbrella 3docean 3d accessory dof lacy model render scene umbrella vray 3d model of...
3d_ocean
$6

Nail Clippers
...model suitable for close-up render’s. included modo file hsa dof (depth of field) applied. included moi source file in...
3d_ocean
$9
Easy Render Scene For C4D/Vray
...scene for c4d/vray 3docean 3d rendering depth of field dof render scene scene through this complete scene you will...
3d_ocean
$5

Vray scene setup
...setup 3. 2 vray cameras, one of them with dof 4. vray lights 5. vitra panton chair model 6....
Ez
turbosquid
$15

EZ stack cutting
...ree 3d model ez stack cutting for download as sldpr and sldas on turbosquid: 3d models for games, architecture, videos. (1422984)
turbosquid
$35
LG Flatron ez T710BH
... available on turbo squid, the world's leading provider of digital 3d models for visualization, films, television, and games.
3d_export
$99

Toyota Verso EZ 2013 3D Model
...a verso e'z ez 2012 2013 2014 2015 2016 mpv van minivan japan japanese
toyota verso ez 2013 3d model humster3d 65289 3dexport
turbosquid
$119
Renault EZ-Go concept - rigged
... concept - rigged for download as max, max, 3ds, fbx, and obj on turbosquid: 3d models for games, architecture, videos. (1525261)
turbosquid
$3

Digital Camera: BTEC EZ Shot 4002
... available on turbo squid, the world's leading provider of digital 3d models for visualization, films, television, and games.
3d_export
$99

Toyota Verso EZ 2012 3D Model
...ta verso e'z 2012 2013 2014 2015 hatchback compact b-mpv mpv urban cvt
toyota verso ez 2012 3d model humster3d 50814 3dexport
3d_export
$5
3 Peice Weight Training Set 3D Model
...3d model 3dexport dumb bell bar dumbell dumbbell ez ezar bench benchpress press weight rack 3 peice weight training...
3d_export
$16

Ibaez guitar 3D Model
...a render musica guitarra
ibaez guitar 3d model download .c4d .max .obj .fbx .ma .lwo .3ds .3dm .stl downriversumo 108254 3dexport
3d_ocean
$89

Toyota Verso (E'Z) 2013
...toyota verso (e'z) 2013 3docean 2012-2016 e'z ez japan japanese minivan mpv toyota toyota verso van verso...
cg_studio
$99

Toyota Verso (E'Z) 20133d model
...20133d model cgstudio cars mpv van toyota verso e'z ez 2012 2013 2014 2015 2016 minivan japan japanese .3ds...
Mk2
turbosquid
$4

Mk2
...
royalty free 3d model mk2 for download as max, obj, and fbx on turbosquid: 3d models for games, architecture, videos. (1305687)
turbosquid
$9
Mk2 Grenade
...osquid
royalty free 3d model mk2 grenade for download as fbx on turbosquid: 3d models for games, architecture, videos. (1175401)
turbosquid
$4

Mk2 Grenade
...quid
royalty free 3d model mk2 grenade for download as blend on turbosquid: 3d models for games, architecture, videos. (1228888)
turbosquid
$2

Grenade Mk2
...osquid
royalty free 3d model grenade mk2 for download as max on turbosquid: 3d models for games, architecture, videos. (1658201)
turbosquid
$2

mk2 Grenade
...osquid
royalty free 3d model mk2 grenade for download as fbx on turbosquid: 3d models for games, architecture, videos. (1329079)
turbosquid
$2

GRENADE MK2
...osquid
royalty free 3d model grenade mk2 for download as fbx on turbosquid: 3d models for games, architecture, videos. (1202615)
turbosquid
$75

Lanchester Mk2
...alty free 3d model lanchester mk2 for download as 3ds and max on turbosquid: 3d models for games, architecture, videos. (1497085)
turbosquid
$10

Grenade MK2
...royalty free 3d model grenade mk2 for download as max and fbx on turbosquid: 3d models for games, architecture, videos. (1146970)
turbosquid
$10

MK2 helmet
...
royalty free 3d model mk2 helmet for download as max and obj on turbosquid: 3d models for games, architecture, videos. (1371428)
turbosquid
free

MK2 Grenade
...
free 3d model mk2 grenade for download as png, obj, and fbx on turbosquid: 3d models for games, architecture, videos. (1225336)
Arduino
turbosquid
$7
Arduino
...turbosquid
royalty free 3d model arduino for download as max on turbosquid: 3d models for games, architecture, videos. (1197165)
turbosquid
$3
Arduino
...turbosquid
royalty free 3d model arduino for download as c4d on turbosquid: 3d models for games, architecture, videos. (1305484)
3d_export
$5
arduino satellite
...rt
this model is the exact arduino based satellite model with some basic sensors and camera modules and also includes batteries.
turbosquid
$1
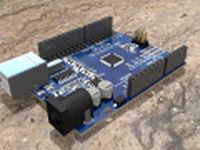
Arduino UNO
...alty free 3d model arduino uno for download as , stl, and wrl on turbosquid: 3d models for games, architecture, videos. (1515932)
3d_export
$5
esp8266 box arduino
...esp8266 box arduino
3dexport
box for esp8266 module with wire hole. inside dimensions: 49x26 mm. height 15 mm.
3d_export
$60
Arduino Uno Rev3 Microcontroller 3D Model
...mega328p circuit board spark cable wire 5v 74v 9v 111v
arduino uno rev3 microcontroller 3d model danielgarnier4403 97237 3dexport
3d_export
free
arduino rover kit
...no!!! materials: no!!! rigged: no animated: no uv mapped: no it is not an exact copy of the original! not subject to 3d printing!
3d_ocean
$7
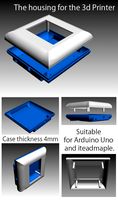
The housing for the 3d Printer
...the housing for the 3d printer 3docean arduino device housing stl the housing consists of two portions:...
3d_export
$5
arm 4 axis
...uno -4 servo motor 180° -3 joystick (x,y) for arduino -mdf wood -some wires -cnc laser cut...
3d_export
$5
solar tracker
...machine for the frame . list of material : -arduino uno -2 step motor with driver -4 ldr sensor...
Robot
3d_ocean
$20

Robot
...robot
3docean
character metal robot robot robotic white
robot model for 3dsmax 2009 and greater
3d_ocean
$45
Robot
...robot
3docean
fighing machine robot
a fighting robot from the scrapyard.
3d_ocean
$18
Robot
...robot
3docean
machin robot science fiction
high poly robot.
3d_export
$7

Robot
...robot
3dexport
robot
3d_export
$5
robot
...robot
3dexport
robot
3d_export
free

Robot
...robot
3dexport
robot
turbosquid
$10

Robot/ Alien Robot
...
royalty free 3d model robot/ alien robot for download as max on turbosquid: 3d models for games, architecture, videos. (1442828)
3d_export
$5

robot
...robot
3dexport
robot in blender
3ddd
$1
robot
...robot
3ddd
робот
robot
3ddd
$1

Robot
...robot
3ddd
робот
robot
8
turbosquid
$6

Rock 8-8
...urbosquid
royalty free 3d model rock 8-8 for download as obj on turbosquid: 3d models for games, architecture, videos. (1659393)
3ddd
$1
Italamp 387/8+8
...italamp 387/8+8
3ddd
italamp
люстра italamp 387/8+8
размеры 92x71h
3ddd
$1

8 марта
...8 марта
3ddd
8 марта
кресло 8 марта
design_connected
$16

No 8
...nected
photo-realistic 3d models of the sibast no 8 armchair from sibast for 3d architectural and interior design presentations.
3d_export
$5
hinge 8
...hinge 8
3dexport
hinge 8
3d_export
$5

iphone 8
...iphone 8
3dexport
iphone 8
turbosquid
$69

iPhone 8 and iPhone 8 Plus
... free 3d model iphone 8 and iphone 8 plus for download as max on turbosquid: 3d models for games, architecture, videos. (1202442)
turbosquid
$12

Calligraphic Digit 8 Number 8
...hic digit 8 number 8 for download as max, obj, fbx, and blend on turbosquid: 3d models for games, architecture, videos. (1389341)
3ddd
free

PLANTS 8
...plants 8
3ddd
цветок , горшок
plant 8,,, hope u all like it
3ddd
$1
8 Марта / Amadey
...8 марта / amadey
3ddd
8 марта
8 marta amadey
design_connected
$27

...print
designconnected
moroso print computer generated 3d model. designed by wanders, marcel.
3ddd
free

Eichholtz Prints
...- eichholtz print central station i
13 - eichholtz print central station ii
14 - eichholtz print marisa
15 - eichholtz print tish
3ddd
$1

Eichholtz Prints
...print abstract - set of 2
10 - eichholtz print orange abstract
11 - eichholtz print buddha right
12 - eichholtz print buddha left
turbosquid
$1

... available on turbo squid, the world's leading provider of digital 3d models for visualization, films, television, and games.
3ddd
free

Eichholtz Prints
...of 4
2 - print dunbar 2 set of 4
3 - print guadeloupe 1 set of 4
4 - print guadeloupe 2 set of 4
5 - print giles
6 - print trett
3ddd
$1

Eichholtz Prints
...nt tutti frutti
3 - eichholtz prints watson - set of 2
4 - eichholtz prints antique nautilus - set of 2
5 - eichholtz print tiara
3d_export
$5

Monster for printing
...monster for printing
3dexport
monster 3d model printing
3ddd
free

printed rug
...printed rug
3ddd
ковер
very creative printed rug
3ddd
free

Eichholtz Prints
...иал: бумага
габариты (вхш): 72 x 62 см
описание: print sweetmeat - постер в деревянной раме.
3 - prints varsity set of 2
арти
3ddd
free

Art Print Posters
...art print posters
3ddd
прованс
art print posters by patrician prints