Thingiverse

Eyeball Father in a teacup by reddadsteve
by Thingiverse
Last crawled date: 3 years, 1 month ago
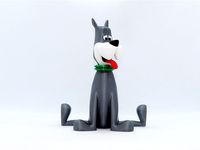
Eyeball Father, or Medama-Oyaji (目玉のおやじ), is a major character in the GeGeGe no Kitarō franchise.
Medama-Oyaji has one giant eyeball for a head. He has a little body and wears no clothing. Before Kitarō's birth, he was a yōkai (ghost/monster) with a leprosy-like "melting disease," and wrapped his large, humanlike body in bandages like a mummy. Later, he perished of this disease, only for him to be reborn out of the decayed body as an anthropomorphic version of his own eyeball. His primary role in the series is to support Kitarō with his vast knowledge of all things yōkai.
No supports are required. If you have the proper filament colors, no painting is needed.
The assembled model is 90mm tall.
This model was made for my granddaughter and is her favorite character.
Enjoy!
...........................................................................................................
Print Instructions:
Supports: No
Resolution: .2mm
Infill: 10%
Notes:**
Refer to the notes below for a few helpful printing and assembly instructions.
...........................................................................................................
Building the model
Colors
Black: (Paramount3D PLA - Black)
eye_black
..
Red: (Hachbox PLA - True Red)
eye_red
..
Blue: (Bumat PLA- Transparent Blue) Fun fact, this filament came with my Flashforge seven years ago and still prints fine without being brittle. I keep my filaments in individual zip lock freezer bags with some desiccant.
water
..
White: (Overture PLA - White)
eye_white
..
Clay: (Protoparadigm PLA, out of business - Sage Green)
cup
..
Skin: (Paramount3D PLA - Universal Beige)
arm_left
arm_right
foot_left
foot_right
body
...........................................................................................................
Printing and assembly tips
Printing tips
1 - No supports are required.
2 - There are some pieces that may need brims or rafts, use your discretion. When setting up my prints I prefer to be conservative, especially since the base of many parts are hidden when inserted into another part. For the smaller parts, a good first layer is helpful.
*I used brims on:
arm_left
arm_right
foot_left
foot_right
body
eye_white
3 - I used a transparent blue for the water for the color and shine, the transparancy aspect is not utilized and not required.
..
Assembly tips:
1 - Take your time gluing the model together and enjoy the process.
2 - I used E6000 sticky craft glue to put this model together. The sticky glue allows more time to position the parts than a fast drying superglue. I have 'fat fingers' and a shaky hand, so the sticky glue works out best for me, especially with small pieces. Just remember to leave enough time for the glue to set before combining too many parts.
3 - Refer to the assembly diagrams in the pictures section as well as the uploaded pictures for putting the model together. The model is meant to be glued.
Do not hesitate to ask questions, feedback is essential to making better models.
Similar models
thingiverse
free
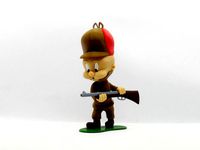
Elmer Fudd by reddadsteve
... model together. the model is meant to be glued.
do not hesitate to ask questions, feedback is essential to making better models.
thingiverse
free

Prickle by reddadsteve
... model together. the model is meant to be glued.
do not hesitate to ask questions, feedback is essential to making better models.
thingiverse
free

Old Hag by reddadsteve
... model together. the model is meant to be glued.
do not hesitate to ask questions, feedback is essential to making better models.
thingiverse
free
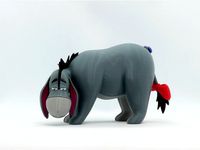
Eeyore by reddadsteve
... model together. the model is meant to be glued.
do not hesitate to ask questions, feedback is essential to making better models.
thingiverse
free
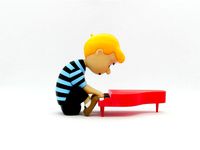
Schroeder by reddadsteve
... model together. the model is meant to be glued.
do not hesitate to ask questions, feedback is essential to making better models.
cults
free

Crocodile
...re no left/right differences.
-the model stands nicely on it's own, however a base is included for extra stability if needed.
cults
free

Dogbert
...nto the notch on the body above the nose and glued them into the glasses_arms. it all turned out quite simple to glue into place.
thingiverse
free

Tweety Bird by reddadsteve
...- a number of the left/right parts look quite similar but are actually different. .. assembly tips: 1 -take...
thingiverse
free
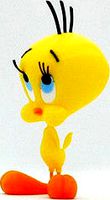
Tweety by reddadsteve
...- a number of the left/right parts look quite similar but are actually different. .. assembly tips: 1 -take...
thingiverse
free
Astro Jetson by reddadsteve
... model together. the model is meant to be glued.
do not hesitate to ask questions, feedback is essential to making better models.
Reddadsteve
thingiverse
free

Dilbert by reddadsteve
...required. if you have the right filament colors, no painting is needed.
the completed model is 225mm tall after assembly.
enjoy!
thingiverse
free

Dogbert by reddadsteve
...assembly. this model is in proportion to the dilbert, wally and pointy haired boss models that i've previously posted.
enjoy!
thingiverse
free

Hagar the Horrible by reddadsteve
...printing the pieces in the suggested colors. no supports are required.
hagar may look fierce but he is really a pussycat.
enjoy!
thingiverse
free

Rat by reddadsteve
...all after assembly. this model is in proportion to the pig and crocodile models from the comic that i've also posted.
enjoy!
thingiverse
free
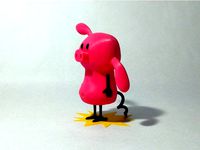
Pig by reddadsteve
...tall after assembly. this model is in proportion to the pig and crocodile models from the comic that i've also posted.
enjoy!
thingiverse
free

Crocodile by reddadsteve
...tall after assembly. this model is in proportion to the pig and crocodile models from the comic that i've also posted.
enjoy!
thingiverse
free

Alice by reddadsteve
...n proportion to the dilbert, wally, pointy haired boss and dogbert models from the comic that i've previously posted.
enjoy!
thingiverse
free

Wally by reddadsteve
... is 200mm tall after assembly. this model is in proportion to the dilbert and pointy haired boss models previously posted.
enjoy!
thingiverse
free

Charlie Brown by reddadsteve
...ad luck.
no supports are required. if you have the proper filament colors, no painting is needed.
the model is 140mm tall.
enjoy!
thingiverse
free

Kermit the Frog by reddadsteve
...o supports are required. if you have the proper filament colors, no painting is needed.
the assembled model is 140mm tall.
enjoy!
Teacup
3d_ocean
$3
teacup
...teacup
3docean
ceramic coffee cup furniture plate porcelain saucer tea teacup
teacup with saucer
archibase_planet
free

Teacup
...teacup
archibase planet
teacup cup kitchen ware
teacup - 3d model (*.gsm+*.3ds) for interior 3d visualization.
3d_ocean
$4

An Apple Teacup
...an apple teacup
3docean
apple filizanka herbata tea teacup
a teacup in the shape of a bitten apple.
turbosquid
$1

Teacup
...urbosquid
royalty free 3d model teacup for download as blend on turbosquid: 3d models for games, architecture, videos. (1463457)
3d_export
$5
teacup
...teacup
3dexport
turbosquid
$7

Teacup
...oyalty free 3d model teacup for download as 3ds, obj, and fbx on turbosquid: 3d models for games, architecture, videos. (1481716)
turbosquid
$2

Teacup
...alty free 3d model teacup for download as blend, fbx, and obj on turbosquid: 3d models for games, architecture, videos. (1648923)
turbosquid
$17

teacup
... available on turbo squid, the world's leading provider of digital 3d models for visualization, films, television, and games.
turbosquid
$15

teacup
... available on turbo squid, the world's leading provider of digital 3d models for visualization, films, television, and games.
turbosquid
$5

TeaCup
... available on turbo squid, the world's leading provider of digital 3d models for visualization, films, television, and games.
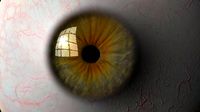
Eyeball
turbosquid
$13

eyeball
...oyalty free 3d model eyeball for download as ma, obj, and fbx on turbosquid: 3d models for games, architecture, videos. (1384637)
turbosquid
$5

eyeball
...yalty free 3d model eyeball for download as max, obj, and fbx on turbosquid: 3d models for games, architecture, videos. (1251944)
turbosquid
$30

Eyeball
... available on turbo squid, the world's leading provider of digital 3d models for visualization, films, television, and games.
turbosquid
$28

eyeball
... available on turbo squid, the world's leading provider of digital 3d models for visualization, films, television, and games.
turbosquid
$25

Eyeball
... available on turbo squid, the world's leading provider of digital 3d models for visualization, films, television, and games.
turbosquid
$19

eyeball
... available on turbo squid, the world's leading provider of digital 3d models for visualization, films, television, and games.
turbosquid
$10

eyeball
... available on turbo squid, the world's leading provider of digital 3d models for visualization, films, television, and games.
turbosquid
$1

Eyeball
... available on turbo squid, the world's leading provider of digital 3d models for visualization, films, television, and games.
3d_ocean
$5

Realistic Eyeball
...ured with 5 interchangeable iris colors. photoshop psd included for iris texture editing. bump mapped veins and iris for realism.
3d_export
$5
Eyeball 3D Model
...eyeball 3d model
3dexport
photo realistic eye eyeball iris pupil model
eyeball 3d model stanleymediauk 45224 3dexport
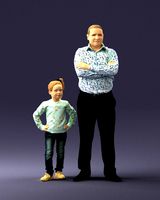
Father
turbosquid
$79
Father
...royalty free 3d model father for download as ma, obj, and fbx on turbosquid: 3d models for games, architecture, videos. (1339096)
turbosquid
free

Father's Strength
... available on turbo squid, the world's leading provider of digital 3d models for visualization, films, television, and games.
turbosquid
$149

Father Man Character
... available on turbo squid, the world's leading provider of digital 3d models for visualization, films, television, and games.
turbosquid
$20

Award Best Father
... available on turbo squid, the world's leading provider of digital 3d models for visualization, films, television, and games.
3ddd
$1

Fathers & Sons / Chateau Versailles
...thers & sons / chateau versailles
3ddd
fathers&sons
обои фабрики fathers & sons коллекция chateau versailles
3ddd
$1

Fathers & Sons / Chateau Versailles
...thers & sons / chateau versailles
3ddd
fathers&sons
обои фабрики fathers & sons
коллекция chateau versailles
turbosquid
$30

God Father Lounge Chair
... available on turbo squid, the world's leading provider of digital 3d models for visualization, films, television, and games.
3ddd
$1

Набор картин "Father Says" (9 шт.)
...;quot;father says" (9 шт.)
3ddd
картина
набор картин "father says"
размер 400х500мм
количество картин: 9 шт.
3d_export
$20
father and daughter 0040
...gt;- cjp technology suitable<br>- source file (.wrl) is included<br>suitable for 3d-systems projet 3d printer series.
3d_export
$20
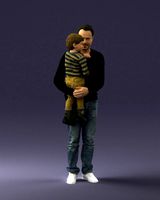
father and son 1226
...gt;- cjp technology suitable<br>- source file (.wrl) is included<br>suitable for 3d-systems projet 3d printer series.