Thingiverse

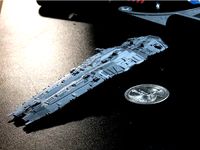
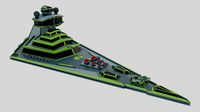
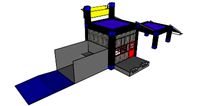
Executor Greebled (Fixed, sliced 3x, whole) Starwars Super Star Destroyer by Verskon
by Thingiverse
Last crawled date: 3 years, 1 month ago
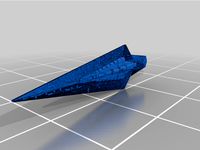
Update 17.01.2018: I played around with greebling Jace1969's Executor and various other SSDs floating around the internet but was not able to produce results superior to SeraphsCoal's quickly so I abandoned that and went with brute force hole fixing. Due to inconsistent slicing results, I'm not going to upload those revisions for now. When I have time to play with 3d modeling again, I'll take another whack at fixing the defects of this beautiful model as I know I'll be printing more of them in the future. That said, the model is a completely acceptable non-professional quality print as is, it only takes a little bit of putty or scrap plastic to fix up before painting. On my 19.8% scale model, the only bits that have broken from intermittent handling is the very tips on the nose... so everything's holding up pretty well even with a pound of lead in it. See you again in a year's time!
Update 18.08.2017: Printed whole @ 12% scale with .25mm nozzle and abs+, side edge down with supports and print tabs. Holes printed in model where the internal dowel shafts resulted in the skin being too thin during slicing. Also too thin in front of bridge tower and engine shielding on the bottom of Part 03. Started investigating greebling with 3DS Max and the original Executor model by Jace1969 to fix thin skin and SeraphsCoal's frame defects. Will be a while before ready but I plan to apply techniques to other ships in the future as well.
Update 04.06.2017: Tweaked Lusankya parts
It'd be neat to have emblazons on the ship or stand for the other Executor classes. Like a hammer and a moon on the tail (top rear of part01) for Night Hammer (or more elegant insignia but as SSD's were intended as blatant symbols, eh). Thoughts, ideas, comments?
My list so far (http://www.theforce.net/swtc/ssdlist.html):
Executor
Lusankya (Rechristened in Rebel Starbird colors)
Reaper (Pentastar Alignment)
Intimidator
Brawl aka Iron Fist (gauntlet)
Razor's Kiss
Night Hammer aka Knight Hammer (black stealth hull, hammer and moon)
Terror
Aggressor
Guardian
Vengeance
Update 03.06.2017: Added reinforcement to part 02's engine nacelles.
Added Alliance Starbird insignia to part 03. http://starwars.wikia.com/wiki/Lusankya
I'm printing 3 part with a .25mm nozzle, .1mm layer height, 19.8% scale to fit Prusa i3 mk2. Meshmixer supports. Sliced with Slic3r. Cura had under extrusion on portions of the print. Front and rear thirds (parts 1&2 @ 15hr, 5&6 @ 20hr) printed fine but when I printed the middle (part 3&4 @125hr), pausing @ 113mm to add 540g of size 7 1/2 lead buckshot ballast + pva glue as a fixative, problems appeared.
First, there was a shell separation @ 113mm-113.3mm-ish running 1/2 of the way around and a resonance wave pattern appearing on another 1/4 of the shell from 113mm and up (too much weight? Belts not tight enough? Motor skipping?). There was also a bit of under-extrusion on a portion. The base also started to deform due to additional weight, heated bed and 90 hours of violent printing. To do again, I would print at .15 mm layer hight and print part 3 and 4 separately to add ballast to part 4 just before the top was printed. That or print part 3&4 as a piece, drill out holes in the base, fill with ballast and fill up with pva glue or epoxy. If you don't mess with pausing the print, part 3&4 should print just fine with a 6-8mm skirt.
Fixed Part 01's right edge (from rear view).
Combined parts for a 3 part print.
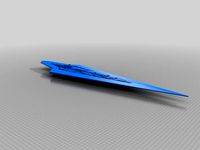
Combined parts to a whole image for smaller prints.
Remix of a Remix of Jace1969's 275cm Executor.
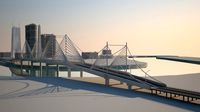
Overall length @ 100% is 275cm.
To Do: Design snug/snap fit nose guard for manipulation and travel protection. Form fit cardboard box insert? Try to fix excessive greebling of the flat bottom of part 04 (It looks ugly, is easy to manually remove with knife)
Update 18.08.2017: Printed whole @ 12% scale with .25mm nozzle and abs+, side edge down with supports and print tabs. Holes printed in model where the internal dowel shafts resulted in the skin being too thin during slicing. Also too thin in front of bridge tower and engine shielding on the bottom of Part 03. Started investigating greebling with 3DS Max and the original Executor model by Jace1969 to fix thin skin and SeraphsCoal's frame defects. Will be a while before ready but I plan to apply techniques to other ships in the future as well.
Update 04.06.2017: Tweaked Lusankya parts
It'd be neat to have emblazons on the ship or stand for the other Executor classes. Like a hammer and a moon on the tail (top rear of part01) for Night Hammer (or more elegant insignia but as SSD's were intended as blatant symbols, eh). Thoughts, ideas, comments?
My list so far (http://www.theforce.net/swtc/ssdlist.html):
Executor
Lusankya (Rechristened in Rebel Starbird colors)
Reaper (Pentastar Alignment)
Intimidator
Brawl aka Iron Fist (gauntlet)
Razor's Kiss
Night Hammer aka Knight Hammer (black stealth hull, hammer and moon)
Terror
Aggressor
Guardian
Vengeance
Update 03.06.2017: Added reinforcement to part 02's engine nacelles.
Added Alliance Starbird insignia to part 03. http://starwars.wikia.com/wiki/Lusankya
I'm printing 3 part with a .25mm nozzle, .1mm layer height, 19.8% scale to fit Prusa i3 mk2. Meshmixer supports. Sliced with Slic3r. Cura had under extrusion on portions of the print. Front and rear thirds (parts 1&2 @ 15hr, 5&6 @ 20hr) printed fine but when I printed the middle (part 3&4 @125hr), pausing @ 113mm to add 540g of size 7 1/2 lead buckshot ballast + pva glue as a fixative, problems appeared.
First, there was a shell separation @ 113mm-113.3mm-ish running 1/2 of the way around and a resonance wave pattern appearing on another 1/4 of the shell from 113mm and up (too much weight? Belts not tight enough? Motor skipping?). There was also a bit of under-extrusion on a portion. The base also started to deform due to additional weight, heated bed and 90 hours of violent printing. To do again, I would print at .15 mm layer hight and print part 3 and 4 separately to add ballast to part 4 just before the top was printed. That or print part 3&4 as a piece, drill out holes in the base, fill with ballast and fill up with pva glue or epoxy. If you don't mess with pausing the print, part 3&4 should print just fine with a 6-8mm skirt.
Fixed Part 01's right edge (from rear view).
Combined parts for a 3 part print.
Combined parts to a whole image for smaller prints.
Remix of a Remix of Jace1969's 275cm Executor.
Overall length @ 100% is 275cm.
To Do: Design snug/snap fit nose guard for manipulation and travel protection. Form fit cardboard box insert? Try to fix excessive greebling of the flat bottom of part 04 (It looks ugly, is easy to manually remove with knife)
Similar models
thingiverse
free
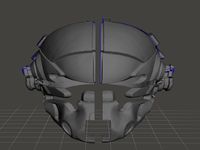
Titanfall MCOR Helmet Revision 2 Split
...d size.
for a reference as to where all the parts go then check out the original model: https://www.thingiverse.com/thing:3175122
thingiverse
free

Star Wars Executor Ship "275cm long" by Jace1969
...t i'm guessing at about 5 - 10 kg's in plastic and 8 months to print.
i might just shrink it to fit the 200 x 200 bed : )
thingiverse
free
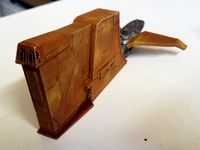
YV-666 Hound's Tooth
...ions
5- assembled at the correct scale (parts not to scale!)
6- parts at the correct scale
7- adjustments for easier printing
gdb
3dwarehouse
free

Executor-class Star Dreadnaught - The Lusankya
...9;s spear' during the battle of borleias. #destroyer #scifi #space #spaceship #star_destroyer #star_wars #super_stardestroyer
thingiverse
free

CAT ARMOR - thin wall fix by lunartique
...part 5 : armor_5_fixed.stl
stinger_tip_fixed.stl
tail_sections_fixed.stl
you can find the rest in of the armor in the link above.
thingiverse
free

Ultraman Hayata Wearable mask cut for 210x210x210 by pariah_l
...e eyes i would try to place on the bed, opening down and support and brim. please post builds! i'm working on mine right now.
thingiverse
free

Pubg part 1 fix by Minnow11
...giverse
this part wouldn't slice in s3d so i fixed the model. now it will slice perfect and now i can continue to print this
thingiverse
free
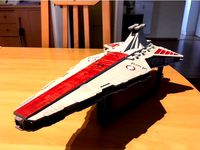
Venator Republic Star Destroyer by DavidBogaerts
...largest flat area rests on the buildbed.
so the model will be vertical pointing upwards.
that way you can print without supports.
thingiverse
free
Feiyue rear joint level fixed part fy-01/02/03 1/12 rc cars parts f12040-041 by Hadamard90
...is joint of my feiyue fy-03 eagle-3 with a bad jump....so i decided to print it again!
i hope it will be usefull for someone else
thingiverse
free

T-7 Ion Disruptor by Jace1969
...this one needs to be sliced up for printing. but i've split most of it up already. hope you enjoy! happy printing cheers jace
Verskon
thingiverse
free
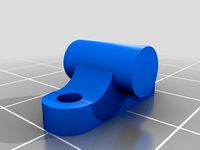
M3_Push_Pin by Verskon
...r m3 hole where friction fit can keep everything together. printed in abs. snap or cut off tabs. superglue into hole if paranoid.
thingiverse
free

Pokemon EEVEE Vaporeon Coin Token by Verskon
...urs, the pokemon tokens all went first. besides, there's tons of evolution for theming year to year.
gotta collect them all!
thingiverse
free
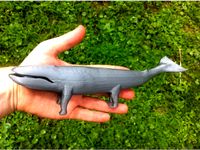
Adopt A Landwhale - Ugly Americans by Verskon
...for more stability.
i cut off the rear feet to add flippers to the ankles. a small studded leather harness was used for contrast.
thingiverse
free

608 Bearing BB by Verskon
... 608_bearing_bb_3.90_2.3_2.25 and the various iteration parts so you can mix and match so long as the raceway offset is the same.
thingiverse
free

608 Bearing Airsoft 6mm by Verskon
...s://www.thingiverse.com/thing:2229433 is a good option for slightly looser tolerances but better pre-breakin spin time than mine.
thingiverse
free
Filament Spool Hub For 608 Bearings by Verskon
...418959), printed washers and rod clips.
design inspired by https://www.thingiverse.com/thing:2135132. easy to make in fusion 360.
thingiverse
free

Anchor Hook Tie down for M3 - M12 Threaded Rod or Prusa I3 frame by Verskon
...e for screw or bolt is offset for ease of nut application and torquing.
i left v1 in case someone needs really close tolerances.
thingiverse
free
Hiigaran Battlecruiser - Maximum Battleship Homeworld 2 by Verskon
...del stand, turret mounting mechanism for turret rotation, fix eye of horus symbol for printing, design articulated barrel turrets
thingiverse
free

Turntable for Airbrush, Painting, Modeling Photos Rotating, 608 or BB bearing by Verskon
...thing:2111631, redesign for threaded section connecting, improve top 608 bearing stability (wide base structure/ roller wheels/ )
thingiverse
free

Prusa I3 MK2 M8 Brace (rear) Independent by Verskon
...the paver for better vibration transmission isolation. overall leveling achieved with cardboard scraps under anti-vibration pads.
Executor
3d_export
$50

Male Executor Character
...t;smooth<br>symmetrical<br>professional quality<br>uv maphigh level of detail<br>high resolution textures
unity_asset_store
$15
Iskariot Executor
... workflow with the iskariot executor asset from lonely worlds. find this & other robots options on the unity asset store.
thingiverse
free
Executor (old version)
...ng this, but the hull seems to bug out, and not load, i am almost done with a new executor model though, so be prepared for that.
thingiverse
free
Executor Mask from Pathologic 2
...
thingiverse
here's the executor mask from pathologic 2, isolated in blender and ready to print!
this is a work in progress!
thingiverse
free

The Executor-class Star Dreadnought Executor by dantesgift
...arrie
darren tan
viper aviator
http://www.moddb.com/mods/star-wars-interregnum
http://forums.sinsofasolarempire.com/447324/page/1
thingiverse
free

Alola Form Executor - Beautiful by loulouisakat
...he tail is prone to fall off. i did print this and it worked fine. i did this at a id tech camp, it was fun to make fun to print.
thingiverse
free

Executor Super Star Destroyer Final
...alerted to our presence. he is as clumsy as he is stupid. also there might be some issues loading the model, it is 10 mb in size.
thingiverse
free
Executor Super Star Destroyer by organisM
...g to start a project on the super star destroyer.
i would be thankful if someone would make this compatible for 3d printing <3
thingiverse
free
Star Wars Executor Ship "275cm long" by Jace1969
...t i'm guessing at about 5 - 10 kg's in plastic and 8 months to print.
i might just shrink it to fit the 200 x 200 bed : )
thingiverse
free

Stand for super star destroyer, executor, large bases and base connector by Greg1prior
...ide stands all ow it to be moved with one hand and fits into the game base.
includes an attachment to connect two bases together.
Greebled
turbosquid
free

Greeble Example
... available on turbo squid, the world's leading provider of digital 3d models for visualization, films, television, and games.
3d_export
$25

Greebles set A 3D Model
...eble greebles industrial machinery plumbing detail lod surface scifi sci-fi busy
greebles set a 3d model zarday321 15209 3dexport
turbosquid
$50

3D Greeble Buildings
...oyalty free 3d model 3d greeble buildings for download as max on turbosquid: 3d models for games, architecture, videos. (1265149)
turbosquid
$12

Greeble collection 4
...ree 3d model greeble collection 4 for download as 3ds and max on turbosquid: 3d models for games, architecture, videos. (1206216)
turbosquid
$5

Engine Part Greeble
...model engine part greeble for download as obj, fbx, and blend on turbosquid: 3d models for games, architecture, videos. (1416705)
turbosquid
$3

Greeble Sci fi
... 3d model greeble sci fi 3d models for download as ma and obj on turbosquid: 3d models for games, architecture, videos. (1447198)
turbosquid
$25

Greebles Set B
... available on turbo squid, the world's leading provider of digital 3d models for visualization, films, television, and games.
turbosquid
$45

3D Greeble Mech Hangar
...alty free 3d model 3d greeble mech hangar for download as max on turbosquid: 3d models for games, architecture, videos. (1275136)
turbosquid
$39

Strange Futuristic Greeble Reactor
... model strange futuristic greeble reactor for download as c4d on turbosquid: 3d models for games, architecture, videos. (1421286)
turbosquid
$20

3D Greeble Pyramid NH
...yalty free 3d model 3d greeble pyramid nh for download as max on turbosquid: 3d models for games, architecture, videos. (1266425)
3X
3d_export
$14

Textura 3x 3D Model
...textura 3x 3d model
3dexport
textura landscapes
textura 3x 3d model rosh 97637 3dexport
turbosquid
$25

Modern Sofa 3x
... available on turbo squid, the world's leading provider of digital 3d models for visualization, films, television, and games.
turbosquid
$15

3x office chairs
... available on turbo squid, the world's leading provider of digital 3d models for visualization, films, television, and games.
turbosquid
$10

3x office shelves
... available on turbo squid, the world's leading provider of digital 3d models for visualization, films, television, and games.
turbosquid
$3

3x vase set
... available on turbo squid, the world's leading provider of digital 3d models for visualization, films, television, and games.
3ddd
$1
modular u shape suspended 3x
...modular u shape suspended 3x
3ddd
modular
люстра u shape suspended 3x
3ddd
$1

Люстра Arte Virginia 3x
...nia 3x
3ddd
arte.virginia
люстра arte virginia 3x рожковая № по каталогу a3191lm-3ab размеры: диаметр 58см высота 37см. 3xe27 60w
3d_ocean
$19
Modern Sofa 3x
...only tri and quad polygons) • real-world sizes and proportions • the model is grouped for easy selection and placing in your s...
archive3d
free

Sofa 3x 3D Model
...sofa 3x 3d model
archive3d
chair armchair
archive3d
free

Sofa 3x 3D Model
...sofa 3x 3d model
archive3d
sofa silik
Destroyer
turbosquid
$40

Destroyer
...osquid
royalty free 3d model destroyer for download as blend on turbosquid: 3d models for games, architecture, videos. (1583013)
turbosquid
$250

Destroyer
... available on turbo squid, the world's leading provider of digital 3d models for visualization, films, television, and games.
turbosquid
$4

Destroyer
... available on turbo squid, the world's leading provider of digital 3d models for visualization, films, television, and games.
turbosquid
$2
Destroyer
... available on turbo squid, the world's leading provider of digital 3d models for visualization, films, television, and games.
3d_export
free
space destroyer
...space destroyer
3dexport
a <br> space destroyer, suitable for game development...
turbosquid
$60

Barbarian Destroyer
...royalty free 3d model barbarian destroyer for download as fbx on turbosquid: 3d models for games, architecture, videos. (1210772)
turbosquid
$60
Robot Destroyer
...id
royalty free 3d model robot destroyer for download as fbx on turbosquid: 3d models for games, architecture, videos. (1212264)
turbosquid
$30

DESTROYER Tyrant
...3d model destroyer tyrant for download as ztl, stl, and obj on turbosquid: 3d models for games, architecture, videos. (1616128)
3d_export
$15

destroyer ship
...le cruisers. the chinese type 055 destroyer has been described as a cruiser in some us navy reports due to its size and armament.
turbosquid
$15

Star Destroyer
...d model star destroyer for download as max, 3ds, fbx, and obj on turbosquid: 3d models for games, architecture, videos. (1624537)
Starwars
turbosquid
$10

starwars
... available on turbo squid, the world's leading provider of digital 3d models for visualization, films, television, and games.
turbosquid
$65

Starwars helmet
...id
royalty free 3d model starwars helmet for download as max on turbosquid: 3d models for games, architecture, videos. (1671400)
turbosquid
$8

StarWars Lightsaber
...yalty free 3d model starwars lightsaber for download as blend on turbosquid: 3d models for games, architecture, videos. (1316575)
3d_export
$5

StarWars Fighter
...starwars fighter
3dexport
3ddd
free
cubeecraft, starwars 2
...cubeecraft, starwars 2
3ddd
cubeecraft , starwars
objetos de papel cubeecraft
3ddd
free

cubeecraft, starwars 1
...cubeecraft, starwars 1
3ddd
cubeecraft , starwars
objetos de papel cubeecraft
turbosquid
$30

Starwars Stormtrooper
... available on turbo squid, the world's leading provider of digital 3d models for visualization, films, television, and games.
turbosquid
$5

Lightsaber Starwars
... available on turbo squid, the world's leading provider of digital 3d models for visualization, films, television, and games.
3d_export
$20

x wing starwars
...x wing starwars
3dexport
hey, i made a x wing from starwars. i hope you have fun with it.
3d_export
$15

starwars millennium falcon
...starwars millennium falcon
3dexport
Sliced
design_connected
$13
Slice
...slice
designconnected
normann copenhagen slice computer generated 3d model. designed by hornemann, hans.
3d_export
$15
onion slice
...onion slice
3dexport
onion slice
3ddd
free
Pizza slice
...pizza slice
3ddd
пицца
pizza slice
3d_ocean
$15

Slice Board
...slice board
3docean
food kitchen knife onion pepper slice board
fully detailed slice board with knife – onion – pepper
design_connected
$4
Slice Of Teak
...slice of teak
designconnected
chista slice of teak computer generated 3d model.
3d_ocean
$20
Sliced ham
...y obj photorealistic scanned slice sliced vray
scanned 3d model of a ham with several slices. placed on rectangular wooden board.
3ddd
$1

Slice board
... лук , разделочная доска
fully detailed slice board and knife
design_connected
$7
Slice Table
...slice table
designconnected
chista slice table coffee tables computer generated 3d model. designed by n/a.
3d_ocean
$18

Pizza slice
...l ray obj photorealistic pizza salami scanned slice vray
scanned 3d model of slice of salami pizza. placed on white square plate.
turbosquid
$29

Watermelon Slice
...d
royalty free 3d model watermelon slice for download as fbx on turbosquid: 3d models for games, architecture, videos. (1238391)
Whole
turbosquid
free
Whole build.jpg
... available on turbo squid, the world's leading provider of digital 3d models for visualization, films, television, and games.
turbosquid
$175

Whole CardioVascular System
...free 3d model whole cardiovascular system for download as fbx on turbosquid: 3d models for games, architecture, videos. (1369865)
turbosquid
$20

Whole Wheat Sandwich
...oyalty free 3d model whole wheat sandwich for download as fbx on turbosquid: 3d models for games, architecture, videos. (1493531)
turbosquid
$12

Whole Chocolate Egg
...el whole chocolate egg for download as 3ds, max, obj, and fbx on turbosquid: 3d models for games, architecture, videos. (1502575)
turbosquid
$20
City - Whole Scene
... available on turbo squid, the world's leading provider of digital 3d models for visualization, films, television, and games.
turbosquid
free

Sword Of Truth (Whole).gmax
... available on turbo squid, the world's leading provider of digital 3d models for visualization, films, television, and games.
turbosquid
$10

Plasticine Clay Blocks whole and torn
...l plasticine clay blocks (whole and torn) for download as obj on turbosquid: 3d models for games, architecture, videos. (1518876)
turbosquid
$19

Broken and whole dark chocolate egg
...ole dark chocolate egg for download as 3ds, max, obj, and fbx on turbosquid: 3d models for games, architecture, videos. (1502048)
turbosquid
$5

Melon whole and sliced 2 LODs
...le and sliced 2 lods for download as obj, fbx, blend, and dae on turbosquid: 3d models for games, architecture, videos. (1377040)
3ddd
free

Lavazza Whole Bean 2.2lb Gran Filtro Dark
...lavazza whole bean 2.2lb gran filtro dark
3ddd
кофе
вкусный кофе lavazza whole bean
Super
3ddd
free

super impossible
...super impossible
3ddd
kartell , super impossible
cтул super impossible фирмы kartell
3d_ocean
$19

Super market
...ean
chain shop large super market 3d model low poly market low poly super market shop super market
low poly model of supermarket.
3d_export
$15

super mario
...r mario.<br>superstar, super mario superhero.<br>сheerful and courageous.<br>new exciting adventures await him.
3d_ocean
$30
Super Hero
...hero mask ninja super hero sword zbrush
super hero created in zbrush 4.0 hero body—6 division levels 1.668 poly to 1.705mil poly.
3d_export
$25

super promotion
...super promotion
3dexport
3d_export
$5
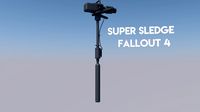
super sledge
...super sledge
3dexport
...
3ddd
$1
Longboard Super Sonic
...longboard super sonic
3ddd
лонгборд
longboard super sonic
turbosquid
$60
Super Soldier
...quid
royalty free 3d model super soldier for download as fbx on turbosquid: 3d models for games, architecture, videos. (1211725)
turbosquid
$60
Super Soldier
...quid
royalty free 3d model super soldier for download as fbx on turbosquid: 3d models for games, architecture, videos. (1207493)
turbosquid
$55
Super Hero
...squid
royalty free 3d model super hero for download as blend on turbosquid: 3d models for games, architecture, videos. (1387035)
Star
3ddd
$1

Rolling Stars Antic Star
...rolling stars antic star
3ddd
rolling stars , вентилятор
rolling stars antic star
turbosquid
$2

Star Shuriken (Throwing Star)
... available on turbo squid, the world's leading provider of digital 3d models for visualization, films, television, and games.
design_connected
$18
Star
...star
designconnected
helen amy murray star computer generated 3d model. designed by murray, helen amy.
3d_ocean
$2
sea star
...sea star
3docean
game star sea star space star
this model is, normally poly model. use for games screen.
3d_export
$2

star gingerbread
...star gingerbread
3dexport
"star" gingerbread in the style of the movie star wars.
turbosquid
$10

STAR
...ar
turbosquid
royalty free 3d model star for download as max on turbosquid: 3d models for games, architecture, videos. (1338162)
turbosquid
$1

Star
...ar
turbosquid
royalty free 3d model star for download as c4d on turbosquid: 3d models for games, architecture, videos. (1564546)
3d_export
$5

star sword
...star sword
3dexport
star sword
3d_export
$5

Star building
...star building
3dexport
star building
3d_export
free

ikosaedr-star
...ikosaedr-star
3dexport
ikosaedr-star
Fixed
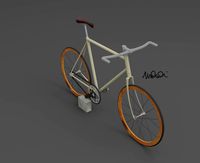
3ddd
$1
Fixed Gear Велосипед
... fixed , bicycle
классический шоссейный велосипед, переделанный под fixed gear.
design_connected
$16
Idée fixe
...idée fixe
designconnected
jacco maris idée fixe computer generated 3d model. designed by maris , jacco.
3d_export
$5
fixing scale knob
...fixing scale knob
3dexport
fixing scale knob
turbosquid
$10

Mini Fix
...bosquid
royalty free 3d model mini fix for download as sldas on turbosquid: 3d models for games, architecture, videos. (1581558)
turbosquid
$49
fixed bike
... available on turbo squid, the world's leading provider of digital 3d models for visualization, films, television, and games.
turbosquid
$39

Fixed Bicycle
... available on turbo squid, the world's leading provider of digital 3d models for visualization, films, television, and games.
3ddd
$1
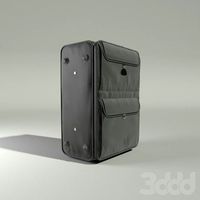
Bag Fixed
...bag fixed
3ddd
чемодан
a bag model by me
3ddd
$1
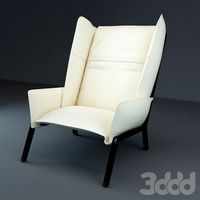
Кресло BEAU FIXE
...fixe
3ddd
beau fixe , ligne roset
кресло beau fixe:
w 80 cm d 106 cm h 97 cm sh 43,5 cm
turbosquid
free

Crowbar "Fixed"
... available on turbo squid, the world's leading provider of digital 3d models for visualization, films, television, and games.
3ddd
$1
Fixed gear
...fixed gear
3ddd
велосипед
шоссейный велосипед с фиксированной передачей