Thingiverse
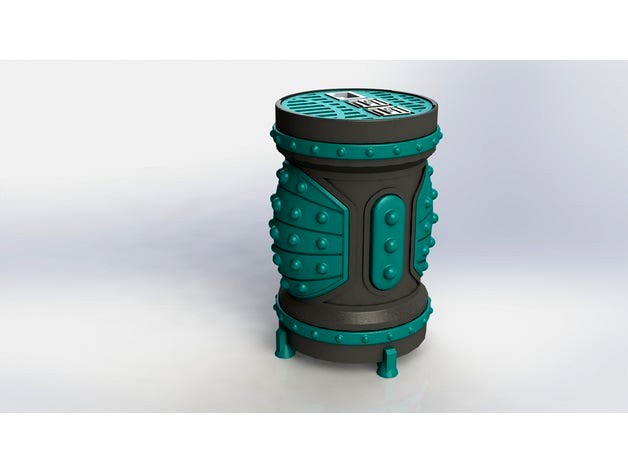
ePIc JediPi ( raspbery pi 2 or 3 case ) by Tripnutz
by Thingiverse
Last crawled date: 3 years, 1 month ago
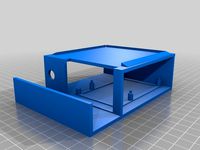
My latest case design for the Raspberry Pi 2 or 3.
I wanted something that would look a bit more appropriate for a living room media center streamer. A couple of the designs were done in wood filament, stained, and clear coated. Obviously wireless will help with the clean look with less wires but if you do want to use the ethernet port I suggest a slim or flat ethernet cord.
The case has base has a place to mount a 40mmx 40mm x 10mm 5v fan.
No hardware needed except to mount the optional fan.
All parts have been orientated for printing.
For all body styles you will need to print the following parts.
Top Cover x1
IO Cover x1
Base x1
If you print the body slim files ( the more fancy version ) you will also need:
Side inserts knurled or smooth x2
Front Badge knured or smooth x1
If you print the body slim files w/ring :
Ring knured or smooth x2
Assembly
Install fan in to base ( 4 - #6 x .5 screws ) If you have some rubber bumpons install them on to the 4 pads on the base.
Feed fan power connector up through body and snap base on to body
Install Pi into body. There are 2 gooves above the base for the pi to rest in. Make sure the grooves are clear of any plastic as it needs to completely rest on these ledges with grooves.
Install IO plate by snapping it in over the Raspberry PI audio/hdmi/power ports. This should snap in pretty easy. If you are having issues double check the pi is correctly sitting in the grooves explained above.
Install top cover plate. Easiest way I have found is to slightly arch the top cover during instsll. It is pretty loose fitting until it is snapped around the usb and ethernet ports and sinks inside there.
If you printed the slim version of the body you can install the side inserts, rings and front badge. To install front bage cut 2 small pieces of filament, about 3/16 long, feed them into the two holes in the front badge and push it into the two holes in the body. You can also glue or tape this on if desired.
I have found the heavy duty hdmi cord really wants to pull the Pi case once assembled to tip over. I suggest lighter gauge cords or find a sweet spot to place the pi case so it doesnt want to tip. Same with ethernet cable. The slim version or flat ones seem to be the less of evils to not fight the pi case from standing upright.
Tip if you can! If you cant tip you can show your make!
Similar models
thingiverse
free

ePIc PI Optimus Pi ( raspberry pi 4 case / enclosure ) by Tripnutz
...o the cutouts and dropping the pi into the cover
then install the base into the cover and pi assembly
no hardware needed
enjoy!!!
thingiverse
free

ePIc snapPI hinged pi case ( raspberry pi case 2 3 and 4 ) by Tripnutz
...rnet port. i have deleted the previous stl. the new cover is epic snappi cover a rpi4. let me know if you run into any issues.
thingiverse
free

Basic Raspberry Pi Zero Snap Case by JasEriAnd
...l release variants of this case with various options.
this can print without support with each half printing on their flat side.
thingiverse
free

TurboPi (Raspberry Pi 2 and 3 case) by Tripnutz
...binding very slightly. i will update in the next couple days but still a sweet case as is.
this has been updated and cleaned up.
thingiverse
free

Raspberry pi 2/3 case by Mentaluproar
...i is enough to keep the pi in place.
edit: coming soon, a version for the pi 4 that is easier to print with a more forgiving fit.
thingiverse
free

Pi 4 3CX case by Ozpara
...the additional pi ports exposed.
printing:
no supports needed
lid snaps onto case
additional materials
30mm fan
pi4b
small screws
thingiverse
free

Apple //e Raspberry Pi 3 case
...ing. and the two standoff need to be cut down nex to the back ports (hdmi, usb, jack) because without this the pi won't fit.
thingiverse
free

ePIc PiBook (raspberry PI 2 or 3 case) by Tripnutz
...up for you see below, otherwise enjoy. i love tips but at the least show me your make!
https://www.etsy.com/listing/626657399/
thingiverse
free

ePIc Pi ePIdemic ( Raspberry Pi 2 and 3 case ) by Tripnutz
...r the ethernet / usb ports so the insert doesnt catch on the small flanges around the usb ports.
enjoy! lets see them makes :)
thingiverse
free

Orange Pi Zero Plus2 H3 Case by BogdanKecman
...man
thingiverse
modified original case to fit orange pi zero plus 2
this is the opi zero with hdmi port without usb and ethernet
Tripnutz
thingiverse
free
My Fav Pi Fan Addon by Tripnutz
...av pi fan addon by tripnutz
thingiverse
an absolutely cosmetic add on for my fav pi. this is only the grill to add to my fav pi
thingiverse
free

GR8 PI 4 Raspberry PI 2 and 3 by Tripnutz
...r8 pi 4 raspberry pi 2 and 3 by tripnutz
thingiverse
a snap together pi case
some screws holes included if you have any issues.
thingiverse
free

D-link dlink 2020 camera mount by Tripnutz
...t use the screw in base. there were a few others on here i was having trouble with but this one ended up working perfect for me.
thingiverse
free

ePIc StealthPi by Tripnutz
... don't need to use it. once it is in the base it seems tight enough.
fits raspberry pi 2 and 3
makes and tips appreciated :)
thingiverse
free

John Deere Oil filter remover D1XX series by Tripnutz
... the d125 and i am pretty sure it is a type d style filter. hooks to your ratchet. i am sure it will work on many other styles.
thingiverse
free

A build kit for Tripnutz's MY FAV PI with 40mm fan cover from Mrcleanr6 by coby137
...r from mrcleanr6 by coby137
thingiverse
a fusion of two designs to build a simple fanned pi, for running at higher clock speeds.
thingiverse
free

ePIc Anker wireless charging stand by Tripnutz
...of the upright against the bed.
https://www.amazon.com/gp/product/b07thhqmhm/ref=ppx_yo_dt_b_asin_title_o08_s00?ie=utf8&psc=1
thingiverse
free
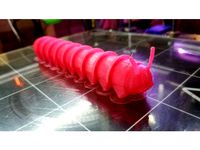
Arti the Caterpillar by Tripnutz
...g. long version 9" long and standard is 7" long.
these new files print much easier. tested and uploaded new pictures.
thingiverse
free

eParrot RGB LCD enclosure by Tripnutz
...out this project can be found at http://eparrot.org/index.php/topic,487.msg6209.html#msg6209
print time is approximately 4 hours.
thingiverse
free

Microsoft Band Stand (1st Version ) by Tripnutz
...ut i didn't want it to fall out obviously. head is slightly tipped back to keep magnets engaged on to band from the charger.
Raspbery
3d_export
$45

High quality raspberry model 3D Model
... model
3dexport
raspberry berry beries raspberies fruit fruits
high quality raspberry model 3d model ruslanlatypov 77612 3dexport
thingiverse
free

Raspbery Pi with digi + case by shiftux
...raspbery pi with digi + case by shiftux
thingiverse
remixed case for 3d printing
thingiverse
free
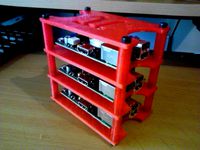
Raspbery Pi cluster rack by Auzze
...raspbery pi cluster rack by auzze
thingiverse
this is a expandable raspi cluster rack.
thingiverse
free

Multi Material Raspbery Pi logo
... logo
thingiverse
remix of dan's rpi logo to separate the leaves from the berry so it can be done as a multi-material print.
thingiverse
free

Raspbery Pi Camera Case For Wide Angle Lens by hslo17
...raspbery pi camera case for wide angle lens by hslo17
thingiverse
remix from thing:3700643
thingiverse
free
Raspbery Pi 3 b /Hard drive/ hub by Elstorm
...raspbery pi 3 b /hard drive/ hub by elstorm
thingiverse
this case holds a pi 3 a seagate 2.5 external drive and a powered hub.
thingiverse
free

Anycubic 4MAX motherboard cover with 80mm fan and Raspbery Pi 3 case
...ad of standard usb cord. i moved from default trigorilla motherboard to skr 1.3 with installed marlin 2.0 so it is not a problem.
thingiverse
free

Ultimaker Camera Holder for Raspbery Pi Camera V2 by bompe
...ed adhesive tape
i use octoprint to control the 3d printer and camera
the source file is for solid edge if you want to remodel it
thingiverse
free

Ultimaker Camera Holder for Raspbery Pi Camera V2 by bompe
...ed adhesive tape
i use octoprint to control the 3d printer and camera
the source file is for solid edge if you want to remodel it
thingiverse
free

Raspbery Pi Case by IsaakMalers
...3 mm spacing. these examples were printed on a mendlemax 2.0
for more information visit my blog: http://theadres.blogspot.com/
Epic
3d_ocean
$29

Epic God
... hand. in his left hand he holds a cup. the archive contains: universal 3d file format (.obj) image preview. *the texture of f...
3d_ocean
$10

Epic Swords
... for unity3d (3.5v and up) + ready to use unity3d package epic names, for epic swords! use them to cut-off enemies heads! just...
turbosquid
$15

Epic Sword
...bosquid
royalty free 3d model epic sword for download as fbx on turbosquid: 3d models for games, architecture, videos. (1220458)
turbosquid
$10

Epic Swords
... available on turbo squid, the world's leading provider of digital 3d models for visualization, films, television, and games.
turbosquid
$10
epic sword
... available on turbo squid, the world's leading provider of digital 3d models for visualization, films, television, and games.
3d_export
$5

Epic Sword 3D Model
...epic sword 3d model
3dexport
sword
epic sword 3d model kolka 6778 3dexport
turbosquid
$39

EPIC WIN Bible
...ree 3d model epic win bible for download as obj, dwg, and 3ds on turbosquid: 3d models for games, architecture, videos. (1535493)
turbosquid
$5

Epic Bastard Sword
... model epic bastard sword for download as blend, fbx, and obj on turbosquid: 3d models for games, architecture, videos. (1669456)
turbosquid
$7

EPIC TABLE LAMP
... model epic table lamp for download as 3ds, max, obj, and fbx on turbosquid: 3d models for games, architecture, videos. (1475357)
3d_export
$5
Epic Sword 3D Model
...y epic низкополигональный good fbx
epic sword 3d model download .c4d .max .obj .fbx .ma .lwo .3ds .3dm .stl kexer 107168 3dexport
Pi
design_connected
$11

Pi
...pi
designconnected
ligne roset pi chairs computer generated 3d model. designed by thibault desombre.
3d_export
$5

raspberry pi
...raspberry pi
3dexport
carcasa para la raspberry pi
turbosquid
$18

pied
... available on turbo squid, the world's leading provider of digital 3d models for visualization, films, television, and games.
3ddd
$1

Emme pi light
...emme pi light
3ddd
emme pi light
люста emme pi light
3ddd
$1

Emme pi light
...emme pi light
3ddd
emme pi light
бра классическое emme pi light
3ddd
$1

Emme Pi Light
...emme pi light
3ddd
emme pi light
3ddd
$1

Emme Pi Light
...emme pi light
3ddd
emme pi light
design_connected
$16

Pi-Air
...pi-air
designconnected
living divani pi-air lounge chairs computer generated 3d model. designed by harry & camila.
3d_ocean
$15

Manneken Pis
...picting a naked little boy urinating into a fountain’s basin. (wikipedia) the model was sculpted in blender 2.70a rendered wit...
3ddd
$1

Emme pi light
...emme pi light
3ddd
emme pi light
люстра классическая фирма: emme pi light
артикул: 3595/5/cot/12/wh
Case
3d_export
$1

case
...case
3dexport
case
archibase_planet
free

Case
...case
archibase planet
showcase show-case glass case
glass-case + cakes - 3d model for interior 3d visualization.
archibase_planet
free

Case
...case
archibase planet
showcase show-case glass case
glass-case for chips - 3d model for interior 3d visualization.
archibase_planet
free

Case
...case
archibase planet
case shelving drawer
case - 3d model for interior 3d visualization.
archibase_planet
free

Case
...case
archibase planet
case rack locker
case - 3d model for interior 3d visualization.
archibase_planet
free

Case
...case
archibase planet
case drawer kitchen furniture
case - 3d model for interior 3d visualization.
archibase_planet
free

Case
...case
archibase planet
case cupboard shelving
glass case - 3d model for interior 3d visualization.
archibase_planet
free

Case
...case
archibase planet
case handbag suitcase
case - 3d model (*.gsm+*.3ds) for interior 3d visualization.
archibase_planet
free

Case
...case
archibase planet
case suitcase
case 5 - 3d model (*.gsm+*.3ds) for interior 3d visualization.
archibase_planet
free

Case
...case
archibase planet
locker case dresser
case - 3d model (*.gsm+*.3ds) for interior 3d visualization.
3
turbosquid
$10

Mountain Bike 3 -3 of 3
...model mountain bike 3 (#3 of 3) for download as fbx and blend on turbosquid: 3d models for games, architecture, videos. (1438752)
turbosquid
$6

Rock 3-3
...urbosquid
royalty free 3d model rock 3-3 for download as obj on turbosquid: 3d models for games, architecture, videos. (1628065)
turbosquid
$29

Books 150 pieces 3-3-3
...books 150 pieces 3-3-3 for download as max, obj, fbx, and stl on turbosquid: 3d models for games, architecture, videos. (1384033)
turbosquid
$3

Genesis 3 Clothing 3
... available on turbo squid, the world's leading provider of digital 3d models for visualization, films, television, and games.
3d_export
$5

hinge 3
...hinge 3
3dexport
hinge 3
3ddd
$1

Розетка 3
...розетка 3
3ddd
розетка
розетка 3
turbosquid
$50

is-3
... available on turbo squid, the world's leading provider of digital 3d models for visualization, films, television, and games.
turbosquid
$10

Mountain Bike 3 -2 of 3
...model mountain bike 3 (#2 of 3) for download as fbx and blend on turbosquid: 3d models for games, architecture, videos. (1438750)
turbosquid
$10

Mountain Bike 1 -3 of 3
...model mountain bike 1 (#3 of 3) for download as fbx and blend on turbosquid: 3d models for games, architecture, videos. (1438743)
3d_export
$5

3 CATS
...3 cats
3dexport
3 cats pen holder
2
design_connected
$11

No 2
...no 2
designconnected
sibast no 2 computer generated 3d model. designed by sibast, helge.
turbosquid
$6

Cliff Rock 2-2
...uid
royalty free 3d model cliff rock 2-2 for download as obj on turbosquid: 3d models for games, architecture, videos. (1619161)
turbosquid
$29

Book variation 2 2
...3d model book variation 2 2 for download as max, obj, and fbx on turbosquid: 3d models for games, architecture, videos. (1366868)
turbosquid
$22

Classic baluster (2) (2)
...assic baluster (2) (2) for download as max, obj, fbx, and stl on turbosquid: 3d models for games, architecture, videos. (1483789)
turbosquid
$99

Smilodon 2 Pose 2
... available on turbo squid, the world's leading provider of digital 3d models for visualization, films, television, and games.
turbosquid
$20

Barrel Barricade 2-2
... available on turbo squid, the world's leading provider of digital 3d models for visualization, films, television, and games.
turbosquid
$6

Wall Trophy (2) (2)
... available on turbo squid, the world's leading provider of digital 3d models for visualization, films, television, and games.
turbosquid
free

Tire label 2 of 2
... available on turbo squid, the world's leading provider of digital 3d models for visualization, films, television, and games.
3ddd
$1

Кровать, 2 тумбочки, 2 светильника
...кровать, 2 тумбочки, 2 светильника
3ddd
кровать, 2 тумбочки, 2 светильника
нормальное качество
формат 3ds max
без текстур
3ddd
free

Кровать, 2 тумбочки, 2 светильника
...кровать, 2 тумбочки, 2 светильника
3ddd
кровать, 2 тумбочки, 2 светильника
нормальное качество
формат 3ds max
без текстур