Thingiverse
Ender 3: Upgrade for cutting stickers with it !!! by teamwittholz
by Thingiverse
Last crawled date: 3 years, 1 month ago
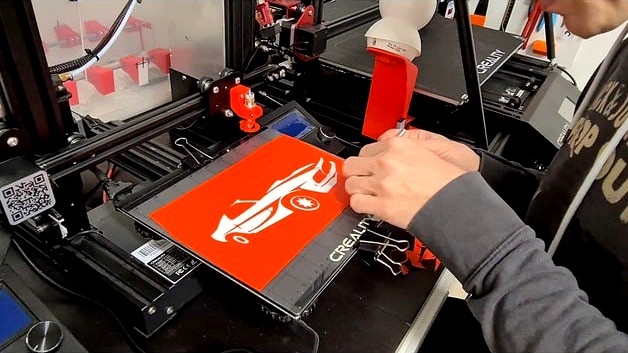
With these 2 tiny parts you can fit a Roland style blade holder to your Ender 3 and cut your custom stickers from adhesive film.
What you need apart from these 2 3D printed parts:
Roland cutter blade (€12 from Ebay or €7 from Ali)
2x M3x15 screws+nuts
self adhesive cutting mat (highly recommended)
color adhesive film (anything will do e.g. DC fix from hardware store)
Did you know that you can drag black&white Bitmaps directly into Cura? That's the simple way, with the downside of having some stairs in your plot.
Alternatively you can Download INKSCAPE for free, and convert any Bitmap into an Vector .svg file. This is really incredible. You can find quick ToDo's on Youtube.
Then you can convert the .svg file into an .stl file with TINKERCAD (online CAD, also free, just registration required). This leads to flawless edges, really amazing good quality.
For cutting you can use Cura. Just set your print to 1 layer, 1 perimeter, 20mm/s, z-hop to min 2mm. Remove the filament from your extruder, and just hang the hotend and fan shroud aside. Set nozzle temp and bed temp to °C. You can also remove all the priming and wiping stuff of your start .gcode. Like this, the printer will start cutting as soon as you hit the print button.
The shoe acts as a slider that has 2 functions: it presses the adhesive film well down to prevent it from coming loose. Furthermore it makes the cutter move up and down as your bed is bent. It keeps a constant distance between bed and blade.
Happy sticker plotting!
Similar models
thingiverse
free

Snapmaker Print Bed Sticker Alignment Plate by Demoend
...he print bed. then pull back more of the adhesive backing and work your way slowly to the other corner, pressing down and you go.
thingiverse
free

Davinci 1 cutter by selabs
...t the assembled unit in the place of the extruder.
blade holder and 30/45/60 degree blade for roland cutting plotter vinyl cutter
thingiverse
free

Artillery Sidewinder X1 Up and Down Sticker SVG by pentaclchad
...wanted it in cut vinyl rather than on a printed sticker. so here is the svg and casio silhouette studio cut file for the sticker!
thingiverse
free

Dough cutter by infoengineer
...cles for pelmeni or the 7 cm blade for vareniki (pierogi). i printed the blades by supporting from bed and oriented them upright.
thingiverse
free

Cutting holder by Martinsys
...er-vinyl-cutter-plotter-purple-12mm-dia-holder-/172726465363?fbclid=iwar3deonfhpdkzfesomfkmnn4b22ze0eioku7qorqorufwaplz2n1rn_h-oi
thingiverse
free

Support vinyl cutter for CNC by arily
...ools/32802953703.html?spm=2114.13010608.0.0.ixudsz
enjoy it! ;-)
edit... 01/18/18
i added a simple stand for your vinyl cutter ;)
thingiverse
free

Replicator 2 CNC Vinyl Cutter by portalengineer
.... cricut cutter blades or markers snap into the parts. you can easily adjust the height of the blade for what you're cutting.
thingiverse
free

Ender 3 Vinyl Cutter Mod by greekjohnny
...ut. (do some tries without the cutter installed, use a pencil instead).
if you break something is not my fault… ok?
best of luck!
thingiverse
free

Laser cut Acrylic Casing for Replicator 1 by Mathew
...tive tools case as an svg file with each panel as its own group, so you can move them around to fit on your own laser cutter bed.
thingiverse
free
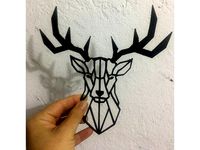
DEER Wall Art / Decoration by blueagle
...s 1.5 hour more than s3d.
in case you want to have fun you can get svg file, psd so you can see the process and fusion360.
enjoy.
Teamwittholz
thingiverse
free

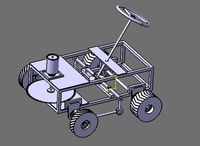
Fairing parts for Infento by teamwittholz
...fairing parts for infento by teamwittholz
thingiverse
https://youtu.be/q-5zttuu4ya
thingiverse
free

Corner Joint for Infento by teamwittholz
...itioning blocks per side, but that works just as well. as usual, you need the m8x20 low head bolts in at least 2 of the 3 places.
thingiverse
free
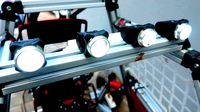
USB rechargeable headlamp for Infento System by teamwittholz
...
look at the pictures to see the orientation. on part needs to be printed sideways for optimal strength and accuracy of the bore.
thingiverse
free

Overdeadpoint lever for Infento by teamwittholz
...s (those ones from inline skater wheels), and a spacer to prevent side loads onto the bearings when you thighten the m8 lock nut.
thingiverse
free

Infento 90° profile to axle connector by teamwittholz
...eas that are important for the driving safety such as chassis parts (wheel support).
it was printed at meltwerk.com by sls in pa.
thingiverse
free

Foot brake accessories for Infento by teamwittholz
... brake cables into it from either side, so you can alter the installation direction to have the block on the left side if needed.
thingiverse
free

Replacement sliding blocks for Razor Crazy Cart by teamwittholz
...han 1h. infill close to max, i used 90%.
on the pics you see a white one, which is a worn original one. the red one is self-made.
thingiverse
free

Infento battery box for 60V 15Ah Li Ion + Controller by teamwittholz
...the 2 parts need to be connected using 6x m6 threaded rods and big washer and locknuts.
no overhangs, big base, is easy to print.
thingiverse
free

Storage solution for Infento hex and square profiles by teamwittholz
...e hex axles were printed on an ender 3 with 0 expansion coeffs with 0.4mm nozzle/0.2mm layer. this part is amazingly stiff. 67g.
thingiverse
free

Battery Display for Razor Crazy Cart by teamwittholz
... some marks of modifications. ignore these. this was my initial version. i have modified the attached model so it fits perfectly.
Stickers
3ddd
$1

stickers Tonka Design
...stickers tonka design
3ddd
stickers by tonka design
turbosquid
$10

Sticker album
... 3d model sticker album for download as ma, fbx, obj, and png on turbosquid: 3d models for games, architecture, videos. (1583501)
turbosquid
$8

Sticker pack
...e 3d model sticker pack for download as ma, png, fbx, and obj on turbosquid: 3d models for games, architecture, videos. (1583512)
turbosquid
$8

Facebook Sticker Crying
...del facebook sticker crying for download as max, obj, and fbx on turbosquid: 3d models for games, architecture, videos. (1293036)
turbosquid
$8

Facebook Sticker Angry
...odel facebook sticker angry for download as max, obj, and fbx on turbosquid: 3d models for games, architecture, videos. (1293033)
turbosquid
$8

Facebook Sticker Sad
... model facebook sticker sad for download as max, obj, and fbx on turbosquid: 3d models for games, architecture, videos. (1293032)
turbosquid
$8

Facebook Sticker Smiling
...el facebook sticker smiling for download as max, obj, and fbx on turbosquid: 3d models for games, architecture, videos. (1293013)
turbosquid
$20
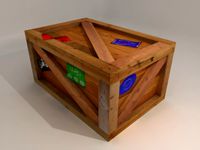
Vintage Crate with Stickers
... available on turbo squid, the world's leading provider of digital 3d models for visualization, films, television, and games.
3d_export
$5

bat sticker for 3d printing
...ting. .max 2018 + .obj + .stl + .fbx video: >>>> https://rumble.com/vr945w-bat-sticker-3d-model-for-3d-printing..html
3d_export
$80
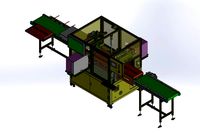
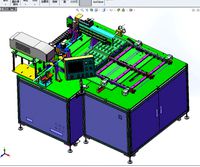
of gift box online automatic sticker wrapper-double-sided sticker-dispenser
...ism is reasonable, the drawing is complete, the whole picture contains more than 300 parts, and all kinds of ingenious mechanisms
Upgrade
turbosquid
$15

Upgraded Glock
...e 3d model upgraded glock for download as obj, fbx, and blend on turbosquid: 3d models for games, architecture, videos. (1185950)
3ddd
$1

Calligaris / UPGRADE
...calligaris / upgrade
3ddd
calligaris
c материалом
3d_export
free

cz upgrade
...cz upgrade
3dexport
https://www.buymeacoffee.com/mestrezen3d https://linktr.ee/mestrezen3
turbosquid
$80

Custer Tank upgrade
... available on turbo squid, the world's leading provider of digital 3d models for visualization, films, television, and games.
turbosquid
$39

Domestos 1 upgrade
... available on turbo squid, the world's leading provider of digital 3d models for visualization, films, television, and games.
3d_export
$10

Upgraded tea cup
...upgraded tea cup
3dexport
a cup with an unusual design and a unique shape for a more enjoyable tea experience
3d_export
$8

dixy outlander classic style upgraded poplar wood lounge chair
...utlander classic style upgraded poplar wood lounge chair
3dexport
dixy outlander classic style upgraded poplar wood lounge chair
turbosquid
free

AK-12 + Upgrades low-poly 3D model
...ow-poly 3d model for download as fbx, blend, and unitypackage on turbosquid: 3d models for games, architecture, videos. (1501145)
evermotion
$700

Upgrade from V-ray 1.5 to 3.5 for 3ds max
...here is no need to purchase a new dongle - your current dongles will be reprogrammed to carry v-ray 3. evermotion 3d models shop.
evermotion
$300

Upgrade from V-Ray 2.0 to V-ray 3.5 for 3ds Max
... interface (gui) for editing settings on one machine and one render node for rendering on one machine. evermotion 3d models shop.
Ender
3ddd
$1

Enders / Elegance
...enders / elegance
3ddd
обогреватель
уличный газовый обогреватель enders elegance
высота: 2200 мм
3d_export
free

ender 3 frame cavity covers
... of the creality ender 3 - makes it look a bit more attractive it just slides into the open channels of the aluminium framework
turbosquid
$1

pen support for ender 3
...y free 3d model pen support for ender 3 for download as blend on turbosquid: 3d models for games, architecture, videos. (1611282)
3d_ocean
$9

Ender Dragon Minecraft
...ojang obj poly videogames
ender dragon minecraft created with cinema 4d r15 formats included: max 2013 – fbx 2012 – c4d r15 – obj
3d_export
free

Creality ender enclosure webcam mount
...e creality enclosure. sure is better than a tripod. change it up if it helps. i printed pla with 50% infill on my dd ender 3 pro.
3d_export
free

ender 3 enclosure corners
...er corners and 4 upper corners, using 25mmx25mm angled aluminium pieces that gets covered on inside of the frame with plexiglass
3d_export
free

ender 3 3d print bed clips
...ed + normal aluminium bed frame of the creality ender 3 = 6mm (b) these clips are designed for glass plate + aluminium bed = 4mm
3d_export
$5

GRUMPY CAT
...grumpy cat 3dexport grumpy cat to print in ender ...
3d_export
$5

Logs fire
...with one multi material for corona and vray r ender. albedo, normal, uvmap, roughness format jpg 4096x4096 models:...
3d_export
$42

excavator
...is the original size. 0.12 mm printing surface creality ender5 ...
Cutting
design_connected
$11
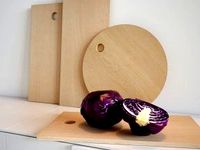
e15 Cut Cutting Boards
...e15 cut cutting boards
designconnected
e15 cut cutting boards computer generated 3d model.
design_connected
$16
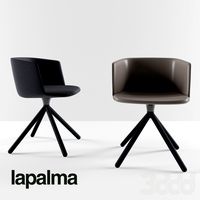
Cut
...cut
designconnected
lapalma cut computer generated 3d model. designed by rota, francesco.
3d_export
$5
cutting machine
...cutting machine
3dexport
crop cutting machine
3d_export
$5

cutting board
...cutting board
3dexport
12 models for cutting boards
3d_export
$20
wire laser cutting peeling cutting machine ffc cutting machine
...and receiving machine, with the structure of this drawing, you don't need to draw by yourself, welcome to collect, thank you.
3ddd
$1
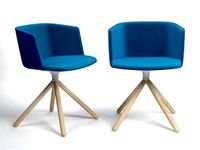
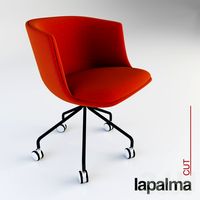
Lapalma CUT
... cut
фабрика: lapalma
коллекция: cut
размер:↑ 74 cm, ↔ 55 см.
описание: стул, ткань, кожа, дерево.
сайт: www.lapalma.it
3ddd
$1
стул lapalma cut
...стул lapalma cut
3ddd
lapalma , cut
стул lapalma cut
3ddd
$1

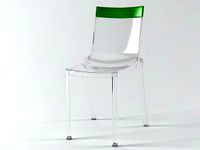
Lapalma CUT
...
коллекция: cut
размер:↑ 74 cm, ↔ 55 см.
описание: стул, порошковое покрытие, черный, белый, ткань, пластик.
сайт: www.lapalma.it
design_connected
$16
Hi Cut
...hi cut
designconnected
kartell hi cut computer generated 3d model. designed by starck, philippe.
3ddd
$1
Vorwerk Cut
...vorwerk cut
3ddd
ковер
vorwerk cut
прямоугольный:
размеры : 2400mm x 3200mm
круглый:
размеры : 2400mm
3
turbosquid
$10

Mountain Bike 3 -3 of 3
...model mountain bike 3 (#3 of 3) for download as fbx and blend on turbosquid: 3d models for games, architecture, videos. (1438752)
turbosquid
$6

Rock 3-3
...urbosquid
royalty free 3d model rock 3-3 for download as obj on turbosquid: 3d models for games, architecture, videos. (1628065)
turbosquid
$29

Books 150 pieces 3-3-3
...books 150 pieces 3-3-3 for download as max, obj, fbx, and stl on turbosquid: 3d models for games, architecture, videos. (1384033)
turbosquid
$3

Genesis 3 Clothing 3
... available on turbo squid, the world's leading provider of digital 3d models for visualization, films, television, and games.
3d_export
$5

hinge 3
...hinge 3
3dexport
hinge 3
3ddd
$1

Розетка 3
...розетка 3
3ddd
розетка
розетка 3
turbosquid
$50

is-3
... available on turbo squid, the world's leading provider of digital 3d models for visualization, films, television, and games.
turbosquid
$10

Mountain Bike 3 -2 of 3
...model mountain bike 3 (#2 of 3) for download as fbx and blend on turbosquid: 3d models for games, architecture, videos. (1438750)
turbosquid
$10

Mountain Bike 1 -3 of 3
...model mountain bike 1 (#3 of 3) for download as fbx and blend on turbosquid: 3d models for games, architecture, videos. (1438743)
3d_export
$5

3 CATS
...3 cats
3dexport
3 cats pen holder