Thingiverse
Ender 3 / Ender 3 Pro - A Better Left Front Drawer with SD Card Slot
by Thingiverse
Last crawled date: 4 years, 2 months ago
Please consider supporting my efforts ( and my coffee and bagel habit ) with a PayPal tip.
20200112: Updated to include components for a Ender 3 Pro version.
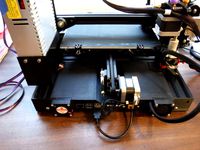
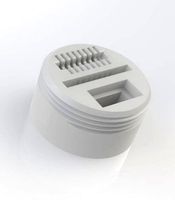
I designed this drawer to compliment my Ender 3 - A Better Rear Electronics Enclosure project (see link below). I moved my electronics to the rear of my Ender 3 and I thought I would put newly available open space to use with a set of drawers. In addition I needed a way to access the Ender 3 SD card. Since the motherboard was inaccessible inside the enclosure, I ran a SD card extension cable to the front of the printer and incorporated it into my new drawer. If you don't need the SD card feature there are other drawer designs in Thingiverse that will work just as well.
You will observe small variations between the final design and my prototype in the picture. Primarily I provided a little better access to the SD card slot and I moved the drawer handle up to the middle of the drawer face. I think it looks better there.
Construction Notes:
The drawer cabinet should be printed vertically with the front/open end up to minimize support structure. You will find a solid block imbedded into the cabinet at the SD card lock slot. The full length SD card cavity supports were difficult to remove. The addition of the block should break the support structure in half and ease its removal. Please provide some feedback about this. As I have my drawer printed I have not tested the embedded block.
There is a small access port on the upper left side of the box for the Z-axis micro switch cable.
The SD card extension is run through the back of the box and the SD card receptacle drops into the slot on the right side and is slid fully forward. The SD card lock slides into the slot to lock the SD card receptacle in place. The lock should have a reasonably tight fit. If it goes in too hard simply sand down the sides a bit. It should be just loose enough to pry out without a big effort. The lock will be fully retained by the drawer.
Two magnets are used to secure the wiring cover in the locked position. One magnet is on the side of the wiring cover and the other is in the upper right rear inside wall of the cabinet. It is accessible from one of the openings on the back.
Use epoxy to secure the magnets. Do not use quick curing epoxy. Give yourself plenty of time to work with the magnets. The holes are oversize and extra deep. I had no problems installing magnets one at a time. A very small C-clamp will help press in stubborn magnets. Try to get the magnets just flush or a hair below flush. Go gently as it is possible to push them in too deep. Vents are provided to help any excess epoxy escape from behind the magnets. Wipe the excess epoxy off before it hardens. Make sure that the magnets are orientated so that they attract the two parts together. Pre-arranging the magnets on a steel bar or ruler will make them easier to handle during the gluing process. Confirm the magnets polarity with another magnet and mark the faces with a Sharpie so you know which side is which. Then it is a simple matter to grab a magnet one at a time as you glue them.
I advise slicing the SD card ribbon cable lengthwise down the middle where it passes through the Ender 3 lateral frame. This will make it easier to route the ribbon cable through the pass-through and bend it in any desired direction. Use a razor blade and a straight edge to get a good cut. Take your time to avoid slicing or cutting a conductor. 6 inches should be enough. For added protection you can tape up each side of the cut to avoid un-intended shorts.
The excess length of the SD card extension can be folded back upon itself and pushed into the back of the cabinet. Push the wiring cover to the back of the cabinet with its left edge touching the left inside of the box. When properly positioned the latches are ready to engage by sliding the wiring cover all the way to the right. At that point the magnets will hold the wiring cover in place and you will not have to worry about pinching the wires when you open and close the door.
Parts List:
All links at Amazon:
Qty 2 required: 8X2mm Magnets:https://www.amazon.com/gp/product/B077KYBYYY/ref=ppx_yo_dt_b_asin_title_o09_s00?ie=UTF8&psc=1
Qty 1 required: Micro SD Card ribbon extension cable. 48 cm.https://www.amazon.com/gp/product/B01D9J8KQE/ref=ppx_yo_dt_b_asin_title_o00_s00?ie=UTF8&psc=1
Credits:
Since I had already printed a set of front right-hand drawers, I modeled my drawer design on them:Ender 3 Double Drawer w/ Bed Arrows & Less Material (L+R)
20200112: Updated to include components for a Ender 3 Pro version.
I designed this drawer to compliment my Ender 3 - A Better Rear Electronics Enclosure project (see link below). I moved my electronics to the rear of my Ender 3 and I thought I would put newly available open space to use with a set of drawers. In addition I needed a way to access the Ender 3 SD card. Since the motherboard was inaccessible inside the enclosure, I ran a SD card extension cable to the front of the printer and incorporated it into my new drawer. If you don't need the SD card feature there are other drawer designs in Thingiverse that will work just as well.
You will observe small variations between the final design and my prototype in the picture. Primarily I provided a little better access to the SD card slot and I moved the drawer handle up to the middle of the drawer face. I think it looks better there.
Construction Notes:
The drawer cabinet should be printed vertically with the front/open end up to minimize support structure. You will find a solid block imbedded into the cabinet at the SD card lock slot. The full length SD card cavity supports were difficult to remove. The addition of the block should break the support structure in half and ease its removal. Please provide some feedback about this. As I have my drawer printed I have not tested the embedded block.
There is a small access port on the upper left side of the box for the Z-axis micro switch cable.
The SD card extension is run through the back of the box and the SD card receptacle drops into the slot on the right side and is slid fully forward. The SD card lock slides into the slot to lock the SD card receptacle in place. The lock should have a reasonably tight fit. If it goes in too hard simply sand down the sides a bit. It should be just loose enough to pry out without a big effort. The lock will be fully retained by the drawer.
Two magnets are used to secure the wiring cover in the locked position. One magnet is on the side of the wiring cover and the other is in the upper right rear inside wall of the cabinet. It is accessible from one of the openings on the back.
Use epoxy to secure the magnets. Do not use quick curing epoxy. Give yourself plenty of time to work with the magnets. The holes are oversize and extra deep. I had no problems installing magnets one at a time. A very small C-clamp will help press in stubborn magnets. Try to get the magnets just flush or a hair below flush. Go gently as it is possible to push them in too deep. Vents are provided to help any excess epoxy escape from behind the magnets. Wipe the excess epoxy off before it hardens. Make sure that the magnets are orientated so that they attract the two parts together. Pre-arranging the magnets on a steel bar or ruler will make them easier to handle during the gluing process. Confirm the magnets polarity with another magnet and mark the faces with a Sharpie so you know which side is which. Then it is a simple matter to grab a magnet one at a time as you glue them.
I advise slicing the SD card ribbon cable lengthwise down the middle where it passes through the Ender 3 lateral frame. This will make it easier to route the ribbon cable through the pass-through and bend it in any desired direction. Use a razor blade and a straight edge to get a good cut. Take your time to avoid slicing or cutting a conductor. 6 inches should be enough. For added protection you can tape up each side of the cut to avoid un-intended shorts.
The excess length of the SD card extension can be folded back upon itself and pushed into the back of the cabinet. Push the wiring cover to the back of the cabinet with its left edge touching the left inside of the box. When properly positioned the latches are ready to engage by sliding the wiring cover all the way to the right. At that point the magnets will hold the wiring cover in place and you will not have to worry about pinching the wires when you open and close the door.
Parts List:
All links at Amazon:
Qty 2 required: 8X2mm Magnets:https://www.amazon.com/gp/product/B077KYBYYY/ref=ppx_yo_dt_b_asin_title_o09_s00?ie=UTF8&psc=1
Qty 1 required: Micro SD Card ribbon extension cable. 48 cm.https://www.amazon.com/gp/product/B01D9J8KQE/ref=ppx_yo_dt_b_asin_title_o00_s00?ie=UTF8&psc=1
Credits:
Since I had already printed a set of front right-hand drawers, I modeled my drawer design on them:Ender 3 Double Drawer w/ Bed Arrows & Less Material (L+R)
Similar models
thingiverse
free

Ender 3 SD Card cable Adaptor Extension by jaruwit
...om/thing:2943750.
it use only micro sd card.
i remix to fit my sd card adaptor cable. and add bottom plate to protect flat cable.
thingiverse
free

Ender 3 SD Card Cover for Cable by KTMan77
...card slot on a stock ender 3 pro where you have a remote sd card reader using a micro sd to sd cable.
this is a work in progress.
thingiverse
free

Ender 3 SD Card cable Mount
...ender 3 sd card cable mount
thingiverse
modified to cover usb cable and provide an access to the cable.
thingiverse
free

Ender 3 - Micro SD Card cable extension holder modified for Ender 3 double drawer by zettlerm
...nt) by exem"
so if you have printed these: https://www.thingiverse.com/thing:3372977 the modification maybe helpful for you.
thingiverse
free

Ender 3 Drawer with SD micro slot holder
... and more).
comleted drawer dimesions - 126x50x126 mm
print time - on the standard quality about 12 hours.
enjoy www.d3arts.cz
thingiverse
free

Ender 3 V2 SD Card holder by WT290
...the machine to the rear of the mount.
you can always just use double sided tape to mount the adapter but what is the fun in that.
thingiverse
free
Ender 3 - A Better Rear Electronics Enclosure
... project.
revisions:
20191124: added mounting provisions for two more lm2596 dc-dc step down converters to the left enclosure.
thingiverse
free

Ender 3 Front screen with Fan Cover and SD card slot
...ard slot
thingiverse
reduce the space the printer takes on the right side
slot for sd card adapter
fan cover built-in as a mount
thingiverse
free

Ribbon cable SDcard holder for Ender 3 V2 by alantch
... for future connection to a rpi for octoprint functionality maybe?
enter in the comments if you find any in correct measurements.
thingiverse
free

Ender 3 V2 SD Card Adapter Vertical Housing by HKASAP
...lows you to use micro usb port by simply removing the "usb cover" part.
i have printed and tested only for ender 3 v2.
Sd
3d_ocean
$4
SD-Card
...sd-card
3docean
camera memory mmc mp3 player ram rom sd card
a sd-card
3ddd
$1

Ravak SDS Evolution
...ravak sds evolution
3ddd
sds , ravak
sds
3d_export
$5
SD Card
...sd card
3dexport
photorealistic sd memory card model. cycles engine. blender 3d v.2.82
3d_export
$10
customizable sd port
...customizable sd port
3dexport
customizable sd port
turbosquid
$1

sd card
...rbosquid
royalty free 3d model sd card for download as sldpr on turbosquid: 3d models for games, architecture, videos. (1198502)
turbosquid
$15
SD-DU107P81P1M.rfa
... available on turbo squid, the world's leading provider of digital 3d models for visualization, films, television, and games.
turbosquid
$15
SD-DU147P81P1M.rfa
... available on turbo squid, the world's leading provider of digital 3d models for visualization, films, television, and games.
turbosquid
$15

SD-DU127P81P1M.rfa
... available on turbo squid, the world's leading provider of digital 3d models for visualization, films, television, and games.
turbosquid
$15

SD-DU117P81P1M.rfa
... available on turbo squid, the world's leading provider of digital 3d models for visualization, films, television, and games.
turbosquid
$15

SD-DU187P81P1M.rfa
... available on turbo squid, the world's leading provider of digital 3d models for visualization, films, television, and games.
Ender
3ddd
$1

Enders / Elegance
...enders / elegance
3ddd
обогреватель
уличный газовый обогреватель enders elegance
высота: 2200 мм
3d_export
free

ender 3 frame cavity covers
... of the creality ender 3 - makes it look a bit more attractive it just slides into the open channels of the aluminium framework
turbosquid
$1

pen support for ender 3
...y free 3d model pen support for ender 3 for download as blend on turbosquid: 3d models for games, architecture, videos. (1611282)
3d_ocean
$9

Ender Dragon Minecraft
...ojang obj poly videogames
ender dragon minecraft created with cinema 4d r15 formats included: max 2013 – fbx 2012 – c4d r15 – obj
3d_export
free

Creality ender enclosure webcam mount
...e creality enclosure. sure is better than a tripod. change it up if it helps. i printed pla with 50% infill on my dd ender 3 pro.
3d_export
free

ender 3 enclosure corners
...er corners and 4 upper corners, using 25mmx25mm angled aluminium pieces that gets covered on inside of the frame with plexiglass
3d_export
free

ender 3 3d print bed clips
...ed + normal aluminium bed frame of the creality ender 3 = 6mm (b) these clips are designed for glass plate + aluminium bed = 4mm
3d_export
$5

GRUMPY CAT
...grumpy cat 3dexport grumpy cat to print in ender ...
3d_export
$5

Logs fire
...with one multi material for corona and vray r ender. albedo, normal, uvmap, roughness format jpg 4096x4096 models:...
3d_export
$42

excavator
...is the original size. 0.12 mm printing surface creality ender5 ...
Card
3d_export
$5
card
...card
3dexport
low poly style card
3d_ocean
$3
Dice+Cards
...dice+cards
3docean
dice+cards
3d_ocean
$2
Credit Card
...d is just like a real credit or debit card. there is a material applied that creates the look of a hologram. the file works in...
3d_export
$1

cards
...cards
3dexport
3d_ocean
$4
SD-Card
...sd-card
3docean
camera memory mmc mp3 player ram rom sd card
a sd-card
turbosquid
$1

Cards
... available on turbo squid, the world's leading provider of digital 3d models for visualization, films, television, and games.
3d_ocean
$5
Business Card Box
...business card box
3docean
business card card interior office
business card and box, include psd card design
3d_export
$5
bluetooth card
...bluetooth card
3dexport
this is a simplified bluetooth card with which you can create cases
archive3d
free
Cards 3D Model
...ive3d
playing cards cards
cards n290612 - 3d model (*.gsm+*.3ds) for interior 3d visualization.
3d_export
$5
SD Card
...sd card
3dexport
photorealistic sd memory card model. cycles engine. blender 3d v.2.82
Slot
3d_export
$5
slot handle
...slot handle
3dexport
slot handle
archibase_planet
free
Slot machine
...ase planet
slot machine slot-machine playing machine
slot machine n260311 - 3d model (*.gsm+*.3ds) for interior 3d visualization.
archibase_planet
free
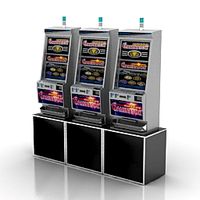
Slot machine
... machine slot-machine one-armed bandit
slot machine novomatic gaminator n240911 - 3d model (*.3ds) for interior 3d visualization.
3d_export
$5

narrow slot handle
...narrow slot handle
3dexport
narrow slot handle
turbosquid
$15

Slot Machine
...oyalty free 3d model slot machine for download as max and fbx on turbosquid: 3d models for games, architecture, videos. (1710861)
turbosquid
$25

Slot Machine
... free 3d model slot machine for download as max, obj, and fbx on turbosquid: 3d models for games, architecture, videos. (1649555)
turbosquid
$25

Coin Slots
... available on turbo squid, the world's leading provider of digital 3d models for visualization, films, television, and games.
turbosquid
$11
Slotted spoon
... available on turbo squid, the world's leading provider of digital 3d models for visualization, films, television, and games.
turbosquid
$5

Slot Sofa
... available on turbo squid, the world's leading provider of digital 3d models for visualization, films, television, and games.
turbosquid
$3
slotted spoon
... available on turbo squid, the world's leading provider of digital 3d models for visualization, films, television, and games.
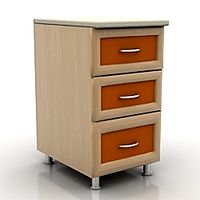
Drawer
3d_export
$5

chest of drawers with drawers sonata
...chest of drawers with drawers sonata
3dexport
chest of drawers with drawers sonata
archibase_planet
free

Drawer
...drawer
archibase planet
drawer case locker
drawer - 3d model for interior 3d visualization.
archibase_planet
free
Drawer
...drawer
archibase planet
drawer dathroom furniture
drawer 896410 - 3d model for interior 3d visualization.
archibase_planet
free
Drawer
...drawer
archibase planet
drawer shelving case
drawer - 3d model (*.3ds) for interior 3d visualization.
archibase_planet
free
Drawer
...drawer
archibase planet
locker bureau drawer
drawer - 3d model (*.gsm+*.3ds) for interior 3d visualization.
archibase_planet
free

Drawer
...drawer
archibase planet
case drawer locker
drawer - 3d model (*.gsm+*.3ds) for interior 3d visualization.
archibase_planet
free
Drawer
...drawer
archibase planet
locker drawer case
drawer - 3d model (*.gsm+*.3ds) for interior 3d visualization.
archibase_planet
free

Drawer
...drawer
archibase planet
drawer case bathroom furniture
drawer 896411 - 3d model for interior 3d visualization.
archibase_planet
free
Drawer
...drawer
archibase planet
locker drawer case
drawer - 3d model (*.gsm+*.3ds) for interior 3d visualization.
archibase_planet
free

Drawer
...drawer
archibase planet
locker case drawer
drawer - 3d model (*.gsm+*.3ds) for interior 3d visualization.
Left
3d_export
$7

human-left-hand
...human-left-hand
3dexport
human-left-hand
3d_export
$5
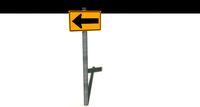
Left arrrow 3D Model
...left arrrow 3d model
3dexport
left turn sign signal signage direction
left arrrow 3d model ryisnelly100 88746 3dexport
design_connected
$20
Nomade Chaise Left
... chaise left
designconnected
ligne roset nomade chaise left lounge chairs computer generated 3d model. designed by didier gomez.
design_connected
$16
Feng Chaise Left
...ng chaise left
designconnected
ligne roset feng chaise left lounge chairs computer generated 3d model. designed by didier gomez.
3ddd
$1

Vittorio-Left facing Sofa
...vittorio-left facing sofa
3ddd
vittorio , угловой
vittorio-left facing sofa
turbosquid
$33
Left Turn Sign
...ree 3d model left turn sign for download as 3ds, max, and obj on turbosquid: 3d models for games, architecture, videos. (1303404)
turbosquid
$15
Left-handed dagger
... available on turbo squid, the world's leading provider of digital 3d models for visualization, films, television, and games.
turbosquid
$10

no left turn - 3ds
... available on turbo squid, the world's leading provider of digital 3d models for visualization, films, television, and games.
turbosquid
$7

Left Arm Armour
... available on turbo squid, the world's leading provider of digital 3d models for visualization, films, television, and games.
turbosquid
$5

Pass Left Signs
... available on turbo squid, the world's leading provider of digital 3d models for visualization, films, television, and games.
Better
3ddd
$1

Мозаика Better B-MOS D1
...os d1
3ddd
better , мозаика
мозаика better b-mos d1.
розтайленая мною.
+ бамп
+ рефлеккт
turbosquid
$19

BETTER THAN CHOCOLATE SOFA
... better than chocolate sofa for download as max, obj, and fbx on turbosquid: 3d models for games, architecture, videos. (1144132)
3d_export
$5

Soviet Tank T-150
...t-150 3dexport simple tank model. in project texture are better ...
archive3d
free
Polycarbonate 3D Model
...polycarbonate plastic polycarbonate sheet a little bit oversized for better ...
3d_export
$20
Terminator
...a robot created by skynet to defeat the resistance. better watch the movie if you haven’t seen it...
3d_export
free
simple grass
...simple grass scene with procedural texture for grass, is better swaps the texture of grass by...
3d_export
$5

picture-mirror
...father,for the bath,it is desirable to make out of wood,better than...
3ddd
$1

APLLES with wood vase
...3ddd яблоко zip archive contain fbx model too, for better textures import to 3d software. kind...
3d_export
$5
vinyl record player
...size 295x260mm without any materials (just standart grey for better ...
3ddd
$1
Armchair 400
...armchair 400, designed by alvar aalto in 1936 and better known as tank. pelt coat idea by...
Front
archibase_planet
free

Front
...front
archibase planet
facade front bluff
front 3d01a - 3d model (*.gsm+*.3ds) for interior 3d visualization.
3d_export
$5
front fork
...front fork
3dexport
front fork
3d_export
$5

Front Desk
...front desk
3dexport
modern and minimal reception front desk
3d_ocean
$4
Medical Front
...medical front
3docean
horror low medical
medical front
3d_ocean
$5
Front Desk
...front desk
3docean
desk front office reception
office reception counter or front desk. cad file and obj file included.
3ddd
free

Axor WaterDream by Front
...r , waterdream , front
axor waterdream by front
3d_export
$5

front nut eye
...front nut eye
3dexport
front nut eye
3d_export
$5
front screw eye
...front screw eye
3dexport
front screw eye
3d_export
$5
front clamping device
...front clamping device
3dexport
front clamping device
archive3d
free
Front 3D Model
...rchive3d
facade front bluff
front 3d01a - 3d model (*.gsm+*.3ds) for interior 3d visualization.
Pro
turbosquid
$29

Pro
...ree 3d model mac pro for download as obj, c4d, fbx, and blend on turbosquid: 3d models for games, architecture, videos. (1505782)
turbosquid
$15

Apple Mac Pro and Pro Display
...ee 3d model apple mac pro and pro display for download as max on turbosquid: 3d models for games, architecture, videos. (1417078)
3d_export
$5

iphone 13 pro max and pro
...3 pro max and 13 pro the model is made in four colors (graphite, gold, silver, and blue), all of which are attached in the files.
3d_export
free

sapphire pro
...sapphire pro
3dexport
sapphire pro 3d printer head mask
3d_export
$4

macbook pro
...macbook pro
3dexport
macbook pro 13" inch 2020 years model
3ddd
free

GentleLase Pro
... syneron , candela
gentlelase pro аппарат для лазерной эпиляции
turbosquid
$25

PRO frame
...rbosquid
royalty free 3d model pro frame for download as max on turbosquid: 3d models for games, architecture, videos. (1148329)
turbosquid
$5

Alien pro
...osquid
royalty free 3d model alien pro for download as blend on turbosquid: 3d models for games, architecture, videos. (1678446)
turbosquid
$5

iphone11 pro
...uid
royalty free 3d model iphone11 pro for download as blend on turbosquid: 3d models for games, architecture, videos. (1562707)
3ddd
$1

Mac Pro (appel)
...mac pro (appel)
3ddd
компьютер , apple
mac pro
3
turbosquid
$10

Mountain Bike 3 -3 of 3
...model mountain bike 3 (#3 of 3) for download as fbx and blend on turbosquid: 3d models for games, architecture, videos. (1438752)
turbosquid
$6

Rock 3-3
...urbosquid
royalty free 3d model rock 3-3 for download as obj on turbosquid: 3d models for games, architecture, videos. (1628065)
turbosquid
$29

Books 150 pieces 3-3-3
...books 150 pieces 3-3-3 for download as max, obj, fbx, and stl on turbosquid: 3d models for games, architecture, videos. (1384033)
turbosquid
$3

Genesis 3 Clothing 3
... available on turbo squid, the world's leading provider of digital 3d models for visualization, films, television, and games.
3d_export
$5

hinge 3
...hinge 3
3dexport
hinge 3
3ddd
$1

Розетка 3
...розетка 3
3ddd
розетка
розетка 3
turbosquid
$50

is-3
... available on turbo squid, the world's leading provider of digital 3d models for visualization, films, television, and games.
turbosquid
$10

Mountain Bike 3 -2 of 3
...model mountain bike 3 (#2 of 3) for download as fbx and blend on turbosquid: 3d models for games, architecture, videos. (1438750)
turbosquid
$10

Mountain Bike 1 -3 of 3
...model mountain bike 1 (#3 of 3) for download as fbx and blend on turbosquid: 3d models for games, architecture, videos. (1438743)
3d_export
$5

3 CATS
...3 cats
3dexport
3 cats pen holder