Thingiverse
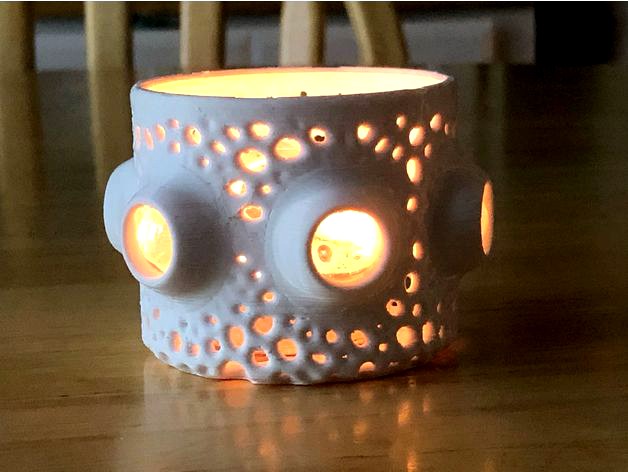
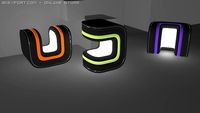
Embedded Marble Tea Light Holder by DaveMakesStuff
by Thingiverse
Last crawled date: 3 years, 3 months ago
WARNING: Embedding objects in your print is risky. Mistakes or oversights in slicing could result in collisions between your nozzle and the object!
That said, this sample tea light holder demonstrates some of the interesting effects that are possible when you feel ready to take the risk. See here for video: https://youtu.be/1aovdxwkPn0
This file is designed for 15mm diameter marbles and a hot end with a nozzle that protrudes at least 5mm from the bottom of the heat block. If these aren’t an option for you, don’t try this project!
The clear marbles shown are from Michaels: https://canada.michaels.com/en/clear-lustre-marbles-by-ashland/10556564.html. There is some variability in diameter, so use calipers to select six that are between 14.5 – 15 mm.
Slicing
The recommendations here are for Cura 4.8.0.
Import “Reference Marbles” and “Tealight Enclosure” into Cura. Right click and “Reset All Model Transformations” so that the reference marbles are sitting inside the tealight enclosures where the real marbles will go eventually. You will notice that the reference marbles are on long 0.1 mm diameter “stilts” so that they don’t automatically drop to the build plate when they are imported.
The reference marbles will be used to program “no go” zones for the nozzle, they will not be printed.
Select the “Reference Marbles” and open “Per Model Settings” to apply customized settings to this object. Check “Wall Line Count, “Top Layers, “Bottom Layers” and “Infill Density” and set all of these values to “0”.
In the main section under “Travel,” ensure that “Combing” and “Avoid Printed Parts when Travelling” are checked. The reference marbles are now “ghosts” that won’t actually print, but will be avoided when generating gcode. Slice the file and closely preview a few layers to ensure that the nozzle does in fact avoid the spaces where the real marbles will eventually be placed.
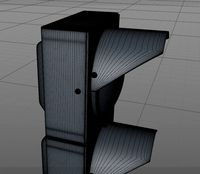
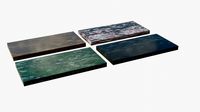
Next we need to set the height for the print to pause and allow you to place the marbles midway through the print. This is done by going in to the “Extensions” menu at the top bar: Post Processing > Modify gcode > Add a script > Pause at Height. Setting the height to 31mm will get you close, but if you want to be absolutely sure, refer to the pictures above that shows a cross section of the marble enclosure and find the layer height that corresponds to line indicated by the arrow. At this height, the marble will not be extruding more than 4mm (so you’ll clear the underside of the carriage) and the nozzle is far enough away that the sloped side of the nozzle with not hit the marble sideways.
I set “Retraction” at 8mm and “Extrude Amount” at 20mm, but you might have reasons for doing things differently.
The “Park Print Head x” and Park Print Head y” are set in conjunction with the coordinates in “Layer Start x” and “Layer Start y” in the “Travel” section of the main settings. Basically, make sure that when your print head returns from pause that is doesn’t slam into a marble on the way! I set x=190 and y=110 to have the nozzle come in from the right side and start on the right-most part of the layer. Slice these settings and preview them closely!
I set speed to 30mm/s, partly just because the Voronoi structures print better at lower speeds.
Printing
Printing the “Collision Checker” beforehand is not necessary, but it might give you some piece of mind at the critical moment of this print!
Once you are confident that you’ve got the settings right, start printing the tealight as you normally would. When the print pauses, you will want to remove any strings or burrs from the hollows where the marbles will sit. I use a spherical abrasive bit on a Dremel. Any imperfections will raise them marbles and put them at risk of collision. (There is a 1mm safety buffer, but things are still pretty close!)
Place the marbles and eyeball or place the “Collision Checker” over the marble to ensure that nothing is protruding higher than 5mm.
Clear the nozzle of any ooze.
Cross your fingers and “Resume Print.” Watch the next few layers closely and ensure that there are no collisions and that the marble stay properly positioned. Once a few layers have been laid down, you can stop holding your breath. The rest of the print will go as normal.
If you make a successful print, please share pictures! If you wreck your printer in the process, please also share pictures!
That said, this sample tea light holder demonstrates some of the interesting effects that are possible when you feel ready to take the risk. See here for video: https://youtu.be/1aovdxwkPn0
This file is designed for 15mm diameter marbles and a hot end with a nozzle that protrudes at least 5mm from the bottom of the heat block. If these aren’t an option for you, don’t try this project!
The clear marbles shown are from Michaels: https://canada.michaels.com/en/clear-lustre-marbles-by-ashland/10556564.html. There is some variability in diameter, so use calipers to select six that are between 14.5 – 15 mm.
Slicing
The recommendations here are for Cura 4.8.0.
Import “Reference Marbles” and “Tealight Enclosure” into Cura. Right click and “Reset All Model Transformations” so that the reference marbles are sitting inside the tealight enclosures where the real marbles will go eventually. You will notice that the reference marbles are on long 0.1 mm diameter “stilts” so that they don’t automatically drop to the build plate when they are imported.
The reference marbles will be used to program “no go” zones for the nozzle, they will not be printed.
Select the “Reference Marbles” and open “Per Model Settings” to apply customized settings to this object. Check “Wall Line Count, “Top Layers, “Bottom Layers” and “Infill Density” and set all of these values to “0”.
In the main section under “Travel,” ensure that “Combing” and “Avoid Printed Parts when Travelling” are checked. The reference marbles are now “ghosts” that won’t actually print, but will be avoided when generating gcode. Slice the file and closely preview a few layers to ensure that the nozzle does in fact avoid the spaces where the real marbles will eventually be placed.
Next we need to set the height for the print to pause and allow you to place the marbles midway through the print. This is done by going in to the “Extensions” menu at the top bar: Post Processing > Modify gcode > Add a script > Pause at Height. Setting the height to 31mm will get you close, but if you want to be absolutely sure, refer to the pictures above that shows a cross section of the marble enclosure and find the layer height that corresponds to line indicated by the arrow. At this height, the marble will not be extruding more than 4mm (so you’ll clear the underside of the carriage) and the nozzle is far enough away that the sloped side of the nozzle with not hit the marble sideways.
I set “Retraction” at 8mm and “Extrude Amount” at 20mm, but you might have reasons for doing things differently.
The “Park Print Head x” and Park Print Head y” are set in conjunction with the coordinates in “Layer Start x” and “Layer Start y” in the “Travel” section of the main settings. Basically, make sure that when your print head returns from pause that is doesn’t slam into a marble on the way! I set x=190 and y=110 to have the nozzle come in from the right side and start on the right-most part of the layer. Slice these settings and preview them closely!
I set speed to 30mm/s, partly just because the Voronoi structures print better at lower speeds.
Printing
Printing the “Collision Checker” beforehand is not necessary, but it might give you some piece of mind at the critical moment of this print!
Once you are confident that you’ve got the settings right, start printing the tealight as you normally would. When the print pauses, you will want to remove any strings or burrs from the hollows where the marbles will sit. I use a spherical abrasive bit on a Dremel. Any imperfections will raise them marbles and put them at risk of collision. (There is a 1mm safety buffer, but things are still pretty close!)
Place the marbles and eyeball or place the “Collision Checker” over the marble to ensure that nothing is protruding higher than 5mm.
Clear the nozzle of any ooze.
Cross your fingers and “Resume Print.” Watch the next few layers closely and ensure that there are no collisions and that the marble stay properly positioned. Once a few layers have been laid down, you can stop holding your breath. The rest of the print will go as normal.
If you make a successful print, please share pictures! If you wreck your printer in the process, please also share pictures!
Similar models
thingiverse
free

dupont cable clip by ldelana77
...void distance : 0.625mm
z hop when retraced
z hop only over printed parts
z hop height 2mm
and use brim plate adhesion width mm.5
thingiverse
free

How to multi color print on single extruder ( Ender 3 + Cura )
...ools icon that will appear on the left of the cura slice button and set your desired layer to activate it.
hope that will help ;)
thingiverse
free

Temp Towers with Layer Height on side PLA, ABS, PETG by historyhunters2
...d temp set to what works best for the filament you're using before you slice, or the prints may fail before they get started.
thingiverse
free

Motor holder for material feeder by maker_101
...in your 3d printed part. you will see when the nut hole appeare and when it is starting to close then insert nut for bowden tube.
thingiverse
free

Pinecil and Tips Magnet Case by egrims
...r any other super glue at the bottom of the pocket before placing the magnet to avoid rattling and would suggest you do the same.
thingiverse
free

Double Sided Key | Çift Taraflı Anahtar by Katalikitci
... part is designed for "kale" branded keys. check your key model if it fits. dimensions are given in the pictures above.
thingiverse
free

Magnetic parts bold with embedded magnets. by TLRobb
...int and let it finish.
parts needed:
4 round magnets that measure 9.54mm in diameter and 1.53mm thick. i got mine at home depot.
thingiverse
free

First Layer Test Square by _Happy_
...lines to close. but just touch enough to close.
slice this with a 0.2 layer height. i've only tested this with a 0.4 nozzle.
thingiverse
free

Seahawk Head Logo, Seattle Seahawks by nobcity54
...er starts. then just swap out the filament. attach some magnets on the back and you have a pretty awesome fridge magnet. go hawks
thingiverse
free

Magnetic Tetra-Bricks! by QuantumZ
...es c. printing with pla should not be an issue but you may want to limit the bet temperature to 75 c or less for other materials.
Davemakesstuff
thingiverse
free

Pointer by DaveMakesStuff
... pointing at things.
sections screw apart for compact storage and transport. rods are 10cm long, print whatever length you need.
thingiverse
free

Gyroid Sculpture with Oval Profile by DaveMakesStuff
...roid/. it can be purchased at: https://www.shapeways.com/designer/davemakesstuff
see here for video: https://youtu.be/wcjtddytqi0
thingiverse
free

Corona Pumpkin by DaveMakesStuff
...#39;ll probably end up with a headache and fever.
here's a better one for printing: https://www.thingiverse.com/thing:4620382
thingiverse
free
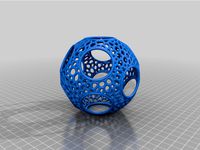
Voronoi Rhombic Dodecahedron Sphere by DaveMakesStuff
... in this sphere are centered on the faces of a rhombic dodecahedron. connecting multiple spheres hole-to-hole will tile 3d space.
thingiverse
free

Hextuple Klein Bottle by DaveMakesStuff
...hat it takes a long time to print, the good news is that it prints without supports.
see video here: https://youtu.be/zcb6e3u87qm
thingiverse
free
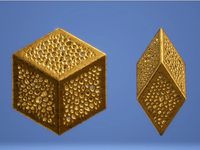
Golden Rhombohedra by DaveMakesStuff
...
see here for christmas ornament versions: https://www.thingiverse.com/thing:4577036
see video here: https://youtu.be/odaqybfys84
thingiverse
free

Three Voronoi Gyroid Spheres by DaveMakesStuff
...rnal structures and edge boundary. files are provided with and without supports.
see here for video: https://youtu.be/lunhqfodetm
thingiverse
free

Golden Rhombohedra Ornaments by DaveMakesStuff
...s are separate shells that can be removed by your mesh editing software if you wish.
see video here: https://youtu.be/odaqybfys84
thingiverse
free

Coronavirus Tree Topper by DaveMakesStuff
...ole object is also provided for you to print as you wish.
see here for a plain ornament:https://www.thingiverse.com/thing:4321410
thingiverse
free

Boy's Bowl by DaveMakesStuff
...pasta :)
boy's surface on wikipedia:https://en.wikipedia.org/wiki/boy%27s_surface
see video here:https://youtu.be/x6b0zxcwoye
Embedded
turbosquid
free

BECHOFF__CX5010_CX5020 __ Embedded PC
... available on turbo squid, the world's leading provider of digital 3d models for visualization, films, television, and games.
3d_ocean
$5
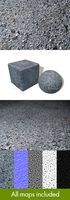
Tarmac with Embedded Shells Seamless Texture
...mation. created from photographs. texture, displacement, normal, occlusion and specular jpg maps are all included in this down...
3d_export
$15
CLamp 3D Model
...clamp 3d model
3dexport
lamp embeded design
clamp 3d model pknobloch 25653 3dexport
3d_export
$5

best plants set
...3dexport plants are made in blender 2.83, textures are embedded in blend file. also you will get them in...
3d_export
$5
stoplight
... performed in the cinema 4d program. additional formats on request. suitable for embedding in any scene, for animation and games.
3d_export
$60

elon musk character with spacex dragon suits
...character with spacex dragon suits 3dexport the format has embedded texture. very well rigged this you can use 3d...
3d_export
$10

Roadster 30s
...the model consists of a roadster and textures.<br>textures are embedded in the main file.<br>scenes shown are not included in...
3d_export
$10
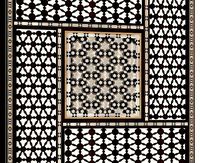
screen syrian
...dealer drew pritchard. the screen is inlaid with mother-of-pearl embedded in a wooden frame with mashrabiya reel panels. it...
3d_export
$15
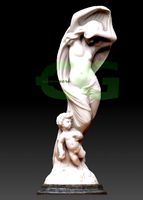
classic sculpture 1
...vertices<br>- 3ds<br>- obj<br>- stl<br>- fbx-low texture embedded<br>- fbx-hi texture embedded ...
3d_export
$5

rose gold gold ring
...fancy rose gold and gold ring with a diamond embedded at the top which is held in place by...
Tea
3d_ocean
$5
Tea Can
...tea tea can tea canister tea pack tea packaging
tea canister, can, in different 3d formats. this one was created in 3ds max 2012.
design_connected
$18

Tea
...tea
designconnected
sancal tea computer generated 3d model. designed by ferrero, estudihac, jose manuel.
3d_export
$5
tea glass
...tea glass
3dexport
tea glass.
turbosquid
$1

Tea
...osquid
royalty free 3d model turkish tea for download as max on turbosquid: 3d models for games, architecture, videos. (1453029)
3ddd
$1

Tea set
...tea set
3ddd
сервиз
tea set
3d_export
free

Tea cup
...tea cup
3dexport
plastic tea cup
turbosquid
$1

TEA
...
royalty free 3d model tea for download as obj, 3ds, and fbx on turbosquid: 3d models for games, architecture, videos. (1606404)
turbosquid
$1

Tea
...
royalty free 3d model tea for download as max, obj, and fbx on turbosquid: 3d models for games, architecture, videos. (1620630)
turbosquid
$22

Tea
... available on turbo squid, the world's leading provider of digital 3d models for visualization, films, television, and games.
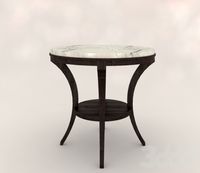
3d_ocean
$5
Tea Table
...tea table
3docean
interior tea.table
tea table for interior purposes
Marble
3d_export
free

marbles
...marbles
3dexport
animated marbles
3ddd
$1

Marble
...marble
3ddd
мрамор
marbles of turkey
3d_export
free
marbles
...marbles
3dexport
3d_export
$5

Marble vase
...marble vase
3dexport
marble vase
turbosquid
$2

Marble
...quid
royalty free 3d model marble for download as ma and max on turbosquid: 3d models for games, architecture, videos. (1240771)
turbosquid
$2
marble
...d
royalty free 3d model marble for download as blend and fbx on turbosquid: 3d models for games, architecture, videos. (1645970)
3d_export
$5
marble skirting
...marble skirting
3dexport
marble skirting for indoor design.
3ddd
$1
Marble Table
...marble table
3ddd
журнальный , круглый
marble table
turbosquid
$10

Marbles
... available on turbo squid, the world's leading provider of digital 3d models for visualization, films, television, and games.
3ddd
$1

Marble lamp
...marble lamp
3ddd
marble lamp in style of 30's
Holder
archibase_planet
free

Holder
...holder
archibase planet
holder toilet paper holder
holder paper n070712 - 3d model (*.gsm+*.3ds) for interior 3d visualization.
archibase_planet
free

Holder
...e planet
holder rack toilet paper holder
holder toilet roll n240715 - 3d model (*.gsm+*.3ds+*.max) for interior 3d visualization.
archibase_planet
free

Holder
...holder
archibase planet
pen holder support prop
pen holder - 3d model for interior 3d visualization.
archibase_planet
free

Holder
...holder
archibase planet
pole post holder
сhurch cross pole holder - 3d model for interior 3d visualization.
archibase_planet
free

Holder
...holder
archibase planet
holder bathroom ware
shower holder - 3d model (*.gsm+*.3ds) for interior 3d visualization.
archibase_planet
free

Holder
...oilet paper holder
holder paper devon&devon; time black n241113 - 3d model (*.gsm+*.3ds+*.max) for interior 3d visualization.
archibase_planet
free

Holder
...holder
archibase planet
holder hanger hanger for towel
holder 7 - 3d model (*.gsm+*.3ds) for interior 3d visualization.
archibase_planet
free

Holder
...holder
archibase planet
holder hanger hanger for towel
holder 3 - 3d model (*.gsm+*.3ds) for interior 3d visualization.
archibase_planet
free

Holder
...holder
archibase planet
holder towel rack towel-horse
holder - 3d model (*.gsm+*.3ds) for interior 3d visualization.
archibase_planet
free

Holder
...lder
archibase planet
holder hanger hanger for towel
holder towel n250912 - 3d model (*.gsm+*.3ds) for interior 3d visualization.
Light
archibase_planet
free

Light
...light
archibase planet
lamp lighting light
light - s2 - 3d model for interior 3d visualization.
archibase_planet
free

Light
...light
archibase planet
light luminaire lighting
light l0465 - 3d model (*.gsm+*.3ds) for interior 3d visualization.
3d_export
$5

lighting
...lighting
3dexport
lighting
3d_export
$5

lighting
...lighting
3dexport
lighting in livingroom
turbosquid
$3

Lighting Tree with Lights
...d model lighting tree with lights for download as max and 3ds on turbosquid: 3d models for games, architecture, videos. (1585507)
archibase_planet
free

Light
...light
archibase planet
luster lighting solution
light - s - 3d model for interior 3d visualization.
archibase_planet
free

Light
...light
archibase planet
luster lamp lighting
light 1 - 3d model for interior 3d visualization.
archibase_planet
free

Lights
...lights
archibase planet
surgical lights surgical lamp
surgical lights (floor) - 3d model for interior 3d visualization.
archibase_planet
free

Light
...light
archibase planet
lighting luminaire candlelight
light l0463 - 3d model (*.gsm+*.3ds) for interior 3d visualization.
3d_export
$18

street light-lighting-light-xia bing
...
3dexport
street light-lighting-light-xia bing<br>max 2015 v-ray 3 max 2015<br>textures<br>all files in zip...