Thingiverse
Electronic Mouse Trap - servo driven
by Thingiverse
Last crawled date: 4 years, 3 months ago
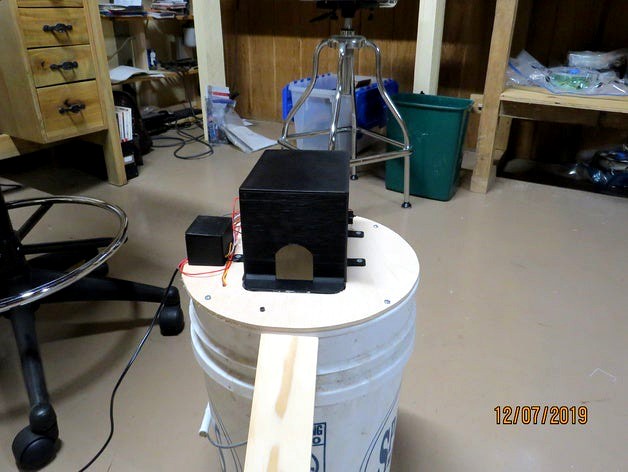
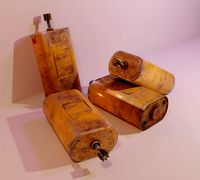
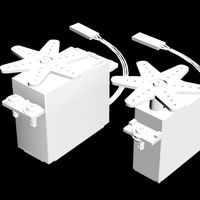
Uses a mini servo to open/close the trap door and through beam photo sensor to trigger the trap door opening.
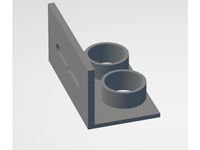
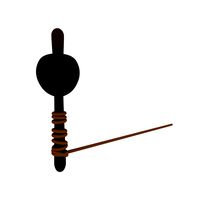
I cut out a piece of 1/4" plywood to fit over the bucket. Trace out the enclosure on this and cut that out. Glue the trap door to the enclosure. Mount the enclosure to the plywood. Mount the thru beam sensors to the enclosure. Mount the servo to the servo mount. Connect the closing arm to the servo. Mount the servo to the plywood. Wire the servo to the arduino. Wire the photo sensor to the arduino. I screwed a large washer to bottom of the trap door and glued a rare earth magnet from an old harddrive to the plywood to keep the trap door closed. Need to play around with magnet position, needs to hold the trap door closed but not so strongly that the servo can't pull it open. Tie a piece of string to the closing arm and attach other end to the trap door. Adjust length as need.
Program the arduino, spread some peanut butter on the far end of the trap enclosure and give it a test.
Wiring schematic and Arduino program included.
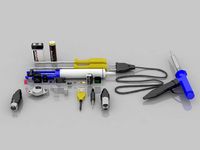
Parts used: ( all available from amazon.com)
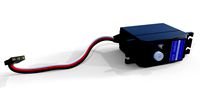
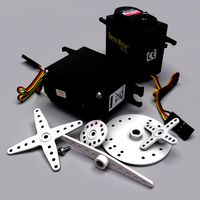
Servo: MG995
Arduino: Nano
Arduino Nano screw terminal adaptor
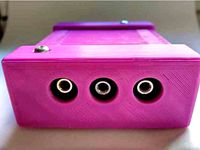
Adafruit Accessories IR Break Beam Sensor - 3mm
Wallwart 9v 2000ma
Plywood 12"x12"x1/4"
Glue
5 gallon bucket
rare earth magnet
miscellaneous screws, bolts, nuts
https://youtu.be/QkyBTy8h40s
I cut out a piece of 1/4" plywood to fit over the bucket. Trace out the enclosure on this and cut that out. Glue the trap door to the enclosure. Mount the enclosure to the plywood. Mount the thru beam sensors to the enclosure. Mount the servo to the servo mount. Connect the closing arm to the servo. Mount the servo to the plywood. Wire the servo to the arduino. Wire the photo sensor to the arduino. I screwed a large washer to bottom of the trap door and glued a rare earth magnet from an old harddrive to the plywood to keep the trap door closed. Need to play around with magnet position, needs to hold the trap door closed but not so strongly that the servo can't pull it open. Tie a piece of string to the closing arm and attach other end to the trap door. Adjust length as need.
Program the arduino, spread some peanut butter on the far end of the trap enclosure and give it a test.
Wiring schematic and Arduino program included.
Parts used: ( all available from amazon.com)
Servo: MG995
Arduino: Nano
Arduino Nano screw terminal adaptor
Adafruit Accessories IR Break Beam Sensor - 3mm
Wallwart 9v 2000ma
Plywood 12"x12"x1/4"
Glue
5 gallon bucket
rare earth magnet
miscellaneous screws, bolts, nuts
https://youtu.be/QkyBTy8h40s
Similar models
thingiverse
free

LACK Enclosure Magnetic Door Handles by coreyegan
...e designed to be mounted (glued) to lower edge of the enclosure acrylic doors, with the inset magnets to secure the doors closed.
thingiverse
free

Self-Resetting Mouse Trap by stubbornmoose
...counterweight, a standard 5 gal bucket, a 1/2" x 1/16" rare earth magnet, and a paperclip or other piece of stiff wire.
thingiverse
free

Enclosure for Arduino Nano and ULN2003 by atlantisq
...o pieces.
designed to work with the astra tracker: https://www.thingiverse.com/thing:4761585 but should work with other projects.
thingiverse
free
Triphase current datalogger CASE for Arduino nano by Blesino
...u only need 4 self-tapping screws (2,9x10mm) to mount it.
electronics and programming according to openenergymonitor.org website.
thingiverse
free

Magnetic Door Handles by wwendorf
...in the first handle is oriented to the south pole in the other handle, otherwise, you will have a door opener, not a door closer.
thingiverse
free
Servo mount for ultrasonic sensor HC-SR05 by elliot4711
...te the sensor. the cutout fits a roughly 30mm servo arm and has a hole for a small screw to secure it to the servo arm if needed.
thingiverse
free

12mm x 2mm magnet door stopper by TheNightDreamer
...for a 5mm head screw to... well to screw it.
my 3d printer enclosure's door kept opening so i designed that to keep it closed
thingiverse
free

DustShoe V5.0 - RSCNC32 RPM Sensor by adiasmesquita
...ring diagram photo:
arduino nano
lcd1602 i2c
hall sensor module
circular magnet diameter 6 mm x 3 mm
https://youtu.be/-gebnvgt9g0
thingiverse
free

Magnetic Door Catch by hermanrock
...ed.
used #4 x 3/8" screw
magnet from harbor freight: http://www.harborfreight.com/10-piece-rare-earth-magnets-67488.html
thingiverse
free

servo mount RR turn-out by schipcas
... 2mm screws. the steel wire is a 0.6 mm welding wire, but also possible for other materials.with arduino you can drive the servo.
Driven
turbosquid
$50
CHAIN DRIVEN CONVEYOR
... available on turbo squid, the world's leading provider of digital 3d models for visualization, films, television, and games.
3d_export
free
driven shaft of the lump crusher
...driven shaft of the lump crusher
3dexport
3d_export
$27
n95 full servo driven mask printer
...n95 full servo driven mask printer
3dexport
n95 full servo driven mask printer
turbosquid
$16

(Project) Food packing helper machine with holding clamp and press table driven by an actuator
... available on turbo squid, the world's leading provider of digital 3d models for visualization, films, television, and games.
3d_export
$47
the fifth generation of one driven two new mask machine
...ing, lamination, pressing, ear band tapping, ultrasonic, etc. the structure of the model is detailed, including model parameters.
3d_export
$15
industrial belt-driven air cooler
...leaning up necessary, just drop your models into the scene and start rendering/texturing. no special plugin needed to open scene.
3d_export
free

golf cart
...golf cart 3dexport golf cart for golfers to be driven in...
3d_export
$10
design and assembly of pulley
...pulley 3d model which is used for drive and driven ...
archive3d
free

Windmill 3D Model
...windmill 3d model archive3d wind turbine wind-driven powerplant wind-electric set windmill n181208 - 3d model (*.gsm+*.3ds)...
3d_export
$30
Compressed Air Engine 3D Model
...motor flywheel shaft camshaft piston valve block engineering compressed-air driven compressed air engine 3d model zenmunster 92451...
Trap
archibase_planet
free

Trap
...trap
archibase planet
trap playground
trap - 3d model for interior 3d visualization.
turbosquid
$10
Animal Trapping - Bamboo Trap
...g - bamboo trap for download as 3ds, lwo, obj, blend, and dae on turbosquid: 3d models for games, architecture, videos. (1179483)
3d_export
free

spring trap
...spring trap
3dexport
just a free fnaf spring trap
turbosquid
$7

Traps
... available on turbo squid, the world's leading provider of digital 3d models for visualization, films, television, and games.
turbosquid
$10

Animal Trapping - Leg-hold trap
...- leg-hold trap for download as 3ds, lwo, obj, blend, and dae on turbosquid: 3d models for games, architecture, videos. (1178754)
archive3d
free

Trap 3D Model
...trap 3d model
archive3d
trap playground
trap - 3d model for interior 3d visualization.
3d_export
$25
Trap 3D Model
...trap 3d model
3dexport
trap hunter steel spring lure ruse mousetrap
trap 3d model ribnadzor 60575 3dexport
turbosquid
$10
Cartoon trap
...rbosquid
royalty free 3d model cartoon trap for download as on turbosquid: 3d models for games, architecture, videos. (1674027)
turbosquid
$2
Wooden trap
...urbosquid
royalty free 3d model wooden trap for download as on turbosquid: 3d models for games, architecture, videos. (1641947)
turbosquid
$30
Metal Trap
...bosquid
royalty free 3d model metal trap for download as fbx on turbosquid: 3d models for games, architecture, videos. (1439394)
Mouse
3d_export
$5

mouse
...mouse
3dexport
stylish computer mouse
3d_export
$5

mouse
...mouse
3dexport
stylish computer mouse
3ddd
$1

Mouse
...mouse
3ddd
мышка
a simple mouse
3d_ocean
$5

mouse
...ocean
3d models computer electronics mouse
silver color 3d mouse. this model has been locked to render. computer mouse 3d models.
archibase_planet
free

Mouse
...mouse
archibase planet
computer mouse equipment technique
mouse - 3d model for interior 3d visualization.
archibase_planet
free

Mouse
...mouse
archibase planet
mouse office computerization
pro mouse - 3d model for interior 3d visualization.
turbosquid
$30

mouse trap with mouse
... available on turbo squid, the world's leading provider of digital 3d models for visualization, films, television, and games.
turbosquid
$12

Mouse and Mouse Pad
... available on turbo squid, the world's leading provider of digital 3d models for visualization, films, television, and games.
3d_export
$10

mouse
...mouse
3dexport
computer mouse model. my customized version of logitech m171.
3d_ocean
$5

Mouse
...ls bust characters model mouse sculpture statuette
3d model, statuette mouse. contents: 3d files fbx, obj,max(2011) + uv mapping.
Servo
turbosquid
$30
Servo
...d model servo for download as obj, blend, dae, stl, and sldpr on turbosquid: 3d models for games, architecture, videos. (1394011)
3d_export
$5

servo motor
...tor
3dexport
it's a simple part of servo motor 0.75kw for used in machines assembly to show specified motor in own project.
turbosquid
$1

Servo Moter
...quid
royalty free 3d model servo moter for download as blend on turbosquid: 3d models for games, architecture, videos. (1650816)
turbosquid
free
Motor/Servo
...osquid
royalty free 3d model motor/servo for download as obj on turbosquid: 3d models for games, architecture, videos. (1522522)
turbosquid
$60

Servo Skull
...
royalty free 3d model servo skull for download as ma and fbx on turbosquid: 3d models for games, architecture, videos. (1318573)
3d_export
$5
Servo 3D Model
...rvo 3d model
3dexport
servo
servo 3d model download .c4d .max .obj .fbx .ma .lwo .3ds .3dm .stl pasqualesiciliano 104590 3dexport
turbosquid
$50
Servo Motor
... available on turbo squid, the world's leading provider of digital 3d models for visualization, films, television, and games.
turbosquid
$49
Servo Motor
...model servo motor for download as 3ds, max, obj, fbx, and stl on turbosquid: 3d models for games, architecture, videos. (1324153)
turbosquid
$29
Servo Set
... available on turbo squid, the world's leading provider of digital 3d models for visualization, films, television, and games.
turbosquid
$10
machine servo
... available on turbo squid, the world's leading provider of digital 3d models for visualization, films, television, and games.
Electronic
turbosquid
$1

electron
...urbosquid
royalty free 3d model electron for download as max on turbosquid: 3d models for games, architecture, videos. (1157488)
turbosquid
$50

electronic
...
royalty free 3d model electronic for download as max and obj on turbosquid: 3d models for games, architecture, videos. (1289427)
turbosquid
$40

Electron
... available on turbo squid, the world's leading provider of digital 3d models for visualization, films, television, and games.
3d_ocean
$8
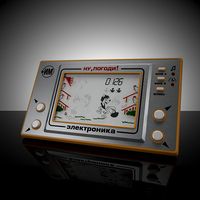
Electronic game
...electronic game
3docean
electronic games nu pogody wait a minute well
electronic game “well, wait a minute”, “nu pogody”
3ddd
$1
Brilux Electronic
...brilux electronic
3ddd
подвес. brilux electronic. польша. материалы настроены.
3d_export
free

electronic shop
...lectronic shop with high quality interior and exterior. it has tvs smartphone play station printer and many more electronic item.
3ddd
$1

Термостаты OJ Electronics
...ермостаты oj electronics
3ddd
oj electronics , термостат
термостаты фирмы oj electronics
3d_export
$8

electron 714
...electron 714
3dexport
game ready model for export to unreal engine soviet tv electron 714 pbr 4k
3ddd
$1

Термостат OJ Electronics
... oj electronics
3ddd
oj electronics , термостат
термостат occ2-1991 фирмы oj electronics
turbosquid
$60
Electronics Stuff
...
royalty free 3d model electronics stuff for download as max on turbosquid: 3d models for games, architecture, videos. (1624680)