Thingiverse

Electric Spinning Wheel by ChPech
by Thingiverse
Last crawled date: 3 years ago
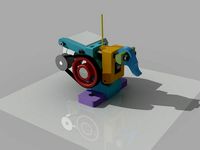
Electric Spinning Wheel
This is a spinning wheel with a big orifice of 25mm useful for making art yarns.
I have printed everything with a e3d v6 volcano 0.8mm nozzle in PETG, layer heights from 0.2mm to 0.4mm without any support.
Bobbin:
1x Bobbin_A
1x Bobbin_B
2x Bobbin_Shim
2x 6903 Bearing
Print 1x Bobbin_A, 1x Bobbin_B and 2x Bobbin_Shim.
Drill open the hole on the bottom of Bobbin_B (the closed hole makes it print without support). - Press both together.
Put in one bearing at the top and one at the bottom.
Insert a shim into each bearing.
Everything should be press fit, but depending on the printer a bit of sanding or gluing might be required.
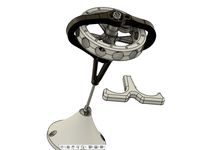
Flyer:
1x Flyer_Body
2x Flyer_Clip
2x Flyer_Ring
1x 6007 Bearing
2x Aluminium Rod 8mmx250mm
1x Steel Rod 10mmx280mm (Alu should work too)
Print 1x Flyer_Body, 2x Flyer_Clip and 2x Flyer_Ring
Sand the surfaces where the wool will pass (maybe even laquer)
Sand, file or grind the end of the steel rod so it fits in Drive_Coupler
Put the 3 rods into the Flyer_Body and add Flyer_Clips and Flyer_Rings
Tensioner:
1x Tensioner_Block
1x Tensioner_Wheel
1x Synthetic Cord
3x Ring Screw Hook
1x Dual Hook Spring
4x M3x30 (up to M3x40) Screw
4x M3 Square Nut
4x M3 Washer
Print 1x Tensioner_Block and 1x Tensioner_Wheel
The spring should be soft, you can combine multiple springs in series to make it softer.
Mount to the Base_Plate according to the picture, the two hooks at the Bobbin should be placed aligning with the bobbin because the Cord will hold it in this position.
From there the cord can be routed anywhere, the Tensioner_Block can also be anywhere.
Front:
1x Front_Top
1x Front_Bottom
1x Front_Hook
4x Front_Joint
1x Front_Cleat
1x Front_Knob
2x 2mm Nail or thick wire
1x KY-040 Rotary Encoder
3x M5x35 Screws
3x M5 Locknuts (other nuts will work too)
6x M5 Washers (bottom washers can be bigger if possible)
Print 1x Front_Top, 1x Front_Bottom, 1x Front_Hook, 4x Front_Joint, 1x Front_Cleat and 1x Front_Knob
Put the Front_Bottom at the front center of the Base_Plate and drill 5mm holes for the screws, 8mm-12mm for the cable of the KY-040
Shorten the axis of the KY-040 to about 5mm
Put 5 wires on the KY-040 put them through the hole and glue the KY-040 to the Front_Bottom, you can use color coded dupont wires, I put a SM2.54-5P connector at the end to later connect to the Arduino
Put the Front_Knob on the KY-040
Screw the Front_Bottom to the Base_Plate
Glue 2 Front_Joint into Front_Top and the other 2 into Front_Bottom
Connect Front_Bottom and Front_Top by interleaving the Front_Joints and fix with a nail
Fix the Front_Hook to the Front_Top with a nail too
Put Front_Cleat into Front_Bottom, this is for parking the wool while pausing spinning
Footswitch:
1x Footswitch_Pin
1x Footswitch_Top
1x Footswitch_Bottom
1x Guitar Effect Button
4x M4x20 or M4x25 Screws
4x M4 Square Nut
1x ~2m Cable with at least 2 wires
1x Male and Female connector with at least 2 connections. Headphone or Guitar plugs will work best
Print 1x Footswitch_Pin, 1x Footswitch_Top and 1x Footswitch_Bottom
The Footswitch_Pin might need to be sanded a bit to slide smoothly into the Footswitch_Top
Pressfit the Footswitch_Pin onto the Guitar Effect Button
Solder the cable and screw everything together
Alternatively any generic binary foot switch will work too but not continous ones from sewing machines
Base:
1x wooden Base_Plate 250mm x 440mm
Some wood pieces as border or rubber feet
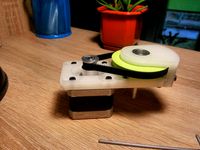
Drive:
1x Drive_Back
1x Drive_BackCap
1x Drive_Coupler
1x Drive_Front
2x 6000 Bearings
1x 6903 Bearing
1x Steel Rod 10mmx60mm (Alu should work too)
1x GT2 Pulley, 60 Teeth, 10mm ID
1x GT2 Pulley, 40 Teeth, 8mm ID
1x GT2 Belt, 280mm x 6mm closed
1x 57BLF01 BLDC Motor
1x JYQD BLDC Driver (the version without hall sensing should work too)
4x M5x45 Screws
3x M5x35 Screws
7x M5 Locknuts (other nuts will work too)
10x M5 Washers (bottom washers can be bigger if possible)
Print 1x Drive_Back, 1x Drive_BackCap, 1x Drive_Coupler and 1x Drive_Front
Shorten the motor cables and solder to the driver board
Mount the motor to Drive_Back the driver fits in the cavity below
Put in 4x M5x45 through the motor and Drive_Back but don't use the nuts yet
Put 2x 6000 Bearings in the top of Drive_Back
Put the 40 Teeth Pulley on the motor shaft, screw side facing to the front
Put the Belt on the 60 Teeth Pulley and put it in trough the top, this pulley needs to face the other way around
Push the Steel Rod through the 2 Bearings and Pulley
Align the pulleys so they move tight but without grinding and tighten the grub screws, if you use steel rod the top grub screw might not bite into it but you can file down a flat portion on the rod about 1mm deep at the area where the screw will be
Pressfit the coupler on the Steel Rod add the 6903 Bearing
Mount Drive_Front to Drive_Back, fasten with 4 Washers and 4 Locknuts
Finally the Drive can be mounted to the Base_Plate, this is not done by measurement but by fit, since some of the manual steps will have accumulated inaccuracy.
Insert the Flyer into the Front and put the Drive onto its end. Align everything so it fits without slack, then mark the holes to mount the Drive, also shorten the Base_Plate to be flush with the Drive
Fasten it with the remaining nuts and washers.
In the end all the wires need to be connected to an Arduino compatible microcontroller. I used SM2.54 Connectors to make it easier replacable and flashable. You can use any power supply from 12V 3A up to 48V but at 48V the wheel will run much faster. Controlling the spinning wheel is done with the rotary encoder, clicking the encoder or the foot switch will pause it, clicking it again will resume at the same speed and direction.
This is rather long, there might be mistakes in here. Feel free to ask questions.
Firmware:https://github.com/ChristophPech/Spinner
Parts Sources:
Guitar Effect Button: https://www.aliexpress.com/item/1pc-SPST-Momentary-Soft-Touch-Push-Button-Stomp-Foot-Pedal-Electric-Guitar-Switch-Hot-Sale/32697477435.html
GT2 Pulley 60 Teeth: https://www.aliexpress.com/item/High-quality-1pcs-GT2-60teeth-Timing-Pulley-GT2-60-teeth-bore-5mm-6-35mm-8mm-10mm/32719419636.html
GT2 Pulley 40 Teeth: https://www.aliexpress.com/item/Free-shipping-1pcs-lot-Alumium-GT2-40teeth-Timing-Pulley-Bore-6mm-for-6mm-Width-GT2-Belt/32771396968.html
GT2 Belt: https://www.aliexpress.com/item/3D-printer-belt-closed-loop-rubber-GT2-timing-belt-200-2GT-6-length-110-112-200mm/32477498985.html
57BLF01 BLDC Motor: https://www.aliexpress.com/item/57BLF01-Brushless-DC-Motor-63W-24V-3000RPM-Nema-23-0-6N-m-Peak-CNC-Router-LONGS/32638118697.html
JYQD BLDC Driver: https://www.aliexpress.com/item/Motor-Controller-DC-Car-Driver-Board-12V-36V-500W-Brushless-Motor-Controller-Hall-Motor-Balanced-Car/32734523707.html
6000 Bearings: https://www.aliexpress.com/item/6000ZZ-Bearing-ABEC-5-10PCS-10x26x8-mm-Deep-
Groove-6000-ZZ-Ball-Bearings-6000Z-80100-Z/554970982.html
6903 Bearings: https://www.aliexpress.com/item/10pcs-Bearing-6903-6903RS-61903-2RS1-6903RZ-17x30x7-ABEC-3-MOCHU-Thin-Section-Shielded-Deep-Groove/32581561929.html
6007 Bearings: https://www.aliexpress.com/item/5pcs-bearing-6007-6007Z-6007ZZ-6007-2Z-35x62x14-Shielded-Deep-groove-ball-bearings-Single-row-P6/32625161658.html
6903 Bearings: https://www.aliexpress.com/item/10pcs-Bearing-6903-6903RS-61903-2RS1-6903RZ-17x30x7-ABEC-3-MOCHU-Thin-Section-Shielded-Deep-Groove/32581561929.html
KY-040 Rotary Encoder: https://www.aliexpress.com/item/5pcs-lot-KY-040-Rotary-Encoder-sensor-Module-for-arduino-Free-Shipping-Dropshipping/32293140596.html
Arduino Nano: https://www.aliexpress.com/item/Nano-V3-ATmega328-CH340G-Micro-USB-Pin-headers-NOT-soldered-Compatible-for-Arduino-Nano-V3-0/32664577152.html
SM2.54 Connectors: https://www.aliexpress.com/item/SM2-54-Kits-20-sets-Kit-in-box-2p-3p-4p-5p-2-54mm-Pitch-Female/32699760809.html
Action:https://www.youtube.com/watch?v=xmsiC8HChfQ
This is a spinning wheel with a big orifice of 25mm useful for making art yarns.
I have printed everything with a e3d v6 volcano 0.8mm nozzle in PETG, layer heights from 0.2mm to 0.4mm without any support.
Bobbin:
1x Bobbin_A
1x Bobbin_B
2x Bobbin_Shim
2x 6903 Bearing
Print 1x Bobbin_A, 1x Bobbin_B and 2x Bobbin_Shim.
Drill open the hole on the bottom of Bobbin_B (the closed hole makes it print without support). - Press both together.
Put in one bearing at the top and one at the bottom.
Insert a shim into each bearing.
Everything should be press fit, but depending on the printer a bit of sanding or gluing might be required.
Flyer:
1x Flyer_Body
2x Flyer_Clip
2x Flyer_Ring
1x 6007 Bearing
2x Aluminium Rod 8mmx250mm
1x Steel Rod 10mmx280mm (Alu should work too)
Print 1x Flyer_Body, 2x Flyer_Clip and 2x Flyer_Ring
Sand the surfaces where the wool will pass (maybe even laquer)
Sand, file or grind the end of the steel rod so it fits in Drive_Coupler
Put the 3 rods into the Flyer_Body and add Flyer_Clips and Flyer_Rings
Tensioner:
1x Tensioner_Block
1x Tensioner_Wheel
1x Synthetic Cord
3x Ring Screw Hook
1x Dual Hook Spring
4x M3x30 (up to M3x40) Screw
4x M3 Square Nut
4x M3 Washer
Print 1x Tensioner_Block and 1x Tensioner_Wheel
The spring should be soft, you can combine multiple springs in series to make it softer.
Mount to the Base_Plate according to the picture, the two hooks at the Bobbin should be placed aligning with the bobbin because the Cord will hold it in this position.
From there the cord can be routed anywhere, the Tensioner_Block can also be anywhere.
Front:
1x Front_Top
1x Front_Bottom
1x Front_Hook
4x Front_Joint
1x Front_Cleat
1x Front_Knob
2x 2mm Nail or thick wire
1x KY-040 Rotary Encoder
3x M5x35 Screws
3x M5 Locknuts (other nuts will work too)
6x M5 Washers (bottom washers can be bigger if possible)
Print 1x Front_Top, 1x Front_Bottom, 1x Front_Hook, 4x Front_Joint, 1x Front_Cleat and 1x Front_Knob
Put the Front_Bottom at the front center of the Base_Plate and drill 5mm holes for the screws, 8mm-12mm for the cable of the KY-040
Shorten the axis of the KY-040 to about 5mm
Put 5 wires on the KY-040 put them through the hole and glue the KY-040 to the Front_Bottom, you can use color coded dupont wires, I put a SM2.54-5P connector at the end to later connect to the Arduino
Put the Front_Knob on the KY-040
Screw the Front_Bottom to the Base_Plate
Glue 2 Front_Joint into Front_Top and the other 2 into Front_Bottom
Connect Front_Bottom and Front_Top by interleaving the Front_Joints and fix with a nail
Fix the Front_Hook to the Front_Top with a nail too
Put Front_Cleat into Front_Bottom, this is for parking the wool while pausing spinning
Footswitch:
1x Footswitch_Pin
1x Footswitch_Top
1x Footswitch_Bottom
1x Guitar Effect Button
4x M4x20 or M4x25 Screws
4x M4 Square Nut
1x ~2m Cable with at least 2 wires
1x Male and Female connector with at least 2 connections. Headphone or Guitar plugs will work best
Print 1x Footswitch_Pin, 1x Footswitch_Top and 1x Footswitch_Bottom
The Footswitch_Pin might need to be sanded a bit to slide smoothly into the Footswitch_Top
Pressfit the Footswitch_Pin onto the Guitar Effect Button
Solder the cable and screw everything together
Alternatively any generic binary foot switch will work too but not continous ones from sewing machines
Base:
1x wooden Base_Plate 250mm x 440mm
Some wood pieces as border or rubber feet
Drive:
1x Drive_Back
1x Drive_BackCap
1x Drive_Coupler
1x Drive_Front
2x 6000 Bearings
1x 6903 Bearing
1x Steel Rod 10mmx60mm (Alu should work too)
1x GT2 Pulley, 60 Teeth, 10mm ID
1x GT2 Pulley, 40 Teeth, 8mm ID
1x GT2 Belt, 280mm x 6mm closed
1x 57BLF01 BLDC Motor
1x JYQD BLDC Driver (the version without hall sensing should work too)
4x M5x45 Screws
3x M5x35 Screws
7x M5 Locknuts (other nuts will work too)
10x M5 Washers (bottom washers can be bigger if possible)
Print 1x Drive_Back, 1x Drive_BackCap, 1x Drive_Coupler and 1x Drive_Front
Shorten the motor cables and solder to the driver board
Mount the motor to Drive_Back the driver fits in the cavity below
Put in 4x M5x45 through the motor and Drive_Back but don't use the nuts yet
Put 2x 6000 Bearings in the top of Drive_Back
Put the 40 Teeth Pulley on the motor shaft, screw side facing to the front
Put the Belt on the 60 Teeth Pulley and put it in trough the top, this pulley needs to face the other way around
Push the Steel Rod through the 2 Bearings and Pulley
Align the pulleys so they move tight but without grinding and tighten the grub screws, if you use steel rod the top grub screw might not bite into it but you can file down a flat portion on the rod about 1mm deep at the area where the screw will be
Pressfit the coupler on the Steel Rod add the 6903 Bearing
Mount Drive_Front to Drive_Back, fasten with 4 Washers and 4 Locknuts
Finally the Drive can be mounted to the Base_Plate, this is not done by measurement but by fit, since some of the manual steps will have accumulated inaccuracy.
Insert the Flyer into the Front and put the Drive onto its end. Align everything so it fits without slack, then mark the holes to mount the Drive, also shorten the Base_Plate to be flush with the Drive
Fasten it with the remaining nuts and washers.
In the end all the wires need to be connected to an Arduino compatible microcontroller. I used SM2.54 Connectors to make it easier replacable and flashable. You can use any power supply from 12V 3A up to 48V but at 48V the wheel will run much faster. Controlling the spinning wheel is done with the rotary encoder, clicking the encoder or the foot switch will pause it, clicking it again will resume at the same speed and direction.
This is rather long, there might be mistakes in here. Feel free to ask questions.
Firmware:https://github.com/ChristophPech/Spinner
Parts Sources:
Guitar Effect Button: https://www.aliexpress.com/item/1pc-SPST-Momentary-Soft-Touch-Push-Button-Stomp-Foot-Pedal-Electric-Guitar-Switch-Hot-Sale/32697477435.html
GT2 Pulley 60 Teeth: https://www.aliexpress.com/item/High-quality-1pcs-GT2-60teeth-Timing-Pulley-GT2-60-teeth-bore-5mm-6-35mm-8mm-10mm/32719419636.html
GT2 Pulley 40 Teeth: https://www.aliexpress.com/item/Free-shipping-1pcs-lot-Alumium-GT2-40teeth-Timing-Pulley-Bore-6mm-for-6mm-Width-GT2-Belt/32771396968.html
GT2 Belt: https://www.aliexpress.com/item/3D-printer-belt-closed-loop-rubber-GT2-timing-belt-200-2GT-6-length-110-112-200mm/32477498985.html
57BLF01 BLDC Motor: https://www.aliexpress.com/item/57BLF01-Brushless-DC-Motor-63W-24V-3000RPM-Nema-23-0-6N-m-Peak-CNC-Router-LONGS/32638118697.html
JYQD BLDC Driver: https://www.aliexpress.com/item/Motor-Controller-DC-Car-Driver-Board-12V-36V-500W-Brushless-Motor-Controller-Hall-Motor-Balanced-Car/32734523707.html
6000 Bearings: https://www.aliexpress.com/item/6000ZZ-Bearing-ABEC-5-10PCS-10x26x8-mm-Deep-
Groove-6000-ZZ-Ball-Bearings-6000Z-80100-Z/554970982.html
6903 Bearings: https://www.aliexpress.com/item/10pcs-Bearing-6903-6903RS-61903-2RS1-6903RZ-17x30x7-ABEC-3-MOCHU-Thin-Section-Shielded-Deep-Groove/32581561929.html
6007 Bearings: https://www.aliexpress.com/item/5pcs-bearing-6007-6007Z-6007ZZ-6007-2Z-35x62x14-Shielded-Deep-groove-ball-bearings-Single-row-P6/32625161658.html
6903 Bearings: https://www.aliexpress.com/item/10pcs-Bearing-6903-6903RS-61903-2RS1-6903RZ-17x30x7-ABEC-3-MOCHU-Thin-Section-Shielded-Deep-Groove/32581561929.html
KY-040 Rotary Encoder: https://www.aliexpress.com/item/5pcs-lot-KY-040-Rotary-Encoder-sensor-Module-for-arduino-Free-Shipping-Dropshipping/32293140596.html
Arduino Nano: https://www.aliexpress.com/item/Nano-V3-ATmega328-CH340G-Micro-USB-Pin-headers-NOT-soldered-Compatible-for-Arduino-Nano-V3-0/32664577152.html
SM2.54 Connectors: https://www.aliexpress.com/item/SM2-54-Kits-20-sets-Kit-in-box-2p-3p-4p-5p-2-54mm-Pitch-Female/32699760809.html
Action:https://www.youtube.com/watch?v=xmsiC8HChfQ
Similar models
thingiverse
free

Anet A8 single motor Z axis drive by osadchy
...he original 400 to 800)
hope i included everything here. if you find anything missing, please comment and i'll answer/update.
thingiverse
free
Compact Belt Drive Extruder by loco
...) 608 bearing
(1x) 688 bearing
(1x) 8x18mm smooth rod or threaded rod
(2x) m4x50
(2x) m4x20
(1x) m3x30
(3x) m3x10
(4x) m4 hex nut
thingiverse
free

NEMA17 Universal Belted 2:1 Reduction Drive by mildw4ve
...rews
2x m3x25 socket hex screws
4x m3x25 or longer socket hex screws for mounting the top plate and anything that might be on it.
thingiverse
free

Tevo Tarantula Single Motor Dual Z Axis by olala2
...ng 8mm - not sure about translation to english and haven´t got link because i am using my 2nd 20teeth gt2 timing pulley bore 8mm)
thingiverse
free
K40 (with wheels) Adjustable Bed by psaik
...ps://www.aliexpress.com/item/free-shipping-1pcs-lot-gt2-1140-closed-loop-rubber-2gt-timing-belt-1140-gt2-6-teeth/32791435275.html
thingiverse
free

Openbeam Printer by xsmarty
...e
also i am using a 300mmx300mm silicon adhesive heatpad
i hope you enjoy my designhttps://www.youtube.com/watch?v=auoyjmhpzpw
thingiverse
free
Nema 17 belted reduction gear by D14
...earance for bolt and bearing to sit tighter. so, you need to adjust them.
links:
gt2-80t http://www.thingiverse.com/thing:1812138
thingiverse
free
Gyroscope
... screw 45mm
4x m6 nut
1x m6 bolt 25mm
12x m3 bolts 20mm
12x m3 nuts
12x balls 15,85mm
1x gt2 belt
1x gt2 pulley 6mm bore 20 teeth
thingiverse
free

GT2 30 teeth pulley for 5mm NEMA17 stepper motor by hlavaatch
...0 teeth pulley for gt2 belt with symmetric set screws to avoid off axis deformation.
requires 2x m3 nut and 2x m3 5mm grub screw.
thingiverse
free

UM reduced extruder for 3.0mm filament by EazyBreezy
... bearing 3x10x4
2x - 625 bearings 5x16x5
5x - m3 nuts
5x - m3x30 screws
1x - m3x12 screw
1x - little spring to the clamp filament
Chpech
thingiverse
free

Birdfeeder for Tits by ChPech
...birdfeeder for tits by chpech
thingiverse
birdfeeder prints without support on the vertical side.
thingiverse
free

Bike Bottle Holder by ChPech
...bike bottle holder by chpech
thingiverse
bottle holder for the bike, assemble with a m3 15 screw and a m3 locknut.
thingiverse
free

Syma X8C Propeller Guard by ChPech
...syma x8c propeller guard by chpech
thingiverse
the original propeller guard is too soft and hits the propeller.
thingiverse
free

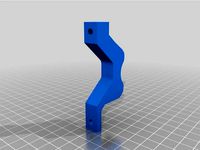
Shelf bracket by ChPech
... for my calligraphy shelf. it fits a 60mm x 20mm wood plank. i milled it from 5083 aluminium, but 3d printing will work fine too.
thingiverse
free
e3d BigBox Vertebrae by ChPech
...but to fit huge 2.3kg rolls of filament the vertebrae of the cable-spine are in the way.
these are vertebrae with more clearance.
thingiverse
free

MattMill Funnel Adapter by ChPech
...e malt mill mattmill
the funnel falls out easily so i made an adapter to hold it still.
new version is a bit longer and threaded.
thingiverse
free

Pen Holder for Schneider Breeze by ChPech
...eeze by chpech
thingiverse
if you have this pen: and want to use it like a real president you can now print a pen stand for it.
thingiverse
free

Raspberry Pi 7 in LCD Touch Screen by ChPech
...y pi 7 in lcd touch screen by chpech
thingiverse
raspberry pi 7 in lcd touch screen
template for creating custom housings/mounts
thingiverse
free

Chamfer Tool by ChPech
...s easily and prints without support.
additionally you need:
1x m5x20
1x m5 lock nut
1x m5 washer
2x m3x15
2x m3x20
4x m3 lock nut
thingiverse
free

Axis Coupler by ChPech
... was very wobbly. after trying three different from thingiverse not working/printing well on my 0.8 volcano nozzle i made my own.
Spinning
3ddd
free
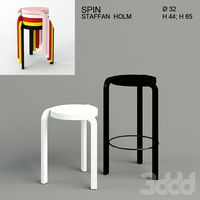
Spin
... , табурет
дизайнер staffan holmhttp://www.swedese.se/stools-and-benches/spin/
design_connected
$16

Spin
...spin
designconnected
driade spin computer generated 3d model. designed by lovegrove, ross.
design_connected
$13

Spin
...spin
designconnected
paola lenti spin computer generated 3d model. designed by lenti, paola.
design_connected
$13

Spin
...spin
designconnected
bbb emmebonacina spin computer generated 3d model. designed by barba, rené.
archibase_planet
free
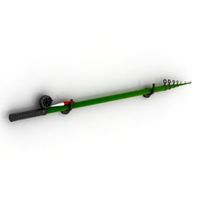
Spinning rod
...g rod
archibase planet
spinning rod spinning rod fishing-rod
spinning rod - 3d model (*.gsm+*.3ds) for interior 3d visualization.
3ddd
$1

Spin / Sumatra
...n / sumatra
3ddd
spin , польша
мягкая мебель (sumatra) польская фабрика "spin"
design_connected
$13

Spin Light
...spin light
designconnected
lasvit spin light computer generated 3d model. designed by koldova, lucie.
3d_export
$5
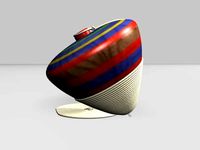
Spinning 3D Model
...spinning 3d model
3dexport
spinning toy tromp mexican mexico mexicano wood
spinning 3d model micro4004 54359 3dexport
3ddd
$1
Paola Lenti / Spin
...paola lenti / spin
3ddd
ковер
ковер spin фабрики paola lentihttp://www.paolalenti.it/en/product/show/spin/
turbosquid
$6

spin top
...urbosquid
royalty free 3d model spin top for download as obj on turbosquid: 3d models for games, architecture, videos. (1179779)
Electric
3d_export
$5

Electric pole
...electric pole
3dexport
electric pole for street, electricity line
3ddd
$1

electric mixer
...electric mixer
3ddd
electric mixer , миксер
electric mixer
3ddd
$1

electrical installation
...electrical installation
3ddd
electrical installation , розетка
electrical installation
turbosquid
$19
The electric water heater electric
... available on turbo squid, the world's leading provider of digital 3d models for visualization, films, television, and games.
turbosquid
free
Electrical Outlet electric splitter
... available on turbo squid, the world's leading provider of digital 3d models for visualization, films, television, and games.
3d_ocean
$20
Electric Guitar
...electric guitar
3docean
electric electric guitar guitar music music instrument
model of a electric guitar created in maya.
3d_ocean
$12

Electric Shaver
...electric shaver
3docean
electric electric shaver hair removal personal care shaver shaving
electric shaver created in 3ds max.
3ddd
$1

electrical switch
...h
3ddd
electrical , розетка
electrical switch from bticino company
series livinglight
3d_export
$7
Electric Conveyor
...electric conveyor
3dexport
electric conveyor
3d_export
$5
electric drums
...electric drums
3dexport
electric drums
Wheel
archibase_planet
free
Wheel
...l steering control steering wheel
wheel ship steering wheel n060215 - 3d model (*.gsm+*.3ds+*.max) for exterior 3d visualization.
3d_ocean
$14
Wheel
...wheel
3docean
car rim car wheel rim wheel
high poly car wheel design. 16,840 polys
3d_export
free
wheel
...wheel
3dexport
wheel
3d_export
free
wheel
...wheel
3dexport
wheel
3d_export
free
Wheel
...wheel
3dexport
wheel
3d_export
$5

wheel
...wheel
3dexport
wheel for car.
3d_export
$5
wheel
...wheel
3dexport
car wheel
3d_export
$5
wheel
...wheel
3dexport
car wheel
3d_export
$5
wheel
...wheel
3dexport
car wheel
3d_export
$5
wheel
...wheel
3dexport
car wheel