Thingiverse
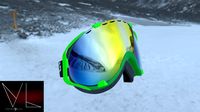
Eachine EV100 FPV Goggle shell replacement by Thump2010
by Thingiverse
Last crawled date: 3 years, 1 month ago
I bought the Eachine EV100 FPV goggles as my first goggles but they really didn't fit my big head, no matter how I adjusted the PID it would still blur the outside edges.
I found the replacement shell from Lichy but honestly nothing fit so I have spent a week fixing it.
I tried printing it in white so that it would not get as hot but no matter what I used ABS, PLA, PETG it lit up like a light bulb housing when the sun hit them so I printed them in black PETG.
I did however printed the face plate with a layer change, I did most of it white with the last 3-4 layers as black, that way the part that is closest to your face is white less heat conductive but still black on the inside to stop light leak.
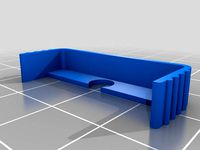
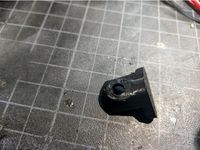
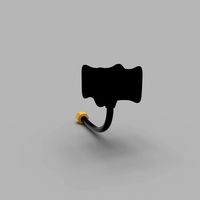
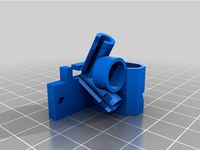
I made and included a new control arm as I popped mine off on accident on one of the 15 different versions of this that I swapped the parts out to and it is gone forever so I made a real simple basic replacement stick, it works fine.
Doing all of the below has made it from a purchase I was questioning to something that fits my head and works well.
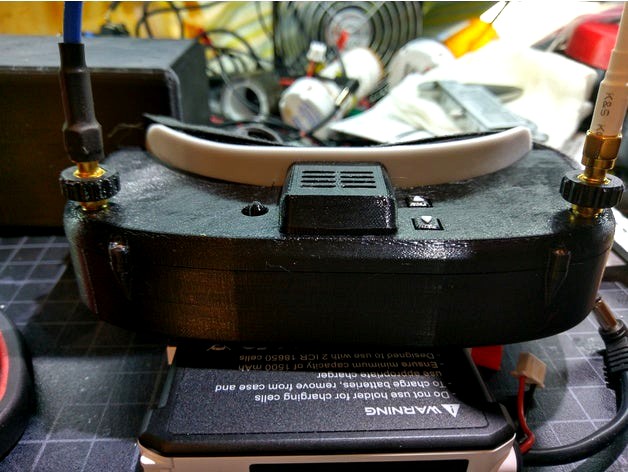
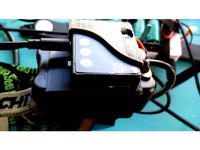
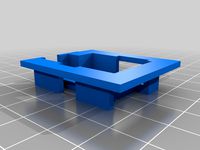
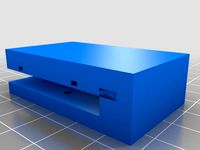
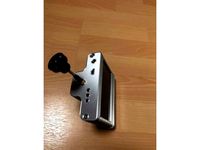
You should not have to force anything but the front of the top and bottom shell but that is as designed with a lip on the bottom shell to catch the inside of the top shell to make the shell nice and flush up front. (the picture shows the gap, it was the last thing I fixed and I didn't want to take new pictures but it does line up nicely now.)
Changes (that I can remember):
Made the shell 2mm shorter to get rid of the 2mm gap above the screens and to make the antennas screw on completely.
Fixed the screw distance so all the screws fit with the board no forcing it.
Fixed all the connector holes to make them fit the board.
Extended some of the plastic on the sides of the screens to close the gaps when PID is at extremes. (trying to get rid of all light leakage)
Added a lip to the front of the bottom half to catch the top of the case (it is the only thing on this design to snap fit) the bottom being the tall part seemed to bulge out a little from the top (you can see it in one of the pictures) this makes it nice and flush on the outside when the 2 halves are put together.
Fixed the screen posts being too big around so you had to force the screens down, the screens slide in place nicely now.
Added all the grooves under the screens that are in the original goggle.
Fixed the faceplate up to match the big nose cutout of the bottom half, the original was really small, much much smaller than the cutout in the bottom half.
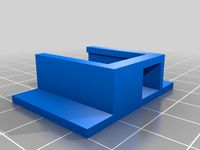
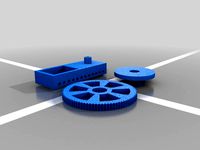
Made the fan holder fit the fan a bit better.
Made the fan holder so you can screw it on the top shell with some m2 screws. (you can glue it or snap fit it if you like but there was plenty of room for some m2 screw heads)
Fixed the buttons to work and line up with the button switches better.
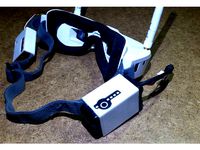
Based the faceplate shape off of a fatshark velcro pad that came with a fatshark foam kit that I bought.
Rounded a lot of edges to not cut into you or the head strap.
Made a second faceplate with a tab in the middle for a 3 point over the head, head strap.
A bunch more stuff that I can't remember right now but will come to me in the middle of the night.
I found the replacement shell from Lichy but honestly nothing fit so I have spent a week fixing it.
I tried printing it in white so that it would not get as hot but no matter what I used ABS, PLA, PETG it lit up like a light bulb housing when the sun hit them so I printed them in black PETG.
I did however printed the face plate with a layer change, I did most of it white with the last 3-4 layers as black, that way the part that is closest to your face is white less heat conductive but still black on the inside to stop light leak.
I made and included a new control arm as I popped mine off on accident on one of the 15 different versions of this that I swapped the parts out to and it is gone forever so I made a real simple basic replacement stick, it works fine.
Doing all of the below has made it from a purchase I was questioning to something that fits my head and works well.
You should not have to force anything but the front of the top and bottom shell but that is as designed with a lip on the bottom shell to catch the inside of the top shell to make the shell nice and flush up front. (the picture shows the gap, it was the last thing I fixed and I didn't want to take new pictures but it does line up nicely now.)
Changes (that I can remember):
Made the shell 2mm shorter to get rid of the 2mm gap above the screens and to make the antennas screw on completely.
Fixed the screw distance so all the screws fit with the board no forcing it.
Fixed all the connector holes to make them fit the board.
Extended some of the plastic on the sides of the screens to close the gaps when PID is at extremes. (trying to get rid of all light leakage)
Added a lip to the front of the bottom half to catch the top of the case (it is the only thing on this design to snap fit) the bottom being the tall part seemed to bulge out a little from the top (you can see it in one of the pictures) this makes it nice and flush on the outside when the 2 halves are put together.
Fixed the screen posts being too big around so you had to force the screens down, the screens slide in place nicely now.
Added all the grooves under the screens that are in the original goggle.
Fixed the faceplate up to match the big nose cutout of the bottom half, the original was really small, much much smaller than the cutout in the bottom half.
Made the fan holder fit the fan a bit better.
Made the fan holder so you can screw it on the top shell with some m2 screws. (you can glue it or snap fit it if you like but there was plenty of room for some m2 screw heads)
Fixed the buttons to work and line up with the button switches better.
Based the faceplate shape off of a fatshark velcro pad that came with a fatshark foam kit that I bought.
Rounded a lot of edges to not cut into you or the head strap.
Made a second faceplate with a tab in the middle for a 3 point over the head, head strap.
A bunch more stuff that I can't remember right now but will come to me in the middle of the night.
Similar models
thingiverse
free
Skyzone Goggles top Toggle adapter with Fatshark Faceplate by Enders13
...se
the fatshark faceplate fan covers the top adjuster for contrast and brightness so i made a simple slider to allow adjustment.
thingiverse
free

Skyzone V2 Goggle Faceplate less "Magic Way" for FatShark Foam Pad by MarenB
...had difficulties to draw it and gave up, when i received a printable, fitting component with at least a nice outside apperance ;)
thingiverse
free

Eachine EV100 DVR Retainer Clip by mobius85
...lip by mobius85
thingiverse
this was designed to clean up the placement of the dvr on my eachine ev100 goggles.
hope this helps!
thingiverse
free

Eachine EV100 Goggle Case by Wreckingball
...eachine ev100 goggle case by wreckingball
thingiverse
simple box for eachine ev100 googles
thingiverse
free

Furious True D Eachine EV100 Mount by Feldrik
...can also rotate the mount from the rp-sma connector if you want
it is fit to touch the goggles up and down so it doesn't move
thingiverse
free

Eachine DVR strap clips for Eachine EV100 by Joza
...ingiverse
simple lightweight clip to mount the eachine ev100 micro av recorder to a 19mm strap of the eachine ev100 fpv goggles.
thingiverse
free

Eachine EV100 Receiver Module Bay for Pro58 (and similar Modules) by Stefan3D
...ttps://blog.thesen.eu/eachine-ev100-fpv-brille-mit-fatshark-kompatiblem-empfaengermodul-nachruesten-mit-einem-pro58-pirx-fuellen/
thingiverse
free

RX5808 Pro Plus OSD Module Cover for Eachine EV100 Goggle by thuankts
...oggle by thuankts
thingiverse
this is my design for eachine ev100 goggle . using rx5808 pro plus with achilles firmware version.
thingiverse
free

Eachine EV100 Goggle Case
...ng:3097027
but i modeled a slimmer design for the case with to fit more the shape of goggles.
so the whole case get a smaler too.
thingiverse
free

Skyzone SKY01 Goggle / FatShark Dominator Headset Faceplate Mod Fan Spacer by teckn0
...t the faceplate isn't butted against it.
example build can be found at:https://johnbrisbois.com/content/skyzone_sky01_refresh
Ev100
thingiverse
free

EV100 by 3dprinteu
...ev100 by 3dprinteu
thingiverse
ev100 meene
thingiverse
free
Eachine EV100 Goggle Case by Wreckingball
...eachine ev100 goggle case by wreckingball
thingiverse
simple box for eachine ev100 googles
thingiverse
free
Eachine DVR strap clips for Eachine EV100 by Joza
...ingiverse
simple lightweight clip to mount the eachine ev100 micro av recorder to a 19mm strap of the eachine ev100 fpv goggles.
thingiverse
free

RX5808 Pro Plus Case for Eachine EV100 by Fanch_FPV
...rx5808 pro plus case for eachine ev100 by fanch_fpv
thingiverse
rx5808 pro plus case for eachine ev100
thingiverse
free
Eachine EV100 DVR Retainer Clip by mobius85
...lip by mobius85
thingiverse
this was designed to clean up the placement of the dvr on my eachine ev100 goggles.
hope this helps!
thingiverse
free
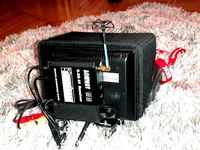
EV100 Battery Holder by marcotheboy
...his design holds onto the strap much more securely.
to insert the strap into the slot, it helps to stretch it while inserting it.
thingiverse
free
EV100 DVR Rubber Suit by deepdrones
...move your fpv goggles to start and stop the recording. must be printed in a flexible filament with a bit of stretch such as tpu.
thingiverse
free

EV100 ProDVR Strap Mount by marcotheboy
...the slot, it helps to stretch it while inserting it.
i updated it to version 2: the strap is now in the middle (it looks nicer).
thingiverse
free
EV100 battery case with DVR by andili
...ev100 battery case with dvr by andili
thingiverse
just added a dvr holder to the battery support from macabox
thingiverse
free

Eachine ev100 Cover by Lichy
...d probably fit the european head.
and improved distance from the eye makes the entire image visible.
it seems that fov is better.
Thump2010
thingiverse
free
XHOVER WIN3 SMA Mount by Thump2010
...3 sma mount by thump2010
thingiverse
a friend asked me to make an sma mount for his xhover win 3" frame.
f3d file included.
thingiverse
free

Duplex Ham Radio Hotspot by Thump2010
...spot.
put the hotspot hat together with the raspberry pi and then put it in the case.
the screws are m2, you will need 6 of them.
thingiverse
free

Malyan M180 Spool Holder by Thump2010
...use but being the same height as the originals and designed to used the bearings from the original holders.
added a 58 mm version
thingiverse
free

Box fan foot by Thump2010
...ould have been better with pla probably.
either way it worked well, fan is nice and stable now.
(forgive the z wobble in my pics)
thingiverse
free

Baby Bottle Disposable Liner Dispensor by Thump2010
... doesn't touch that part as the bottle is in the way, and the inside is protected by the other liners and the lid on the top.
thingiverse
free

Spin Brush sander by Thump2010
... is almost eight years old, who knows if they have changed since then.
here is a video of it working https://youtu.be/b9w12flegwe
thingiverse
free

Anycubic Linear Plus PSU Mount by Thump2010
...lel to the bottom edges instead of straight across the corner.
it uses the screws and nuts that come with the original psu mount.
thingiverse
free

FXT Viper Antenna Thumbscrew by Thump2010
...5.06: print setup → quality → horizontal expansion
simplify3d 3.x: other → dimensional adjustments → horizontal size compensation
thingiverse
free

Parametric Lipo Battery Protector by Thump2010
...eed to change the fusion 360 parameters mentioned above.
bonus feature: it gives the quad a very nice and flat surface to sit on.
thingiverse
free
Low profile RC transmitter wall hanger by Thump2010
...y hang an rc transmitter with a kickstand.
it was designed in fusion 360 but it is not parametric, just drawn. f3d file included.
Eachine
thingiverse
free
Eachine DVR strap clips for Eachine EV100 by Joza
...ingiverse
simple lightweight clip to mount the eachine ev100 micro av recorder to a 19mm strap of the eachine ev100 fpv goggles.
thingiverse
free

Eachine Twig Canopy
...eachine twig canopy
thingiverse
canopy for the eachine twig drone.
thingiverse
free
Support for the Eachine TS5828L
...or the eachine ts5828l
thingiverse
this is a support for the eachine video transmitter tx5828l. made it to use with zaggy wings.
thingiverse
free

Eachine TX02 by Cselloman
...eachine tx02 by cselloman
thingiverse
this is a 1:1 copy of the eachine tx02 cam. use it on your designs freely
thingiverse
free

Eachine ROTG02 Box by Lorent_Den
...eachine rotg02 box by lorent_den
thingiverse
eachine rotg02 box
thingiverse
free

ducts for eachine cvatar by dalodi
...ducts for eachine cvatar by dalodi
thingiverse
ducts for eachine cvatar
thingiverse
free

eachine e010 controller by ejpsx
...eachine e010 controller by ejpsx
thingiverse
eachine e010 controller
thingiverse
free

Mount for Eachine Pro58 module for Eachine VR D2 goggles
...ine vr d2 goggles
thingiverse
you can read more about the upgrade on: http://lll.mk/fpv/eachine-pro58-boxed-goggles-on-steroids/
thingiverse
free
eachine VTX LT200 case
...eachine vtx lt200 case
thingiverse
case for vtx eachine lt200
thingiverse
free

Eachine E010 stick by DaniF
...eachine e010 stick by danif
thingiverse
stick for rc eachine e010
Goggle
3ddd
$1

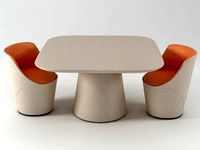
Goggle desk
...goggle desk
3ddd
goggle desk , стол
goggle desk стол для современных и амбициозных
3ddd
$1

Goggle Desk
... goggle desk , стол
goggle desk – стол для амбициозных и современных
turbosquid
$74

Goggles
... available on turbo squid, the world's leading provider of digital 3d models for visualization, films, television, and games.
turbosquid
$30

Goggles
... available on turbo squid, the world's leading provider of digital 3d models for visualization, films, television, and games.
3d_ocean
$17
Steampunk Goggles
...bj and max 10,11 and 13 version format. materials are included and it is based on mental ray renderer. also, main file include...
3d_ocean
$5

Goggle Desk
...al design by danny venlet for babini • all objects are properly named and grouped • model is fully textured with all materials...
3d_export
$20

safety goggles glasses
...safety goggles glasses
3dexport
safety goggles glasses
turbosquid
$10
Steampunk Goggles
...d
royalty free 3d model steampunk goggles for download as ma on turbosquid: 3d models for games, architecture, videos. (1537373)
turbosquid
$25
Steampunk Goggles
...el steampunk goggles for download as max, obj, fbx, and blend on turbosquid: 3d models for games, architecture, videos. (1490759)
turbosquid
$15
Ski goggles
...3d model ski goggles for download as 3ds, obj, fbx, and blend on turbosquid: 3d models for games, architecture, videos. (1271456)
Fpv
turbosquid
$1
FPV VTX Antenna
...e 3d model fpv vtx antenna for download as obj, fbx, and stl on turbosquid: 3d models for games, architecture, videos. (1230317)
3d_export
$9

Fpv logo 3D Model
...onogram vehicle part of auto transport 3d model logo emblem detailed high quality badge
fpv logo 3d model rmodeler 59628 3dexport
3d_export
$8
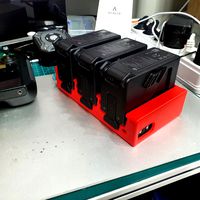
dji fpv battery slot holder
...er for 3 dji fpv batteries. holds perfectly without shaking. need 1 m3 countersunk head bolt. need to print 6 pin, 1 case, 1 cap.
3d_export
$10
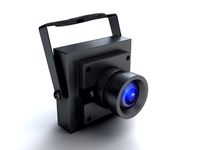
fpv camera hd 700tvl
...aterials are logically named<br>the main format is in 3ds max 2009.<br>satisfcation garranteed..<br>thank you !
thingiverse
free
FpV Mount (SOPORTE FPV) by elborjas1987
...fpv mount (soporte fpv) by elborjas1987
thingiverse
this is a fpv mount with the same holes of naza base.
thingiverse
free
fpv by tbutera
...fpv by tbutera
thingiverse
fpv
thingiverse
free
fpv by tbutera
...fpv by tbutera
thingiverse
fpv
thingiverse
free
FPV DRONE ROOSTER DJI FPV PART
...fpv drone rooster dji fpv part
thingiverse
fpv drone rooster dji fpv install part
thingiverse
free
FPV monitor
...tml?rmmds=myorder&cur_warehouse=cn
link for download : https://cults3d.com/fr/mod%c3%a8le-3d/divers/fpv-monitor-ecran-fpv-faf
thingiverse
free
FPV receiver mount for FPV display by petrex
...eceiver mount for fpv display by petrex
thingiverse
aomway receiver mount for field view 777 fpv monitor. with small cable tray.
Shell
archibase_planet
free
Shell
...shell
archibase planet
sports shell playground
sports shell 1 - 3d model (*.gsm+*.3ds) for interior 3d visualization.
design_connected
$16
Shell
...shell
designconnected
fasem international shell armchairs computer generated 3d model. designed by roberto lazzeroni.
3ddd
$1

Shell Chair
...shell chair
3ddd
hans wegner , shell
shell chair
design_connected
$13
Shell
...shell
designconnected
fiam italia shell coffee tables computer generated 3d model. designed by danny lane.
3ddd
$1

Shell armchair
...shell armchair
3ddd
shell
shell armchair
designer don't remember
turbosquid
$1
Shells
...
turbosquid
royalty free 3d model shells for download as max on turbosquid: 3d models for games, architecture, videos. (1449062)
turbosquid
$10

Shell
...quid
royalty free 3d model shell for download as stl and obj on turbosquid: 3d models for games, architecture, videos. (1583461)
turbosquid
free
Shells
...uid
free 3d model shells for download as blend, fbx, and obj on turbosquid: 3d models for games, architecture, videos. (1562122)
turbosquid
$49

Shell
...yalty free 3d model shell for download as blend, fbx, and obj on turbosquid: 3d models for games, architecture, videos. (1569496)
turbosquid
$1

Shell
...yalty free 3d model shell for download as blend, fbx, and obj on turbosquid: 3d models for games, architecture, videos. (1606504)
Replacement
3d_export
$12

replaceable bristle
...replaceable bristle
3dexport
this is 3d printable replaceable bristle toothbrush.
3d_export
$34
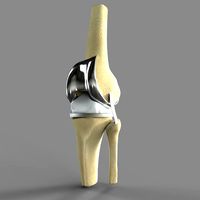
Knee Replacement
...h meets the lower leg. ... during a total knee replacement, the end of the femur bone is removed and replaced with a metal shell.
3d_export
$44
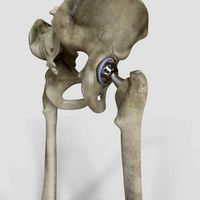
Hip Replacement
...omponents. the damaged femoral head is removed and replaced with a metal stem that is placed into the hollow center of the femur.
turbosquid
$59

Hip replacement
...el hip replacement for download as ma, c4d, lwo, lxo, and obj on turbosquid: 3d models for games, architecture, videos. (1520195)
turbosquid
$10

Module replacment station
...alty free 3d model module replacment station for download as on turbosquid: 3d models for games, architecture, videos. (1271271)
3d_export
$8
tool replacement gearbox
...tool replacement gearbox
3dexport
eccentric lifting mechanism, you can process according to available drawings.
turbosquid
$7

Globe Oil Atomizer Replacement Housing
... oil atomizer replacement housing for download as ige and stl on turbosquid: 3d models for games, architecture, videos. (1253839)
turbosquid
free

SLICE Ceramic Scapel (Replaceable Blade)
... (replaceable blade) for download as obj, fbx, blend, and dae on turbosquid: 3d models for games, architecture, videos. (1363525)
3d_export
$19
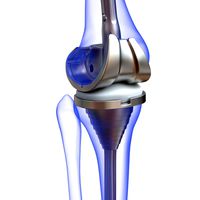
Knee Replacement Implant
...ntimeter<br>__________________________<br>poly count :<br>polygon count - 217440<br>vertex count - 108776
turbosquid
$19

(Project) Bad odor filtering sytem with support rail and pulley that assure a comfortable gel filter element replacement.
... available on turbo squid, the world's leading provider of digital 3d models for visualization, films, television, and games.