Thingiverse
E3D v5 or v6 X-Carriage mount for standard Prusa i3 by BoByS
by Thingiverse
Last crawled date: 4 years, 7 months ago
I'm uploading my files by request!
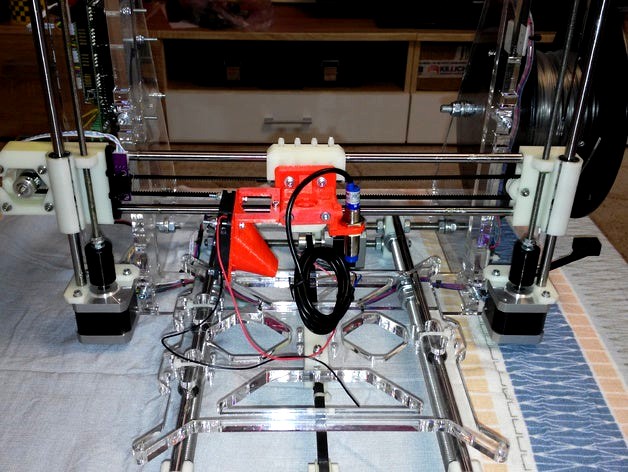
The Photo is OLD! My printer is working for like one month with this modification and I didn't had any issues with it! Great holder by Tech2C! If you don't want issues with collisions between the parts - read the bottom of this page (the PRO tips!!!).
It's for standard Prusa i3 X carriage - the "T"-shaped one. The holes are 23.5mm apart (I think my carriage is with 24mm spacing but they work on my printer) - measured with callipers. The sensor holder is for 12mm sensor! The screws are M3x16. The hotend is v6 or v5 (mine is v5).
The center of the nozzle is 31mm from the front face of the carriage (the original length is reduced to fit my Y axis movement - 200mm - the end-stop is triggered by the left LM8UU linear bearing).
My Marlin options for the sensor that are working just fine:
define X_PROBE_OFFSET_FROM_EXTRUDER 34 //To the RIGHT of the nozzle - in the 3D model --> 33.15mm
define Y_PROBE_OFFSET_FROM_EXTRUDER -7 //To the BACK of the nozzle - in the 3D model --> -14.125mm
define Z_PROBE_OFFSET_FROM_EXTRUDER -1.65 //HERE PLEASE, START AT 0! The minus means that my nozzle goes DOWN after the autobed leveling procedure!!!
For 18mm capacitive or inductive sensor of the original E3D holder made by Tech2C, please go here: http://www.thingiverse.com/thing:1132723 -> An impressive work by mariors50!
My make is here: http://www.thingiverse.com/make:164687
Update #1: Added mirrored versions of the carriage and the sensor holder -> For the sensor on the LEFT side!
Update #2: Added the 18mm sensor holder. It's universal and can be mounted on the right and on the left side of the carriage. The parameters (based on the 3D model): 39.5mm to the RIGHT of the hotend; 13.375mm to the BACK of the nozzle. Use these settings in Marlin! My 3D model was based on LJC18A3-B-Z/AY capacitive sensor - this is the one I have laying around (on my printer - I decided to upgrade to Aluminium heatbed so I have been using M12 Inductive sensor and I'm happy with the results). Be careful with the collisions between this sensor and the Right Z-axis motor coupler! I can't test this sensor! Try to play with the M3 screws that are holding the sensormount and try to rotate the sensor a little bit if you have big coupler on the Z-axis!
Ultimate PRO tip #1: The hot end clamp is tightened with M4 screws. Tighten the RIGHT one a little bit more on the standard Prusa i3! This will left some room between the PC Fan and the left motor coupler! The PC fan holder is fragile! You don't want to break it!
Ultimate PRO tip #2: As you can see, my holder has 2 mounting holes on top of the horizontal beam and 2 mounting holes on the bottom of it. If you need more space in the Z axis and fairly small couplers for the motors of it, you can mount the whole holder on the 2 bottom holes - this will rise the maximum Z axis travel with ~20mm.