Thingiverse

e3d Titan extruder mount for Fusebox CoreXY by phord
by Thingiverse
Last crawled date: 3 years, 1 month ago
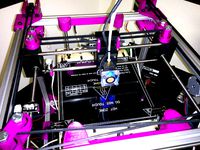
This is a redesign of the FuseBox CoreXY printer's print head. This uses a Titan extruder from e3D for direct-drive printing with either 3mm or 1.75mm filament. The carriage is about 15mm wider than the original one which reduces the usable X-axis width, and the cage fan on the back similarly reduces the Y-axis travel distance by about 10mm. The belt clips should work with the original belts and hardware.
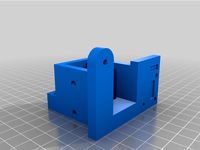
I moved the extruder body as far inward as I could to reduce the width. I had to raise the carriage platform to accommodate the belt heights. The hotend is raised well into the undercarriage. A fan duct cools the heat sink with directed air flow.
I added a mount for the BLTouch Z-probe from ANTCLABS. It works quite nicely once I got the height set correctly.
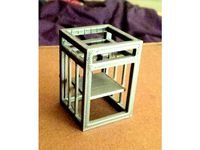
The STL is designed to hold the pancake extruder motor from e3D, 25mm deep. You can use a larger motor, but you might need to tweak the cage. The openscad files are quite parametric to allow for this.
The fan duct is tricky to assemble since it's way up inside the undercarriage and the heater block gets in the way. The scoop goes around the heat sink fins. You can spread it wider to get around the heater block and then force it up onto the heat sink. You may be able to screw the heater on after the duct is attached, but I had trouble with this on my first prototype. This new one gives more room and should be easier, but I haven't tried it.
The 50mm cage fan blows a lot more air than the original e3D fan. It's too much, really. I narrowed the fan duct to compensate some, but you may also need to slow the fan down or further restrict the air flow. Another option is to use the 30mm fan and mount it under the carriage.
I haven't designed a part cooling fan for this print head yet. That will be coming soon.
There are a couple of other tweaks to make, like better recessed nut captures. I'm printing with this head now, and it works well for me. I was worried it would be too heavy for this coreXY carriage, but it really is quite smooth.
I printed mine in PET-G, but I expect PLA, ABS or Nylon would work as well. PLA might get a little melty on the fan duct, though.
The fan duct has a small block under the scoop around the heatsink. This is a designed-in support structure and should be removed after printing. I did it this way because most slicers have difficulty providing support in just one location, and many of them fill up the fan duct where it's impossible to remove.
You will need a 50mm cage fan for the heat sink blower, and a 22mm m3 or m4 screw to affix the fan duct to the carriage (optional).
I moved the extruder body as far inward as I could to reduce the width. I had to raise the carriage platform to accommodate the belt heights. The hotend is raised well into the undercarriage. A fan duct cools the heat sink with directed air flow.
I added a mount for the BLTouch Z-probe from ANTCLABS. It works quite nicely once I got the height set correctly.
The STL is designed to hold the pancake extruder motor from e3D, 25mm deep. You can use a larger motor, but you might need to tweak the cage. The openscad files are quite parametric to allow for this.
The fan duct is tricky to assemble since it's way up inside the undercarriage and the heater block gets in the way. The scoop goes around the heat sink fins. You can spread it wider to get around the heater block and then force it up onto the heat sink. You may be able to screw the heater on after the duct is attached, but I had trouble with this on my first prototype. This new one gives more room and should be easier, but I haven't tried it.
The 50mm cage fan blows a lot more air than the original e3D fan. It's too much, really. I narrowed the fan duct to compensate some, but you may also need to slow the fan down or further restrict the air flow. Another option is to use the 30mm fan and mount it under the carriage.
I haven't designed a part cooling fan for this print head yet. That will be coming soon.
There are a couple of other tweaks to make, like better recessed nut captures. I'm printing with this head now, and it works well for me. I was worried it would be too heavy for this coreXY carriage, but it really is quite smooth.
I printed mine in PET-G, but I expect PLA, ABS or Nylon would work as well. PLA might get a little melty on the fan duct, though.
The fan duct has a small block under the scoop around the heatsink. This is a designed-in support structure and should be removed after printing. I did it this way because most slicers have difficulty providing support in just one location, and many of them fill up the fan duct where it's impossible to remove.
You will need a 50mm cage fan for the heat sink blower, and a 22mm m3 or m4 screw to affix the fan duct to the carriage (optional).
Similar models
thingiverse
free

E3D Chimera or Cyclops Filament Cooling 30mm Fan Shroud by Kzar42
...osen the fan screws from the extruder's heat sink until they clear the shroud's bezel, fit it in, and tighten the screws.
thingiverse
free

PJRAW MK1 E3D Modded Fan Duct by Silentwidow
...he heat block for me, so i modded the fan ducts to redirect the air down away from it.
https://www.thingiverse.com/thing:4628662
thingiverse
free

Original Prusa MINI E3D Standard Heater Block - X-Carriage R4 by Chrizz
...ard to do revisions internally because its infested with 50+ features and a bunch of useless extrusions and pointless sketches...
thingiverse
free

Titan Aero FanDuct - theUGLY by BogdanKecman
...tancer" ... also the white pieces on the part blower fan are also just a fat tpu washers i printed as screws are too long :)
thingiverse
free

TEVO TARANTULA E3DV6 PART COOLING FAN DUCT by Albatrossity
...so that the heater block sits inside the duct nicely without touching.
if you like it feel free to drop me a $$. it helps a lot!
grabcad
free

Tevo Tarantula Part cooling fan (suits my x carriage with e3dv6 hotend)
...so that the heater block sits inside the duct nicely without touching.
if you like it feel free to drop me a $$. it helps a lot!
thingiverse
free

Fan duct Tronxy and similar for 4020 fan
...fan ducts and also avoiding the layerfan's airflow to go back on the heatblock but it also works with the stock heating block
thingiverse
free

E3D Fan duct and Mendel 90 X carriage for LM10UU by sphereinabox
...able.
you should be able to use http://www.thingiverse.com/thing:91931 to duct air onto your part, but i haven't tried yet.
thingiverse
free

Extruder Cooler for Solidoodle and E3D V6 extruder by uzzors2k
...rflow wrapping around the extruder, i found this extruder cooler helped reduce print warp a lot. overhangs are also much cleaner.
thingiverse
free

E3D V6 split fan shroud by Old-Steve
.... i am working on a 3 fan model again.
related things:
effector 2640121
carriages 2653647
fan shroud 2846998
ubl adapter 2847002
Phord
thingiverse
free
Parametric Test Tube Rack by phord
...eful about the material you use to print this, especially if you deal with caustic chemicals or biological specimens in your lab.
thingiverse
free

Fusebox mods in OpenScad by phord
... made the cowling thinner (2.5mm)
note: axmod has generated several openscad redesigns based on this printer for his fb2020 remix
thingiverse
free

Flexy-fixed Greg's Wade's Extruder by phord
...ny trouble with it.
also, i renamed the files to match this thing's name and to avoid confusion with andrewbcn's version.
Fusebox
turbosquid
$5

Fusebox
...oyalty free 3d model fusebox for download as ma, fbx, and obj on turbosquid: 3d models for games, architecture, videos. (1629769)
3d_ocean
$5

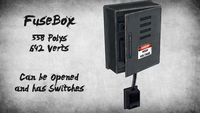
Electric Fusebox
...e fusebox can be opened and has 3 seperated fuse switches, also has a main button which can easy be animated. low poly (558 po...
turbosquid
$1

Fusebox-gameready
... available on turbo squid, the world's leading provider of digital 3d models for visualization, films, television, and games.
3d_export
$19
Electric Fusebox 3D Model
...n buttons switches game enviroment trigger ready low poly voltage high power
electric fusebox 3d model sickleadzdk 91280 3dexport
3d_export
free

Download free Fuse box 3D Model
...download free fuse box 3d model 3dexport fusebox fuse box blender fbx textured fuse box 3d model...
3d_ocean
$5
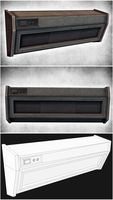
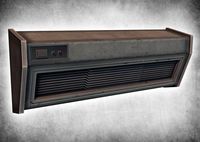
Air condition Unit 06
...air aircon appliance box con condition electric electronics environment fusebox game low poly small switches trigger unit voltage wall...
cg_studio
$15

Electric Fusebox3d model
...
cgstudio
.w3d .obj .max .fbx .3ds - electric fusebox 3d model, royalty free license available, instant download after purchase.
3d_export
$10

Urban Street Props Vol 1 3D Model
...bench air condition bollard cone crate drum barrels fence fusebox urban street props vol 1 3d model sickleadzdk 74914...
3d_export
$10
Air condition Unit 06 3D Model
...model 3dexport aircon air condition unit wind con box fusebox electric electronic switch button buttons switches game enviroment trigger...
3d_ocean
$35

Urban Street Props Vol 1
...crate drum dumpster enviroment props fence fire hydrant fps fusebox game game props low poly models pallet pallet truck...
Corexy
thingiverse
free

CoreXY by Kaz_tech
...corexy by kaz_tech
thingiverse
this is the model of corexy platform. i separately put the parts on this place.
thingiverse
free

corexy plotter by tjwan
...corexy plotter by tjwan
thingiverse
parts for corexy mill inspired by http://der-frickler.net/technik/corexyportal
thingiverse
free
ScribbleJ CoreXY Beta by ScribbleJ
...j/corexy-v1https://github.com/scribblej/corexy-v1#corexy-beta
full gallery of development photos here: http://imgur.com/a/donun
thingiverse
free

CoreXY Emblem by emkajot
...by emkajot
thingiverse
an emblem for your corexy printer.
size: 100mm x 38mm x 2mm.
update: added a version with a proper mount.
thingiverse
free

SolidCore CoreXY Carriage by shanehooper
...olidcore 3d printer. this design could be used in other corexy 3d printers.
also see:https://3ddistributed.com/corexy-3d-printer/
thingiverse
free
CoreXY 3D Printer Model by ReginaFabricam
...bricam
thingiverse
this is an original design of a corexy printer.https://www.tinkercad.com/things/jggr9qk4s4p-3d-printer-corexy
thingiverse
free

coreXY Upper structure Left
...corexy upper structure left
thingiverse
my customized corexy 3d printer upper left parts
thingiverse
free
CoreXY by frankie
...ing machines, etc. the design is described in greater detail at http://www.corexy.com . a video is at http://vimeo.com/40914530 .
thingiverse
free

Endstop block for CoreXY carriage by svkeulen
...endstop block for corexy carriage by svkeulen
thingiverse
endstop for corexy carriage
thingiverse
free
X carriage for the CoreXY MGN12 by hackerbijay
...x carriage for the corexy mgn12 by hackerbijay
thingiverse
x carriage for the corexy frame
Titan
design_connected
$18

Titan
...titan
designconnected
original btc titan computer generated 3d model.
3d_ocean
$25

RMS Titanic
...rms titanic
3docean
ship steamer titanic
3d model of the rms titanic
turbosquid
$49

Titan
...quid
royalty free 3d model titan for download as obj and ztl on turbosquid: 3d models for games, architecture, videos. (1314276)
turbosquid
$8

Titan
...d
royalty free 3d model titan for download as , fbx, and obj on turbosquid: 3d models for games, architecture, videos. (1545505)
3d_export
$15

eren yeager titan from attack on titan
...eren yeager titan from attack on titan
3dexport
3d model of eren titan
3d_export
$5
titanic new
...titanic new
3dexport
titanic 3d model normal quality for animation
3d_export
$100
Titan 3D Model
...titan 3d model
3dexport
silo launcher rocket titan
titan 3d model acquarius 37854 3dexport
3d_ocean
$25

Titan
...nfs nfshs one ps ps1 psone rod speed sports stakes titan transport vehicle
quality exterior and low polygon interior concept car.
3ddd
$1

Titanic Lamp(table)
...titanic lamp(table)
3ddd
titanic lamp(table)
turbosquid
$10

Titan chair
...osquid
royalty free 3d model titan chair for download as max on turbosquid: 3d models for games, architecture, videos. (1301533)
E3D
turbosquid
$23

E3D - Google Home
... 3d model e3d - google home for download as max, obj, and c4d on turbosquid: 3d models for games, architecture, videos. (1192509)
cg_studio
free

e3d model
...e3d model
cgstudio
- e 3d model, royalty free license available, instant download after purchase.
turbosquid
$2

Syringe C4D (E3D Ready)
...lty free 3d model syringe c4d (e3d ready) for download as c4d on turbosquid: 3d models for games, architecture, videos. (1336720)
turbosquid
$12

Microphone USB E3D and C4D
...ree 3d model microphone usb e3d & c4d for download as c4d on turbosquid: 3d models for games, architecture, videos. (1568216)
turbosquid
$29

E3D - OnePlus 6 Black
...model e3d - oneplus 6 black for download as max, obj, and c4d on turbosquid: 3d models for games, architecture, videos. (1358534)
turbosquid
$29

E3D - Motorola One 2018
...del e3d - motorola one 2018 for download as max, obj, and c4d on turbosquid: 3d models for games, architecture, videos. (1358533)
turbosquid
$29

E3D - Disney MagicBands 2
...l e3d - disney magicbands 2 for download as max, obj, and c4d on turbosquid: 3d models for games, architecture, videos. (1355515)
turbosquid
$29

E3D - Samsung Z4 Smartphone
...e3d - samsung z4 smartphone for download as max, obj, and c4d on turbosquid: 3d models for games, architecture, videos. (1182179)
turbosquid
$23

E3D - Razer Phone model
...del e3d - razer phone model for download as max, obj, and c4d on turbosquid: 3d models for games, architecture, videos. (1231207)
turbosquid
$23

E3D - Alcatel Idol 5
... model e3d - alcatel idol 5 for download as max, obj, and c4d on turbosquid: 3d models for games, architecture, videos. (1212799)
Extruder
3ddd
$1

Extruded Chair
...extruded chair
3ddd
extruded , tom dixon
inspired by tom dixon extruded chair
turbosquid
$15

Extruded Table
... extruded table for download as blend, dae, fbx, obj, and stl on turbosquid: 3d models for games, architecture, videos. (1634137)
turbosquid
$2

3D Printer Extruder
...d
royalty free 3d model 3d printer extruder for download as on turbosquid: 3d models for games, architecture, videos. (1537359)
turbosquid
$1

Zombie extruded text
...oyalty free 3d model zombie extruded text for download as obj on turbosquid: 3d models for games, architecture, videos. (1322198)
turbosquid
$4

Extruder conical screw
...el extruder conical screw for download as sldpr, ige, and stl on turbosquid: 3d models for games, architecture, videos. (1524433)
turbosquid
$50

3d PRINTER - Extruder
... available on turbo squid, the world's leading provider of digital 3d models for visualization, films, television, and games.
turbosquid
$15

Extruded Table 2
...xtruded table 2 for download as blend, dae, fbx, obj, and stl on turbosquid: 3d models for games, architecture, videos. (1621846)
turbosquid
$10

Maya Extrude Tool
... available on turbo squid, the world's leading provider of digital 3d models for visualization, films, television, and games.
3d_export
$5

world earth extrude map
...world earth extrude map
3dexport
3ddd
$1

Simply Elegant Extruded Tree Coffee Table Design
...ble by link studios. the silhouette of a tree is visible at one angle, extruded from the surface to create the support structure.
Mount
3d_export
free

mounting bracket
...mounting plate is the portion of a hinge that attaches to the wood. mounting plates can be used indoors, cabinetry and furniture.
turbosquid
$2

MOUNTING
... available on turbo squid, the world's leading provider of digital 3d models for visualization, films, television, and games.
turbosquid
free

Mounts
... available on turbo squid, the world's leading provider of digital 3d models for visualization, films, television, and games.
turbosquid
free

Mount Fuji
...fuji
turbosquid
free 3d model mount fuji for download as obj on turbosquid: 3d models for games, architecture, videos. (1579977)
3d_export
$5

Headphone mount LR
...headphone mount lr
3dexport
headphone mount l+r
turbosquid
$39

Mount rainier
...quid
royalty free 3d model mount rainier for download as fbx on turbosquid: 3d models for games, architecture, videos. (1492586)
turbosquid
$5

pipe mounting
...quid
royalty free 3d model pipe mounting for download as obj on turbosquid: 3d models for games, architecture, videos. (1293744)
turbosquid
$3

Mounting Tires
...uid
royalty free 3d model mounting tires for download as fbx on turbosquid: 3d models for games, architecture, videos. (1708511)
3d_export
$5

Magnetic GoPro Mount
...pro mount
3dexport
cool magnetic mount for gopro. allows you to mount the camera on flat metal surfaces and get exclusive shots.
turbosquid
$5

Stone Mount
...ty free 3d model stone mount for download as ma, obj, and fbx on turbosquid: 3d models for games, architecture, videos. (1370306)