Thingiverse
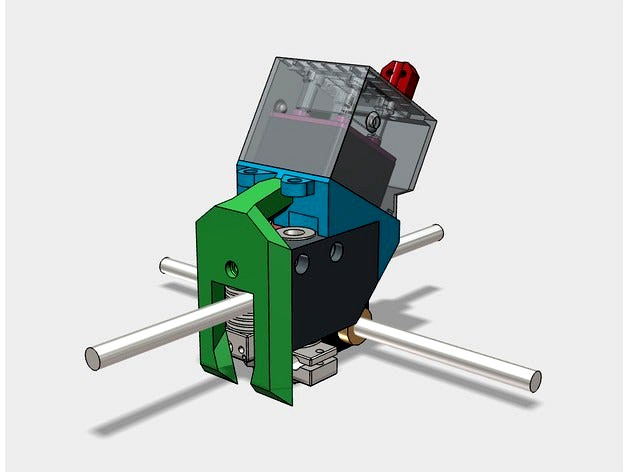
E3D on Vertex K8400 (Rev 2) by Bo_Ris
by Thingiverse
Last crawled date: 3 years, 1 month ago
This is the second revision of my E3D dual print-head mount for Vertex K8400 published here. The old design had the following issues:
the lower ends of left and right holders were too close to the heat-blocks and could melt
as the result of printing process imperfections there were several gaps in between things causing ducts to leak air
air duct openings were not aligned with the nozzles
there was insufficient airflow/cooling towards bearings located under the print-head
the wires coming from heaters and thermistors were hanging around X rod and it was not easy to fish them into the long channels of the main thing
the fan was fixed in the position with sliding-in piece rather than screws
air was hitting heat-blocks not allowing them to reach temperatures above 223 degrees
while LEDs looked as a cool feature, they were not very practical due to ever-changing amount of light that hits Raspberry Pi camera. Having stationary LED strips along the edges of the printer is a better option.
overall appearance/design had issues (at least in my opinion)
New design addresses everything from the above list. In addition, it allows to gain few additional millimeters of printing space along X and Y axis (details below). 15 Ohm resistor used in the 1st design now allows to reach temperatures up to 240 degrees. Replacing it with 33 Ohm 1Watt resistor will reduce airflow and the noise produced by the fan and will allow to heat up-to 270 degrees, which is the maximum nozzle operating temperature.
Required parts
One or two E3D v6 HotEnd Full Kit - 1.75mm Universal (with Bowden add-on) (12v). You can purchase them from here. Buy the original; Chinese replica will not fit into this design.
Heater cartridge(s) - one per print head. You MUST reuse the original ones from K8400. Do not install the cartridges that came with E3D as they are for 12V, while the printer supplies 15V DC.
One 33 Ohm 1W resistor
One 40mm x 40mm x 20mm 12V high speed fan
Four M4 x 16mm hex socket cup screws
Four countersunk screws M3 x 50mm. They are part of the original hot-end mount and can be re-used (I used M3 x 50mm hex socket cup screws)
Four M3 x 30mm hex socket cup screws
Four M3 x 16mm hex socket cup screws
Two M3 x 12mm hex socket cup screws
One M3 x 12mm screw
Four self-locking M3 nuts
IMPORTANT: This design fits the GENUINE E3D hot-end http://e3d-online.com/E3D-v6/Full-Kit/v6-1.75mm-Universal-Bowden It cannot be used with Chinese replicas that are bigger in size.
Update 16-Dec-2017 Uploaded STEP file with all parts for those who wants to modify this design to fit other hotends. If you do such modification please share it with others via Remix It section.
Update 26-Oct-2018 Uploaded top cover for thinner 40x40x10 fan. If you use such fan, I'd recommend to have a separate fan as posted here https://www.thingiverse.com/thing:3044377
Similar models
thingiverse
free

E3D dual head on Velleman VERTEX K8400 Air Intake by Bo_Ris
...t-end to heat up above 245 degrees. i am also sharing .123dx file that will allow you to modify the sizes of openings, if needed.
thingiverse
free

E3D dual head on Velleman VERTEX K8400 with space gain and light by Bo_Ris
...and should be used in single print-head setup as a replacement of the left extruder. this is required to provide proper air flow.
thingiverse
free

Fan mount for e3d-v6 on k8400 by blackroses
...ses the original k8400 top fan. and mounts directly on the e3d-v6 mount for vertex k8400 http://www.thingiverse.com/thing:1341732
thingiverse
free
E3D V6 Tripple-Fan and LED Mount by rottaca
... wire and pay attention to the correct polarity!
use a zip tie to keep the fan duct inplace. there are two slots on the backside.
thingiverse
free
E3D V6 Mount by Jmaca32
...ere a pdf file included with dimensions!
the e3d dimensions were pulled from the e3d website
parts
4x: m3 x 20mm screw
4x: m3 nut
grabcad
free

E3D 30mm to 40mm fan adapter
... full kit 1.75mm universal: http://amzn.to/2qc6keb
the blue shroud was borrowed from https://grabcad.com/library/e3d-v6-hotend-3
thingiverse
free
E3D v6 hotend (dual) on the K8400 extruder. (new design) by belni
...mm bowden hotend (dual) on the k8400.
this is a new design!
try it.. and tell if you like it.
release early, release often.
thingiverse
free

E3D V6 clone - fan adapter with hex nuts by Hasenpups
...erse
this is a fan adapter for the popular e3d v6 clones with a 30mm fan.
you can attach a 40mm fan with m3 bolds and hex nuts.
thingiverse
free

E3D-V6 Fan Shroud for Printrbot Simple Metal by ClassicGOD
...he outside of the frame.
[edit]
uploaded v3 of the model (with and without the airflow divider)- it was remodeled from scratch.
thingiverse
free

E3D V6 fan duct for bed and hotend by HgArgen
...3d v6 fan duct for bed and hotend.
it allows to install in all positions.
for 40 mm fan and m3 screws and nuts.
work in progress!
K8400
thingiverse
free
Vertex K8400 Small Corner part (K8400-HQP-SC) by Hest
...vertex k8400 small corner part (k8400-hqp-sc) by hest
thingiverse
vertex k8400 small corner part (k8400-hqp-sc)
thingiverse
free

Base for K8400 by Hitty
...base for k8400 by hitty
thingiverse
just a base for your k8400 to extend the space for the power adapter.
thingiverse
free

K8400 Fan tool by dergringo
...k8400 fan tool by dergringo
thingiverse
k8400 fan tool
thingiverse
free
Support ventilateur K8400 / Fan support K8400 by ldellanna
........................
fan support for velleman vertex k8400
minimum layer : 0.2mm
printing time in 0.1mm -> max 20 minutes
thingiverse
free

K8400 Scraper holder by Storm67
...k8400 scraper holder by storm67
thingiverse
scraber holder for velleman k8400 vertex
thingiverse
free

Fan Tool K8400 Velleman by dergringo
...fan tool k8400 velleman by dergringo
thingiverse
fan tool velleman k8400
thingiverse
free

Endcap Custom for Vertex K8400 by olechristiandalseth
...endcap custom for vertex k8400 by olechristiandalseth
thingiverse
endcap for vertex k8400
left and right.
thingiverse
free
Vertex K8400 spool holder by simersion
...vertex k8400 spool holder by simersion
thingiverse
spoolholder for vertex k8400
100mm length and 35mm diameter.
thingiverse
free
E3D dual head K8400 by hexxter
...e3d dual head k8400 by hexxter
thingiverse
holder for the e3d hot end on the vertex k8400 printer.
thingiverse
free

Vertex K8400 power switch by Zannddor
...vertex k8400 power switch by zannddor
thingiverse
alternative power switch to the 3d printer vertex k8400
Ris
turbosquid
$20

ris
... available on turbo squid, the world's leading provider of digital 3d models for visualization, films, television, and games.
3ddd
$1

Лампа Настольная Vita Ri 22163
...лампа настольная vita ri 22163
3ddd
vita , ri
лампа настольная vita ri 22163
3ddd
$1

Кресло JUMBO RIS-41b
...hymia
стиль: классика
длина: 80
глубина: 85
высота: 155
артикул: ris-41b
варианты отделки: орех, крашенный, с золотом, с серебром
3ddd
free
Диван JUMBO RIS-42b
...hymia
стиль: классика
длина: 155
глубина: 85
высота: 155
артикул: ris-42
варианты отделки: орех, крашенный, с золотом, с серебром
3d_export
$25

Parth 11 riing 3D Model
...ing 3d model
3dexport
parth 11 riing 3d model download .c4d .max .obj .fbx .ma .lwo .3ds .3dm .stl gorgsalvatore 109549 3dexport
3d_export
$10

M4A1 rifle RIS version 3D Model
...m4a1 rifle ris version 3d model
3dexport
rifle gun weapon
m4a1 rifle ris version 3d model figlif 1347 3dexport
3ddd
$1
Centennial Regulation Pool Table by RI Anderson
...by ri anderson
3ddd
brunswick
бильярдный стол в стиле ар-деко centennial regulation pool table by ri anderson
размеры 264x147x81h
turbosquid
$2

KWA SR5 RIS - 4inch HandGuard
... available on turbo squid, the world's leading provider of digital 3d models for visualization, films, television, and games.
turbosquid
$199
Tank Type 5 Chi-Ri Japan
...el tank type 5 chi-ri japan for download as max, max, and fbx on turbosquid: 3d models for games, architecture, videos. (1640853)
cg_studio
$59
Colt M4A1 Carbine RIS Assault rifle3d model
...s .c4d .lwo .obj - colt m4a1 carbine ris assault rifle 3d model, royalty free license available, instant download after purchase.
Bo
3d_export
$5

boing
...boing
3dexport
boing plane
turbosquid
$19

Boing boing Park
... available on turbo squid, the world's leading provider of digital 3d models for visualization, films, television, and games.
3ddd
$1
Boing 747
...boing 747
3ddd
boing 747 без текстур
3ddd
$1

Bo concept
...bo concept
3ddd
boconcept , декоративный набор
bo concept
3ddd
$1
Bo Concept / Pinto
...bo concept / pinto
3ddd
boconcept
bo concept pinto
3ddd
$1
кровать bo concept
...кровать bo concept
3ddd
boconcept
кровать bo concept
3ddd
$1
Bo concept sidebroad
...bo concept sidebroad
3ddd
тумба , boconcept
bo concept
3ddd
$1

Bo-box / Ирис
...bo-box / ирис
3ddd
bo-box
кресло ирис, пр-ль bo-box, коллекция soul. габариты (мм): 720x900x880
3ddd
free
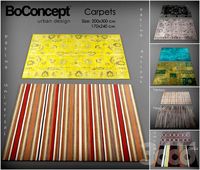
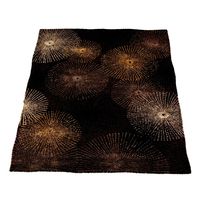
Bo Concept
... ковер
сборник ковров от bo concept
размер - 200х300см, 170х240 см
10 шт.http://www.boconcept.ru
turbosquid
$5

Bo Shuriken
...y free 3d model bo shuriken for download as obj, fbx, and dae on turbosquid: 3d models for games, architecture, videos. (1412495)
Rev
3d_export
$5

Rev Gun 3D Model
...rev gun 3d model
3dexport
rev gun
rev gun 3d model sone93 52014 3dexport
3d_export
$15

Maverick REV-6
...n act as the main blaster of a nerfer, but due to the short range, it is recommended to use it as a secondary, additional weapon.
turbosquid
$84

Euro Pallet rev 2009
... available on turbo squid, the world's leading provider of digital 3d models for visualization, films, television, and games.
turbosquid
$9
Chandra rugs REV-15802
... available on turbo squid, the world's leading provider of digital 3d models for visualization, films, television, and games.
turbosquid
$60

rev"s drum set
... available on turbo squid, the world's leading provider of digital 3d models for visualization, films, television, and games.
3ddd
$1
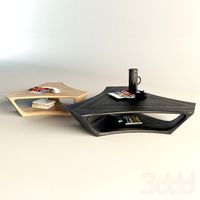
Sova Design/Rev coffee table
... table
3ddd
журнальный
https://www.facebook.com/media/set/?set=a.514295972031044.1073741841.343660145761295&type;=3
turbosquid
$30

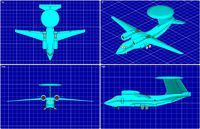
Yak-44 (Rev) AEW Aircraft Solid Assembly Model
... available on turbo squid, the world's leading provider of digital 3d models for visualization, films, television, and games.
turbosquid
$30

Mitsubishi Mu-2 Aircraft Solid Assembly Model(Rev)
... available on turbo squid, the world's leading provider of digital 3d models for visualization, films, television, and games.
turbosquid
$30
An-71 Madcap (Rev) AEW Aircraft Solid Assembly Model
... available on turbo squid, the world's leading provider of digital 3d models for visualization, films, television, and games.
turbosquid
$30

Antonov An-74 (Rev} STOL Transport Aircraft Solid Assembly Model
... available on turbo squid, the world's leading provider of digital 3d models for visualization, films, television, and games.
E3D
turbosquid
$23

E3D - Google Home
... 3d model e3d - google home for download as max, obj, and c4d on turbosquid: 3d models for games, architecture, videos. (1192509)
cg_studio
free

e3d model
...e3d model
cgstudio
- e 3d model, royalty free license available, instant download after purchase.
turbosquid
$2

Syringe C4D (E3D Ready)
...lty free 3d model syringe c4d (e3d ready) for download as c4d on turbosquid: 3d models for games, architecture, videos. (1336720)
turbosquid
$12

Microphone USB E3D and C4D
...ree 3d model microphone usb e3d & c4d for download as c4d on turbosquid: 3d models for games, architecture, videos. (1568216)
turbosquid
$29

E3D - OnePlus 6 Black
...model e3d - oneplus 6 black for download as max, obj, and c4d on turbosquid: 3d models for games, architecture, videos. (1358534)
turbosquid
$29

E3D - Motorola One 2018
...del e3d - motorola one 2018 for download as max, obj, and c4d on turbosquid: 3d models for games, architecture, videos. (1358533)
turbosquid
$29

E3D - Disney MagicBands 2
...l e3d - disney magicbands 2 for download as max, obj, and c4d on turbosquid: 3d models for games, architecture, videos. (1355515)
turbosquid
$29

E3D - Samsung Z4 Smartphone
...e3d - samsung z4 smartphone for download as max, obj, and c4d on turbosquid: 3d models for games, architecture, videos. (1182179)
turbosquid
$23

E3D - Razer Phone model
...del e3d - razer phone model for download as max, obj, and c4d on turbosquid: 3d models for games, architecture, videos. (1231207)
turbosquid
$23

E3D - Alcatel Idol 5
... model e3d - alcatel idol 5 for download as max, obj, and c4d on turbosquid: 3d models for games, architecture, videos. (1212799)
Vertex
3d_export
$10

vertex decorative003
...vertex decorative003
3dexport
vertex decorative_003
3d_export
$10

vertex decorative001
...vertex decorative001
3dexport
vertex decorative_001
turbosquid
$5

Vertex Pendant
...uid
royalty free 3d model vertex pendant for download as stl on turbosquid: 3d models for games, architecture, videos. (1565161)
turbosquid
$5

Vertex Coaster
...uid
royalty free 3d model vertex coaster for download as stl on turbosquid: 3d models for games, architecture, videos. (1565158)
3ddd
$1
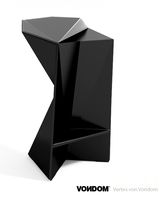
Vertex von Vondom
...vertex von vondom
3ddd
vondom
vertex von vondomhttp://www.vondom.com/producto/52/0/vertex/
turbosquid
$3

Vertex Set
...d model vertex vondom set for download as usdz, gltf, and fbx on turbosquid: 3d models for games, architecture, videos. (1599323)
3ddd
$1

VONDOM / VERTEX
...vondom / vertex
3ddd
karim rashid , vondom
designer - karim rashid
3d_export
$15
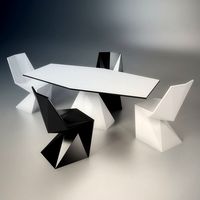
Vondom Vertex 3D Model
...d model
3dexport
vondom vertex table chair plastic seat furniture furnishing
vondom vertex 3d model rogojin.denis 87870 3dexport
3ddd
$1

VONDOM / VERTEX
..., karim rashid , vondom
designer - karim rashid
3ddd
$1
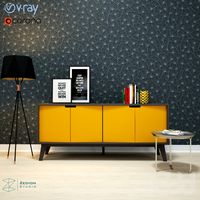
BUFFET VERTEX
...nical specification :
height 65 cm , width 150 cm , depth 43 cmhttp://www.oppa.com.br/buffet-vertice-4-portas-amarelo
2
design_connected
$11

No 2
...no 2
designconnected
sibast no 2 computer generated 3d model. designed by sibast, helge.
turbosquid
$6

Cliff Rock 2-2
...uid
royalty free 3d model cliff rock 2-2 for download as obj on turbosquid: 3d models for games, architecture, videos. (1619161)
turbosquid
$29

Book variation 2 2
...3d model book variation 2 2 for download as max, obj, and fbx on turbosquid: 3d models for games, architecture, videos. (1366868)
turbosquid
$22

Classic baluster (2) (2)
...assic baluster (2) (2) for download as max, obj, fbx, and stl on turbosquid: 3d models for games, architecture, videos. (1483789)
turbosquid
$99

Smilodon 2 Pose 2
... available on turbo squid, the world's leading provider of digital 3d models for visualization, films, television, and games.
turbosquid
$20

Barrel Barricade 2-2
... available on turbo squid, the world's leading provider of digital 3d models for visualization, films, television, and games.
turbosquid
$6

Wall Trophy (2) (2)
... available on turbo squid, the world's leading provider of digital 3d models for visualization, films, television, and games.
turbosquid
free

Tire label 2 of 2
... available on turbo squid, the world's leading provider of digital 3d models for visualization, films, television, and games.
3ddd
$1

Кровать, 2 тумбочки, 2 светильника
...кровать, 2 тумбочки, 2 светильника
3ddd
кровать, 2 тумбочки, 2 светильника
нормальное качество
формат 3ds max
без текстур
3ddd
free

Кровать, 2 тумбочки, 2 светильника
...кровать, 2 тумбочки, 2 светильника
3ddd
кровать, 2 тумбочки, 2 светильника
нормальное качество
формат 3ds max
без текстур