Thingiverse
Dual extruder calibration objects by alloystorm
by Thingiverse
Last crawled date: 3 years, 1 month ago
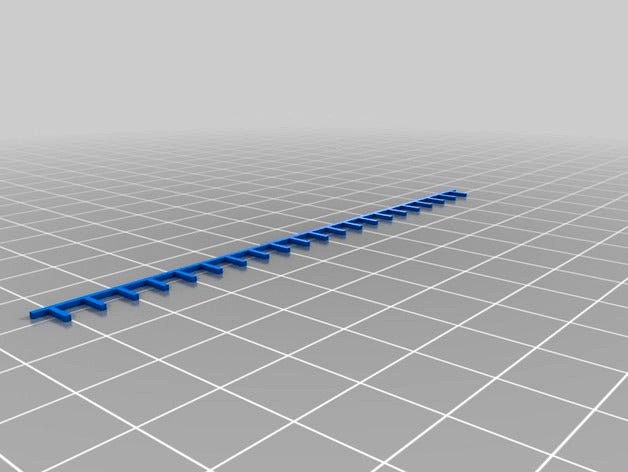
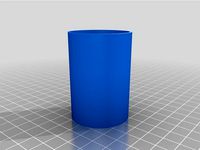
Calibrate your dual extruder XY offsets with minimum effort and material waste.
Use only around 50mm of each material.
First eyeball the offsets so the extruders fall in around 1mm range when switching between them (use T0 and T1 command).
One method I found useful is to stick a piece of blu-tack in the middle of the bed, lower your extruder to make a mark on the blu-tack, then switch to the second extruder and make another mark. Then you can measure the XY distances of the 2 marks and use them as initial offset values.
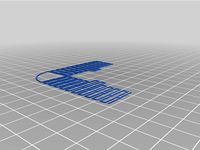
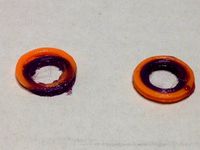
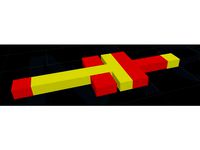
Load both objects into your slicer without any offset. Assign each to a different extruder and print. They should be able to bind together without any overlap if your extruder offset is close enough.
After printing the object, find the short line that align best with the line on its opposite side, count how many short lines are on its left and right. If it's 10 vs 10, that means a perfect alignment. If not, change the offset value by 0.1 * (numOfShortLineOnLeft - 10), then print again to verify.
After finishing X axis, rotate the objects by 90 degrees to calibrate Y axis.
Use only around 50mm of each material.
First eyeball the offsets so the extruders fall in around 1mm range when switching between them (use T0 and T1 command).
One method I found useful is to stick a piece of blu-tack in the middle of the bed, lower your extruder to make a mark on the blu-tack, then switch to the second extruder and make another mark. Then you can measure the XY distances of the 2 marks and use them as initial offset values.
Load both objects into your slicer without any offset. Assign each to a different extruder and print. They should be able to bind together without any overlap if your extruder offset is close enough.
After printing the object, find the short line that align best with the line on its opposite side, count how many short lines are on its left and right. If it's 10 vs 10, that means a perfect alignment. If not, change the offset value by 0.1 * (numOfShortLineOnLeft - 10), then print again to verify.
After finishing X axis, rotate the objects by 90 degrees to calibrate Y axis.
Similar models
thingiverse
free
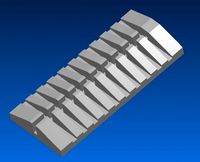
Dual Extruder Nozzle Offset Calibration Pattern by mah115
... for clean lines. each "finger" is 2mm wide. pattern is offset by 0.1mm per finger. longer finger indicates 0 offset.
thingiverse
free

dual extruder head X and Y offset calibration print by davew_tx
...tion.
enter those numbers in the slicer or firmware.
reprint and see if hashes line up.
adjust and redo until hashes are aligned.
thingiverse
free
Indexed Concentric Rings, Dual Extruder Offset Calibration by wbrucem
... any misalignment and adjust offsets accordingly. in most cases you'll want to apply half of the adjustment to each extruder.
thingiverse
free

Dual extruder calibration by icardozo
... icardozo
thingiverse
the pieces are simple design to calibrate printer with doble extruder.
its special for aligned both axis.
thingiverse
free
Dual Extruder Offset Calibration by ChrisX35
...er calibration tower. import files, prepare for dual print, print, measure, and adjust offsets to tweak your dual color process.
thingiverse
free
ConcentricRings Dual Extruder Calibration by DrVegetable
... still on the bed, and new offset values were calculated to result in perfect alignment in the second print, on the right.
enjoy!
thingiverse
free
Dual extruder calibration stl by cyberplourin
... it for raise3d n2 dual +
after 6 printing - i moved offset x & y step by step. the calibration was good for bigger printing.
thingiverse
free
Dual extruder offset calibration test
...dual extruder offset calibration test
thingiverse
dual extruder offset calibration test. step between stars 0.05
thingiverse
free

Dual Colour Print Test Cube by delibelli
...librate my idex printer. the cube is in two parts, just import them to your slicer, align them and assign extruders to each part.
thingiverse
free

Three extruder calibration by Tomasw
...hould be 20 mm.
print one layer or more, pause, measure, adjust offset, save and restart print until you have a perfect offset.
Alloystorm
thingiverse
free
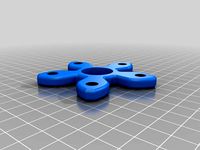
Gear spinning toy by alloystorm
...se
spinning toy with gear profile so multiple spinners can interact with each other.
https://www.youtube.com/watch?v=5wm4jnwhago
thingiverse
free

Vortex vase WIP by alloystorm
...ed to test my new dual extruder delta printer.
will make further adjustment when i'm more familiar with dual extruder print.
thingiverse
free
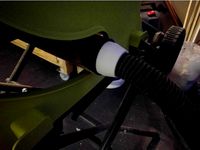
Makita 0700 router dust port adapter for Ozito shop vac by alloystorm
...akita 0700 router dust port adapter for ozito shop vac by alloystorm
thingiverse
dust collection adapter for makita 0700 router.
thingiverse
free
Ryobi 1800W 254mm Table Saw dust port adapter by alloystorm
...er by alloystorm
thingiverse
converts the dust port to 34mm diameter to be able to connect to ozito shop vac.
added thread &
thingiverse
free

Geeetech G2S pro print cooling duct by alloystorm
...it. i was intending to use a zip tie to secure the fan but it seems the duct is tight enough to secure it without any other help.
thingiverse
free

4 cell AA battery pack by alloystorm
...ans, be sure to remove coating on both sides to allow conductivity. you can do that by either burning it lightly or some sanding.
thingiverse
free

Neato XV series battery pack by alloystorm
... easily over 1 hour of running time. for comparison, the original 3500mah battery packs last about 40 minutes when they were new.
Calibration
turbosquid
$15
DEFIBRILLATOR CALIBRATORS
... available on turbo squid, the world's leading provider of digital 3d models for visualization, films, television, and games.
turbosquid
$3
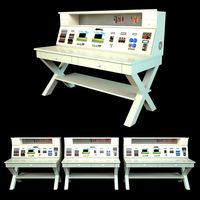
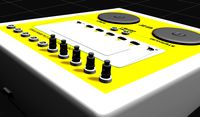
Calibration Test Benches
...libration test benches for download as 3ds, obj, c4d, and fbx on turbosquid: 3d models for games, architecture, videos. (1355804)
turbosquid
$79

Tag Heuer Monaco Calibre 11
...free 3d model tag heuer monaco calibre 11 for download as max on turbosquid: 3d models for games, architecture, videos. (1634427)
turbosquid
$50

Smith & Wesson 50 Calibre Magnum
... available on turbo squid, the world's leading provider of digital 3d models for visualization, films, television, and games.
3d_export
$10
Laboratory Calibration Weight Set 1 3D Model
... 3d model
3dexport
laboratory lab science equipment weight set
laboratory calibration weight set 1 3d model bessoo 88084 3dexport
3d_export
$15
Laboratory Scale and Calibration Weight Set 3D Model
...port
laboratory lab science equipment weight set scale
laboratory scale and calibration weight set 3d model bessoo 88203 3dexport
3d_export
$5
3D printer filament calibration tool 3D Model
...ernier
3d printer filament calibration tool 3d model download .c4d .max .obj .fbx .ma .lwo .3ds .3dm .stl locoman 107942 3dexport
3d_export
$59
tag heuer link calibre 16 watch
...built to real-world scale. units used: centimeters. model is 18 centimeters tall.<br>scene objects are organized by groups.
3d_export
free
laser height reference calibration tool opt lasers
...ind out more about the engraving and cutting laser heads, this item was designed to work with, take a look at the following page:
3d_export
$99
Patek Philippe White Gold Calibre 89
...br>please note: this 3d model like all my other models cannot be used as nft, as is or modified<br>thank you for reading
Dual
turbosquid
free

Dual Pistols
...ls
turbosquid
free 3d model dual pistols for download as fbx on turbosquid: 3d models for games, architecture, videos. (1320360)
turbosquid
$2

Dual Axe
...urbosquid
royalty free 3d model dual axe for download as fbx on turbosquid: 3d models for games, architecture, videos. (1332372)
turbosquid
$10

Dual Lesaths
... available on turbo squid, the world's leading provider of digital 3d models for visualization, films, television, and games.
3ddd
$1

плитка Dual Bianco (Испания)
...й плитки venis dual (испания). технические качества: устойчивость к стирания, отличная геометрия, отсутствие проблем при укладке.
turbosquid
$35

Dual Mesh Fonts
...ree 3d model dual mesh fonts for download as ma, obj, and fbx on turbosquid: 3d models for games, architecture, videos. (1352989)
turbosquid
$29

Dual Flask with Bungs
...del dual flask with bungs for download as obj, fbx, and blend on turbosquid: 3d models for games, architecture, videos. (1210512)
turbosquid
$19

Dual Socket Plug
...3d model dual socket plug for download as obj, fbx, and blend on turbosquid: 3d models for games, architecture, videos. (1303912)
turbosquid
$13

Dual Adjustable Pulley
... available on turbo squid, the world's leading provider of digital 3d models for visualization, films, television, and games.
turbosquid
$10

Amoi N809 Dual
... available on turbo squid, the world's leading provider of digital 3d models for visualization, films, television, and games.
turbosquid
$5

Dual Turret Tank
... available on turbo squid, the world's leading provider of digital 3d models for visualization, films, television, and games.
Extruder
3ddd
$1

Extruded Chair
...extruded chair
3ddd
extruded , tom dixon
inspired by tom dixon extruded chair
turbosquid
$15

Extruded Table
... extruded table for download as blend, dae, fbx, obj, and stl on turbosquid: 3d models for games, architecture, videos. (1634137)
turbosquid
$2

3D Printer Extruder
...d
royalty free 3d model 3d printer extruder for download as on turbosquid: 3d models for games, architecture, videos. (1537359)
turbosquid
$1

Zombie extruded text
...oyalty free 3d model zombie extruded text for download as obj on turbosquid: 3d models for games, architecture, videos. (1322198)
turbosquid
$4

Extruder conical screw
...el extruder conical screw for download as sldpr, ige, and stl on turbosquid: 3d models for games, architecture, videos. (1524433)
turbosquid
$50

3d PRINTER - Extruder
... available on turbo squid, the world's leading provider of digital 3d models for visualization, films, television, and games.
turbosquid
$15

Extruded Table 2
...xtruded table 2 for download as blend, dae, fbx, obj, and stl on turbosquid: 3d models for games, architecture, videos. (1621846)
turbosquid
$10

Maya Extrude Tool
... available on turbo squid, the world's leading provider of digital 3d models for visualization, films, television, and games.
3d_export
$5

world earth extrude map
...world earth extrude map
3dexport
3ddd
$1

Simply Elegant Extruded Tree Coffee Table Design
...ble by link studios. the silhouette of a tree is visible at one angle, extruded from the surface to create the support structure.
Objects
3d_export
$40
cartoon - objects
...cartoon - objects
3dexport
cartoon - objects<br>cartoon objects dae fbx cg lowpoly collection pack 3d 3dmodel object
3ddd
free

decorative objects
...decorative objects
3ddd
decorative objects can be used for corners
3ddd
$1
Interior Objects
...interior objects
3ddd
interior objects,i make most of the design. voila..!
3ddd
$1
Plastic Objects
...ner , пластик
plastic, objects, kitchen, jar, dish, cup, bowl, pitcher, plate, container
turbosquid
$5
WC object
...rbosquid
royalty free 3d model wc object for download as c4d on turbosquid: 3d models for games, architecture, videos. (1554177)
turbosquid
$2

Bathroom objects
...
royalty free 3d model bathroom objects for download as blend on turbosquid: 3d models for games, architecture, videos. (1224432)
3d_export
$20

table with objects
...table with objects
3dexport
turbosquid
$10
Bull Object
...y free 3d model bull object for download as max, fbx, and obj on turbosquid: 3d models for games, architecture, videos. (1699706)
turbosquid
$5

Ritual Objects
...free 3d model ritual objects for download as ma, fbx, and obj on turbosquid: 3d models for games, architecture, videos. (1611233)
archive3d
free
Objective 3D Model
...-glass objective lens
objective n120508 - 3d model (*.gsm+*.3ds) for interior 3d visualization.