Thingiverse
Drawers for AnyCubic Chiron by kevinthefixer
by Thingiverse
Last crawled date: 3 years, 3 months ago
First let me say this is not my original work; I simply resized some models from more skilled people than I. Since I couldn't get the "this is a remix" checkbox to work right I thought I'd give credit here. The core of the project comes from:https://www.thingiverse.com/thing:4606144
I resized the drawers to 200mmWx250D and left the height alone. The rails were lengthened accordingly, and the .stl of these 3 pieces is here.
The upper cover started out being:https://www.thingiverse.com/thing:4082884
And resized it to 215Wx250Dx1H; it doesn't need to be very strong, it's just a dust cover and it helps in installation.
Sorry I can't find the originals of the standoffs you need for the center mounts nor the knobs. The standoffs are 1/4"x3/4" or 6mmx20, two for each drawer, and a knob of your choice for each (I didn't care for the one fab3dLab supplied). These may be purchased at a hardware store also.
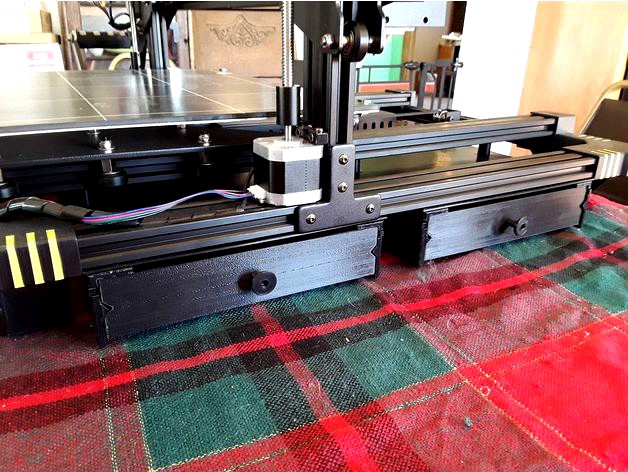
All the electronics for the Chiron are under the frame on the right side of the printer, so that leaves a lot of extra space on the left for storage, but I didn't find any models that took advantage of that.This one works for me, but beware, there are days of printing time involved, each drawer takes almost a full (2Kg) roll of filament and installation is not for sissies! So if that didn't scare you off here's what you'll need in addition to the above (per drawer: there is room for 2 under the Chiron):
--2x 5mmx10 button-head screws (Phillips might work, socket-heads are too high)
--2x 5x30 button-head screws
--4x 5mm T-slot nuts (hammer nuts)
After you've printed it all and put it in a pile, make sure the rails slide smoothly over the drawers. If they don't, sand stuff until they do, it won't be so easy later. Set the rails on the drawer sides (the screw holes on top), flip the assembly upside down and glue it to the dust cover (I used clear epoxy), as centered as possible. Once the glue dries you can move on to drilling the screw holes (don't drill into your dining room table).
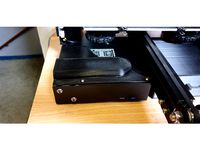
Note the screw holes are oblong from resizing the model, don't worry about it too much. Drill the front holes first (the front of the rails have the little tongue with the bump that fits in the groove in the drawer), just set a 6mm or 7/32 bit into the front of the oblong hole in the rail and drill through the dust cover. Measure the offset between the outer edge of the lower left frame rail on your printer to the left edge of the middle-left rail, the one the heatbed rolls on. Then add 20mm. This was 118mm on my Chiron. Mark that on the drawer rails measuring from the first holes, and drill the others. "Measure twice, drill once!" On mine, it landed on the back part of the countersink for the center hole on the rail. Sorry I forgot to take pics but I'm not about to take it apart again for that. You can see in the second pic the standoffs above these screw holes on my front drawer.
Now you can mount it! Flip the printer over so you have access to the underside. I found it easiest to put scrap pieces of 2x4 lumber under the left corners of the printer frame and lay it over on that side with a bit of the gantry protruding off the table. Put all 4 screws into the holes in the rails/dust cover, short ones to the front. Start the T-nuts on the front ones. Put a standoff on the long rear ones, then start the T-nuts on them too. The short T-nuts on the front of the rails go in the slot that's now the lowest point on the printer, that is, the far left slot on the underside when the printer is upright. This puts the front of the drawer just about flush with the left frame rail. The other holes and T-nuts line up with the far slot on the left-center rail. Tighten up the screws. Now, that's easy to say but it took me 3 or 4 tries to get each one right! T-nuts can be uncooperative, especially when trying to defy gravitational orientation. But eventually, with the help of some not-so-carefully-chosen expletives, I got it done and didn't get any blood on it. Tighten it all up carefully and evenly and right the printer and install your new drawers. They will fit either way, I liked the plain side and installed a plain knob, YMMV.
I resized the drawers to 200mmWx250D and left the height alone. The rails were lengthened accordingly, and the .stl of these 3 pieces is here.
The upper cover started out being:https://www.thingiverse.com/thing:4082884
And resized it to 215Wx250Dx1H; it doesn't need to be very strong, it's just a dust cover and it helps in installation.
Sorry I can't find the originals of the standoffs you need for the center mounts nor the knobs. The standoffs are 1/4"x3/4" or 6mmx20, two for each drawer, and a knob of your choice for each (I didn't care for the one fab3dLab supplied). These may be purchased at a hardware store also.
All the electronics for the Chiron are under the frame on the right side of the printer, so that leaves a lot of extra space on the left for storage, but I didn't find any models that took advantage of that.This one works for me, but beware, there are days of printing time involved, each drawer takes almost a full (2Kg) roll of filament and installation is not for sissies! So if that didn't scare you off here's what you'll need in addition to the above (per drawer: there is room for 2 under the Chiron):
--2x 5mmx10 button-head screws (Phillips might work, socket-heads are too high)
--2x 5x30 button-head screws
--4x 5mm T-slot nuts (hammer nuts)
After you've printed it all and put it in a pile, make sure the rails slide smoothly over the drawers. If they don't, sand stuff until they do, it won't be so easy later. Set the rails on the drawer sides (the screw holes on top), flip the assembly upside down and glue it to the dust cover (I used clear epoxy), as centered as possible. Once the glue dries you can move on to drilling the screw holes (don't drill into your dining room table).
Note the screw holes are oblong from resizing the model, don't worry about it too much. Drill the front holes first (the front of the rails have the little tongue with the bump that fits in the groove in the drawer), just set a 6mm or 7/32 bit into the front of the oblong hole in the rail and drill through the dust cover. Measure the offset between the outer edge of the lower left frame rail on your printer to the left edge of the middle-left rail, the one the heatbed rolls on. Then add 20mm. This was 118mm on my Chiron. Mark that on the drawer rails measuring from the first holes, and drill the others. "Measure twice, drill once!" On mine, it landed on the back part of the countersink for the center hole on the rail. Sorry I forgot to take pics but I'm not about to take it apart again for that. You can see in the second pic the standoffs above these screw holes on my front drawer.
Now you can mount it! Flip the printer over so you have access to the underside. I found it easiest to put scrap pieces of 2x4 lumber under the left corners of the printer frame and lay it over on that side with a bit of the gantry protruding off the table. Put all 4 screws into the holes in the rails/dust cover, short ones to the front. Start the T-nuts on the front ones. Put a standoff on the long rear ones, then start the T-nuts on them too. The short T-nuts on the front of the rails go in the slot that's now the lowest point on the printer, that is, the far left slot on the underside when the printer is upright. This puts the front of the drawer just about flush with the left frame rail. The other holes and T-nuts line up with the far slot on the left-center rail. Tighten up the screws. Now, that's easy to say but it took me 3 or 4 tries to get each one right! T-nuts can be uncooperative, especially when trying to defy gravitational orientation. But eventually, with the help of some not-so-carefully-chosen expletives, I got it done and didn't get any blood on it. Tighten it all up carefully and evenly and right the printer and install your new drawers. They will fit either way, I liked the plain side and installed a plain knob, YMMV.
Similar models
thingiverse
free

Nerf Stryfe Motor Cover with Rail by Ultrasonic2
...quot;gap" ...
i hope you like my "pacman" num numm nummm
https://youtu.be/valubiiwkmghttps://youtu.be/ig-tf6vic3o
thingiverse
free

mounting standoff by 33scout
...9;t have to drill or screw into the surface. this should work on any surface that is flat and hot glue will stick to. enjoy :)
thingiverse
free

Cabinet Handle Drill Templates
...ry greatly so you will not be able to use a drill template. the solid stainless steel handles i used were bought off amazon.com.
thingiverse
free
Ender 3 fan guard with v-slot cover by MrAtari1040ST
...two screws on the top. you can push the front plate a bit down to slide the fan duct in place. next put the screws back in place.
thingiverse
free

ENDER3 Y linear rails carrier + calibration tools by catlord21
...#39;s probably :
rails aren't paralell
rail carriers have bad lubrification
dust on rails
[will post picture and video later]
thingiverse
free

Tablet Mount for 20x40 V-Slot 3D Printer - clip on by goldentuna1200
...needed.
you could also drill holes through the back if you wanted to lock it down with 5m screws. i just didn't see the need.
thingiverse
free

Anet A8 Power Supply Cover by allen476
... take the cover off. downside is that you have to drill the frame.
holes on the bottom so you can use cable ties to secure wires.
thingiverse
free

2020 AM8 M3 t-nut easy installation by Fer451
...ghten it.
don't use it where you need structural strength, it's to hold small stuff on afterwards, leds, filament guides,
thingiverse
free
Side by side dual spool holder for 2020. by jrahaim
... side on the back frame, and one on the front frame.).
i put one 3mm t-nut in the center hole (i didn't use the side holes).
thingiverse
free

Drawer Slide Mounting Bracket Right Hand Side by santababa
...ts.
i did not make any holes. just drill 2 holes for screws. it's cleaner to drill hole using a drill with the size you like.
Kevinthefixer
thingiverse
free

AnyCubic Chiron gantry cable clip by kevinthefixer
...couple small cable ties keep the cables from sliding, and there is still plenty of slack for the gantry to go all the way up top.
thingiverse
free

Commodore 64--2021 by kevinthefixer
...lose to the ssd so i booted up without wi-fi or bluetooth again! finally got it right, even if it's nearly forty years late.
thingiverse
free

Raspberry Pi 4 super silent case with HDD(SSD) mount by Zdendys
...adapter like this: https://www.ebay.com/c/25016580769 . thanks for omment of kevinthefixer ...
Chiron
turbosquid
$20

Bugatti Chiron
...osquid
royalty free 3d model bugatti chiron for download as on turbosquid: 3d models for games, architecture, videos. (1672037)
turbosquid
$49

Bugati Chiron
...d
royalty free 3d model bugatti chiron for download as blend on turbosquid: 3d models for games, architecture, videos. (1568696)
3d_export
$5

Bugatti Chiron
...een sold. as of january 2022, some of these sold vehicles still need to be physically manufactured and delivered to their owners.
turbosquid
$25

bugati chiron
... model bugati chiron for download as 3ds, obj, fbx, and blend on turbosquid: 3d models for games, architecture, videos. (1258877)
3d_export
$12

rim for bugatti chiron gt
...rim for bugatti chiron gt
3dexport
this rim is made for the bugatti chiron gt.
3d_export
$7

bugatti chiron armchair
...15 obj leave me comment if you have any question or if you have any opinions or suggestions about this model. thank you very much
turbosquid
$160

Bugatti Chiron 3d model
...oyalty free 3d model bugatti chiron 3d model for download as on turbosquid: 3d models for games, architecture, videos. (1433781)
cg_studio
$199

Bugatti Chiron 20173d model
...or
.obj .max .lwo .fbx .c4d .3ds - bugatti chiron 2017 3d model, royalty free license available, instant download after purchase.
3d_export
$5

bugatti chiron 2017 bugatti machine car
...bugatti chiron 2017 bugatti machine car
3dexport
car bugatti chiron 2017 3d model
turbosquid
$39
Bugatti Chiron wheel 4
...l 4 for download as ma, 3ds, max, lwo, obj, xsi, c4d, and fbx on turbosquid: 3d models for games, architecture, videos. (1383533)
Anycubic
thingiverse
free

anycubic filament holder
...anycubic filament holder
thingiverse
anycubic filament holder
thingiverse
free

Cableholder Anycubic Mega
...cableholder anycubic mega
thingiverse
cableholder anycubic mega
thingiverse
free

AnyCubic Toolholder by WildManPrinting
...anycubic toolholder by wildmanprinting
thingiverse
anycubic i3 mega toolholder that clips on the side of the spool a-frame.
thingiverse
free

AnyCubic Funnel by phana007
...anycubic funnel by phana007
thingiverse
funnel for anycubic resin and also a reducer for a normal soda bottle.
thingiverse
free

Anycubic Kossel PID calibration
...ir mount:
kossel raspberry camera ir mount
extruder pid calibration.
simple extruder temperature calibration of your 3d printer.
thingiverse
free

anycubic mega i3
...anycubic mega i3
thingiverse
anycubic i3 mega/mega s led 30mm 10-14v 6500k
thingiverse
free

Handle for anycubic by cruiser7
...handle for anycubic by cruiser7
thingiverse
its easier to handle the cover of the anycubic mono x and wash&care
thingiverse
free

anycubic predator Printbed by Lihyon
...anycubic predator printbed by lihyon
thingiverse
anycubic predator printbed
thingiverse
free

Anycubic Predator Triggers by marcelcountry
...anycubic predator triggers by marcelcountry
thingiverse
anycubic predator triggers
thingiverse
free

support anycubic cable by sarpdental
...support anycubic cable by sarpdental
thingiverse
support anycubic cable
Drawers
3d_export
$5

chest of drawers with drawers sonata
...chest of drawers with drawers sonata
3dexport
chest of drawers with drawers sonata
archibase_planet
free

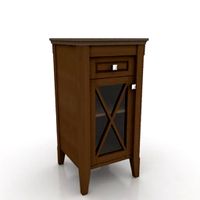
Drawer
...drawer
archibase planet
drawer case locker
drawer - 3d model for interior 3d visualization.
archibase_planet
free
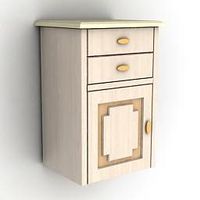
Drawer
...drawer
archibase planet
drawer dathroom furniture
drawer 896410 - 3d model for interior 3d visualization.
archibase_planet
free
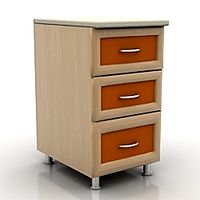
Drawer
...drawer
archibase planet
drawer shelving case
drawer - 3d model (*.3ds) for interior 3d visualization.
archibase_planet
free
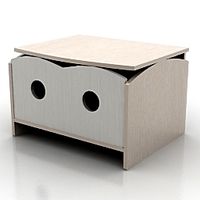
Drawer
...drawer
archibase planet
locker bureau drawer
drawer - 3d model (*.gsm+*.3ds) for interior 3d visualization.
archibase_planet
free

Drawer
...drawer
archibase planet
case drawer locker
drawer - 3d model (*.gsm+*.3ds) for interior 3d visualization.
archibase_planet
free
Drawer
...drawer
archibase planet
locker drawer case
drawer - 3d model (*.gsm+*.3ds) for interior 3d visualization.
archibase_planet
free

Drawer
...drawer
archibase planet
drawer case bathroom furniture
drawer 896411 - 3d model for interior 3d visualization.
archibase_planet
free
Drawer
...drawer
archibase planet
locker drawer case
drawer - 3d model (*.gsm+*.3ds) for interior 3d visualization.
archibase_planet
free

Drawer
...drawer
archibase planet
locker case drawer
drawer - 3d model (*.gsm+*.3ds) for interior 3d visualization.