Thingiverse
DIY RC Street Racing Car: One Week Classroom Project by Banana_Science
by Thingiverse
Last crawled date: 3 years ago
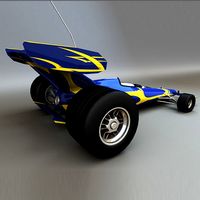
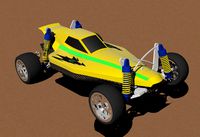
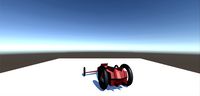
We are finally proud to introduce the high performance RC Street Car V1! Designed with a lesson plan in mind, this is the ultimate one week project for any classroom or hobbyist. Though all the parts to get this car driving are included in this post, we've created Onshape CAD tutorials to teach YOU how to design most parts of this car as it was a key project of the Inventing Reality Summer 2017 summer program. If you're looking for even more Onshape and Tinkercad classroom tutorials, projects, and lessons, check out our Inventing Reality 2017 lesson folder.
Regarding the car itself, it's SUPER FAST, durable, and fun to both build and drive. All parts of the frame can be completely 3D printed, even the tires and gear! Therefore, it's super easy to fix and modify since all parts can be made with the click of a button. It is known to be able to do the "super doughnut" meaning that it does doughnuts so intense that it spins at a 45 degree angle when it does them. Here's a driving video.
Check out our RC Street Racing Car V2 for some major upgrades
Non 3D Printed Parts List:
-2430 7200kv 4P Brushless Motor & 25A ESC
-GoolRC TG3 3 Channel Transmitter & Receiver
-RioRand 9g Metal Gear Servo
-GNB 850mah 2s LiPo
-JST Connector Kit (the ESC comes with a T plug which will need to be replaced with a JST for the battery)
-14T 2mm Pinion Gear Note: if out of stock, check comments for links to substitute gears other people have found
-M5x150mm Bolt (for rear axle)
-M5 Nuts
-M5 Lock Nuts
-M5x40 Bolts (For front axles)
-M3 Lock Nuts
-M3 Bolt Assortment
-M2/2.5/3 Bolt Assortment
-625zz Bearings
-High Strength Threadlocker
-Medium Strength Threadlocker
3D Printed Parts (number of copies necessary for one car in listed () )
-(1)Rear Axle Ruler: This part is simply a measurement device. Place it at the end of your M5x150mm rear axle bolt to measure how far to screw in your right rear wheel-(4)Rear Wheel Simple/Front Wheel Simple (PLA and TPU): these are the simple versions of the rear wheel. Instead of a complex tread pattern, they consist simply of rectangular flaps. These work surprisingly well as the tread flaps function like suspension which the car otherwise lacks. Note that all wheels need to be printed with TPU treads. For optimal results, print treads with ultraflexible Ninjaflex TPU. The center of the wheel should be printed in PLA for best results also. All wheels are mounted to their respective axles by two M5 nuts. A standard M5 nut should be installed on the inside of the wheel while a lock nut should be installed on the outside of the wheel. For the rear right wheel, add a dot of red loctite to both bolts to ensure it doesn't unscrew.-(2 of each set)Front Wheel Axle Mounts (sides 1 & 2): These mounts sandwich together to hold your front 625ZZ bearings to hold your front M5x40 bolts. You want to print these in the strongest material possible at 100% infill and at least 3 shells as they take most of the shock from bumps. Printing them in solid PLA will do just fine though.-(2)5mm Flange Spacer: Sandwich these on either side of your 3D printed rear axle drive gear ensure it stays straight and doesn't move. Make sure that the flanged part faces toward the gear!-(1)15mm Spacer: Install this spacer on the left side of your car's rear axle to space the left wheel from the body.-(1)9g Servo Mount: This simply bolts into the bottom of your frame and holds a 9g metal gear servo.-(1)Steering Rack: This connects to both sets of your motor mounts to allow your wheels to turn. Connect this rack to your servo arm with some thin music wire or a very stiff paper clip.-(2)ESC Mount: Mount these on either side of your ESC to keep it tightly locked down to your frame.-(1 of each)Right & Left Side Guard Air Intakes: These optional side pieces pop into the M3 bolt holes on your bottom plate and can then be fastened to the top plate with M3x8 bolts. These not only help contain all of your wires, but also keep all sorts of dirt and grime out. Also, the air intakes direct airflow onto the ESC heatsink and motor to keep them cool.-(1)2430 Motor Mount: As the name implies, this allows you to mount your 2430 motor with M2.5 bolts. Additionally, both of your rear axle bearings pop into the side of this mount to be held in place. It simply bolts down to your bottom plate to be installed.-(1 of each)Front & Rear Bumper: These bumpers will save you a lot of suffering and unnecessary printing. For optimal strength, print these bumpers in a very stiff TPU or nylon filament so that they flex a little bit but not too much. The front bumper is an essential piece for protecting your front steering mechanism which can break during a hard crash. These bumpers simply screw down to your bottom plate.-(1)Rear Drive Gear: This super simple 3D printed gear connects to your rear axle with a M5 nut. The gear should be printed in PLA with 100% infill and 3 shells for maximum strength. Surprisingly, this gear will last a very long time before finally wearing out! To install your gear, simply pound a M5 lock nut or regular nut into the gear with a mallet. Screw it onto the rear axle and fasten it with a dot of red loctite. We've included 6 different files for the rear drive gear to compensate for different printers and materials being used. We suggest you try printing the 79 tooth default gear first to see if it fits. If you end up stripping your 79 tooth rear drive gear, just keep trying our larger sizes in increments of 2 teeth to find the best fit for you.-(1)Base Plate: At the heart of your car, there's the base plate. We've included .STL and .SVG files so you 3D print, laser cut, water jet, or cnc your base plate in any material you want! For optimal results, laser cut it in some cheap 1/8" ply.-(1)Upper Plate: To hold everything together and make this car even stronger, there's the upper plate. This screws onto the top of your front wheel axle mounts and onto the top of the rear motor mount. The side air intakes also screw onto the top plate. Just like the top plate, we've included both STL and SVG files so it can be cut/printed out of just about any material you like.
Similar models
cults
free
DIY RC Street Racing Car: One Week Classroom Project
...
laser cutting
onshape
rc mechanics
voltage
amperage
duration of lesson
1-2 weeks depending on what parts students choose design
thingiverse
free
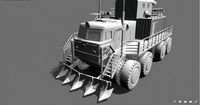
RC modification of the Tony Stark's Hotrod by gamebox13
...by m5 nuts and lock-nuts.
small gear puts on motor's axle with m3 nut and screw.
https://www.youtube.com/watch?v=uztbpafhmxo
thingiverse
free

Logitech g27 Steering wheel adapter by Garrett_w
...will need to supply an m10 bolt and nut (washer also suggested) along with m5 nuts and bolts to bolt your wheel to adapter plate.
thingiverse
free

2020 geared extruder motor mount by rmoro
... 10mm bolts and t-slot nuts to mount the printed part to the printer.
use two tie-wraps to mount the motor onto the printed part.
thingiverse
free

Rear Wheel Axle Holder by shawwwn
...le holder, rev.1 - http://www.thingiverse.com/thing:1376086)
rev. 1:
changes made to adapt the the rear plate.
freecad 0.15(4671)
grabcad
free

Stub Axle RH
...drive vehicle. in a rear wheel drive vehicle this axle is capable of angular movement about the kingpin for steering the vehicle.
grabcad
free

VSBD (Vertical Shaft Bicycle Drive)
...ith side gear teeth on the maximum diameter of inside rear wheel rim, transmitting power through being clamped on the spoke nuts.
thingiverse
free

RC Tank adaptor plate for Geared Motors by Oger
...china, we'll see how these work.
https://www.ebay.de/itm/dc12v-500rpm-mikro-mini-motor-getriebe-speed-reduzieren-drehmoment-
3dwarehouse
free

ESC Geometricity 2012
...gned rear bumper. there are also new 16-spoke wheels. like/dislike? give me your reviews! new 2012 models coming soon, #esc #vxr8
thingiverse
free
Yokomo YD2SX3 esc wiring stealth mount by defMondo
... the surface of the printer and the only supports will be under the beveled screw holes and the hump lined up with the out drive.
Banana
3d_export
free

banana
...banana
3dexport
banana lowpoly<br>for fruits and vegetables collection
3d_export
$19

banana
...banana
3dexport
3d_export
$10

banana
...banana
3dexport
turbosquid
free

Banana
...banana
turbosquid
free 3d model banana for download as fbx on turbosquid: 3d models for games, architecture, videos. (1367269)
3d_export
$5

banana tree
...banana tree
3dexport
banana tree
3d_export
$5
Cartoon banana
...cartoon banana
3dexport
cool banana
turbosquid
$39
Banana
...
turbosquid
royalty free 3d model banana for download as fbx on turbosquid: 3d models for games, architecture, videos. (1238376)
turbosquid
$20

Banana
...
turbosquid
royalty free 3d model banana for download as fbx on turbosquid: 3d models for games, architecture, videos. (1492054)
turbosquid
$14

Banana
...
turbosquid
royalty free 3d model banana for download as obj on turbosquid: 3d models for games, architecture, videos. (1606612)
turbosquid
$13
Banana
...
turbosquid
royalty free 3d model banana for download as lxo on turbosquid: 3d models for games, architecture, videos. (1561014)
Classroom
3d_export
$6

classroom
...classroom
3dexport
hello, i decided to create a classroom. i used blender 3d version 2.92.0.
turbosquid
$60

Classroom
...squid
royalty free 3d model 3d classroom for download as max on turbosquid: 3d models for games, architecture, videos. (1534735)
3d_export
$5
Classroom
...classroom
3dexport
https://www.dock4all.com/
3d_export
$12

modern classroom
...modern classroom
3dexport
modern classroom vr4.1
turbosquid
$15

Classroom
... available on turbo squid, the world's leading provider of digital 3d models for visualization, films, television, and games.
3d_export
$65

classroom
...classroom
3dexport
simple rendering of the scene file
3d_export
$65

Classroom
...classroom
3dexport
simple rendering of the scene file
3ddd
$1
Classroom Desk
... desk , парта
classroom desk and 2 chairs ( wood,leather and aluminum)
3d_export
$100

Classroom
...vertices: 146,703 preview images rendered in v-ray. model has real-world scale. background and lighting are included in the file.
3d_export
free

classroom
...classroom
3dexport
watch the download and render tutorial in our youtube channel.
Week
3ddd
$1
david weeks
...david weeks
3ddd
david weeks
david weeks
turbosquid
$12
Acaba No.435 Weeks Studio
...d model acaba no.435 weeks studio for download as max and obj on turbosquid: 3d models for games, architecture, videos. (1605096)
turbosquid
$8

Treble Single david weeks
...d model treble single david weeks for download as max and obj on turbosquid: 3d models for games, architecture, videos. (1435530)
turbosquid
$12

David Weeks Floor lamp
...odel david weeks floor lamp for download as max, obj, and fbx on turbosquid: 3d models for games, architecture, videos. (1498285)
turbosquid
$50

Sxeh embryo week ten
... available on turbo squid, the world's leading provider of digital 3d models for visualization, films, television, and games.
turbosquid
$29

Wooden by David Weeks Studio
... available on turbo squid, the world's leading provider of digital 3d models for visualization, films, television, and games.
3ddd
$1
Cross Cable by David Weeks Studio
... david weeks studio
3ddd
david weeks
ссылка на сайт производителя:http://www.davidweeksstudio.com/lighting/cross-cable/
turbosquid
$15

David weeks studio Sarus Mobile
... 3d model david weeks studio sarus mobile for download as max on turbosquid: 3d models for games, architecture, videos. (1192077)
3ddd
$1
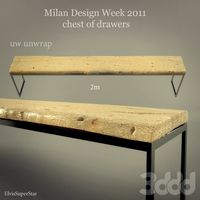
Milan Design Week 2011
...milan design week 2011
3ddd
консоль
в комплекте развертки дисплейс, нормал, спекулар , дифуз , бамп
3ddd
$1

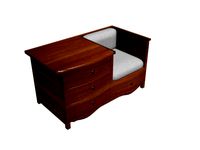
Milan Design Week 2011 ( TV )
...milan design week 2011 ( tv )
3ddd
тумба
vray 2.0
Diy
3d_export
free
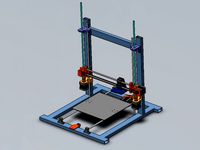
DIY 3D Printer
...diy 3d printer
3dexport
diy 3d printer model
turbosquid
$10

Diy tiered
...l diy tiered for download as max, max, max, max, fbx, and obj on turbosquid: 3d models for games, architecture, videos. (1603709)
turbosquid
$3
Diy Desk to Bench
...odel diy desk to bench for download as 3ds, max, obj, and fbx on turbosquid: 3d models for games, architecture, videos. (1506589)
turbosquid
$2

DIY Moon Light
...model diy moon light for download as obj, fbx, blend, and dae on turbosquid: 3d models for games, architecture, videos. (1501170)
3d_export
$8
DIY CNC Router 3D Model
...diy cnc router 3d model
3dexport
cnc; router; diy; homemade
diy cnc router 3d model maikeru86 58463 3dexport
turbosquid
$5

Diy Kitchen Cabinets
...itchen cabinets for download as 3ds, obj, fbx, blend, and dae on turbosquid: 3d models for games, architecture, videos. (1197373)
3d_export
free

Download free Diying Plant 3D Model
...download free diying plant 3d model
3dexport
diying plant blender
diying plant 3d model visitorsama 98607 3dexport
3ddd
$1
DIY coffee table + decor
... рамка для фото
кофейный столик diy 400х350х600(h) мм. моделился по фото. внимание: материалы - corona.
turbosquid
$3
Diy Wire Lamp Shade
...free 3d model diy wire lamp shade for download as 3ds and fbx on turbosquid: 3d models for games, architecture, videos. (1347605)
cg_studio
$12

DIY MONGOLIAN LAMB STOOLS3d model
... hair soft pile white
.max - diy mongolian lamb stools 3d model, royalty free license available, instant download after purchase.
Rc
3ddd
$1
RC Helicopter
...rc helicopter
3ddd
вертолет
mini rc helicopter
93.329 polys
3d_export
$7
rc helicopter model
...rc helicopter model
3dexport
rc helicopter model
3d_ocean
$25
RC F1
...rc f1
3docean
auto car control f1 formula race rc remote speed
remote control f1 car
turbosquid
$10
rc plane
...lane
turbosquid
free 3d model rc plane for download as blend on turbosquid: 3d models for games, architecture, videos. (1295828)
turbosquid
$100
RC Helicopter
...free 3d model rc helicopter for download as 3ds, max, and obj on turbosquid: 3d models for games, architecture, videos. (1298511)
turbosquid
$59
Drone with RC
...3d model drone with rc for download as 3ds, max, obj, and fbx on turbosquid: 3d models for games, architecture, videos. (1363601)
turbosquid
$75
RC buggy
... available on turbo squid, the world's leading provider of digital 3d models for visualization, films, television, and games.
turbosquid
$39

RC Plane001
... available on turbo squid, the world's leading provider of digital 3d models for visualization, films, television, and games.
turbosquid
$30
RC Jet
... available on turbo squid, the world's leading provider of digital 3d models for visualization, films, television, and games.
turbosquid
$30
Rc airplane
... available on turbo squid, the world's leading provider of digital 3d models for visualization, films, television, and games.
Science
turbosquid
$30

Science Building
...d
royalty free 3d model science building for download as max on turbosquid: 3d models for games, architecture, videos. (1148857)
turbosquid
$2
Bench Science
...quid
royalty free 3d model bench science for download as rfa on turbosquid: 3d models for games, architecture, videos. (1274551)
turbosquid
$5
Science Flasks
...ty free 3d model science flasks for download as blend and obj on turbosquid: 3d models for games, architecture, videos. (1639964)
turbosquid
$95

Megalopolis the science
...del megalopolis the science for download as max, obj, and fbx on turbosquid: 3d models for games, architecture, videos. (1189886)
turbosquid
$8

Science Stool
...3d model science stool for download as obj, dae, fbx, and stl on turbosquid: 3d models for games, architecture, videos. (1608945)
turbosquid
$25

Science Equipment
... available on turbo squid, the world's leading provider of digital 3d models for visualization, films, television, and games.
turbosquid
$20

science desk_1
... available on turbo squid, the world's leading provider of digital 3d models for visualization, films, television, and games.
turbosquid
free

Science Equipment
...ce equipment for download as max, 3ds, dae, dxf, fbx, and obj on turbosquid: 3d models for games, architecture, videos. (1690832)
turbosquid
free

Museum of Science
... available on turbo squid, the world's leading provider of digital 3d models for visualization, films, television, and games.
turbosquid
$56

Gun science fiction
...yalty free 3d model gun science fiction for download as blend on turbosquid: 3d models for games, architecture, videos. (1388382)
Racing
3ddd
$1
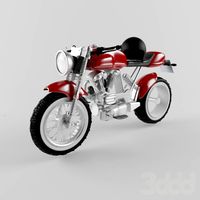
race
...race
3ddd
мотоцикл
race
turbosquid
$15
Racing
...d
royalty free 3d model racing for download as obj and blend on turbosquid: 3d models for games, architecture, videos. (1474846)
3d_export
$5

racing car
...racing car
3dexport
racing car
3d_export
$5
racing helmet
...racing helmet
3dexport
helmet 3d model for motocross or racing cars
3d_export
$5
racing car
...racing car
3dexport
low poly classical racing car model
3d_ocean
$29
racing car
...cing car rim seat speed sport sport car tyre
detailed 3d model of racing car. all materials are included. model is ready for use.
3d_ocean
$29

racing car
... rim seat speed spoiler sport sport car tire
detailed 3d model of racing car. all materials are included. model is ready for use.
3d_ocean
$15

Race Car
...race car
3docean
a very detailed and realistic 3d model of a race car, which was created with polygons.
3ddd
$1
Turbo Racing
... машинка
игрушечная гоночная дорога "turbo racing". почувствуй себя настоящим гонщиком.
3d_export
$100

start race motocross
...start race motocross
3dexport
start race motocross
Street
3ddd
$1
street lamp
...street lamp
3ddd
street lamp , фонарь
street lamp
3d_ocean
$4
Street lamp
...street lamp
3docean
3d 3d object lamp street street lamp
street lamp (low poly)
3d_ocean
$20
Street lamps
...low metal road street illumination street lamps street lanterns town traffic urban
this eighteen models street lamps high quality
3d_ocean
$7
Street Light
...street light
3docean
light lighting street transformer
a semi detailed street light with a transformer.
3d_ocean
$4
Street Bench
...street bench
3docean
bench streer bench street
street bench model - .ma - .obj
3d_export
free

Street with StreetLights
...street with streetlights
3dexport
street, with streetlights.
3d_export
$5

street lamp
...street lamp
3dexport
street light for parks.
3ddd
free
Street light
...street light
3ddd
фонарь
street light
turbosquid
$1

Street Signs 04 Street Names
...ree 3d model street signs 04 street names for download as fbx on turbosquid: 3d models for games, architecture, videos. (1672588)
turbosquid
$1

Street Signs 03 Street Names
...ree 3d model street signs 03 street names for download as fbx on turbosquid: 3d models for games, architecture, videos. (1672050)
Car
3d_export
$5

car
...car
3dexport
luxury car high quality car
3d_export
$5

car
...car
3dexport
luxury car high quality car
3d_export
$5

car
...car
3dexport
luxury car high quality car
3d_export
$5

car
...car
3dexport
luxury car high quality car
3d_export
$5

car
...car
3dexport
luxury car high quality car
archibase_planet
free
Car
...
archibase planet
car sports car motor-car sportster
car nascar#1 n300114 - 3d model (*.gsm+*.3ds) for exterior 3d visualization.
archibase_planet
free

Car
...ibase planet
car motor-car sportster sports car
car gablota xform n190214 - 3d model (*.gsm+*.3ds) for exterior 3d visualization.
archibase_planet
free

Car
...car
archibase planet
car motor car transport
car vaz 2104- 3d model for interior 3d visualization.
3d_export
$15

car
...car
3dexport
car
3d_export
free
car
...car
3dexport
car
Project
3d_export
$7
project
...project
3dexport
project
3d_export
$20
Project
...project
3dexport
design_connected
$16

Project Chair
...project chair
designconnected
rex kralj project chair computer generated 3d model. designed by žitnik, marjan.
3ddd
$1

lectric Project
...настроены. сетка очень плотная.
доступно только для группы "profi"
про группу "profi" можно прочитать в чаво
3d_ocean
$19

Soon project
...kup. made in 3ds max 2013 1- 3dsmax with vray render included material and light 2- obj file 3- fbx file hope you like it plea...
turbosquid
$49

Joint | Project
...squid
royalty free 3d model joint | project for download as on turbosquid: 3d models for games, architecture, videos. (1297983)
turbosquid
$11

house project
...bosquid
royalty free 3d model house project for download as on turbosquid: 3d models for games, architecture, videos. (1672482)
turbosquid
$450
University project
...
royalty free 3d model university project for download as rvt on turbosquid: 3d models for games, architecture, videos. (1463354)
turbosquid
$30

smart projecter
...lty free 3d model smart projecter for download as max and obj on turbosquid: 3d models for games, architecture, videos. (1236214)
3d_export
$5
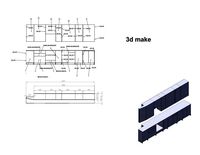
project drawing
...project drawing
3dexport
project drawing and 3d model<br>format jpg sldprt dwg<br>by 3d make
One
turbosquid
$2
one plus one
... available on turbo squid, the world's leading provider of digital 3d models for visualization, films, television, and games.
3ddd
$1
One
...one
3ddd
стул
офисный стул one
3ddd
free

one
...
palazetti one ,http://palazzetti.ca/index.php/component/virtuemart/seating/armchairs-lounges/one-chair-detail?itemid=0
turbosquid
$35

One A
... available on turbo squid, the world's leading provider of digital 3d models for visualization, films, television, and games.
turbosquid
free

One
... available on turbo squid, the world's leading provider of digital 3d models for visualization, films, television, and games.
3ddd
$1
Стул One
...стул one
3ddd
one , magis
кресло magis s.p.a , one
3ddd
$1
Стул One
...стул one
3ddd
one , magis
кресло one chair (4star), magis s.p.a.
3d_export
$20

xbox one
...xbox one
3dexport
xbox one
3ddd
$1

xbox one
... консоль , джойстик
xbox one + kinect + gamepad
3ddd
free
One
...nstantin grcic
артикул ct-284 (cosmorelax.ru)
размер l36xw41xh82.5, sh 77cm
цвет черный, красный
материал алюминий
вес 2,5 кг