Thingiverse
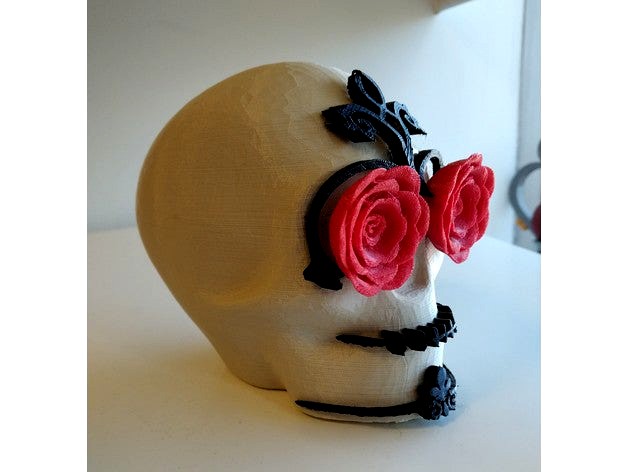
DIY de Los Muertos (DIY Sugar Skull) by andreamakesthings
by Thingiverse
Last crawled date: 3 years ago
Introduction: La Catrina (or Sugar Skull) is widely recognized as a symbol for the Mexican holiday, Dia de Los Muertos or Day of the Dead. A holiday where families go visit their deceased and bring prayers, food and songs. Aside from Dia De Los Muertos, La Catrina has grown as a symbol of Mexican artisanry, often representing las Catrinas as the very people who make it. This lesson plan is intended to teach students over the history and evolution of Las Catrinas.
La Catrina was created around 1910 by illustrator, Jose Guadalupe Posado, to portray those of indigenous background who tried to renounce their heritage and embrace a euro-centric aristocratic life style. Posado illustrated them as skeletons to serve as a reminder that people from all backgrounds and walks of life would ultimately end up on the same path.
Objectives: Students will learn the history of Dia de Los Muertos and the story behind La Catrina. They will design their own Catrina using 3D-printed decorations.
Audience: This activity is intended for grade levels 2nd-9th.
Subjects: History, Art and Design
Materials: TinkerCAD, Thingiverse, 3D Printer, Glue
Print Time: Depending on print settings, skulls can take ~5 hours. Decorations can take half an hour. Optional: Students can break into groups of 3 to design a group skull and reduce amount of printing time.
Duration: 2-4 class periods
Activity:
Step 1: Students will receive a paper with the drawing of a skull as well as a transparency. Students will draw a design on transparency. This design will later be printed and applied to the skull.
Step 2: Using a camera, students or teacher will take photo of their transparency against a white background.
Step 3: Send photo to email, then use a vector conversion website to convert your photo into a vector image.
Step 4A: Download the SkullMold.stl and upload to TinkerCAD in the same workplane.
Step 4B: Align the skull design so that the mold intersects with the design and is aligned with the design.
Step 5: Download “Lisa the Printable Skull” from Thingiverse and upload to TinkerCAD. Select the Hole tool to convert the skull into a hole.
Step 6: Align the “hole” skull and the design so that ~5 mm are protruding from the skull. Use the “Align” tool to assure the two objects are well-aligned. Then group.
Step 7: Have students select what flower decorations they would like on their skull. The project has two skull files preset with holes to fit the decorations.
Step 8: Print all the desired files. Recommend printing with Supports enabled along with standard settings.
Step 9: Assemble! The flowers are designed to be pressure fit with the dowels that were printed alongside them. The skull design will have to be glued on.
Evaluation: Students will be evaluated on their ability to follow through with instructions and willingness to participate in the activity. Optional: Students can be quizzed on the history of La Catrina and Dia de Los Muertos.
Similar models
thingiverse
free

Catrina by DarkSpark2099
...catrina by darkspark2099
thingiverse
this is a tradicional skull from a mexican catrina for dia de muertos
3dwarehouse
free

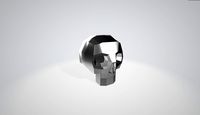
Black sugar skull decoration dia de los muertos
...black sugar skull decoration dia de los muertos
3dwarehouse
3dwarehouse
free

White Sugar Skull decoration dia de los muertos
...white sugar skull decoration dia de los muertos
3dwarehouse
3dwarehouse
free

Catrina mexicana
...catrina mexicana
3dwarehouse
catrina dia de muertos mexico mexican catrina, deads day
thingiverse
free

Sugar Skull
...ugar skull
thingiverse
sugar skull for dia de los muertos. printed with no supports, but did require some cleanup for bridging.
cg_trader
$12

Skull Pendant Calavera 1 | 3D
...skull pendant calavera 1 | 3d
cg trader
pendant with a skull design, conmemorating the mexican holiday dia de muertos
cg_trader
$10

Calaverita de Azucar
...
cg trader
calaverita de azucar (sugar skull)
traditional sugar skull that decorates altars in the dia de los muertos in mexico
cg_trader
$19

La Catrina Toon Version | 3D
...cartoon mexico patzcuaro culture mexican skull skeleton dia muertos noche halloween art other cartoon character character cartoon
cg_trader
$6

Decorated Skull Dia De Los Muertos
...los muertos
cg trader
3d decorated skull dia de los muertos skull decorated dia de, formats blend, ready for 3d animation and ot
cg_trader
$9

La Catrina | 3D
...nt on gold or silver material 10saleoff catrina dead skeleton woman mexico culture skull tradition miniatures figurines halloween
Andreamakesthings
thingiverse
free

Spides by andreamakesthings
...spides by andreamakesthings
thingiverse
decided to draw a childhood dog and print him.
thingiverse
free

Puerquito/Marranito by andreamakesthings
...s) so i printed one out.
recipe i used was from this baker/youtuber here:
https://www.youtube.com/watch?v=hwuotosgfne&t=217s
Muertos
turbosquid
$25

Pan de Muerto
...yalty free 3d model pan de muerto for download as max and fbx on turbosquid: 3d models for games, architecture, videos. (1157475)
turbosquid
$9

Kettle Da de Muertos
... available on turbo squid, the world's leading provider of digital 3d models for visualization, films, television, and games.
3d_export
$17
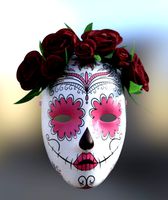
mask dia los muertos halloween
...en
3dexport
day of the dead masks contain 4 different flowers. improve your overall day of the dead experience with these masks.
3ddd
$1
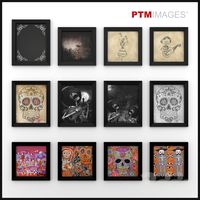
Day of the Dead Prints by PTM Images
...картины по теме праздника дня мёртвых (исп. día de muertos. размеры - 500х500 и 500х600. в архиве файлы для...
3d_ocean
$5
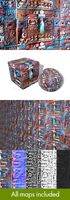
Mexican Carving Seamless Texture
...ancient archaeology carving column dead derelict dia de los muertos dragon festival history mask mayan mexican mexico old rock...
thingiverse
free

Llavero día de muertos by jsmoctezuma
...llavero día de muertos by jsmoctezuma
thingiverse
pequeño diseño de pareja de llaveros de día de muertos.
sketchfab
$4

Stylized Sugar Pan de Muerto
... and textured with substance painter.
manually made uvs. - stylized sugar pan de muerto - buy royalty free 3d model by bacontaco
thingiverse
free

Dia De Los Muertos Skull by woodsyzacko
...dia de los muertos skull by woodsyzacko
thingiverse
~ this is a 3d scan of a cute dia de los muertos skull. ~
sketchfab
$10

El Muerto - Stylized Skull
...something for my beautiful country’s tradition el día de muertos hope you like this low-poly hand-painted stylized skull. i...
sketchfab
$5

Robot Catrin Dia de muertos
...ab
create with blender, zbrush, 3dsmax, substance painter - robot catrin dia de muertos - buy royalty free 3d model by diegovega
Sugar
archibase_planet
free

Sugar bowl
...sugar bowl
archibase planet
sugar bowl sugar-basin sugar-bowl
sugar bowl - 3d model (*.gsm+*.3ds) for interior 3d visualization.
archibase_planet
free
Sugar-bowl
...rchibase planet
sugar-bowl sugar bowl sugar-basin kitchen ware
sugar-bowl - 3d model (*.gsm+*.3ds) for interior 3d visualization.
archibase_planet
free

Sugar-bowl
... planet
sugar bowl sugar-basin sugar-bowl kitchen ware
sugar-bowl n160911 - 3d model (*.gsm+*.3ds) for interior 3d visualization.
archibase_planet
free

Sugar bowl
...sugar bowl
archibase planet
sugar bowl sugar-basin
sugar bowl - 3d model (*.gsm+*.3ds) for interior 3d visualization.
archibase_planet
free

Sugar bowl
...sugar bowl
archibase planet
sugar bowl sugar-basin kitchen ware
sugar bowl - 3d model (*.3ds) for interior 3d visualization.
archibase_planet
free
Sugar bowl
...ugar bowl
archibase planet
sugar bowl sugar-basin kitchen ware
sugar bowl - 3d model (*.gsm+*.3ds) for interior 3d visualization.
archibase_planet
free

Sugar bowl
...ugar bowl
archibase planet
sugar bowl sugar-basin kitchen ware
sugar bowl - 3d model (*.gsm+*.3ds) for interior 3d visualization.
archibase_planet
free

Sugar bowl
...anet
sugar bowl sugar-basin kitchen ware
sugar bowl screaming fox n150113 - 3d model (*.gsm+*.3ds) for interior 3d visualization.
archibase_planet
free
Sugar-bowl
...e planet
vase sugar-bowl bowl sugar-basin kitchen ware
sugar-bowl n100313 - 3d model (*.gsm+*.3ds) for interior 3d visualization.
archibase_planet
free

Sugar bowl
...sugar bowl
archibase planet
sugar bowl kitchen ware sugar-basin
vase 3 - 3d model (*.gsm+*.3ds) for interior 3d visualization.
Diy
3d_export
free
DIY 3D Printer
...diy 3d printer
3dexport
diy 3d printer model
turbosquid
$10
Diy tiered
...l diy tiered for download as max, max, max, max, fbx, and obj on turbosquid: 3d models for games, architecture, videos. (1603709)
turbosquid
$3
Diy Desk to Bench
...odel diy desk to bench for download as 3ds, max, obj, and fbx on turbosquid: 3d models for games, architecture, videos. (1506589)
turbosquid
$2
DIY Moon Light
...model diy moon light for download as obj, fbx, blend, and dae on turbosquid: 3d models for games, architecture, videos. (1501170)
3d_export
$8
DIY CNC Router 3D Model
...diy cnc router 3d model
3dexport
cnc; router; diy; homemade
diy cnc router 3d model maikeru86 58463 3dexport
turbosquid
$5
Diy Kitchen Cabinets
...itchen cabinets for download as 3ds, obj, fbx, blend, and dae on turbosquid: 3d models for games, architecture, videos. (1197373)
3d_export
free

Download free Diying Plant 3D Model
...download free diying plant 3d model
3dexport
diying plant blender
diying plant 3d model visitorsama 98607 3dexport
3ddd
$1
DIY coffee table + decor
... рамка для фото
кофейный столик diy 400х350х600(h) мм. моделился по фото. внимание: материалы - corona.
turbosquid
$3
Diy Wire Lamp Shade
...free 3d model diy wire lamp shade for download as 3ds and fbx on turbosquid: 3d models for games, architecture, videos. (1347605)
cg_studio
$12
DIY MONGOLIAN LAMB STOOLS3d model
... hair soft pile white
.max - diy mongolian lamb stools 3d model, royalty free license available, instant download after purchase.
Skull
3d_export
$15
skull
...skull
3dexport
skull
3d_export
$15

skull
...skull
3dexport
dirty skull
3d_export
$7
skull
...skull
3dexport
skull model
3d_export
$5

Skull
...skull
3dexport
skull with teeth
3d_ocean
$9

Skull
...skull
3docean
anatomy bone head skeleton skull
just a nice 3d model of skull.
archibase_planet
free
Skull
...skull
archibase planet
skull cranium skeleton
skull n260707- 3d model for interior 3d visualization.
3d_export
$5

skull
...skull
3dexport
old skull without a lower jaw
3d_export
$5
Skull
...skull
3dexport
skull model that can be used in games and movies.
3d_export
free
Skull
...skull
3dexport
the 3d object is modeled after the human skull.
3d_export
$10

Skull
...skull
3dexport
the simple hight poly model of the skull. without textures
Los
3ddd
$1
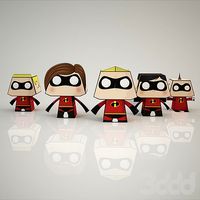
Paperminions - Los Increibles
...inions - los increibles
3ddd
paperminions , los increibles
paperminions - los increibles
3ddd
$1

DO-LO-REZ
...do-lo-rez
3ddd
do-lo-rez , moroso
do-lo-rez sofa
3ddd
$1

Do-lo-Res
... угловой
диван фабрика do-lo-res компонуется из отдельных боксов, разнообразных размеров и тканей.
3ddd
$1
Lo turi
...lo turi
3ddd
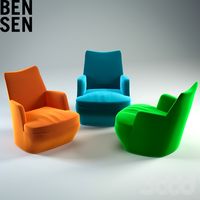
bensen
1200x1200
turbosquid
$30
Lock Lo
... available on turbo squid, the world's leading provider of digital 3d models for visualization, films, television, and games.
turbosquid
free

face lo
... available on turbo squid, the world's leading provider of digital 3d models for visualization, films, television, and games.
3ddd
$1

DO-LO-REZ
...бы образовалась форма дивана, и закреплены к основе стальными булавками.
покрытия модели do-lo-rez несъемные. основа деревянная.
turbosquid
$41
Lo-profile Wheel.max
... available on turbo squid, the world's leading provider of digital 3d models for visualization, films, television, and games.
turbosquid
$2

Espada - sword LO
... available on turbo squid, the world's leading provider of digital 3d models for visualization, films, television, and games.
turbosquid
free

Sofa Los Cabos
... available on turbo squid, the world's leading provider of digital 3d models for visualization, films, television, and games.