Thingiverse
DIY CMM Arm Digitizer by afactor2
by Thingiverse
Last crawled date: 3 years ago
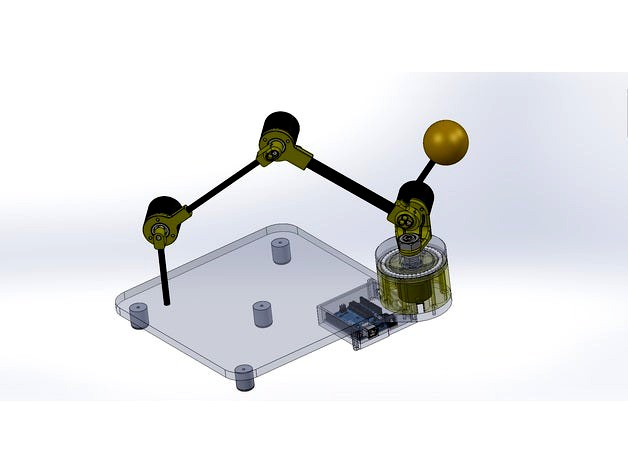
The original DIY Digitizer project used 3D Printing, CNC Router and Laser cutting this project has been designed to use only 3D Printing.
This list includes a BOM file of links and part numbers used of both standard and large build.
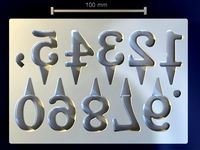
Also incuded are the PDF templated for drilling the base plate which can be made form any known flat rigid materiel like PolyCARB, Carbon or Fiberglas plate, 12" x 12" by alt least 0.25"
Please look at the original project of additional information http://fablab.ruc.dk/diy-digitizer/
This document will be up dated as the project progresses
05-20-2018
1) Counter balance added to improve ease of motion
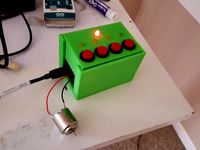
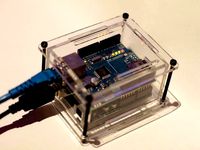
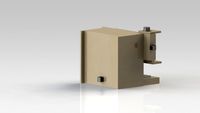
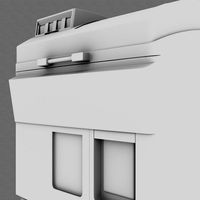
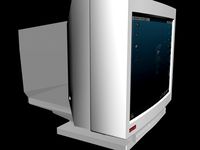
2) 2 different Arduino enclosures one for 3 encoders and one for 4
3) pictures of 4 encoder assembled unit added
4) The tubes that make up the arm also work as wire guides to do this the rubber sleeve is cut around the cable and slid off over the shield wire. Scrunch the shield over the 4 conductor and trim them back about 12" at first. Use the shield wire as a snake wire to run the cable though the tubes, if the rubber over sleeve was removed carefully without splitting length ways the shield wire is used to re install the sleeve when using the 4 encoder between encoder 3 and 2 and from the base to the Arduino Enclosure as in the photo.
5) all PCB connections were made on the back side of the prototyping board with PC type pines and connectors
This list includes a BOM file of links and part numbers used of both standard and large build.
Also incuded are the PDF templated for drilling the base plate which can be made form any known flat rigid materiel like PolyCARB, Carbon or Fiberglas plate, 12" x 12" by alt least 0.25"
Please look at the original project of additional information http://fablab.ruc.dk/diy-digitizer/
This document will be up dated as the project progresses
05-20-2018
1) Counter balance added to improve ease of motion
2) 2 different Arduino enclosures one for 3 encoders and one for 4
3) pictures of 4 encoder assembled unit added
4) The tubes that make up the arm also work as wire guides to do this the rubber sleeve is cut around the cable and slid off over the shield wire. Scrunch the shield over the 4 conductor and trim them back about 12" at first. Use the shield wire as a snake wire to run the cable though the tubes, if the rubber over sleeve was removed carefully without splitting length ways the shield wire is used to re install the sleeve when using the 4 encoder between encoder 3 and 2 and from the base to the Arduino Enclosure as in the photo.
5) all PCB connections were made on the back side of the prototyping board with PC type pines and connectors
Similar models
grabcad
free

Canbus Shield Uno Enclosure
...ad
non-waterproof enclosure for a canbus shield mounted on the arduino uno. cable support and wiring access to uno a and d pins
thingiverse
free

Arduino Plate
...be positioned vertically and has more holes
plate-v02
plate-base-v02-3mm (for 3 mm plywood)
plate-base-v02-4mm (for 4 mm plywood)
thingiverse
free
Enclosure - Arduino with Shield and wires/buttons/leds by captainmojojojo
...or 4 buttons with and 4 leds
-moved the power led to the top center
-left room for several wires to go out the side to the motors
thingiverse
free

Arduino Nano + Ethernet Shield - ENC28J60 webserver enclosure by Kolouch
...h
thingiverse
just a little enclosure for arduino nano webserver project.
to use with arduino nano + ethernet shield - enc28j60.
thingiverse
free

3D Printed DIY Flight Simulator Yoke Using Arduino by dvilardi
...o (original with atmel microcontroller and reset pins)
mdf wood base and screws
wires (tip: use old ethernet cables)
rubber bands
thingiverse
free

Arduino and 2 Row LCD Box by atom657
... be glued in the spot (there are tons of enclosures on here that can do so). the lcd enclosure is also removable for easy wiring.
thingiverse
free

Electronic Mouse Trap - servo driven
...12"x12"x1/4"
glue
5 gallon bucket
rare earth magnet
miscellaneous screws, bolts, nuts
https://youtu.be/qkybty8h40s
thingiverse
free
Laser cut Ethernet shield / Arduino enclosure by teabot
... measurements from an arduino uno board and a arduino ethernet shield v5.
made at the london hack space:
london.hackspace.org.uk/
thingiverse
free

Electric Vehicle Large Cable Divider - Three Position by evwest
...ehicle project. this size divider is intended for 2/0 double insulated or shielded cable. the required screw is a #8 x 3/4".
thingiverse
free

Electric Vehicle Large Cable Divider - Two Position by evwest
...ehicle project. this size divider is intended for 2/0 double insulated or shielded cable. the required screw is a #8 x 3/4".
Afactor2
thingiverse
free

Rigid Grip for Canon 20D & 30D by afactor2
... canon 20d & 30d by afactor2
thingiverse
rigid grip for canon 20d with extended grip battery holder. still work in progress
thingiverse
free
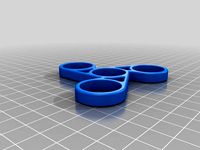
3Delta Spinner by afactor2
... 8 to 9 loops 20% fill 0.2mm tip 0.1 layer it prints with virtually no cleanup and the bearings fit without adjusting the holes.
thingiverse
free

Anet A8 or clone X & Y Bearing to Gear Adapter Gear by afactor2
...ce for the teeth when checked in netfabb. out came my engineering hand buck and her is the result.
step 14 file is also included
Cmm
3dfindit
free
CMM
...cmm
3dfind.it
catalog: wiska
3dfindit
free

CMMS-AS
...cmms-as
3dfind.it
catalog: festo
3dfindit
free

CMMS-AS
...cmms-as
3dfind.it
catalog: festo
3dfindit
free
CMMS-AS
...cmms-as
3dfind.it
catalog: festo
thingiverse
free

45-CMM-3.02-FDM-HOUSEHOLD-ITEM by 900377300
...45-cmm-3.02-fdm-household-item by 900377300
thingiverse
45-cmm-3.02-fdm-household-item
thingiverse
free

Complimentary Mfg Machine (CMM) by Anathae
...ive manufacturing machine. the end effector for this is intended to have both a metal-inert-gas (mig) welder and a milling head.
thingiverse
free

Replacement FARO Arm EDGE CMM Probe Magnet Holder
...ent faro arm edge cmm probe magnet holder
thingiverse
this is a replacement probe and scanner holder for the faro arm edge pcmm.
thingiverse
free

CMM - Renishaw REVO by tbm0115
... the b axis to do whatever with.
the intent for this model was to use the part as an offline programming reference for clearance.
thingiverse
free

CMM fixture and fittings for X-UHF project by colinza
... in 4 segments. sides are keyed for a piece of 1.75mm filament off cut.
made a bridge piece for connecting different pcb modules
thingiverse
free

Model guitar stand by JimR
...model guitar stand by jimr thingiverse stand for 25 cmm mini guitar...
Diy
3d_export
free
DIY 3D Printer
...diy 3d printer
3dexport
diy 3d printer model
turbosquid
$10

Diy tiered
...l diy tiered for download as max, max, max, max, fbx, and obj on turbosquid: 3d models for games, architecture, videos. (1603709)
turbosquid
$3
Diy Desk to Bench
...odel diy desk to bench for download as 3ds, max, obj, and fbx on turbosquid: 3d models for games, architecture, videos. (1506589)
turbosquid
$2

DIY Moon Light
...model diy moon light for download as obj, fbx, blend, and dae on turbosquid: 3d models for games, architecture, videos. (1501170)
3d_export
$8
DIY CNC Router 3D Model
...diy cnc router 3d model
3dexport
cnc; router; diy; homemade
diy cnc router 3d model maikeru86 58463 3dexport
turbosquid
$5

Diy Kitchen Cabinets
...itchen cabinets for download as 3ds, obj, fbx, blend, and dae on turbosquid: 3d models for games, architecture, videos. (1197373)
3d_export
free

Download free Diying Plant 3D Model
...download free diying plant 3d model
3dexport
diying plant blender
diying plant 3d model visitorsama 98607 3dexport
3ddd
$1
DIY coffee table + decor
... рамка для фото
кофейный столик diy 400х350х600(h) мм. моделился по фото. внимание: материалы - corona.
turbosquid
$3
Diy Wire Lamp Shade
...free 3d model diy wire lamp shade for download as 3ds and fbx on turbosquid: 3d models for games, architecture, videos. (1347605)
cg_studio
$12
DIY MONGOLIAN LAMB STOOLS3d model
... hair soft pile white
.max - diy mongolian lamb stools 3d model, royalty free license available, instant download after purchase.
Arm
archibase_planet
free
Arm
...ase planet
arm hand right hand skeleton
arm human skeleton right arm n030515 - 3d model (*.gsm+*.3ds+*.max) for 3d visualization.
3ddd
$1

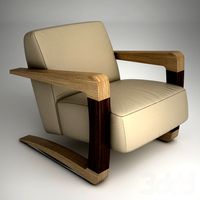
arm chair
...arm chair
3ddd
arm chair , пуф
arm chair
turbosquid
$5
arm
...arm
turbosquid
royalty free 3d model arm for download as obj on turbosquid: 3d models for games, architecture, videos. (1306158)
turbosquid
free

Arm
...arm
turbosquid
free 3d model arm for download as obj and fbx on turbosquid: 3d models for games, architecture, videos. (1346955)
turbosquid
$29

Arm
...osquid
royalty free 3d model arm for download as obj and fbx on turbosquid: 3d models for games, architecture, videos. (1382436)
3d_export
$5

coat of arms
...coat of arms
3dexport
coat of arms
3ddd
$1
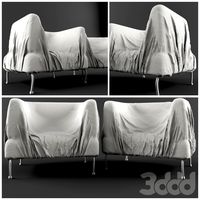
ARM SOFA
...arm sofa
3ddd
arm sofa
3ddd
$1

Arm chair
...arm chair
3ddd
arm chair
3ddd
$1

Arm chair
...arm chair
3ddd
угловое
arm chair
3ddd
$1
ARM CHAIR
...arm chair
3ddd
arm chair clothes
Digitizer
turbosquid
$20
Digits
... available on turbo squid, the world's leading provider of digital 3d models for visualization, films, television, and games.
turbosquid
$79

Digital piano
... available on turbo squid, the world's leading provider of digital 3d models for visualization, films, television, and games.
turbosquid
$70

Digital Cameras
... available on turbo squid, the world's leading provider of digital 3d models for visualization, films, television, and games.
turbosquid
$50

Digital Indicator
... available on turbo squid, the world's leading provider of digital 3d models for visualization, films, television, and games.
turbosquid
$49

Digital Clock
... available on turbo squid, the world's leading provider of digital 3d models for visualization, films, television, and games.
turbosquid
$49
Digital Printer
... available on turbo squid, the world's leading provider of digital 3d models for visualization, films, television, and games.
turbosquid
$39

Digital scales
... available on turbo squid, the world's leading provider of digital 3d models for visualization, films, television, and games.
turbosquid
$25
Digital 21
... available on turbo squid, the world's leading provider of digital 3d models for visualization, films, television, and games.
turbosquid
$25
Digital Durometer
... available on turbo squid, the world's leading provider of digital 3d models for visualization, films, television, and games.
turbosquid
$25

Digital Scales
... available on turbo squid, the world's leading provider of digital 3d models for visualization, films, television, and games.