Thingiverse
DIY - ARDUINO BASED CAR PARKING ASSISTANT by tarantula3
by Thingiverse
Last crawled date: 3 years, 1 month ago
Introduction
Hi Friends,
I am back again with another Arduino based home automation project. This time I am trying to make my partner's life easy by installing a collision avoidance system in the garage to help her park the car safely without hitting the garage wall.
So, in this video, I am going to use an ultrasonic sensor to calculate the car's distance from the garage wall and display it using green, yellow and red LEDs. The color of LEDs indicates whether to keep moving, slow down, stop or go back.
The total cost of the project is around $20 - $25.
Step 1: Logic
The project has 3 phases
Phase 1: Waiting for the car In this phase the device keeps looking for a moving object within the sensors proximity. If an object enters the proximity then one of the three LEDs turns on based on how far the moving object is. If the object is way too close, then a noise is made to make the moving object aware of the distance.
Phase 2: No car in the garage If there is no object in the proximity then turn off all the LEDs.
Phase 3: The car has stopped moving (Parked in the right spot) If the object has stopped moving and is still in the proximity wait for 20 CPU cycles and then turn off the LEDs.
Step 2: Hardware Requirement
For this very simple project we need:
A Perfboard
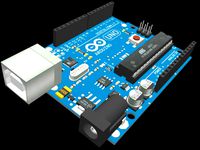
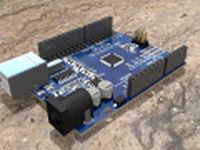
An Arduino nano/uno (whatever is handy)
A Red, Green and a Yellow LED (Light Emitting Diode)
3 x 220ohm resistor for the LEDs
One HC-SRO4 Ultrasonic Sensor
A Buzzer shield or A buzzer and a 100 ohm resistor
A 220v AC to 5v DC Buck step-down module
One Female Pin Header Strip
An Ethernet cable
Some connecting cables
A USB cable to upload the code to the Arduino
and general soldering equipments
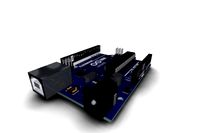
Step 3: Assembly
Let start by connecting the LEDs to the board.
Connect the Red LED to pin D2, Yellow LED to D3 and the Green LED to D4 of the Arduino by putting in a 220ohm resistor between the Arduino board and the LEDs. Now lets connect the Buzzer to analogue pin A0. Next, connect the Trig pin of the Ultrasonic Sensor to D5 and the Echo pin to D6 of the Arduino. Once all the modules are connected to the Arduino board, its time for us to connect all the positive and negative pins together. Connect all the positive pins of the modules to the +5v supplied by the Buck Step-Down Module and the negative pins to the -ve terminal of the Module. That's it, we can now upload our sketch to the board.
In this assembly I am using 3 LEDs to display the distance, however you can replace the 3 LEDs with a RGB LED, or you can also use an array of LEDs like an audio level indicator to display the movement of the car.
Step 4: My Setup
OK now lets see what I have made.
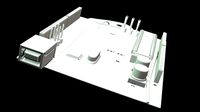
I have installed the Arduino, buzzer, the ultrasonic sensor and the three 220 ohms resistors on one Perfboard. The 3 LEDs and the power module is installed on a second Perfboard. I will be covering the LEDs with a translucent cover to give it a nice look.
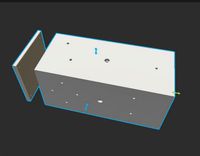
The 220v power supply will be connected to the screw terminal block. The base unit will then be connected to the LEDs and the power supply with an Ethernet cable.
Step 5: The Code
int trigPin = PD5; // Sensor Trip pin connected to Arduino pin D5
int echoPin = PD6; // Sensor Echo pin connected to Arduino pin D6
int redLED = PD2; // Red LED connected to pin D2
int yellowLED = PD3; // Yellow LED connected to pin D3
int greenLED = PD4; // Green LED connected to pin D4
int buzzer = A0; // Buzzer connected to Analogue pin A0
long TempDistance = 0; // A variable to store the temporary distance
int counter = 0; // Counter value to check if the object has stopped moving
void setup() {
Serial.begin(9600);
pinMode(trigPin, OUTPUT);
pinMode(echoPin, INPUT);
pinMode(redLED, OUTPUT);
pinMode(greenLED, OUTPUT);
pinMode(yellowLED, OUTPUT);
pinMode(buzzer, OUTPUT);
}
void loop() {
long duration, Distance;
digitalWrite(trigPin, LOW);
delayMicroseconds(2);
digitalWrite(trigPin, HIGH);
delayMicroseconds(10);
digitalWrite(trigPin, LOW);
duration = pulseIn(echoPin, HIGH);
Distance = (duration/2) / 74; // Distance in Inches
if(counter < 20){ // Do the rest if the car is still moving
if (Distance > 200) { // Nothing in the garrage
turnThemAllOff();
}
if ((Distance > 55) && (Distance <= 200)) { // Turn on Green LED
digitalWrite(greenLED, HIGH);
digitalWrite(yellowLED, LOW);
digitalWrite(redLED, LOW);
noTone(buzzer);
}
if ((Distance > 15) && (Distance <= 55)) { // Turn on Yellow LED
digitalWrite(yellowLED, HIGH);
digitalWrite(redLED, LOW);
digitalWrite(greenLED,LOW);
noTone(buzzer);
}
if (Distance <= 15) { // Turn on Red LED
digitalWrite(redLED, HIGH);
digitalWrite(greenLED,LOW);
digitalWrite(yellowLED, LOW);
noTone(buzzer);
}
if (Distance < 8) { // Item is way to close - start the buzzer
tone(buzzer, 500);
}
}
if ((Distance == TempDistance) || ((Distance+1) == TempDistance) || ((Distance-1) == TempDistance)){
if(counter >= 20){ // Turn off the lights if the object hasn't moved for 20 cycles (no change in distance)
Serial.println("No movement detected, turning off the lights");
turnThemAllOff();
} else {
counter++;
}
} else {
counter = 0; // Reset counter if there is a movement
}
TempDistance = Distance;
Serial.print(Distance);
Serial.println(" inches");
Serial.print("Counter : ");
Serial.println(counter); delay(500);
}
// Function to turn the LEDs off
void turnThemAllOff(){
digitalWrite(redLED, LOW);
digitalWrite(greenLED,LOW);
digitalWrite(yellowLED, LOW);
noTone(buzzer);
}
Start the code by defining the constants and the global variables that will be used throughout the code.
Then define the pin modes in the setup section of the code.
Then create a function to turn off all the LEDs and the buzzer.
Now, calculate the "Distance" in inches by reading the values received from the Ultrasonic Sensor.
Then by checking the value of the "Distance" we will turn on and off the LEDs based on how far the object is. If the distance is greater than 200 then turn off all the LEDs and the buzzer as the object is out of range. Else if it is between 55 and 200 then turn on the green LED. If the object is between 15 and 55 then turn on the yellow LED, and if the object goes closer than 15 inches then turn on the red LED until it reaches 8 inches. When the distance becomes less than 8 start the buzzer along with the red LED.
Next bit of the code is to set the value of the counter based on the cars movement which then decides when to turn off the LEDs. It compares the value of "Distance" with the "TempDistance" and if the values are same (object hasn't moved) then increments the counter. If the object moves any-time during this process the counter is reset to 0. Finally the "TempDistance" is set to the value of "Distance".
Just before comparing the Distances we also need to check if the counter value has exceed 20. I am doing this to stop the below code from executing if the car is in a steady position.
Lastly we just need to add a small delay to our sketch to pause the code for a while.
Step 6: Quick Demo
So this is how I have installed the unit in my garage.
As I walk close to the sensor the light changes from green to yellow to red and ultimately the buzzer goes on when I am too close to the sensor. In my case I have installed the buzzer next to the Arduino however I will recommend you to install the buzzer along with the LEDs. If you want you can also flash the red LED when the buzzer goes on.
So now, my partner can park the car easily without making any assumptions. Doesn't matter how many times she fail her driving test she is not going to break my wall (even when she is drunk). Not that I am asking her to drive when she is drunk (just kidding).
Thanks again for watching this video! I hope it helps you. If you want to support me, you can subscribe to my channel and watch my other videos. Thanks, ca again in my next video.
Hi Friends,
I am back again with another Arduino based home automation project. This time I am trying to make my partner's life easy by installing a collision avoidance system in the garage to help her park the car safely without hitting the garage wall.
So, in this video, I am going to use an ultrasonic sensor to calculate the car's distance from the garage wall and display it using green, yellow and red LEDs. The color of LEDs indicates whether to keep moving, slow down, stop or go back.
The total cost of the project is around $20 - $25.
Step 1: Logic
The project has 3 phases
Phase 1: Waiting for the car In this phase the device keeps looking for a moving object within the sensors proximity. If an object enters the proximity then one of the three LEDs turns on based on how far the moving object is. If the object is way too close, then a noise is made to make the moving object aware of the distance.
Phase 2: No car in the garage If there is no object in the proximity then turn off all the LEDs.
Phase 3: The car has stopped moving (Parked in the right spot) If the object has stopped moving and is still in the proximity wait for 20 CPU cycles and then turn off the LEDs.
Step 2: Hardware Requirement
For this very simple project we need:
A Perfboard
An Arduino nano/uno (whatever is handy)
A Red, Green and a Yellow LED (Light Emitting Diode)
3 x 220ohm resistor for the LEDs
One HC-SRO4 Ultrasonic Sensor
A Buzzer shield or A buzzer and a 100 ohm resistor
A 220v AC to 5v DC Buck step-down module
One Female Pin Header Strip
An Ethernet cable
Some connecting cables
A USB cable to upload the code to the Arduino
and general soldering equipments
Step 3: Assembly
Let start by connecting the LEDs to the board.
Connect the Red LED to pin D2, Yellow LED to D3 and the Green LED to D4 of the Arduino by putting in a 220ohm resistor between the Arduino board and the LEDs. Now lets connect the Buzzer to analogue pin A0. Next, connect the Trig pin of the Ultrasonic Sensor to D5 and the Echo pin to D6 of the Arduino. Once all the modules are connected to the Arduino board, its time for us to connect all the positive and negative pins together. Connect all the positive pins of the modules to the +5v supplied by the Buck Step-Down Module and the negative pins to the -ve terminal of the Module. That's it, we can now upload our sketch to the board.
In this assembly I am using 3 LEDs to display the distance, however you can replace the 3 LEDs with a RGB LED, or you can also use an array of LEDs like an audio level indicator to display the movement of the car.
Step 4: My Setup
OK now lets see what I have made.
I have installed the Arduino, buzzer, the ultrasonic sensor and the three 220 ohms resistors on one Perfboard. The 3 LEDs and the power module is installed on a second Perfboard. I will be covering the LEDs with a translucent cover to give it a nice look.
The 220v power supply will be connected to the screw terminal block. The base unit will then be connected to the LEDs and the power supply with an Ethernet cable.
Step 5: The Code
int trigPin = PD5; // Sensor Trip pin connected to Arduino pin D5
int echoPin = PD6; // Sensor Echo pin connected to Arduino pin D6
int redLED = PD2; // Red LED connected to pin D2
int yellowLED = PD3; // Yellow LED connected to pin D3
int greenLED = PD4; // Green LED connected to pin D4
int buzzer = A0; // Buzzer connected to Analogue pin A0
long TempDistance = 0; // A variable to store the temporary distance
int counter = 0; // Counter value to check if the object has stopped moving
void setup() {
Serial.begin(9600);
pinMode(trigPin, OUTPUT);
pinMode(echoPin, INPUT);
pinMode(redLED, OUTPUT);
pinMode(greenLED, OUTPUT);
pinMode(yellowLED, OUTPUT);
pinMode(buzzer, OUTPUT);
}
void loop() {
long duration, Distance;
digitalWrite(trigPin, LOW);
delayMicroseconds(2);
digitalWrite(trigPin, HIGH);
delayMicroseconds(10);
digitalWrite(trigPin, LOW);
duration = pulseIn(echoPin, HIGH);
Distance = (duration/2) / 74; // Distance in Inches
if(counter < 20){ // Do the rest if the car is still moving
if (Distance > 200) { // Nothing in the garrage
turnThemAllOff();
}
if ((Distance > 55) && (Distance <= 200)) { // Turn on Green LED
digitalWrite(greenLED, HIGH);
digitalWrite(yellowLED, LOW);
digitalWrite(redLED, LOW);
noTone(buzzer);
}
if ((Distance > 15) && (Distance <= 55)) { // Turn on Yellow LED
digitalWrite(yellowLED, HIGH);
digitalWrite(redLED, LOW);
digitalWrite(greenLED,LOW);
noTone(buzzer);
}
if (Distance <= 15) { // Turn on Red LED
digitalWrite(redLED, HIGH);
digitalWrite(greenLED,LOW);
digitalWrite(yellowLED, LOW);
noTone(buzzer);
}
if (Distance < 8) { // Item is way to close - start the buzzer
tone(buzzer, 500);
}
}
if ((Distance == TempDistance) || ((Distance+1) == TempDistance) || ((Distance-1) == TempDistance)){
if(counter >= 20){ // Turn off the lights if the object hasn't moved for 20 cycles (no change in distance)
Serial.println("No movement detected, turning off the lights");
turnThemAllOff();
} else {
counter++;
}
} else {
counter = 0; // Reset counter if there is a movement
}
TempDistance = Distance;
Serial.print(Distance);
Serial.println(" inches");
Serial.print("Counter : ");
Serial.println(counter); delay(500);
}
// Function to turn the LEDs off
void turnThemAllOff(){
digitalWrite(redLED, LOW);
digitalWrite(greenLED,LOW);
digitalWrite(yellowLED, LOW);
noTone(buzzer);
}
Start the code by defining the constants and the global variables that will be used throughout the code.
Then define the pin modes in the setup section of the code.
Then create a function to turn off all the LEDs and the buzzer.
Now, calculate the "Distance" in inches by reading the values received from the Ultrasonic Sensor.
Then by checking the value of the "Distance" we will turn on and off the LEDs based on how far the object is. If the distance is greater than 200 then turn off all the LEDs and the buzzer as the object is out of range. Else if it is between 55 and 200 then turn on the green LED. If the object is between 15 and 55 then turn on the yellow LED, and if the object goes closer than 15 inches then turn on the red LED until it reaches 8 inches. When the distance becomes less than 8 start the buzzer along with the red LED.
Next bit of the code is to set the value of the counter based on the cars movement which then decides when to turn off the LEDs. It compares the value of "Distance" with the "TempDistance" and if the values are same (object hasn't moved) then increments the counter. If the object moves any-time during this process the counter is reset to 0. Finally the "TempDistance" is set to the value of "Distance".
Just before comparing the Distances we also need to check if the counter value has exceed 20. I am doing this to stop the below code from executing if the car is in a steady position.
Lastly we just need to add a small delay to our sketch to pause the code for a while.
Step 6: Quick Demo
So this is how I have installed the unit in my garage.
As I walk close to the sensor the light changes from green to yellow to red and ultimately the buzzer goes on when I am too close to the sensor. In my case I have installed the buzzer next to the Arduino however I will recommend you to install the buzzer along with the LEDs. If you want you can also flash the red LED when the buzzer goes on.
So now, my partner can park the car easily without making any assumptions. Doesn't matter how many times she fail her driving test she is not going to break my wall (even when she is drunk). Not that I am asking her to drive when she is drunk (just kidding).
Thanks again for watching this video! I hope it helps you. If you want to support me, you can subscribe to my channel and watch my other videos. Thanks, ca again in my next video.
Similar models
thingiverse
free

Motion sensing night light by SteveOst
...talwrite(led1,low);
digitalwrite(led2,low);
}
serial.println("motion");
serial.print(motionvalue);
}
else
{
delay(300);
thingiverse
free
3D printed induction motor controller with arduino by robogio
...write(b, high);
digitalwrite(c, high);
digitalwrite(d, low);
digitalwrite(e, high);
digitalwrite(f, low);
delaymicroseconds(t);
}
thingiverse
free
3DX TRAFFIC LIGHT
...digitalwrite(ledg, low);
digitalwrite(ledy, high);
delay(3000);
digitalwrite(ledr, high);
digitalwrite(ledy, low);
delay(1000);
}
thingiverse
free

Advanced (Arduino controlled) Zoetrope by WillemvD
...); digitalwrite(sb1,high); digitalwrite(sb2,low); delay(s);}
digitalwrite(f,high);
delay(1); //short flash
digitalwrite(f,low);
}
thingiverse
free

Arduino Litho Click Box(s) & Parking Sensor by MrBancroft
...istance <=13){
serial.println("out of range");
}
else {
serial.print(distance);
serial.println(" cm");
}
}
thingiverse
free

FidgetReactionTimeTester (alcohol check?) by WillemvD
...to test it yet.
trouble with placing the batteries?
heat the pushpins with a soldering iron and push them slightly into the wall.
grabcad
free

Harry Vader's fully armed and operational Elder Light Saber Wand
...nalogwrite(blueled, 255);
}
else{
analogwrite(blueled, 0);
}
delay(5);
}
// end mode 5
}
// end main loop
thingiverse
free

PIR portable Alarm Buzzer for Fishing or Camping by MiaouCat
...
delay(100);
notone(buzzerpin);
digitalwrite(ledpin, low);
delay(100);
}
else {
notone(buzzerpin);
digitalwrite(ledpin, low);
}
}
thingiverse
free

Touchless WC Flush Unit ultrasound IFÖ IFO toilett button conversion replacement servo by spaceengineer
...); //servo position 90 degree
delay(2000);
myservo.write(180); //servo position 180 degree
delay(1000);
myservo.detach();
}
}
thingiverse
free

Chromotherapy Christmas House by STEMaker
...e(9, low);
digitalwrite(10, low);
digitalwrite(11, low);
}
// slight delay so it doesn't rotate color too quicky
delay(33);
}
Tarantula3
thingiverse
free

DRIVING A RELAY WITH AN ARDUINO by tarantula3
...lps you. if you want to support me, you can subscribe to my channel and watch my other videos. thanks, ca again in my next video.
thingiverse
free
USING AN LDR SENSOR WITH ARDUINO by tarantula3
.... if you want to support me, you can subscribe to my channel and watch my other videos. thanks, ca again in my next instructable.
thingiverse
free
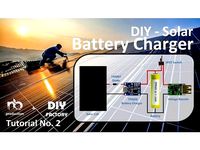
DIY - SOLAR BATTERY CHARGER by tarantula3
...lps you. if you want to support me, you can subscribe to my channel and watch my other videos. thanks, ca again in my next video.
Arduino
turbosquid
$7
Arduino
...turbosquid
royalty free 3d model arduino for download as max on turbosquid: 3d models for games, architecture, videos. (1197165)
turbosquid
$3
Arduino
...turbosquid
royalty free 3d model arduino for download as c4d on turbosquid: 3d models for games, architecture, videos. (1305484)
3d_export
$5
arduino satellite
...rt
this model is the exact arduino based satellite model with some basic sensors and camera modules and also includes batteries.
turbosquid
$1
Arduino UNO
...alty free 3d model arduino uno for download as , stl, and wrl on turbosquid: 3d models for games, architecture, videos. (1515932)
3d_export
$5
esp8266 box arduino
...esp8266 box arduino
3dexport
box for esp8266 module with wire hole. inside dimensions: 49x26 mm. height 15 mm.
3d_export
$60
Arduino Uno Rev3 Microcontroller 3D Model
...mega328p circuit board spark cable wire 5v 74v 9v 111v
arduino uno rev3 microcontroller 3d model danielgarnier4403 97237 3dexport
3d_export
free
arduino rover kit
...no!!! materials: no!!! rigged: no animated: no uv mapped: no it is not an exact copy of the original! not subject to 3d printing!
3d_ocean
$7
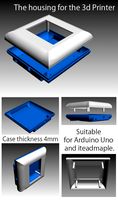
The housing for the 3d Printer
...the housing for the 3d printer 3docean arduino device housing stl the housing consists of two portions:...
3d_export
$5
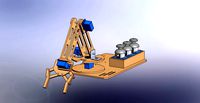
arm 4 axis
...uno -4 servo motor 180° -3 joystick (x,y) for arduino -mdf wood -some wires -cnc laser cut...
3d_export
$5

solar tracker
...machine for the frame . list of material : -arduino uno -2 step motor with driver -4 ldr sensor...
Assistant
turbosquid
$120

Robot Assistant
...id
royalty free 3d model robot assistant for download as max on turbosquid: 3d models for games, architecture, videos. (1381212)
3d_export
$5

painting assistant
...painting assistant
3dexport
draw samples
3d_export
$5

assistive cane
...assistive cane
3dexport
aristocratic cane for characters
3d_export
$10
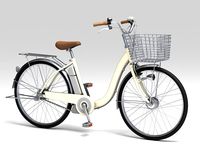
Assist bike 3D Model
...assist bike 3d model
3dexport
assist bike
assist bike 3d model modelix 59218 3dexport
turbosquid
$69

computer assistant character
... available on turbo squid, the world's leading provider of digital 3d models for visualization, films, television, and games.
turbosquid
$1

Robot Assistant
...d
royalty free 3d model 3d robot human for download as blend on turbosquid: 3d models for games, architecture, videos. (1599434)
turbosquid
$30

Galaxy Assistant's Stool
... available on turbo squid, the world's leading provider of digital 3d models for visualization, films, television, and games.
3d_export
$15

Prototype version of the robot assistant
...ersion of the robot assistant, designed to help a person in a variety of tasks, both in helping in the garden and in armed escort
turbosquid
$69

Droid Assistant
... robot guard for download as blend, dae, fbx, obj, stl, and x on turbosquid: 3d models for games, architecture, videos. (1624852)
turbosquid
free

Free Realistic Grass Assistant
...3d model free realistic grass assistant for download as blend on turbosquid: 3d models for games, architecture, videos. (1454100)
Diy
3d_export
free
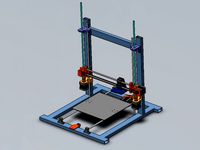
DIY 3D Printer
...diy 3d printer
3dexport
diy 3d printer model
turbosquid
$10

Diy tiered
...l diy tiered for download as max, max, max, max, fbx, and obj on turbosquid: 3d models for games, architecture, videos. (1603709)
turbosquid
$3
Diy Desk to Bench
...odel diy desk to bench for download as 3ds, max, obj, and fbx on turbosquid: 3d models for games, architecture, videos. (1506589)
turbosquid
$2

DIY Moon Light
...model diy moon light for download as obj, fbx, blend, and dae on turbosquid: 3d models for games, architecture, videos. (1501170)
3d_export
$8
DIY CNC Router 3D Model
...diy cnc router 3d model
3dexport
cnc; router; diy; homemade
diy cnc router 3d model maikeru86 58463 3dexport
turbosquid
$5

Diy Kitchen Cabinets
...itchen cabinets for download as 3ds, obj, fbx, blend, and dae on turbosquid: 3d models for games, architecture, videos. (1197373)
3d_export
free

Download free Diying Plant 3D Model
...download free diying plant 3d model
3dexport
diying plant blender
diying plant 3d model visitorsama 98607 3dexport
3ddd
$1
DIY coffee table + decor
... рамка для фото
кофейный столик diy 400х350х600(h) мм. моделился по фото. внимание: материалы - corona.
turbosquid
$3
Diy Wire Lamp Shade
...free 3d model diy wire lamp shade for download as 3ds and fbx on turbosquid: 3d models for games, architecture, videos. (1347605)
cg_studio
$12

DIY MONGOLIAN LAMB STOOLS3d model
... hair soft pile white
.max - diy mongolian lamb stools 3d model, royalty free license available, instant download after purchase.
Parking
3d_ocean
$8
Park
...park
3docean
3d max park
3d max park model
3d_export
$5

park
...park
3dexport
it's a beautiful 3d park!
3d_export
free
Park
...park
3dexport
part of the park for games , advertisements , videos , etc .
3d_ocean
$25

Park Car
...park car
3docean
car park
the park car
turbosquid
$1
Park
...rk
turbosquid
royalty free 3d model park for download as max on turbosquid: 3d models for games, architecture, videos. (1618400)
3d_export
free

Park
...park
3dexport
a small park area with: fountain; benches; trees; a children's playground; mini-cafe; drinking fountains
3d_export
$11
Car park -parking de voiture
...ure
3dexport
parking pour voitures électriques et aussi pour autres voitures - parking for electric cars and also for other cars
3d_export
$65

Amusement park
...amusement park
3dexport
amusement park
3d_export
$16
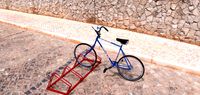
bicycle parking
...bicycle parking
3dexport
bicycle parking
3ddd
free
park sculptures
...park sculptures
3ddd
-park sculptures-
Car
3d_export
$5

car
...car
3dexport
luxury car high quality car
3d_export
$5

car
...car
3dexport
luxury car high quality car
3d_export
$5

car
...car
3dexport
luxury car high quality car
3d_export
$5

car
...car
3dexport
luxury car high quality car
3d_export
$5

car
...car
3dexport
luxury car high quality car
archibase_planet
free

Car
...
archibase planet
car sports car motor-car sportster
car nascar#1 n300114 - 3d model (*.gsm+*.3ds) for exterior 3d visualization.
archibase_planet
free

Car
...ibase planet
car motor-car sportster sports car
car gablota xform n190214 - 3d model (*.gsm+*.3ds) for exterior 3d visualization.
archibase_planet
free
Car
...car
archibase planet
car motor car transport
car vaz 2104- 3d model for interior 3d visualization.
3d_export
$15

car
...car
3dexport
car
3d_export
free
car
...car
3dexport
car
Based
archibase_planet
free
Base
...base
archibase planet
base column column base
base 1 - 3d model (*.gsm+*.3ds) for interior 3d visualization.
archibase_planet
free

Base
...base
archibase planet
base column base column
base 5 - 3d model (*.gsm+*.3ds) for interior 3d visualization.
archibase_planet
free

Base
...base
archibase planet
base column column base
base 7 - 3d model (*.gsm+*.3ds) for interior 3d visualization.
archibase_planet
free
Base
...base
archibase planet
base column column base
base 2 - 3d model (*.gsm+*.3ds) for interior 3d visualization.
archibase_planet
free

Base
...base
archibase planet
base column column base
base 3 - 3d model (*.gsm+*.3ds) for interior 3d visualization.
archibase_planet
free
Base
...base
archibase planet
base column column base
base 4 - 3d model (*.gsm+*.3ds) for interior 3d visualization.
archibase_planet
free
Base
...base
archibase planet
base column base column
base 6 - 3d model (*.gsm+*.3ds) for interior 3d visualization.
archibase_planet
free

Base
...base
archibase planet
foundation base
column base ionic - 3d model (*.gsm+*.3ds) for interior 3d visualization.
archibase_planet
free

Base
...base
archibase planet
foundation base
column base tuscan - 3d model (*.gsm+*.3ds) for interior 3d visualization.
design_connected
$18
Base
...base
designconnected
tom dixon base computer generated 3d model. designed by dixon, tom.