Thingiverse
Dial Gauge Holder Sidemount for X axis bar carriage for Ender 3 (CC-BY) by Zsquish
by Thingiverse
Last crawled date: 2 years, 10 months ago
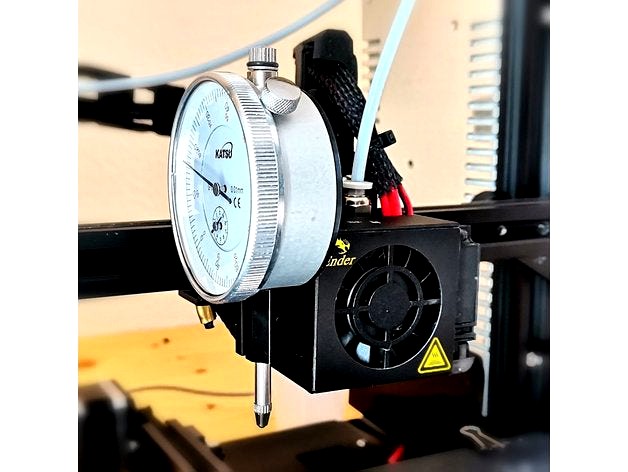
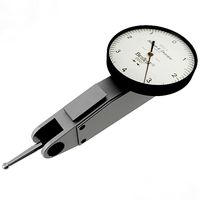
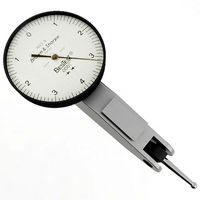
Holds the dial gauge directly on the x axis carriage instead of over the wobbly fan housing.
Less of a remix, more of an inspiration.
Compatible with http://www.thingiverse.com/thing:3417079. Other probably too.
Why
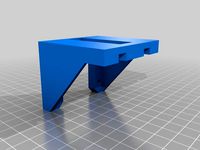
The over-the-hotend-fan holder is quite wobbly and can be pushed down easily. That changes the value on the dial gauge. To give it better stiffness, I made a side mount directly on the X carriage.
Based on the mounting bracket of the BL Touch.
Designed for Ender '3. Might also fit Ender' 3Pro, Ender 3S, Ender '5, Ender '5 Pro, Ender 5S, CR-10. (all links are MakerBot Affiliate Links, not mine)
Design Details
Keeps the hot end fan outlet free to ensure air flow during printing. Homing possible with bracket mounted. Homing possible with dial gauge in place.
After installation, the tip of the dial gauge is offset relative to the nozzle tip to the left (X-) and to the front (Y-). Can be used efficiently in combination with OctoPrint and the plugin Terminal Commands to move directly over bed screws on button push.
I recommend Mk4 xor Mk5. Mk4 is a little bit closer to the X motor cover as you can by the pictures. For Mk4 holder I used Z=1mm for measuring the bed height.
The Mk5 reaches 3mm lower and also further to the front, meaning the nozzle doesn't have to be that close to the bed.
Mk2 and Mk3 are included for special cases where these might fit as well or a shorter version is needed. Collision with Mk2 and Mk3 is likely!
Make sure no it does not collide with parts mounted to the X axis motor cover (e.g. Pi Camera mount).
Print Instructions
Layer Height: 0.2mm
Infill: 20% (maybe less possible)
Speed: 50mm/s (adjust according to your experience)
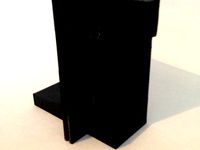
Print in assembly position. This makes removing the supports easier without risking to break parts.
Assembly Instructions
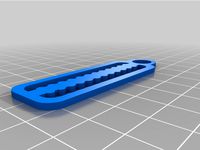
Test fit with dial gauge. If too tight use drill bit to widen the mounting hole
Remove screws holding the Hot End fan housing on the X carriage.
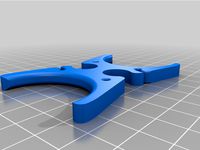
Mount Thingy directly over the half circles of the hot end fan holder. There should be enough space on the backside.
Keep the wheel screw where it is. The hole in the Thing fits the screw head. The stock screws should be long enough to hold both the fan housing and the dial gauge holder.
REMOVE DIAL GAUGE BEFORE PRINTING
...to avoid damage to printer and dial gauge
Materials Needed
Dial Gauge
2mm Allen key (supplied with machine)
8mm drill bit if fit too tight.
Less of a remix, more of an inspiration.
Compatible with http://www.thingiverse.com/thing:3417079. Other probably too.
Why
The over-the-hotend-fan holder is quite wobbly and can be pushed down easily. That changes the value on the dial gauge. To give it better stiffness, I made a side mount directly on the X carriage.
Based on the mounting bracket of the BL Touch.
Designed for Ender '3. Might also fit Ender' 3Pro, Ender 3S, Ender '5, Ender '5 Pro, Ender 5S, CR-10. (all links are MakerBot Affiliate Links, not mine)
Design Details
Keeps the hot end fan outlet free to ensure air flow during printing. Homing possible with bracket mounted. Homing possible with dial gauge in place.
After installation, the tip of the dial gauge is offset relative to the nozzle tip to the left (X-) and to the front (Y-). Can be used efficiently in combination with OctoPrint and the plugin Terminal Commands to move directly over bed screws on button push.
I recommend Mk4 xor Mk5. Mk4 is a little bit closer to the X motor cover as you can by the pictures. For Mk4 holder I used Z=1mm for measuring the bed height.
The Mk5 reaches 3mm lower and also further to the front, meaning the nozzle doesn't have to be that close to the bed.
Mk2 and Mk3 are included for special cases where these might fit as well or a shorter version is needed. Collision with Mk2 and Mk3 is likely!
Make sure no it does not collide with parts mounted to the X axis motor cover (e.g. Pi Camera mount).
Print Instructions
Layer Height: 0.2mm
Infill: 20% (maybe less possible)
Speed: 50mm/s (adjust according to your experience)
Print in assembly position. This makes removing the supports easier without risking to break parts.
Assembly Instructions
Test fit with dial gauge. If too tight use drill bit to widen the mounting hole
Remove screws holding the Hot End fan housing on the X carriage.
Mount Thingy directly over the half circles of the hot end fan holder. There should be enough space on the backside.
Keep the wheel screw where it is. The hole in the Thing fits the screw head. The stock screws should be long enough to hold both the fan housing and the dial gauge holder.
REMOVE DIAL GAUGE BEFORE PRINTING
...to avoid damage to printer and dial gauge
Materials Needed
Dial Gauge
2mm Allen key (supplied with machine)
8mm drill bit if fit too tight.
Similar models
thingiverse
free

CR-10 V2 Dial Gauge Holder
...riginal m3 screws with some that are slightly longer
it is a friction fit so the gauge can be quickly removed ready for printing.
thingiverse
free

Dial indicator (53mm) holder for Prusa i3 MK2 by pafprint
...2 screws)
mount holder to the place of nozzle fan
insert dial indicator
short screws are in your spare bag from prusa printer :)
thingiverse
free

Ender 3 Indicator Holder
...inkercad. the dovetail will most likely require some sanding to fit. it needs to be tight, but not so tight as to crack anything.
thingiverse
free
Makergear M2 Dial Holder by Steve0
...g fits the hole on the right of the dial holder and supports the holder and dial.
this dial holder is quick to attach and remove.
thingiverse
free

Ender 3 Pro Dial Indicator handle - very stable by wkon
... of it guarantee that there is no any collision with frame or endstop in axis x.
i printed this with 50% infill and 4 perimeters.
thingiverse
free

Ender 3 Pro Dial Indicator handle - very stable by wkon
... of it guarantee that there is no any collision with frame or endstop in axis x.
i printed this with 50% infill and 4 perimeters.
thingiverse
free

Makergear M2 Dial Indicator Mount by mattrsch
...g fits the hole on the right of the dial holder and supports the holder and dial.
this dial holder is quick to attach and remove.
thingiverse
free
Yet Another Dial Gauge Holder (for Huxley) by jweob
...ate: i've added an improved version that also has a clip at the bottom of the holder to snap more securely to the x-carriage.
thingiverse
free

MK2s - MK3 Hybrid Extruder/X-Carriage by felixdapony
...e cover. much better cable management, i take back what i said above.
edit3: added all the required files
edit4: added step files
thingiverse
free

Dial gauge holder by ivan_kk
...dial gauge holder by ivan_kk
thingiverse
dial gauge holder for hot bed calibration. it mounts on v6 aluminium mount.
Zsquish
thingiverse
free

Flat spring 15mm x 226mm (CC-BY) by Zsquish
...uploaded in case someone needs this.
assembly instructions
mount with crossed zip ties.
materials needed
2x 2.5mm x 100mm zip tie
thingiverse
free

Herb shade (CC-BY) by Zsquish
...al (weather resistant foil or similar).
(all product links are makerbot affiliate links. i do not get anything from these links.)
thingiverse
free

Spacer (4mm, 5mm diameter) for Ender 3 extruder (CC-BY) by Zsquish
...e
assembly instructions
print and put on extruder shaft. might meed pliers to remove.
materials needed
nonemaybe pliers to remove
thingiverse
free

Spacer (3.3 mm inner, 6 mm outer) for OctoPrint Box (CC-0) by Zsquish
...er due to tiny size.
assembly instructions
combine as needed for desired height.
materials needed
longer screws needed than usual
thingiverse
free

Shallower (shorter) double drawer case for Ender 3 (CC-BY) by Zsquish
...g
(4mm allen key to remove the display)
(all product links are makerbot affiliate links. i do not get anything from these links.)
thingiverse
free

Car Relay mount and dummy model for 24/12V relays (CC-BY) by Zsquish
...place.
materials needed
nothing (screws according to car manual if installation in car is needed).
tap needed if thread required.
thingiverse
free
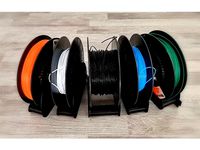
Separable Filament Spool Stand for 500g and 1000g spools (45mm, 80mm, 60mm wide), fits IKEA SAMLA (CC-BY) by Zsquish
...
for my print, glue was not needed because it was a tight press fit. though, might benefit from the extra strength from hot glue.
Sidemount
turbosquid
$15

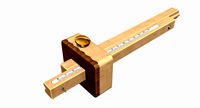
Aluminum Sidemount Tank 7G
...luminum sidemount tank 7g for download as blend, fbx, and obj on turbosquid: 3d models for games, architecture, videos. (1576495)
thingiverse
free

Popsocket Sidemount
...popsocket sidemount
thingiverse
popsocket mount that can be screwed on the side of anything :)
thingiverse
free
Sidemount Gurtstopper mit Ring by BlutVampir
...sidemount gurtstopper mit ring by blutvampir
thingiverse
sidemount bracked to clip bottlebungee to it.
thingiverse
free

Prusa I3 LCD Sidemount by Misanthrop
...or lcd display of a prusa i3 mk3s+
more space in the frontend and better handling.
required parts:
2x m3x12
2x m3x16
2x m3 nuts
thingiverse
free
Loop and Hose Retainer for the Divesoft Liberty SideMount Rebreather by _iw0gz_
... hose retainer for the divesoft liberty sidemount rebreather
anello e fermo per tubo per il rebreather divesoft liberty sidemount
thingiverse
free

Monitor Sidemount Logitech B525 Webcam by domi1974
...easy to adjust in height.
for monitors up to 20mm thickness. i used tape to give it a better grip on the backside of the monitor.
thingiverse
free
oldham sidemount for any motor plate thickness by Pashenka
...
thingiverse
after making new thicker x-motormount plate, i found out my sidemount oldham coupler was not inline with the z rod.
thingiverse
free

sidemounted Precision Piezo bracket by O_Lampe
... 2010 extrusion, so i had to mount the bracket from inside.
i made the top part rotating, because i have a square bed on a delta.
thingiverse
free
CCR Liberty SideMount Counterlungs Dryer by _iw0gz_
...- usb driven
2) 40mm fan guard (often supplied with the fan)
3) 4 off m3 x 30mm long steel screws
4) 4 off m3 standard steel nuts
thingiverse
free

Ender 3 Spool holder sidemount (wider)
...r 3 spool holder sidemount (wider)
thingiverse
this one has a bit wider 4040 foot than the original one for the extra stability.
Dial
3ddd
$1

Hidra Dial
...a dial , биде , унитаз
hidra dial унитаз + биде
turbosquid
$30
Dial Indicator
...ree 3d model dial indicator for download as 3ds, max, and obj on turbosquid: 3d models for games, architecture, videos. (1302779)
3d_export
$7
dial indicator
...r is any of various instruments used to accurately measure small distances and angles, and amplify them to make them more obvious
turbosquid
$99

Phone Dialing
... available on turbo squid, the world's leading provider of digital 3d models for visualization, films, television, and games.
turbosquid
$25
Dial Indicator
... available on turbo squid, the world's leading provider of digital 3d models for visualization, films, television, and games.
turbosquid
$15

Dial Indicator
... available on turbo squid, the world's leading provider of digital 3d models for visualization, films, television, and games.
3d_ocean
$12

Old Rotary Dial Telephone
...ial phone telephone
this is a model of a rotary dial telephone made in cinema4d file contains the following files: .obj .c4d .3ds
3ddd
$1

Dialing kitchen
...зон , базилик , лук
polys: 48 893
verts: 54 349
3d_export
$45
Dial Indicator 3D Model
...tion metalworking hurco indicating geometric dimensioning tolerancing bridgeport
dial indicator 3d model plutonius 63521 3dexport
turbosquid
$38

Sun Dial 3ds
... available on turbo squid, the world's leading provider of digital 3d models for visualization, films, television, and games.
Gauge
3d_ocean
$10
Gauges
...rim to them. each gauge has an xpresso tag to give them an automatic animation without the need for keyframing and can be chan...
3d_export
$5

pressure gauge
...pressure gauge
3dexport
pressure gauge
3d_export
$5
gauge protector
...gauge protector
3dexport
gauge protector
3d_export
$5
Gauge 3D Model
...gauge 3d model
3dexport
gauge pressure gas air liquid
gauge 3d model fau 71180 3dexport
3d_export
$5

protected pressure gauge
...protected pressure gauge
3dexport
protected pressure gauge
3d_export
$5

hard gauge protector
...hard gauge protector
3dexport
hard gauge protector
turbosquid
$29
Screw Gauge
... available on turbo squid, the world's leading provider of digital 3d models for visualization, films, television, and games.
turbosquid
$29
Marking Gauge
... available on turbo squid, the world's leading provider of digital 3d models for visualization, films, television, and games.
turbosquid
$20

Blade Gauge
... available on turbo squid, the world's leading provider of digital 3d models for visualization, films, television, and games.
3d_export
$5
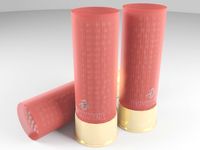
12 Gauge 3D Model
...12 gauge 3d model
3dexport
shotgun shell gauge 12
12 gauge 3d model pirog 54511 3dexport
Carriage
archibase_planet
free

Carriage
...arriage
archibase planet
perambulator baby carriage pram
carriage n250908 - 3d model (*.gsm+*.3ds) for interior 3d visualization.
3d_export
free

carriage
...carriage
3dexport
old fashion carriage model, more files here:
turbosquid
$140

Carriage
...urbosquid
royalty free 3d model carriage for download as max on turbosquid: 3d models for games, architecture, videos. (1482052)
turbosquid
$25

Carriage
...urbosquid
royalty free 3d model carriage for download as max on turbosquid: 3d models for games, architecture, videos. (1285944)
3d_export
free

carriage
...carriage
3dexport
game cart
3d_ocean
$15

Barrel Carriage
...ieval oak old transport wheels wine wood
this model contains a barrel and a carriage. it is a medieval type of wood oak carriage.
turbosquid
$40

Carriage
...ty free 3d model carriage for download as obj, fbx, and blend on turbosquid: 3d models for games, architecture, videos. (1290094)
turbosquid
free

Carriage
...yalty free 3d model carriage for download as ma, obj, and fbx on turbosquid: 3d models for games, architecture, videos. (1239157)
3d_export
$5

Medieval carriage
...medieval carriage
3dexport
medieval carriage in fairy style
turbosquid
$58

Carriage
...d model carriage with scene for download as max, obj, and fbx on turbosquid: 3d models for games, architecture, videos. (1276262)
Ender
3ddd
$1

Enders / Elegance
...enders / elegance
3ddd
обогреватель
уличный газовый обогреватель enders elegance
высота: 2200 мм
3d_export
free

ender 3 frame cavity covers
... of the creality ender 3 - makes it look a bit more attractive it just slides into the open channels of the aluminium framework
turbosquid
$1

pen support for ender 3
...y free 3d model pen support for ender 3 for download as blend on turbosquid: 3d models for games, architecture, videos. (1611282)
3d_ocean
$9

Ender Dragon Minecraft
...ojang obj poly videogames
ender dragon minecraft created with cinema 4d r15 formats included: max 2013 – fbx 2012 – c4d r15 – obj
3d_export
free

Creality ender enclosure webcam mount
...e creality enclosure. sure is better than a tripod. change it up if it helps. i printed pla with 50% infill on my dd ender 3 pro.
3d_export
free

ender 3 enclosure corners
...er corners and 4 upper corners, using 25mmx25mm angled aluminium pieces that gets covered on inside of the frame with plexiglass
3d_export
free

ender 3 3d print bed clips
...ed + normal aluminium bed frame of the creality ender 3 = 6mm (b) these clips are designed for glass plate + aluminium bed = 4mm
3d_export
$5

GRUMPY CAT
...grumpy cat 3dexport grumpy cat to print in ender ...
3d_export
$5

Logs fire
...with one multi material for corona and vray r ender. albedo, normal, uvmap, roughness format jpg 4096x4096 models:...
3d_export
$42

excavator
...is the original size. 0.12 mm printing surface creality ender5 ...
Cc
design_connected
$13

CC Stool
...cc stool
designconnected
rex kralj cc stool computer generated 3d model. designed by kralj, niko.
design_connected
$11

CC Table
...cc table
designconnected
rex kralj cc table computer generated 3d model. designed by kralj, niko.
3d_export
$10

Volkswagen Passat CC
...volkswagen passat cc
3dexport
volkswagen passat cc
turbosquid
$10

CC Chair
...alty free 3d model cc chair for download as max, fbx, and obj on turbosquid: 3d models for games, architecture, videos. (1594521)
turbosquid
$10

Borbet Cc
... available on turbo squid, the world's leading provider of digital 3d models for visualization, films, television, and games.
3d_export
$39

peugeot 206 cc
...peugeot 206 cc
3dexport
peugeot 206 cc, year 2000. model with high quality finishing on the outside and inside.
3ddd
free

CC-Tapis Infini
... infini , ковер
cc tapis infini ковер
размеры : 2400mm x 1600mm
design_connected
$13

CC Bar Stool
...cc bar stool
designconnected
rex kralj cc bar stool computer generated 3d model. designed by kralj, niko.
design_connected
$13

Bar Table CC
...bar table cc
designconnected
rex kralj bar table cc computer generated 3d model. designed by studio rex kralj.
design_connected
$13

CC Dining Table
...cc dining table
designconnected
rex kralj cc dining table computer generated 3d model. designed by studio rex kralj.
Axis
3ddd
$1

Мария Axis
...
3ddd
кухня , классическая , axis
модель кухни.
3d_export
$22

Axis robot 6-axis robotic arm
...ing parts drawings, standard parts purchased parts list, can be produced directly according to the drawings, welcome to download!
3ddd
free

Versatile Axis
...ddd
nexus , плитка
http://bvtileandstone.com/ceramic-porcelain/versatile-axis/
3d_export
$19

robot 2 axis
...robot 2 axis
3dexport
robot 2 axis
turbosquid
$40

Axis R5F
... available on turbo squid, the world's leading provider of digital 3d models for visualization, films, television, and games.
turbosquid
$40

Axis S5F
... available on turbo squid, the world's leading provider of digital 3d models for visualization, films, television, and games.
turbosquid
$30

Axis Athlon
... available on turbo squid, the world's leading provider of digital 3d models for visualization, films, television, and games.
turbosquid
$10

Linear Axis
... available on turbo squid, the world's leading provider of digital 3d models for visualization, films, television, and games.
3d_export
$15

drawing axis
...drawing axis
3dexport
simple rendering of the scene file
3ddd
$1

versatile axis ARC
...versatile axis arc
3ddd
versatile , плитка
versatile axis arc red dot design award
Bar
archibase_planet
free
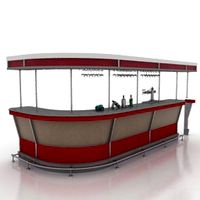
Bar
...bar
archibase planet
bar bar rack
bar 2 - 3d model for interior 3d visualization.
archibase_planet
free
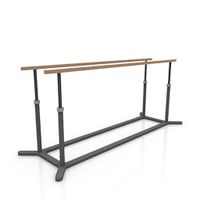
Bars
...bars
archibase planet
horizontal bar parallel bars
parallel bars - 3d model for interior 3d visualization.
3d_export
$10

bar
...bar
3dexport
modern bar
3d_export
$10

bar
...bar
3dexport
modern bar
3d_export
$10

bar
...bar
3dexport
modern bar
3d_export
$10

bar
...bar
3dexport
modern bar
3d_export
$10

bar
...bar
3dexport
modern bar
3d_export
$10

bar
...bar
3dexport
modern bar
3d_export
$10

bar
...bar
3dexport
modern bar
3d_export
$10

bar
...bar
3dexport
modern bar
Holder
archibase_planet
free

Holder
...holder
archibase planet
holder toilet paper holder
holder paper n070712 - 3d model (*.gsm+*.3ds) for interior 3d visualization.
archibase_planet
free

Holder
...e planet
holder rack toilet paper holder
holder toilet roll n240715 - 3d model (*.gsm+*.3ds+*.max) for interior 3d visualization.
archibase_planet
free

Holder
...holder
archibase planet
pen holder support prop
pen holder - 3d model for interior 3d visualization.
archibase_planet
free

Holder
...holder
archibase planet
pole post holder
сhurch cross pole holder - 3d model for interior 3d visualization.
archibase_planet
free

Holder
...holder
archibase planet
holder bathroom ware
shower holder - 3d model (*.gsm+*.3ds) for interior 3d visualization.
archibase_planet
free

Holder
...oilet paper holder
holder paper devon&devon; time black n241113 - 3d model (*.gsm+*.3ds+*.max) for interior 3d visualization.
archibase_planet
free

Holder
...holder
archibase planet
holder hanger hanger for towel
holder 7 - 3d model (*.gsm+*.3ds) for interior 3d visualization.
archibase_planet
free

Holder
...holder
archibase planet
holder hanger hanger for towel
holder 3 - 3d model (*.gsm+*.3ds) for interior 3d visualization.
archibase_planet
free

Holder
...holder
archibase planet
holder towel rack towel-horse
holder - 3d model (*.gsm+*.3ds) for interior 3d visualization.
archibase_planet
free

Holder
...lder
archibase planet
holder hanger hanger for towel
holder towel n250912 - 3d model (*.gsm+*.3ds) for interior 3d visualization.
3
turbosquid
$10

Mountain Bike 3 -3 of 3
...model mountain bike 3 (#3 of 3) for download as fbx and blend on turbosquid: 3d models for games, architecture, videos. (1438752)
turbosquid
$6

Rock 3-3
...urbosquid
royalty free 3d model rock 3-3 for download as obj on turbosquid: 3d models for games, architecture, videos. (1628065)
turbosquid
$29

Books 150 pieces 3-3-3
...books 150 pieces 3-3-3 for download as max, obj, fbx, and stl on turbosquid: 3d models for games, architecture, videos. (1384033)
turbosquid
$3

Genesis 3 Clothing 3
... available on turbo squid, the world's leading provider of digital 3d models for visualization, films, television, and games.
3d_export
$5

hinge 3
...hinge 3
3dexport
hinge 3
3ddd
$1

Розетка 3
...розетка 3
3ddd
розетка
розетка 3
turbosquid
$50

is-3
... available on turbo squid, the world's leading provider of digital 3d models for visualization, films, television, and games.
turbosquid
$10

Mountain Bike 3 -2 of 3
...model mountain bike 3 (#2 of 3) for download as fbx and blend on turbosquid: 3d models for games, architecture, videos. (1438750)
turbosquid
$10

Mountain Bike 1 -3 of 3
...model mountain bike 1 (#3 of 3) for download as fbx and blend on turbosquid: 3d models for games, architecture, videos. (1438743)
3d_export
$5

3 CATS
...3 cats
3dexport
3 cats pen holder