Thingiverse
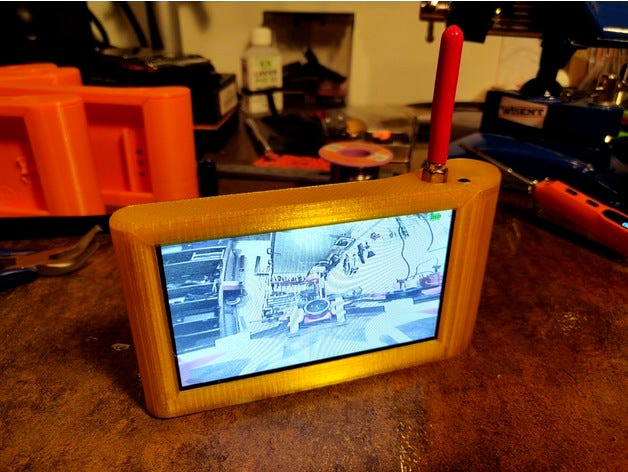
DiA FPV (cheapo) monitor by DiAleksi
by Thingiverse
Last crawled date: 3 years, 1 month ago
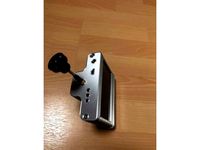
I needed some small, simple handheld fpv monitor for the cheap price. Found on Banggood RX5808 receiver with 5" display, but all the cases I found are ugly and not so handy. So got an inspiration to design my own version. And here it is! Feel free to download and print it yourself :) Total price is under $30 and your time.
I've done a test with tiny whoop's 260mAh lipo battery. It lasts for half an hour. So with over 3000mAh Li-Ion you can get an operation time almost for 6 hours!
Here is the BOM list:
Banggood: RX5808 5.8G 48CH FPV Receiver with 480*320 5 Inch HD Display Snow Screen Monitor DIY $25
Banggood: 3 Pins Toggle Switch AC 125V 6A 2 Position SPDT $1.32
For SMA connector you can use the one that came with the monitor set. It's RP-SMA if it suits you. Otherway get some SMA pigtail connector. Google :)
And at last, you need one M3 bolt, at least 10mm long.
Assembly instructions
See the assembly video: https://www.youtube.com/watch?v=Yvh2YlkTi1U
Tape the PCB to the display with double-sided tape. Put flat cable under it.
Get a broken brushless motor and rip two magnets from it. Grind them with the sandpaper for a better connection.
Solder black and red wires to each magnet. Glue the black wired magnet to the bottom of the Li-Ion holder.
Solder black wire to the GND pad of the PCB.
Solder red wire with the magnet to the toggle switch's centre pin. Solder another red wire to one of the side pin of the toggle switch. Solder another end of the red wire to PCB's VBAT pad.
If you want to keep RP-SMA connector, just keep it. Or change to SMA version. Mount it to the cover. The 8mm socket wrench helps a lot :)
Cut an empty side of the button panel to make it shorter. Do not cut over the traces. Put its plug and wire through the hole on the bottom of the mount and place the panel. Slide the panel lock behind the button panel.
Keep one nut on the toggle switch and put inside the switch hole on the side of the case. Adjust with the nut how far switch's toggle will come outside with your preference. Hot glue it to the place.
Slide the Li-Ion holder to the case.
Arrange the wires behind the display and slide it to the case.
Insert 18650 Li-Ion battery negative side on the bottom. Connect "red" magnet to the positive side. Check to see if the monitor works.
Put on the cover. There is an angled lock on the left side of the cover. You have to slide the cover in a 45-degree angle from top left to bottom right.
Screw the M3 bolt and it's done!
Add some 5.8G antenna :)
Similar models
thingiverse
free
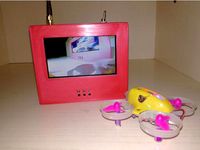
FPV 5.8 GHz RX5808 monitor by danlotano
...ard to the back of the display with some dual sided tape.
glue the magnets or glue the back cover and enjoy your new fpv monitor!
thingiverse
free

GE-FPV RX5808 Case by OliRanks
...x in tinkercad of zsaviation's rx5808 case to fit the ge-fpv version from banggood.
3.5mm socket hole was 2mm too low for me.
thingiverse
free
Pagoda 2 antenna cover by tozes
...bs and before the sma connector.
use a bit of ca glue to hold the cover to the top pcb on the top and to the cable on the bottom.
thingiverse
free

rx5808-pro-diversity box by grafis
...ceiver-with-oled-display-for-fpv-racer-se-/391567332845?hash=item5b2b3b55ed:g:gzeaaoswmllx4kbg
size adapted for quanum googles v2
thingiverse
free

Rx5808 pro advanced PCB case by eovnu87435ds
...ingiverse
a 3d printed case to fit the rx5808 pro advanced pcb project. i haven't built the top yet, but here is the bottom.
thingiverse
free

GE FPV RX5808 Clip on Case by Rec0iL_One
...dvr will fit a default servo lead.
it has on the bottom a default tripod thread.
¹maybe a little bit of glue for the xt60 plug ;)
thingiverse
free

Enclosure for D.I.Y. FPV Monitor ! by Rognosh
...-monitor-diy-for-fpv-goggles-p-1309235.html?rmmds=myorder
the lcd screen and the button panel are screwed in place with hot glue.
thingiverse
free

Chassis / Proffieboard holder 28mm by Nailka_007
...tp4056 bms pcb
slider switch 3a
musb port pcb
magnet head
latching switch 12mm
latching switch 16mm
npxl pogo pins connector pcb
grabcad
free

SMA Male Connector Solder Attachment Thru Hole PCB
...sma male connector solder attachment thru hole pcb
grabcad
pasternack's pe4525 sma male pcb connector.
thingiverse
free

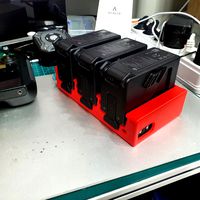
DiA 18650 2S and 4S pack holder covers by DiAleksi
...overs for 18650 li-ion cell holders with power and balance plugs.
i used holders from banggood, soldered wires and balance plugs.
Dialeksi
thingiverse
free

Support for Lakier bottle by DiAleksi
...support for lakier bottle by dialeksi
thingiverse
support for easy toppling lakier bottle
thingiverse
free

Gibson plektrum box by DiAleksi
...gibson plektrum box by dialeksi
thingiverse
just want some minimalistic box to store plectrums :)
thingiverse
free

Emodia racer pod by DiAleksi
...emodia racer pod by dialeksi
thingiverse
tpu/nylon racer pod for emodia frame.
https://dima.fi/fpv/emodia/
thingiverse
free

QAV-R Clone shell by DiAleksi
...qav-r clone shell by dialeksi
thingiverse
shell for qav-r clone frame.
thingiverse
free

Emodia 20x20 spacer by DiAleksi
...emodia 20x20 spacer by dialeksi
thingiverse
spacer for emodia true-x and pure-x frame combinations to use with 20x20mm stack.
thingiverse
free

Spool stand by DiAleksi
...e
couldn't wait till monday to find some bearings to make bottom roll stand, so i drew this and printed. why not to share ;)
thingiverse
free

Emodia sandwich spacers by DiAleksi
...sandwich spacers by dialeksi
thingiverse
spacers for emodia frame, where two bottom plates are used.
https://dima.fi/fpv/emodia/
thingiverse
free

Goldberg for 7mm motors by DiAleksi
...otors by dialeksi
thingiverse
we are all moving from 6mm to 7mm motors, so should the goldberg too :)
print with pctpe or nylon.
thingiverse
free

Drum stick for kids by DiAleksi
... kids by dialeksi
thingiverse
my daughter lost her drum sticks, so here is another job for printer.
length: 170mm
diameter: 10mm
thingiverse
free

Air vent cover 20mm by DiAleksi
...air vent cover 20mm by dialeksi
thingiverse
air vent cover 20mm. no need to spend money on them, just print.
Cheapo
thingiverse
free

El Cheapo Laser mount for Eleksmaker by Remy_Loste
... gantry from the eleksmaker laser. modified from the original file that el cheapo sent me. original design credit goes to them.
thingiverse
free

L-Cheapo Adapter for Sainsmart 3018 & Equivalent by Kuprin
...here.com/lcheapo
need an l-cheapo mount for something else? https://robots-everywhere.com/re_wiki/pmwiki.php?n=main.lcheapomounts
thingiverse
free

Rigidbot L-Cheapo laser mount by dgriffith
...itions the laser in between the rails to the right of the extruder, holds the laser by the diode to make it as rigid as possible.
thingiverse
free

Rigidbot L-Cheapo Laser Mount by Sactocal
...ed it some to possibly reduce vibration and be a bit more sturdy.
http://robots-everywhere.com/re_wiki/index.php?n=main.lcheapo
thingiverse
free

L-Cheapo Laser Cutter Parts by spiritplumber
...e releasing the working drawings here.
the jig for making the heatsink is demoed here:https://www.youtube.com/watch?v=1olpq63jgbc
thingiverse
free

Rigidbot mount for L-Cheapo V2 laser cutter by xzivr
...giverse
this is my overbuilt mount for the l-cheapo v2 laser cutter. designed to fit with my e3d v6 hotend mount still in place.
thingiverse
free

el-cheapo tabletop minifuge by tinytim
...fuge by tinytim
thingiverse
mini-centrifuge (tabletop) for 6x reaction tubes using cheap parts (i.e. things i had lying around).
thingiverse
free

L-Cheapo Mk4~Mk5 holders by spiritplumber
... know of that is open-source hardware.
and yes, it does cut things, not just engrave. https://www.youtube.com/watch?v=6kqju_hfrnm
thingiverse
free

L-Cheapo Adapter for Eleksmaker Laser Engravers & Clones by Kuprin
...ou have an l-cheapo and need to mount it to something else: https://robots-everywhere.com/re_wiki/pmwiki.php?n=main.lcheapomounts
thingiverse
free

Cheapo GoPro Quadcopter mount by Dan-hargreaves82
...mm (l) x 24.6mm (d) and 41.5mm (h)
i have 2 cable tie holes that run throughout the bottom of the holder and a velcro strap slot.
Dia
3ddd
$1

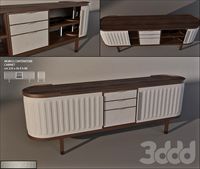
Giorgetti Dia
...giorgetti dia
3ddd
giorgetti , комод
комод giorgetti dia
3ddd
$1
Savoy Dias Orb Pendant
...rb pendant
3ddd
savoy house
люстра dias orb pendant от savoyhttp://www.savoyhouse.com/dias-orb-pendant-7-4353-4-ch.html
turbosquid
$14

Sollos dia chair
...ty free 3d model sollos dia chair for download as max and obj on turbosquid: 3d models for games, architecture, videos. (1533902)
3ddd
$1
Giorgetti DIA
...etti , тумба
сайт: www.giorgetti.eu
в файле 2 модели, с открытыми дверцами и закрытыми.
turbosquid
$44

Dia Sofa
...urbosquid
royalty free 3d model wrlo6820 for download as max on turbosquid: 3d models for games, architecture, videos. (1340780)
3ddd
free
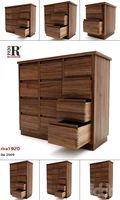
шкафы, riva 1920 dia 2009
...шкафы, riva 1920 dia 2009
3ddd
riva 1920
шкафы, riva 1920 dia 2009
turbosquid
$30
Berkeley 71 dia and Mercer
... free 3d model berkeley 71 dia and mercer for download as max on turbosquid: 3d models for games, architecture, videos. (1314370)
3ddd
$1

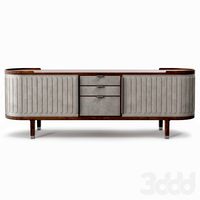
Giorgetti / DIA
... комод
комод фирмы giorgetti коллекция 2012 года.
материал: дерево, кожа.
размер: 2350x560x80 мм
design: chi wing lo
3ddd
$1
Giorgetti Dia
...or model for easy change or setup.
object at 0.0.0, clean and light scene.
the archive contains the obj file and more previews.
3d_export
$12

isacco agostoni pouffe dia
...
isacco agostoni dia pouffe<br>real world dimentions: 58x52h<br>texrures are included in sizes: 3000x3000, 1600x1600
Fpv
turbosquid
$1

FPV VTX Antenna
...e 3d model fpv vtx antenna for download as obj, fbx, and stl on turbosquid: 3d models for games, architecture, videos. (1230317)
3d_export
$9

Fpv logo 3D Model
...onogram vehicle part of auto transport 3d model logo emblem detailed high quality badge
fpv logo 3d model rmodeler 59628 3dexport
3d_export
$8
dji fpv battery slot holder
...er for 3 dji fpv batteries. holds perfectly without shaking. need 1 m3 countersunk head bolt. need to print 6 pin, 1 case, 1 cap.
3d_export
$10
fpv camera hd 700tvl
...aterials are logically named<br>the main format is in 3ds max 2009.<br>satisfcation garranteed..<br>thank you !
thingiverse
free
FpV Mount (SOPORTE FPV) by elborjas1987
...fpv mount (soporte fpv) by elborjas1987
thingiverse
this is a fpv mount with the same holes of naza base.
thingiverse
free
fpv by tbutera
...fpv by tbutera
thingiverse
fpv
thingiverse
free
fpv by tbutera
...fpv by tbutera
thingiverse
fpv
thingiverse
free
FPV DRONE ROOSTER DJI FPV PART
...fpv drone rooster dji fpv part
thingiverse
fpv drone rooster dji fpv install part
thingiverse
free
FPV monitor
...tml?rmmds=myorder&cur_warehouse=cn
link for download : https://cults3d.com/fr/mod%c3%a8le-3d/divers/fpv-monitor-ecran-fpv-faf
thingiverse
free
FPV receiver mount for FPV display by petrex
...eceiver mount for fpv display by petrex
thingiverse
aomway receiver mount for field view 777 fpv monitor. with small cable tray.
Monitor
3d_ocean
$5

Monitor
...monitor
3docean
computer desktop monitor screen
a computer monitor
3d_export
free

monitor
...monitor
3dexport
monitor
archibase_planet
free
Monitor
...monitor
archibase planet
monitor lcd monitor pc equipment
monitor - 3d model (*.gsm+*.3ds) for interior 3d visualization.
3d_export
$5

monitor
...monitor
3dexport
monitor or pc.
3d_ocean
$5
Monitor
...monitor
3docean
computer desktop monitor screen windows work
a monitor with windows desktop
archibase_planet
free

Monitor
...r
archibase planet
monitor lcd monitor pc equipment
monitor mouse n120614 - 3d model (*.gsm+*.3ds) for interior 3d visualization.
archibase_planet
free
Monitor
...archibase planet
monitor lcd monitor pc equipment
monitor samsung n090714 - 3d model (*.gsm+*.3ds) for interior 3d visualization.
archibase_planet
free
Monitor
...r pc equipment
monitor samsung 27'' led monitor 7 t27b750 n200315 - 3d model (*.gsm+*.3ds) for interior 3d visualization.
archibase_planet
free

Monitor
...monitor
archibase planet
monitor apple
monitor-apple - 3d model for interior 3d visualization.
archibase_planet
free
Monitor
...monitor
archibase planet
monitor display
monitor sony - 3d model for interior 3d visualization.