Thingiverse
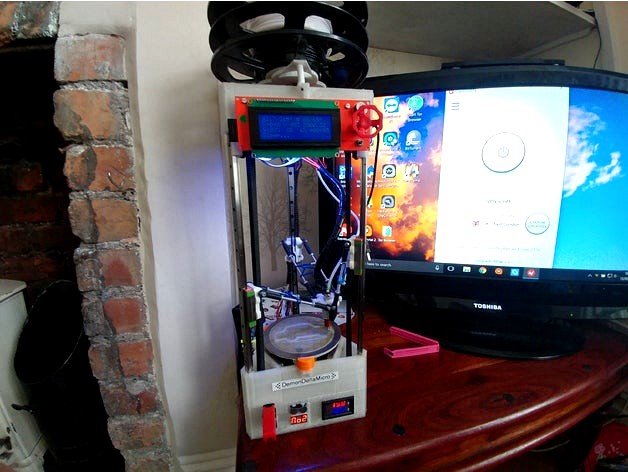
DemonDeltaMicro - Lipo Pack Addon Module by DjDemonD
by Thingiverse
Last crawled date: 3 years ago
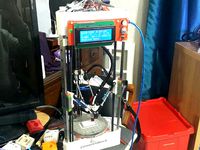
30-12-17 IMPORTANT SAFETY TIP - I HAVE NOW ON TWO OCCASIONS HAD THIS PRINTER TIP OVER, ITS TALL AND NARROW. PLEASE SECURE THE PRINTER TO THE BATTERY UNIT WITH THE SCREWS. PLEASE ALSO CONSIDER SOME OTHER FORM OF RESTRAINT. IT SEEMS TO BE THE WEIGHT OF THE SPOOL WHEN FULL ON TOP. I WILL DESIGN A NEW SPOOL HOLDER.
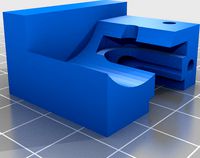
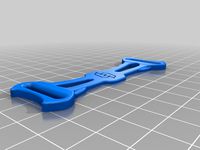
Update 17-09-17 - Modified the box and lid to fit together with countersunk m3 screws. There are also blocks which will fit into the base of the DemonDeltaMicro printer. I have also put screw holes through and updated the listing for the printer base on its thingiverse page.
Update: So first few prints, managed a car shaped cookie cutter (PLA with heated bed), around half of a 75% scale benchy, which came off the bed after I turned the heater off partway through, and then around 80% of a 75% scale benchy with no heat, on a PEI surface instead. BMS cut the pack off when the cells got down to 3.0v so it didn't complete. But that's around 3 hours of printing time with a fully charged pack, no issues with the prints themselves, in fact, the high voltage speeds up the heaters and makes the motors quieter. Some serious testing both with/without heating to see how long the pack lasts yet to be done.
Okay so want a really portable printer?https://youtu.be/WxNGG_h4XqM
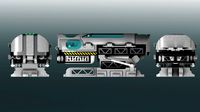
This add-on module for the DemonDeltaMicro printer gives you a battery pack that could run the machine for 2-4 hours (depending on heated bed usage).
DISCLAIMER - Lithium Polymer/Lithium-Ion batteries are dangerous if improperly handled, shorted, overcharged, over-discharged, soaked in water or generally treated with a lack of respect. I accept no responsibility for fires/shorts/burns or any other battery-related incident. Handle them correctly and they are very useful.
BOM - For this, you will need
-DemonDeltaMicro Printer https://www.thingiverse.com/thing:1874766
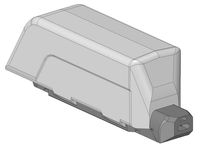
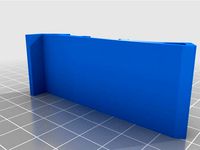
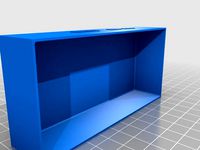
-Printed Lipo Module and printed lid PETG recommended.
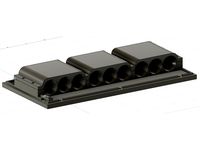
-12 lipo batteries (unprotected type) approx 2200mAh (genuine capacity) or greater
(ideally already soldered into a 16.8v pack)
-Battery management board (I used a 578800 20A module from ebay for a 4S pack)
-Large super cool missile fire switch - eBay 10A, double pole, single throw
-Lipo battery monitor (not 100% essential but I want to ensure the BMS is doing its job) -
eBay
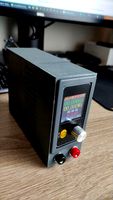
-LED voltmeter/ammeter combined unit (10A type not 50A type)
-Anderson Powerpole 15A connectors with plate to make socket - eBay (any other high current RC connector will do)
-Wire/solder
General guidance on Assembly (not comprehensive you need to know what you're doing with lipo packs).
The printed case has space for a 4S3P lipo pack, that's 4 sets in series of 3 parallel cells. This gives 16.8v max. If you can get a ready-made pack in a 6x2 row arrangement (often used for alarm systems) then get one. Ensure cells are the unprotected type, as we will be pulling fairly high current from them.
The BMS is soldered solidly to the battery + and -, and to each of the smaller leads which run from the joins between each set of 3 cells, these are the balancing leads and are there to ensure the BMS keeps all the cells at the same voltage. Use wire rated for at least 10A, 15A even better.
The lipo monitor needs to be connected so that the pins labelled 1,2,3,4 go to balance lead 1 (between 1st and 2nd set of cells), 2 (between 2nd and 3rd set of cells), 3 (you get it yeah), and 4 to the last set which is effective the + for the pack. The first pin labelled - or GND needs to be connected to the negative output of the DPDT switch, so this only turns on when the pack is on.
The P- and P+ (pack + & -) are then routed via the DPDT switch (again 10A+ rated).
The voltmeter/ammeter unit has thin red, yellow, and black wires. Connect red and yellow to the positive output of the DPDT switch, black to the negative output of the switch. The thick red and black wires need to go in series with the negative output from this unit, i.e the current return from the printer flows through the ammeter (which has an internal shunt so it doesn't melt). Ensure Red come from the switch in the battery pack positive output (again heavy duty solder here) and then black goes to the output from the pack.
Use some heavy duty RC car connectors to create an output for the pack, use the corresponding connectors on the printer.
The printer mains adaptor was an Xbox unit, I now have the RC car power connectors on its output and have disabled the PS-ON feature which enabled the printer controller to turn the PSU on and off, as the battery pack does not have an always-on 5v rail to use.
Once everything is connected, attach the lid by drilling some 3.2mm countersunk holes in the lid, and 2.8mm holes in the battery box, a little adhesive doesn't hurt. Use lots of tape to hold wires down, and ensure nothing is going to short/rub etc..
This module can then be connected to the printer, by sitting it on top and drilling some similar 3.2/2.8mm holes through the side of the base triangle of the printer.
Either use the battery unit, which can be charged with a lipo charger capable of charging 4S pack, or use the mains adaptor. At this time there is no way to connect both at the same time and effectively create a UPS unit, maybe this will come later.
The printer seems quite happy at this high voltage and bed heating and nozzle heating is faster, motors are quieter. The regulator on the arduino mega should be able to run from 16.8v rather than 12, but keep an eye on it and keep the arduino well cooled.
Update 17-09-17 - Modified the box and lid to fit together with countersunk m3 screws. There are also blocks which will fit into the base of the DemonDeltaMicro printer. I have also put screw holes through and updated the listing for the printer base on its thingiverse page.
Update: So first few prints, managed a car shaped cookie cutter (PLA with heated bed), around half of a 75% scale benchy, which came off the bed after I turned the heater off partway through, and then around 80% of a 75% scale benchy with no heat, on a PEI surface instead. BMS cut the pack off when the cells got down to 3.0v so it didn't complete. But that's around 3 hours of printing time with a fully charged pack, no issues with the prints themselves, in fact, the high voltage speeds up the heaters and makes the motors quieter. Some serious testing both with/without heating to see how long the pack lasts yet to be done.
Okay so want a really portable printer?https://youtu.be/WxNGG_h4XqM
This add-on module for the DemonDeltaMicro printer gives you a battery pack that could run the machine for 2-4 hours (depending on heated bed usage).
DISCLAIMER - Lithium Polymer/Lithium-Ion batteries are dangerous if improperly handled, shorted, overcharged, over-discharged, soaked in water or generally treated with a lack of respect. I accept no responsibility for fires/shorts/burns or any other battery-related incident. Handle them correctly and they are very useful.
BOM - For this, you will need
-DemonDeltaMicro Printer https://www.thingiverse.com/thing:1874766
-Printed Lipo Module and printed lid PETG recommended.
-12 lipo batteries (unprotected type) approx 2200mAh (genuine capacity) or greater
(ideally already soldered into a 16.8v pack)
-Battery management board (I used a 578800 20A module from ebay for a 4S pack)
-Large super cool missile fire switch - eBay 10A, double pole, single throw
-Lipo battery monitor (not 100% essential but I want to ensure the BMS is doing its job) -
eBay
-LED voltmeter/ammeter combined unit (10A type not 50A type)
-Anderson Powerpole 15A connectors with plate to make socket - eBay (any other high current RC connector will do)
-Wire/solder
General guidance on Assembly (not comprehensive you need to know what you're doing with lipo packs).
The printed case has space for a 4S3P lipo pack, that's 4 sets in series of 3 parallel cells. This gives 16.8v max. If you can get a ready-made pack in a 6x2 row arrangement (often used for alarm systems) then get one. Ensure cells are the unprotected type, as we will be pulling fairly high current from them.
The BMS is soldered solidly to the battery + and -, and to each of the smaller leads which run from the joins between each set of 3 cells, these are the balancing leads and are there to ensure the BMS keeps all the cells at the same voltage. Use wire rated for at least 10A, 15A even better.
The lipo monitor needs to be connected so that the pins labelled 1,2,3,4 go to balance lead 1 (between 1st and 2nd set of cells), 2 (between 2nd and 3rd set of cells), 3 (you get it yeah), and 4 to the last set which is effective the + for the pack. The first pin labelled - or GND needs to be connected to the negative output of the DPDT switch, so this only turns on when the pack is on.
The P- and P+ (pack + & -) are then routed via the DPDT switch (again 10A+ rated).
The voltmeter/ammeter unit has thin red, yellow, and black wires. Connect red and yellow to the positive output of the DPDT switch, black to the negative output of the switch. The thick red and black wires need to go in series with the negative output from this unit, i.e the current return from the printer flows through the ammeter (which has an internal shunt so it doesn't melt). Ensure Red come from the switch in the battery pack positive output (again heavy duty solder here) and then black goes to the output from the pack.
Use some heavy duty RC car connectors to create an output for the pack, use the corresponding connectors on the printer.
The printer mains adaptor was an Xbox unit, I now have the RC car power connectors on its output and have disabled the PS-ON feature which enabled the printer controller to turn the PSU on and off, as the battery pack does not have an always-on 5v rail to use.
Once everything is connected, attach the lid by drilling some 3.2mm countersunk holes in the lid, and 2.8mm holes in the battery box, a little adhesive doesn't hurt. Use lots of tape to hold wires down, and ensure nothing is going to short/rub etc..
This module can then be connected to the printer, by sitting it on top and drilling some similar 3.2/2.8mm holes through the side of the base triangle of the printer.
Either use the battery unit, which can be charged with a lipo charger capable of charging 4S pack, or use the mains adaptor. At this time there is no way to connect both at the same time and effectively create a UPS unit, maybe this will come later.
The printer seems quite happy at this high voltage and bed heating and nozzle heating is faster, motors are quieter. The regulator on the arduino mega should be able to run from 16.8v rather than 12, but keep an eye on it and keep the arduino well cooled.
Similar models
thingiverse
free
XYS3580 XYS3606 portable power supply dc dc converter case (18650 cell powered) by mathmed
...ires: red to out+, black to out-
connect bms - to in - and rocker switch "1" to in +
push the module on its place
done.
grabcad
free

3PCS BMS Charger Module 12V 10A 18650 Lithium Battery
... 18650 lithium battery charging board with protection module cell charging input output pcb protection board
solidworks 2021+step
thingiverse
free

Battery for old 12V SKIL drill/driver tool
...that contacts the battery cells - no spot welding or soldering is needed. connectivity is made with screws and cheap copper wire.
thingiverse
free

Da Vinci 1.1 Cartridge Touch screen programmer by Waggster
...f the dpdt switch is soldered to the eeprom. this then allows the dpdt switch to toggle the eeprom to connected / off / arduino.
thingiverse
free
BatteryPack_18650_3S3P by Sableix
... any suggestions for design, functionality or safety improvements, feel free and leave a comment.
hope the thing works for you :)
thingiverse
free

6S 18650 holder with XT30 output for TS-100
...or: https://aliexpi.com/l00m
balance connector: https://aliexpi.com/0lb3
some 20awg & 24awg wires or 0.75mm^2 & 0.25 m^2
thingiverse
free

18650 2s1p battery pack with BMS enclosure by thehummingbeard
...vaged strips of nickel to solder the connection together with a generic bms circuit i ordered from ebay. hope you find it useful!
thingiverse
free
MK2 E-Bike Battery Pack for 40 Cells and BMS ebike by butchja
...rs hobbyking
glue for xt connectors, e.g. epoxy
wiring
dimensions
length: ~286mm
height ~100mm
width: ~76mm
part status
approved
thingiverse
free

E-Bike Battery Pack for 40 Cells and BMS ebike by butchja
...obbyking
glue for xt connectors, e.g. epoxy
wiring
total dimensions
length: 260.5mm
height 96mm
width: 76mm
part status
approved
grabcad
free

DALY BMS | LiFePo4 | 8S 24V 30A
..., over-discharging, and over-current. it also balances the cells in the battery pack to ensure that they are all charged equally.
Djdemond
thingiverse
free
50mm Towball cover Hitch Cap by DjDemonD
...50mm towball cover hitch cap by djdemond
thingiverse
cover for 50mm towball.
thingiverse
free
Duet3D Smarteffector Nimble Mount DjDemonD Remix by DjDemonD
...ess sensitive. you also need to consider the orientation of the large nut to you heatsink when assembling the hotend into the se.
thingiverse
free

Brio Wooden Train Tunnel by DjDemonD
...valley etc.. multiple units can be joined to make a longer tunnel. 80mm diameter so even fairly large trains can make it through.
thingiverse
free

Bowden pushfit locking ring for clone titan and y-splitter by DjDemonD
...for clone titan and y-splitter by djdemond
thingiverse
locking clip for trianglelabs clone titan and y-splitter bowden fittings.
thingiverse
free
3-Way Approach for Brio Thomas Engine Shed by DjDemonD
...ond
thingiverse
i bought one of these engine sheds but didn't have the approach track which is a custom piece so i made one.
thingiverse
free

Precision Piezo - 27mm and 20mm Piezo Disc drill guide. by DjDemonD
... djdemond
thingiverse
drilling guide for piezo discs to centre your drill.
see youtube video here: https://youtu.be/ms1fd0v5z68
thingiverse
free

Mechanical Z Endstop for DjDemonD/AndreasL Dual z axis smartrapcore alu by DjDemonD
...babystep z on the first print and used m206 to enter the home offset. (nb. if the nozzle was 1mm too high the m206 z would be 1.)
thingiverse
free

Paper Towel Holder Strengthened Remix by DjDemonD
...t to allow for the strengthening braces. since altering it, it works perfectly in fact i am even using some as spool holders too.
thingiverse
free
Sensor Test Rig by DjDemonD
...aver. i am not going to provide full build instructions, if you cannot figure out how to build it, should you be testing sensors?
thingiverse
free

Technics 1200 Turntable with spinning record by DjDemonD
... fits over a 5mm motor shaft and spins as my printer prints.
just bond it all together after assembly with superglue or acetone.
Addon
turbosquid
$10

Medieval House with Addon
...free 3d model medieval house with addon for download as blend on turbosquid: 3d models for games, architecture, videos. (1164630)
turbosquid
$2

Minecraft Rig + Addons
... available on turbo squid, the world's leading provider of digital 3d models for visualization, films, television, and games.
turbosquid
$10

Boarded up Medieval House no addon
... 3d model boarded up medieval house no addon for download as on turbosquid: 3d models for games, architecture, videos. (1165309)
turbosquid
$5

ikea hemnes workstation secretary and addon
... available on turbo squid, the world's leading provider of digital 3d models for visualization, films, television, and games.
turbosquid
$10

Boarded up Medieval House with addon
...free 3d model boarded up medieval house for download as blend on turbosquid: 3d models for games, architecture, videos. (1164989)
3d_export
$45

Race Track Construction Kit Addon Pack A 3D Model
...ction environment f1 grandstand flags tyre wall
race track construction kit addon pack a 3d model rivermillstudios 92419 3dexport
3d_export
$45

Race Track Construction Kit Addon Pack B 3D Model
...ion environment f1 trees pit lane alloy tractor
race track construction kit addon pack b 3d model rivermillstudios 92674 3dexport
3ddd
$1

IKEA FJALLA BOXES
...коробка , ящик set of ikea fjalla boxes and addon ...
3d_export
$10

snowball toy
...3dexport glass ball with snow. christmas toy.<br>an extra object addon was...
3d_export
$25
green monster rigged rigify
...rigify 3dexport green monster fully rigged activate rigify by edit-preference-addon made with blender fully textured works in blender...
Lipo
thingiverse
free
Soporte lipo
...soporte lipo
thingiverse
customizable lipo stand
thingiverse
free
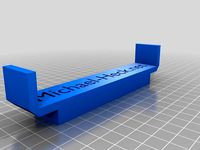
Copterframe Lipo Adapter for bigger Lipos by heckmic
...o adapter for bigger lipos by heckmic
thingiverse
copterframe lipo adapter for bigger lipos
look at michael-heck.net for more.
thingiverse
free

Testeur LIPO / LIPO Tester
...testeur lipo / lipo tester
thingiverse
salut a tous ceux qui sont sur cette page !
thingiverse
free

Lipo Taranis
...lipo taranis
thingiverse
pour lipo gn3 taranis
thingiverse
free
Harvest lipo buckle
...harvest lipo buckle
thingiverse
tpu lipo belt. keep out the frame your lipo straps.
thingiverse
free

lipo box by snoupypop
...lipo box by snoupypop
thingiverse
pour lipo 25c 1s
thingiverse
free

Lipo Stand by Cagatay
...lipo stand by cagatay
thingiverse
6x (12x35mm) lipo compartment
thingiverse
free
Lipo cover for bottom slung lipos by Zugara
...s and battery strap width of 20mm. length of 75mm x 30mm wide, 17mm height.
stl is for hollow print, so adjust yours accordingly.
thingiverse
free
boite lipo by micma
...boite lipo by micma
thingiverse
boite pour accu lipo tattu 850mha
thingiverse
free

LiPo Holder for Taranis
... taranis
thingiverse
this is my lipo holder for taranis radios. i use it with 850 mah lipo's, but others may also work fine.
Module
turbosquid
$4

Module
...
turbosquid
royalty free 3d model module for download as max on turbosquid: 3d models for games, architecture, videos. (1259603)
3d_export
free

Martian module
...martian module
3dexport
martian module objects 18 textures are missing
design_connected
$39

Kennedee Moduls
...kennedee moduls
designconnected
kennedee moduls computer generated 3d model. designed by massaud, jean-marie.
design_connected
$39

Sayonara Moduls
...sayonara moduls
designconnected
bbb emmebonacina sayonara moduls computer generated 3d model. designed by decursu, giorgio.
design_connected
$27

Togo Moduls
...togo moduls
designconnected
ligne roset togo moduls computer generated 3d model. designed by ducaroy, michel.
design_connected
$34
Nuvola Moduls
...nuvola moduls
designconnected
bonaldo nuvola moduls 2-seater computer generated 3d model. designed by giuseppe viganò.
3d_export
free
Hibernation module
...hibernation module
3dexport
design_connected
$27
Sabi moduls
...sabi moduls
designconnected
paola lenti sabi moduls 2-seater computer generated 3d model. designed by francesco rota.
3d_export
$50

pls concrete module
...pls concrete module
3dexport
pls concrete module<br>pls with concrete mobile mixer module m5
turbosquid
free

Hibernation module
...squid
free 3d model hibernation module for download as blend on turbosquid: 3d models for games, architecture, videos. (1667696)
Pack
3d_export
$5
pack
...pack
3dexport
low poly pack
archibase_planet
free

Packing
...packing
archibase planet
wrapping wrapper packing
packing 2 - 3d model (*.gsm+*.3ds) for interior 3d visualization.
archibase_planet
free

Packing
...packing
archibase planet
packaging wrapping packing
packing 3 - 3d model (*.gsm+*.3ds) for interior 3d visualization.
archibase_planet
free

Packing
...packing
archibase planet
wrapper packing packaging
packing 4 - 3d model (*.gsm+*.3ds) for interior 3d visualization.
archibase_planet
free

Packing
...packing
archibase planet
packaging wrapping packing
packing 5 - 3d model (*.gsm+*.3ds) for interior 3d visualization.
archibase_planet
free

Packing
...packing
archibase planet
packing packaging wrapper
packing 7 - 3d model (*.gsm+*.3ds) for interior 3d visualization.
3d_export
$7

Health Pack Armor Pack and Ammo Pack 3D Model
...pack 3d model
3dexport
health armor ammo pack check point game
health pack armor pack and ammo pack 3d model u2501 99166 3dexport
3d_ocean
$79

Turrets Pack - Tower Defense Pack
...be used in any sf type of game, especially in tower defense games. the pack includes: - flack cannon: 6239 polygons - chain gu...
3d_export
$7

arbalet pack
...arbalet pack
3dexport
arbalet pack
3d_export
$5
rocks pack
...rocks pack
3dexport
rocks pack