Thingiverse

Dell WD19TB Dock Stand with 120mm fan by jppowers
by Thingiverse
Last crawled date: 3 years, 8 months ago
Dell WD-15 USB-C dock with 120mm Fan
Design Goal
This is an updated version of my WD-15 USB-C dock (https://www.thingiverse.com/thing:4335172). I picked up a WD19TB to address some other upgrades I made, and decided to take another stab at this idea.
The design goal was fairly simple: Minimize the foot print of the dock and laptop while still providing cooling to the laptop's bottom. I usually leave my laptop closed while docked so, if I stand everything up it should be fairly easy to keep the foot print down significantly.
It's designed to fit a XPS 13 9370 and Latitude 7390, but also fits my new XPS 15 9500 without any real issue.I did have to move the cables coming out of the dock a bit since the XPS 15 is wider and the cables interfered with centering the new laptop on the fan, though.
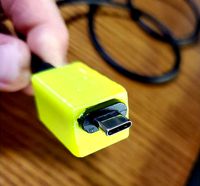
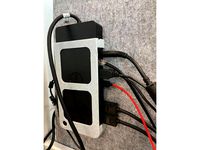
By standing the WD19TB dock on it's side, with the cable running up and back, I can put the laptop with it's back facing the other direction, feed the USB-C cable thru the front, and have a fan blowing against the bottom of the laptop. The dock does have a fan blowing thru it so does require some grating on the bottom to allow air flow.
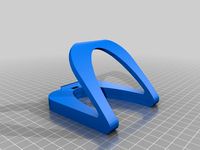
Design wise it's really quite simple. The "left" slot is for the dock, there's a slot on the middle separator to feed the USB-C cable thru, and the laptop rests on the right. The cutout for the fan is for a standard 120mm computer fan (I have a few laying around). It includes cutouts for nut on the "inside," but using more traditional case fan self-tapping screws should work. Even standard M4 screws are held in place without nuts somewhat securely (depending on your printer's tolerances that may or may not be true for you). There's a little cubby under the fan with a cutout to route the fan's cable. There's a little cutout where the dock's power button is as well so you can still hit it (albeit with a bit more difficulty). The bottom side of the dock's slot has further slots cut thru it so it allows airflow as long as the dock stand is lifted off the table (I use 3M Command Strips to keep it in place, which provides enough lift off the table). Since the WD19TB is so much taller than the WD-15, I also added a small bracket to the back side to help it not tip backwards and a small lip to the top and bottom to help the dock "float" a bit better, providing a better fit I found.
Bill of Materials
Required:
3D printer and filament (inb4 someone points it out in the comments)
120mm 3 or 4 pin fan
3/4pin fan to USB (for providing power)
4 screws M4/case fan tap screws for mounting fan
Optional:
120mm case fan dust filter
4 screws for mounting dust filter (if using above)
4 to 8 M4 nuts (4 if using M4 screws to mount fan, 8 if using M4 screws to mount fan and filter)
Note on the 3/4pin fan to USB power adapter:
I used the following from Frys.com:https://www.frys.com/product/9085057?site=sr:SEARCH:MAIN_RSLT_PG
It's cheap, easy, has a long cable, and chief for me: A power adjustment knob. Absolutely not a required feature, but a nice to have. You can easily wire up something yourself, look for a similar product elsewhere, etc., just pointing out the option I went with it and linking it for easier consumption.
How to use it
The STL is already oriented for printing. In case your slicer imports it wrong, the "back" side should be on the print bed. This will mean the dock side with the grating is on the left, the fan cut out on the right. Obviously, rotate how you will and the left/right won't be accurate anymore, but live your life. If your printer has solid cooling you can print without supports. I used PrusaSlicer support enforcers to get a cleaner top of the fan hole cutout, but otherwise nothing.
Mount the fan as you wish. I used M4 16mm screws and M4 nuts because I have bunch laying around. I also mounted a case fan filter to the fan itself with more of the same screws and nuts.
Put the dock on the left, standing up so the the side opposite the USB-C cable is facing the bottom. Feed the USB-C cable thru the back side of the cable route so it comes out the front of the printed part.
You're basically done. Drop your laptop on the right with the underside of the laptop facing the fan, back (where the hinge is) facing the bottom of the part, and plug your USB-C cable in.
Optional, but I used some Command Strips to mount the dock in place on my desk. Some rubber feet or something would probably help, too. I suggest the command strips or similar products to "fasten" the dock in place so the weight of the cables that plug into the dock don't tilt it around too much.
Design Goal
This is an updated version of my WD-15 USB-C dock (https://www.thingiverse.com/thing:4335172). I picked up a WD19TB to address some other upgrades I made, and decided to take another stab at this idea.
The design goal was fairly simple: Minimize the foot print of the dock and laptop while still providing cooling to the laptop's bottom. I usually leave my laptop closed while docked so, if I stand everything up it should be fairly easy to keep the foot print down significantly.
It's designed to fit a XPS 13 9370 and Latitude 7390, but also fits my new XPS 15 9500 without any real issue.I did have to move the cables coming out of the dock a bit since the XPS 15 is wider and the cables interfered with centering the new laptop on the fan, though.
By standing the WD19TB dock on it's side, with the cable running up and back, I can put the laptop with it's back facing the other direction, feed the USB-C cable thru the front, and have a fan blowing against the bottom of the laptop. The dock does have a fan blowing thru it so does require some grating on the bottom to allow air flow.
Design wise it's really quite simple. The "left" slot is for the dock, there's a slot on the middle separator to feed the USB-C cable thru, and the laptop rests on the right. The cutout for the fan is for a standard 120mm computer fan (I have a few laying around). It includes cutouts for nut on the "inside," but using more traditional case fan self-tapping screws should work. Even standard M4 screws are held in place without nuts somewhat securely (depending on your printer's tolerances that may or may not be true for you). There's a little cubby under the fan with a cutout to route the fan's cable. There's a little cutout where the dock's power button is as well so you can still hit it (albeit with a bit more difficulty). The bottom side of the dock's slot has further slots cut thru it so it allows airflow as long as the dock stand is lifted off the table (I use 3M Command Strips to keep it in place, which provides enough lift off the table). Since the WD19TB is so much taller than the WD-15, I also added a small bracket to the back side to help it not tip backwards and a small lip to the top and bottom to help the dock "float" a bit better, providing a better fit I found.
Bill of Materials
Required:
3D printer and filament (inb4 someone points it out in the comments)
120mm 3 or 4 pin fan
3/4pin fan to USB (for providing power)
4 screws M4/case fan tap screws for mounting fan
Optional:
120mm case fan dust filter
4 screws for mounting dust filter (if using above)
4 to 8 M4 nuts (4 if using M4 screws to mount fan, 8 if using M4 screws to mount fan and filter)
Note on the 3/4pin fan to USB power adapter:
I used the following from Frys.com:https://www.frys.com/product/9085057?site=sr:SEARCH:MAIN_RSLT_PG
It's cheap, easy, has a long cable, and chief for me: A power adjustment knob. Absolutely not a required feature, but a nice to have. You can easily wire up something yourself, look for a similar product elsewhere, etc., just pointing out the option I went with it and linking it for easier consumption.
How to use it
The STL is already oriented for printing. In case your slicer imports it wrong, the "back" side should be on the print bed. This will mean the dock side with the grating is on the left, the fan cut out on the right. Obviously, rotate how you will and the left/right won't be accurate anymore, but live your life. If your printer has solid cooling you can print without supports. I used PrusaSlicer support enforcers to get a cleaner top of the fan hole cutout, but otherwise nothing.
Mount the fan as you wish. I used M4 16mm screws and M4 nuts because I have bunch laying around. I also mounted a case fan filter to the fan itself with more of the same screws and nuts.
Put the dock on the left, standing up so the the side opposite the USB-C cable is facing the bottom. Feed the USB-C cable thru the back side of the cable route so it comes out the front of the printed part.
You're basically done. Drop your laptop on the right with the underside of the laptop facing the fan, back (where the hinge is) facing the bottom of the part, and plug your USB-C cable in.
Optional, but I used some Command Strips to mount the dock in place on my desk. Some rubber feet or something would probably help, too. I suggest the command strips or similar products to "fasten" the dock in place so the weight of the cables that plug into the dock don't tilt it around too much.
Similar models
thingiverse
free

USB-C Docking Cable Support for Dell Latitude 7410 by will_maxim
...n (https://www.thingiverse.com/thing:4799551). i couldn't make that model work, so i designed mine from scratch in tinkercad.
thingiverse
free
USB-C Docking Cable Support for Dell Precision 5540 Laptop by will_maxim
...n (https://www.thingiverse.com/thing:4799551). i couldn't make that model work, so i designed mine from scratch in tinkercad.
thingiverse
free

Fan Guard/Filter Holder by Tony_G
...rial, the stuff that's about 1/2" thick, to fit to guard, then used nuts to hold the guard to the back of the enclosure.
thingiverse
free

Snapmaker Original - Enclosure Filter Fan Adapter
...zn.to/2r6fw0h
4 x m4x8mm socket cap screws - https://amzn.to/2nfgmuz
usb 5v to 12v step up/upvolt cable - https://amzn.to/2se0mvx
thingiverse
free

Lid with 120mm Fan Grill for bgdog's Modular Case by mnijph
...mount point for a 120mm fan and a grill.
requires:
4x m4 30mm or 35mm screws
4x m4 hex nuts
4x m3 6mm or 8mm screws
1x 120mm fan
thingiverse
free

Yet Another Air Purifier Block by mrflobow
...ews in bottom remix.
i've not reprint it i used my various types of files to archive more space.
v1 was successfully printed.
thingiverse
free

Solder fume extractor
...3-delig-588546
you might also want to mount a fan guard (https://www.thingiverse.com/thing:1581974) to the other side of the fan.
thingiverse
free
Low Profile USB-C Dock by Lqkas
... the leftside of the dock is to not muffle the speaker of my oneplus 5t
this is my first design ever, feel free to give feedback.
thingiverse
free

Laptop table extension
...consists of two parts, which are connected with m4 screws and m4 nuts. the whole is mounted to the existing table with m4 screws.
thingiverse
free

120mm Fan SSD mount by jziemba95
...i could mount up to 5 2.5" drives to a 120mm fan. screw holes can accommodate normal fan mounting screws or radiator screws.
Wd19Tb
thingiverse
free
Dell WD19TB laptop dock holder by gtlloyd
... on the legs as they can easily snap.
pin the dock holder to your cubicle wall, then slide the dock (without any cables) into it.
thingiverse
free

Dell docking station WD19TB wall support by Donnadri
...ther two positions.
i have created a smaller version to fit the right-front corner and the back-center.
a m3-.50 nut is required.
Jppowers
thingiverse
free

Rainbow Six Seige Ban Hammer by jppowers
... the handle will handle being scaled up well but i imagine it should, i highly doubt it can scale down but much if at all though.
thingiverse
free

Pokemon Go Universal Aimer - Mk5 by jppowers
...lly loctite fun-tak mounting putty (http://smile.amazon.com/dp/b001f57zpw) and it works really well. very happy with the results.
thingiverse
free

GT86/FRS/BRZ center console organizer REMIX by jppowers
... mk3s fits it just barely, and i think a 200mm x 200mm bed might fit it if you spin it 45 degrees. cutting it half may work, too.
thingiverse
free

Prusa i3 MK3 PiCam v2 X-Axis Motor Mount REMIX - With Diffuser by jppowers
...b led strips this time around: https://smile.amazon.com/gp/product/b07nwfvry4/ref=ppx_yo_dt_b_search_asin_title?ie=utf8&psc=1
thingiverse
free

Prusa i3 MK3 PiCam v2 X-Axis Motor Mount by jppowers
...h i didn't notice only one was on.
view from octoprint control tab during the first layer of my first print after installing.
120Mm
turbosquid
$20

M829A3 120mm, APFSDS-T
...alty free 3d model m829a3 120mm, apfsds-t for download as obj on turbosquid: 3d models for games, architecture, videos. (1219997)
turbosquid
$79

M-75 120mm Mortar
... available on turbo squid, the world's leading provider of digital 3d models for visualization, films, television, and games.
3d_export
$5

Lian Li 120mm Spider Fan Guard 3D Model
...d 3d model
3dexport
lian li 120mm spider fan guard cooler pt-g05
lian li 120mm spider fan guard 3d model mackandco 37968 3dexport
turbosquid
$69

QF 120mm Mk VIII naval gun
...mm mk viii naval gun for download as lwo, obj, fbx, and blend on turbosquid: 3d models for games, architecture, videos. (1430519)
3d_export
$5
Ammo box tank shell 120mm
...hell 120mm
3dexport
nato box for tank ammunition caliber 120-125mm 3d format:fbx,obj,3ds max 2013 texture only diffuse 1024x1024
3ddd
$1

Черепашка
...черепашка 3ddd черепаха l-450mm,w-350mm, h-120mm ...
3d_export
$5

pantera decorativa
...pantera decorativa 3dexport pantera decorativa de 120mm de largo, 43mm de ancho y 42mm de...
3ddd
$1

Светильник точечный
...с хрустальными подвесками фирмы asfour. размеры: диаметр 77mm, высота 120mm ...
3ddd
$1

Свечи #1
...3ddd свеча производитель: - модель: свечи размеры: w-40/65mm, d-40/65mm, h-70/120mm ...
3ddd
$1
Архитектурная подсветка
...направленный светильник страна / country: китай габариты :235mm h 120mm защита...
Dell
3ddd
$1

Dell U2312HM
...dell u2312hm
3ddd
dell
dell u2312hm
3ddd
$1
Dell U2412M
...dell u2412m
3ddd
dell , монитор
монитор dell u2412m
3ddd
$1
Монитор DELL
...монитор dell
3ddd
монитор , dell
просто монитор
3ddd
$1
dell
...dell
3ddd
монитор
good luck
3ddd
$1
Dell U2711
...dell u2711
3ddd
dell , монитор
модель сделана очень подробно.
3ddd
$1
DELL U2410
... монитор
монитор dell lcd 24 ultrasharp u2410 [ips, 1920x1200, 800001, 178гор178вер, dvi, hdmi, pip, cardreader, tco03]
3ddd
$1

Dell XPS
... монитор , моноблок
подумал что apple уже слишком много.)
turbosquid
$10
Dell Monitor
...osquid
royalty free 3d model dell monitor for download as ma on turbosquid: 3d models for games, architecture, videos. (1152872)
3ddd
free
Monitor Dell ST2310
... dell
монитор dell st2310инфо: http://www.3dnews.ru/news/monitori_dell_st2310_st2210_dlya_lubitelei_full_hd/
turbosquid
$24

Dell Monitor
...ree 3d model dell monitor for download as obj, fbx, and blend on turbosquid: 3d models for games, architecture, videos. (1437518)
Dock
design_connected
$20
Docks
...docks
designconnected
gandia blasco docks computer generated 3d model. designed by romero vallejo.
turbosquid
$5

Dock
...squid
royalty free 3d model dock for download as 3ds and fbx on turbosquid: 3d models for games, architecture, videos. (1159328)
turbosquid
$20

Dock
... available on turbo squid, the world's leading provider of digital 3d models for visualization, films, television, and games.
turbosquid
$10
Dock
... available on turbo squid, the world's leading provider of digital 3d models for visualization, films, television, and games.
turbosquid
$10

Dock
... available on turbo squid, the world's leading provider of digital 3d models for visualization, films, television, and games.
turbosquid
$2
dock
... available on turbo squid, the world's leading provider of digital 3d models for visualization, films, television, and games.
3d_export
$65

dock
...dock
3dexport
simple rendering of the scene file
design_connected
$16

Dry-Dock
...dry-dock
designconnected
restoration hardware dry-dock computer generated 3d model.
3d_ocean
$6
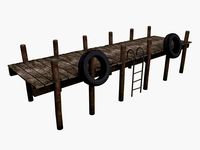
The Boat Dock
...s you see are separate, so you can remove the tyres and ladder and extend out the main section of the dock to make a long section
3ddd
$1
Bjorn Meier docks
... docks , модульный
bjorn meier docks
vray+corona
Fan
3d_export
$5

fan
...fan
3dexport
fan 3d model, table fan, fan, electric fan, ventilator
archibase_planet
free

Fan
...fan
archibase planet
fan large fan
fan out n260707 - 3d model for interior 3d visualization.
archibase_planet
free

Fan
...fan
archibase planet
fan ceiling fan ventilator
fan stealth n300615 - 3d model (*.gsm+*.3ds) for interior 3d visualization.
3d_export
$15

fan
...fan
3dexport
is an ancient fan
3ddd
$1

Fan-C-Fan by marco gallegos
...n-c-fan by marco gallegos
3ddd
вентилятор , marco gallegos
fan-c-fan by marco gallegos
3d_export
$10

fan
...fan
3dexport
a detailed fan designed for home or space blowing is now available for only 19.99!
turbosquid
$1

Fan
...fan
turbosquid
free 3d model fan for download as on turbosquid: 3d models for games, architecture, videos. (1427865)
turbosquid
$14

Fan
...fan
turbosquid
royalty free 3d model fan for download as on turbosquid: 3d models for games, architecture, videos. (1415642)
3ddd
$1

Светильник Fan
...светильник fan
3ddd
fan , italamp
светильник fan, производитель italamp
turbosquid
$25

Fan
...fan
turbosquid
royalty free 3d model fan for download as c4d on turbosquid: 3d models for games, architecture, videos. (1483246)
Stand
turbosquid
$50

stand watermelon stand
...yalty free 3d model stand watermelon stand for download as ma on turbosquid: 3d models for games, architecture, videos. (1528284)
archibase_planet
free
Stand
...stand
archibase planet
stand post pole
stand - 3d model for interior 3d visualization.
archibase_planet
free

Stand
...stand
archibase planet
stand sport barbell
stand kettler - 3d model for interior 3d visualization.
archibase_planet
free
Stand
...stand
archibase planet
locker drawer stand
stand 897810 - 3d model for interior 3d visualization.
archibase_planet
free
Stand
...stand
archibase planet
stand rack post
stand 2 - 3d model for interior 3d visualization.
archibase_planet
free
Stand
...stand
archibase planet
stand storefront shelving
stand 3 - 3d model for interior 3d visualization.
archibase_planet
free
Stand
...stand
archibase planet
stand shelf shelving
stand 4 - 3d model for interior 3d visualization.
archibase_planet
free
Stand
...stand
archibase planet
stand post stall
stand 5 - 3d model for interior 3d visualization.
archibase_planet
free
Stand
...stand
archibase planet
stand post stall
stand 6 - 3d model for interior 3d visualization.
archibase_planet
free
Stand
...stand
archibase planet
stand post shelving
stand 7 - 3d model for interior 3d visualization.