Thingiverse
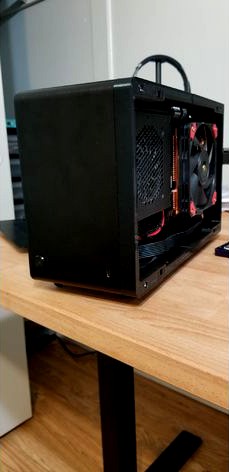
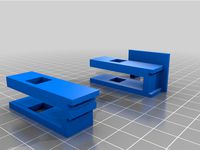
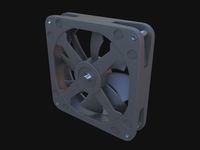
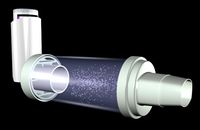
Dan A4 SFX (V4+) CPU & GPU Spacer (+16mm) for coolers up to 64mm or extra GPU clearance by ecor
by Thingiverse
Last crawled date: 3 years, 4 months ago
This will only work on Dan A4 SFX V4 or newer as it requires the threaded holes on the side to be mounted, along with the pins and clips.
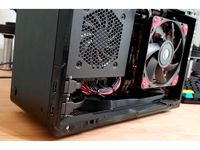
I needed more clearance for a larger cooler than it fits in this case (Thermalright AXP 100 full copper + noctua 120mm fan for a Ryzen 3900x), initially I had built a window with an spaced center to fit it in, but this solution allows me to "seal" it better and reuse the original cover.
This theoretically increases the volume or your case to 8.1L approximately for 1 side. It's actually less because we should be counting the internal volume, but I don't want to do the math.
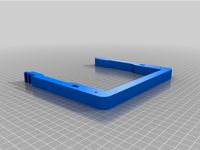
There are some spacers in thingiverse but they rely on the original clips to mount, which works for older versions of the Dan A4 and are mostly for the GPU side. This model uses the V4+ threaded holes to mount the spacer on the side (you'll need some M3x16 screws), the under-lip mounts to the original mounting points, then you mount the aluminum cover on top (remove clips from case and install in spacer) which will be held by the pins AND the under-lip is fastened to the spacer.
I'm using this set of M3 bolts for a bunch of projects, including this one:https://amzn.to/3iAKqI2
This model doesn't require supports to print when you print it under-lip side up (countersunk holes may sag a little bit, but they should be fine).
Technically you should print in PETG or better, but you may get away with PLA, I didn't test it.
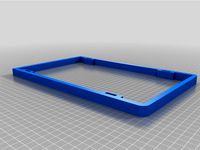
The model is split in 2 parts for easier printing.
THIS IS IMPORTANT!!! Be sure to have your printer properly calibrated. A CALIBRATION CUBE MAY NOT BE enough to print accurate LONG parts. My calibration cubes were spot on initially but I was still off by 0.5-1mm when printing long pieces. Try and do a 150mm squared cross in XY axis and calibrate that way before attempting to print this. Also I shouldn't have to say it, but bed level should be spot on.
Please note that depending on your printer's accuracy you may get more or less gap between the part. The design uses a 0.2mm gap between both front and back pieces. If you can't live with this, scale it in the proper axis to get less that 0.2mm gap. If your gap is larger than 0.2mm, calibrate your printer.
Update 2020-08-21
Added GPU side for +16mm clearance.
I needed more clearance for a larger cooler than it fits in this case (Thermalright AXP 100 full copper + noctua 120mm fan for a Ryzen 3900x), initially I had built a window with an spaced center to fit it in, but this solution allows me to "seal" it better and reuse the original cover.
This theoretically increases the volume or your case to 8.1L approximately for 1 side. It's actually less because we should be counting the internal volume, but I don't want to do the math.
There are some spacers in thingiverse but they rely on the original clips to mount, which works for older versions of the Dan A4 and are mostly for the GPU side. This model uses the V4+ threaded holes to mount the spacer on the side (you'll need some M3x16 screws), the under-lip mounts to the original mounting points, then you mount the aluminum cover on top (remove clips from case and install in spacer) which will be held by the pins AND the under-lip is fastened to the spacer.
I'm using this set of M3 bolts for a bunch of projects, including this one:https://amzn.to/3iAKqI2
This model doesn't require supports to print when you print it under-lip side up (countersunk holes may sag a little bit, but they should be fine).
Technically you should print in PETG or better, but you may get away with PLA, I didn't test it.
The model is split in 2 parts for easier printing.
THIS IS IMPORTANT!!! Be sure to have your printer properly calibrated. A CALIBRATION CUBE MAY NOT BE enough to print accurate LONG parts. My calibration cubes were spot on initially but I was still off by 0.5-1mm when printing long pieces. Try and do a 150mm squared cross in XY axis and calibrate that way before attempting to print this. Also I shouldn't have to say it, but bed level should be spot on.
Please note that depending on your printer's accuracy you may get more or less gap between the part. The design uses a 0.2mm gap between both front and back pieces. If you can't live with this, scale it in the proper axis to get less that 0.2mm gap. If your gap is larger than 0.2mm, calibrate your printer.
Update 2020-08-21
Added GPU side for +16mm clearance.
Similar models
thingiverse
free
DAN A4-SFX GPU Spacer with LED by Kondor2004
...ntrol.
revision 1. 2020-11-26
v4-dan-a4-spacer-17mm_led_part1_r1_with_holes.stl
v4-dan-a4-spacer-17mm_led_part2_r1_with_holes.stl
thingiverse
free
Dan A4 SFX (V4+) +16mm side spacer with 2x USB-A by ecor
...he insert if there are requests (maybe just 1 usb?, maybe a blank for mods?, maybe a reset button?), let me know in the comments.
thingiverse
free
DAN A4-SFX GPU Spacer by entrhopi
...r cpu side !!!
i'm currently not planning to make more alterations or adjustments since my dan is no longer in my possession.
thingiverse
free

DAN A4-SFX SFF Under Desk Mount by sffmounts
...dan a4-sfx sff under desk mount by sffmounts
thingiverse
under desk mount for the dan a4-sfx case
thingiverse
free

Dan A4-SFX Vesa Monitor Arm
...dan a4-sfx vesa monitor arm
thingiverse
simpel monitor stand for dan cases a4-sfx.
3dwarehouse
free

DAN Cases A4-SFX
...dan cases a4-sfx
3dwarehouse
- just the shell - outer dimensions should be 1:1
thingiverse
free

Dan A4-SFX Custom Components by CarbonVirus
...not sag/move.
cable combs are used to properly route 24-pin/8-pin motherboard power cables as well as two 6-pin gpu power cables.
thingiverse
free
NR200 PSU lift mod by pebst
...ng off and potentially hitting the motherboard.
the rectangle fixture is optional.
petg recommended for higher material strength.
thingiverse
free

DAN A4-SFX USB C Mod Clip by Itchy_Lettuces
...icular to the plane of the layers, making it stronger.
update 05 mar 2021 - i've added a pre-supported stl for resin printing
thingiverse
free

GPU Spacer for Dust Filter by eckhartselektronikecke
...se
this is a gpu spacer,i designed for my custom case, for when you need a dust filter, but your fans suck the dust filter in...
Ecor
turbosquid
$9

ecoreal estate black coin
...y free 3d model ecoreal estate black coin for download as max on turbosquid: 3d models for games, architecture, videos. (1457749)
turbosquid
$9

ecoreal estate gold coin
...ty free 3d model ecoreal estate gold coin for download as max on turbosquid: 3d models for games, architecture, videos. (1457747)
thingiverse
free
Dan A4 SFX (V4+) +16mm side spacer with 2x USB-A by ecor
...he insert if there are requests (maybe just 1 usb?, maybe a blank for mods?, maybe a reset button?), let me know in the comments.
thingiverse
free

4.7L Mini ITX case, easily printable (2 major pieces), sandwich layout, no extra thread inserts, standoffs or feet required by ecor
...p it should be no problem.
fasten the 3 screws at the "top" (in this orientation) once the spine is flush with the case
cg_trader
$2

ecorative Stucco 355 - 8K Shader
...k shader
cg trader
ecorative stucco 355 - 8k shader 3d plaster gypsum, available in max, fbx, mat, ready for 3d animation and ot
cg_trader
$3

decorative set 13
...ooks, cup, glasses,...
polys:207436
vertx: 226419
version: 2016
format: max, obj
thank you for choosing my model!
enjoy your use!
cg_trader
$35

Small flowerpot 3 | 3D
...cacti bonsai flowerpot vase house decor artchallenge plant plants ecortion dae flower vase flowers vase flower vase house plant...
cults
free
Customizable Origami Elephant
...geometric geometrical home_decor jewelry lowpoly low_poly necklace origami pendant wall_decortion this is a customizable 2d origami art of a...
3dwarehouse
free
Edificio Ecor VI
...edificio ecor vi
3dwarehouse
edificio ecor vi
Sfx
3d_export
$99
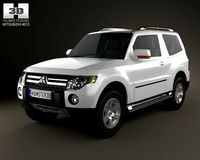
Mitsubishi Pajero 3door 2009 3D Model
...2008 2009 2010 2011 2012 3door doors suv 4x4 sfx full size japan mid mitsubishi pajero 3door 2009 3d...
3d_export
$99
Mitsubishi Pajero Montero Wagon 1991 3D Model
...1991 3d model 3dexport mitsubishi pajero montero wagon shogunю sfx mk1 1991 1992 1993 1994 1995 1996 1997 1998...
3d_export
$99

Mitsubishi Pajero Montero Wagon 2005 3D Model
...2005 3d model 3dexport mitsubishi pajero montero wagon shogunю sfx mk1 1999 2000 2001 2002 2003 2004 2005 2006...
3d_export
$99
Mitsubishi Pajero Montero Wagon 1983 3D Model
...1983 3d model 3dexport mitsubishi pajero montero wagon shogunю sfx mk1 1982 1983 1984 1985 1986 1987 1988 1989...
3d_ocean
$89

Mitsubishi Pajero (Montero) Wagon 1983
...generation japan japanese mitsubishi mitsubishi pajero mk1 montero pajero sfx shogun suv wagon the 3d model was created on...
3d_ocean
$89
Mitsubishi Pajero (Montero) Wagon 1991
...japanese mitsubishi mitsubishi pajero mk1 montero pajero second generation sfx shogun suv wagon the 3d model was created on...
3d_ocean
$89

Mitsubishi Pajero (Montero) Wagon 2005
...crossover japan japanese mitsubishi mitsubishi pajero mk1 montero pajero sfx shogun suv third generation wagon the 3d model was...
3d_ocean
$89
Mitsubishi Pajero 3door 2009
...junior mid size mitsubishi mitsubishi pajero montero pajero pinin sfx shogun suv mitsubishi pajero 3door 2009 3d model by...
3dfindit
free
CM-SFx
...cm-sfx
3dfind.it
catalog: abb low voltage & systems
unity_asset_store
$10

Doors SFX: Scifi
...flow with the doors sfx: scifi asset from indiegamemodels. find this & other characters options on the unity asset store.
64Mm
3d_export
$5
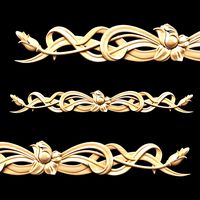
Cartouche-012
...adapted for carving on cnc machines length: 699mm width: 64mm height:...
3d_export
$5

Cartouche-005
...adapted for carving on cnc machines length: 699mm width: 64mm height:...
3d_export
$19

Super Sleek Beverage Can 400 Ml 1352 Oz
...vertex with more than 5 edges: 0<br>object:<br>- dimension mm: 64mm x 64mm x 152mm<br>- dimension inches: 2.51" x 2.51"...
3d_export
$19

Super Sleek Beverage Can 450 Ml 1521 Oz
...vertex with more than 5 edges: 0<br>object:<br>- dimension mm: 64mm x 64mm x 168mm<br>- dimension inches: 2.51" x 2.51"...
3d_export
$19

Super Sleek Beverage Can 473 Ml 16 Oz
...vertex with more than 5 edges: 0<br>object:<br>- dimension mm: 64mm x 64mm x 175mm<br>- dimension inches: 2.51" x 2.51"...
3d_export
$12

Wine Bottle Screw Cap
...5 edges: 0<br>object:<br>- dimension mm: 33mm x 33mm x 64mmlt;br>- dimension inches: 1.28" x 1.28" x 2.53"<br>- model parts:...
3d_export
$19

Gingerbread cookie 002
...more than 5 edges: 0<br>object:<br>- dimension mm: 68mm x 64mm x 10mm<br>- dimension cm: 6.8cm x 6.4cm x 1cm<br>-...
3d_export
$19

Gingerbread cookie 005
...vertex with more than 5 edges: 0<br>object:<br>- dimension mm: 64mm x 56mm x 11mm<br>- dimension cm: 6.4cm x 5.6cm...
3d_export
$19

Gingerbread cookie 008
...more than 5 edges: 0<br>object:<br>- dimension mm: 56mm x 64mm x 10mm<br>- dimension cm: 5.6cm x 6.4cm x 1cm<br>-...
3d_export
$19

Gingerbread cookie 011
...more than 5 edges: 0<br>object:<br>- dimension mm: 47mm x 64mm x 8mm<br>- dimension cm: 4.69cm x 6.4cm x 0.8cm<br>-...
Gpu
turbosquid
$100

GPU Enclosure
...yalty free 3d model gpu enclosure for download as obj and stl on turbosquid: 3d models for games, architecture, videos. (1381061)
turbosquid
$5

GPU Converter
...yalty free 3d model gpu converter for download as 3ds and max on turbosquid: 3d models for games, architecture, videos. (1355494)
3d_export
$5
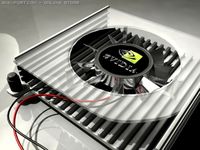
GPU fan 3D Model
...gpu fan 3d model
3dexport
gpu fan 3d model assassin360 26353 3dexport
turbosquid
$40

GPU video card
...alty free 3d model gpu video card for download as max and fbx on turbosquid: 3d models for games, architecture, videos. (1386266)
3d_export
$16
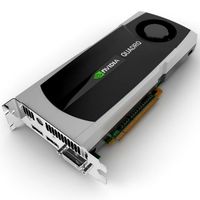
Nvidia Quadro FX GPU 3D Model
...ter gpu display computer extreme shading 3d pc pci express 3ds max maya fbx
nvidia quadro fx gpu 3d model denisvfx 31910 3dexport
3d_export
$8

soporte para gpu
... spec alpha gabinete atx gaming con una asus turbo rtx 2060 se puede ajustar el tamaño del modelo ( formato para zbrush.obj.stl )
3d_ocean
$4
Controller TQFP100
...controller tqfp100 3docean chip computer cpu electronic gpu mcu micro controller pin platine silicon wafer a micro...
3d_ocean
$4
Controller TQFP32
...controller tqfp32 3docean chip controller cpu electronic gpu mcu micro controller silicon smd tqfp wafer a micro...
3d_ocean
$4
Controller TQFP44
...controller tqfp44 3docean chip controller cpu electronic gpu mcu micro controller package smd tqfp tqfp44 a micro...
3d_ocean
$4
Controller TQFP64
...controller tqfp64 3docean chip computer cpu gpu mcu micro controller package silicon tqfp tqfp64 wafer a...
Cpu
3d_ocean
$9

CPU
...media / storage
case elegance 3d models. computer cpu tower 3d models. this low-poly model. this model has been locked to render.
3d_export
$5
cpu cover
...cpu cover
3dexport
cpu cover, cpu box, sheet metal container
turbosquid
$2
CPU
... available on turbo squid, the world's leading provider of digital 3d models for visualization, films, television, and games.
turbosquid
$1

CPU
... available on turbo squid, the world's leading provider of digital 3d models for visualization, films, television, and games.
3d_ocean
$6
CPU chips
... without the cover and the circuits are visible. each one of chips have 65 092 polygons. the scene is made in 3ds max 2010 wit...
turbosquid
$20

cooler cpu
...bosquid
royalty free 3d model cooler cpu for download as c4d on turbosquid: 3d models for games, architecture, videos. (1488768)
turbosquid
$3

Ryzen CPU
...osquid
royalty free 3d model ryzen cpu for download as blend on turbosquid: 3d models for games, architecture, videos. (1394644)
turbosquid
$2

ryzen cpu
...rbosquid
royalty free 3d model ryzen cpu for download as fbx on turbosquid: 3d models for games, architecture, videos. (1507810)
turbosquid
$30
CPU Cooling
...royalty free 3d model cpu cooling for download as max and fbx on turbosquid: 3d models for games, architecture, videos. (1386263)
3d_export
$5

CPU 3D Model
...cpu 3d model
3dexport
cpu 3d model alexungureanu 70876 3dexport
A4
3d_export
free

banner a4
...banner a4
3dexport
banner a4
turbosquid
$20
A4
... available on turbo squid, the world's leading provider of digital 3d models for visualization, films, television, and games.
3ddd
$1

Slipper Bath A4
...slipper bath a4
3ddd
toto
slipper bath a4
turbosquid
$5

M16-A4
... available on turbo squid, the world's leading provider of digital 3d models for visualization, films, television, and games.
turbosquid
$5

M16 A4
... available on turbo squid, the world's leading provider of digital 3d models for visualization, films, television, and games.
3ddd
$1
Audi A4
...audi a4
3ddd
сцена с рендером vray
3ddd
$1
ambiente a4
...о: spartherm (шпартерм) германия
модель: ambiente a4http://www.spartherm.com/produkte/kaminoefen/serie_ambiente/a4.html
3d_export
$5
Audi A4 3D Model
...audi a4 3d model
3dexport
audi a4 rim car
audi a4 3d model as3mble 13313 3dexport
3d_export
$30
Audi A4 3D Model
...audi a4 3d model
3dexport
car-audi-audi a4-sedan
audi a4 3d model ali3d63 52202 3dexport
3ddd
$1

Masiero 3050 A4
...masiero 3050 a4
3ddd
masiero
3d модель бра фабрики masiero, коллекция classica. артикул 3050 a4.
16Mm
3d_export
$30
Parth ring2 16mm stl diamond price stl 3D Model
...arth ring2 16mm stl diamond price stl 3d model download .c4d .max .obj .fbx .ma .lwo .3ds .3dm .stl gorgsalvatore 105374 3dexport
3d_export
$10
Korona 3D Model
...korona 3d model 3dexport parth ring2 16mm stl diamond price korona 3d model download .c4d .max...
3d_export
$25
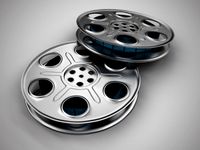
Film Reels 3D Model
...hollywood theater theatre reels realistic c4d 35mm movie spool 16mm cinema 3ds strip filmstrip celluloid vintage retro film reels...
3d_export
$30

Film reel 3D Model
...oscar academy awards projector camera spool theatre cinema imax 16mm 35mm hollywood movie panavision motion picture frames images film...
3d_export
$5
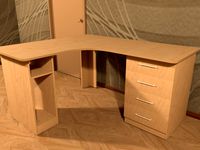
Computer desk
...top: width - 1544mm length - 1344mm thickness - 16mm bedside table for the system unit: width - 510mm...
3d_export
$5

Cartouche-016
...carving on cnc machines length: 336mm width: 106mm height: 16mm ...
3d_ocean
$5
Realistic Film Reel
...realistic film reel 3docean 16mm 35mm 3d model 3ds camera can celluloid cinema film...
3d_export
$14

Brazier 1105 - v2
...550 mm - thickness - 2,5mm - diameter - 16mm ...
3d_export
$7

ring of blades
...game dark souls.<br>there are 24 models in the archive.<br>ring diameter:<br>16mm 17mm 18mm 19mm 20mm 21mm 22mm 23mm<br>in the archive...
3d_export
$10
carved art nouveau
...(l * h * d): 563 x 70 x 16mmlt;br>* polys: 56 422<br>* .stl file included<br>3d model of modern...
V4
design_connected
$16
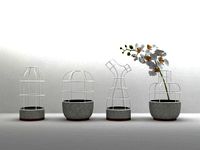
V4 vases
...v4 vases
designconnected
sy design v4 vases computer generated 3d model. designed by song, seung-yong.
turbosquid
$20
Door v4
...yalty free 3d model door v4 for download as max, max, and obj on turbosquid: 3d models for games, architecture, videos. (1523140)
turbosquid
$5
Hand v4
...yalty free 3d model hand v4 for download as ztl, obj, and stl on turbosquid: 3d models for games, architecture, videos. (1567431)
turbosquid
$9
silencer v4
...3d model silencer v4 for download as blend, dae, fbx, and obj on turbosquid: 3d models for games, architecture, videos. (1711410)
turbosquid
$90

V4 Engine
... available on turbo squid, the world's leading provider of digital 3d models for visualization, films, television, and games.
turbosquid
$35
Payphone v4
... available on turbo squid, the world's leading provider of digital 3d models for visualization, films, television, and games.
turbosquid
$28
HAZRO V4
... available on turbo squid, the world's leading provider of digital 3d models for visualization, films, television, and games.
turbosquid
$15

Carousel v4
... available on turbo squid, the world's leading provider of digital 3d models for visualization, films, television, and games.
turbosquid
$1
PokBall V4
... available on turbo squid, the world's leading provider of digital 3d models for visualization, films, television, and games.
3ddd
free

фонтан V4
...фонтан v4
3ddd
фонтан
фонтан, fantan, fontan
Coolers
archibase_planet
free
Cooler
...hibase planet
wine-cooler wine cooler kitchen equipment
rk wine cooler uc - 3d model (*.gsm+*.3ds) for interior 3d visualization.
archibase_planet
free
Cooler
...cooler
archibase planet
cooler
cooler seyedmms n271212 - 3d model (*.gsm+*.3ds) for interior 3d visualization.
archibase_planet
free
Cooler
...cooler
archibase planet
refrigerator cooler kitchen's technics
cooler - 3d model for interior 3d visualization.
archibase_planet
free
Cooler
...er
archibase planet
pc equipment cooler computer equipment
cooler n040908 - 3d model (*.gsm+*.3ds) for interior 3d visualization.
archibase_planet
free
Cooler
...cooler
archibase planet
cooler cpu fan pc equipment
cooler asus n080211 - 3d model (*.gsm+*.3ds) for interior 3d visualization.
3d_export
$5
Cooler
...cooler
3dexport
water cooler. program maya 2018. materials v-ray 3.6.
3d_export
$5

Juice cooler
...juice cooler
3dexport
juice cooler
turbosquid
$10
Cooler
...uid
royalty free 3d model cooler for download as max and fbx on turbosquid: 3d models for games, architecture, videos. (1478561)
turbosquid
$20
cooler
... available on turbo squid, the world's leading provider of digital 3d models for visualization, films, television, and games.
turbosquid
$20
cooler
... available on turbo squid, the world's leading provider of digital 3d models for visualization, films, television, and games.
Clearance
turbosquid
$1

Clearance Sign
... available on turbo squid, the world's leading provider of digital 3d models for visualization, films, television, and games.
3d_ocean
$15
HDRI - Clearance
...res & lowres version) and a .ldr file of the image (as .jpeg). the environment is a 360° panorama in horizontal and holds ...
3d_export
$10

k-mf series planetary reducer
...is from 3 to 1000 to 3, low back clearance 8-15 arc minutes for the whole series of single...
3d_export
$5
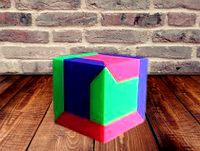
puzzle cube
...held and moved in a specific direction to separate. clearance between the parts is around .3mm allowing for smooth...
3ddd
$1

Restoration Hardware Belgian Track Arm Upholstered chair
...32"h - luxe: 40"w x 43"d x 34"h - clearance needed for delivery:...
3ddd
$1
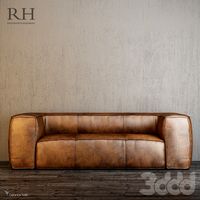
FULHAM LEATHER SOFAS
...x 30'h luxe depth: 96'w x 47'd x 30'h clearance needed for delivery:...
3d_export
$15

gaz-aa
...dimensions: 2450mm x 1870mm wheelbase: 3340mm , rear axis clearance 200mm clutch: single disk, dry mechanical brakes tyres: 6.50-20...
3d_export
$20
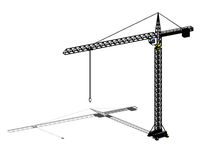
Tower Crane - Revit Family
...cast foundation<br>cabin options:<br>- side cabin<br>- suspended cabin<br>analytic visualization options:<br>- clearance zone<br>- maximum load 3d graph<br>parametric dimensions:<br>- jib length<br>- counter...
3d_export
$200
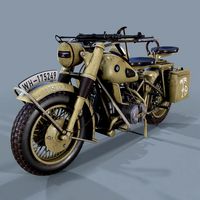
german motorcycle r 75 ww2
...mm 1,730 height, mm 1,000 wheelbase, mm 1,444 ground clearance mm 150 seat height 780 * weight, kg 420...
3d_export
$200

german motorcycle r 75 schwarz grau ww2
...mm 1,730 height, mm 1,000 wheelbase, mm 1,444 ground clearance mm 150 seat height 780 * weight, kg 420...
Spacer
turbosquid
$55
Spacer
... available on turbo squid, the world's leading provider of digital 3d models for visualization, films, television, and games.
turbosquid
$60
grendizer & double spacer
... available on turbo squid, the world's leading provider of digital 3d models for visualization, films, television, and games.
3d_export
$5
Hex Spacers M3 Male-Female
... spacers m3 male-female
3dexport
hex spacers m3 male-female with length from 5mm to 60mm for printed circuit boards. step files.
3d_export
$5
industrial lift - spacer crane
...crane<br>- 500 kg<br>- render 3ds max 2020 and corona renderer.<br>- formats: max 2020, max 2017, obj, fbx, stp
3d_export
$5

spacer hanging light
...lampshades: any total number of lamps: 6 polys: 18 546 verts: 19 045 https://imperiumloft.ru/lyustry-175/ev_a048924-eurosvet.html
turbosquid
$5
Industrial lift Spacer crane Renaissance construction
...naissance construction for download as max, max, fbx, and obj on turbosquid: 3d models for games, architecture, videos. (1571898)
3d_export
$7

industrial lift - spacer crane renaissance construction
...ction<br>- 750 kg<br>- render 3ds max 2020 and corona renderer.<br>- formats: max 2020, max 2017, obj, fbx, stp
3d_export
$10

Spacer Sliding Wardrobe 1200 Hanger
...painter available for all software<br>ue4. ue5. blender. maya. 3d max. unity. c4d.<br>formats: .obj .gltf .fbx .blend
3d_export
$5
Hockey puck 3D Model
...hockey puck 3d model 3dexport hockey puck spacer washer disk shim hockey puck 3d model gizmo_fbi 28754...
3d_export
$5

Front 30mm Lift Kit for 1996-2004 Nissan Pathfinder and 1997-2003 Infiniti QX4
...terrano r50, regulus 1997-2003 infiniti qx4 - front strut spacer ...
Dan
3ddd
free
Dan Mansion
...dan mansion
3ddd
dan mansion , барный
dan mansion
turbosquid
$13

Dan dan dandelion
...del leafless dandelion for download as lwo, fbx, dae, and obj on turbosquid: 3d models for games, architecture, videos. (1691938)
3ddd
$1
Itomaki by Dan Sunaga
...omaki by dan sunaga
3ddd
dan sunaga , журнальный
itomaki coffetable design by dan sunaga
3ddd
$1
DOLPHIN DAN-FORM
...dolphin dan-form
3ddd
dolphin , dan-form
стул из каталога dan-form
3ddd
free
DAN-FORM ZEUS
...dan-form zeus
3ddd
dan-form , zeus
красивый стул dan-form zeus
3ddd
free
DAN-FORM APOLLO
...dan-form apollo
3ddd
dolphin , dan-form
классический стул из каталога dan-form.
turbosquid
free

Crocodile dan
...n
turbosquid
free 3d model crocodile dan for download as max on turbosquid: 3d models for games, architecture, videos. (1154058)
3ddd
$1
Agnes DAN-FORM
...agnes dan-form
3ddd
agnes
модель стула agnes из каталога dan-form
turbosquid
$14

Counterbalance by Dan Yeffet
...ounterbalance by dan yeffet for download as max, obj, and fbx on turbosquid: 3d models for games, architecture, videos. (1453558)
turbosquid
$22

dan wesson revolver
... available on turbo squid, the world's leading provider of digital 3d models for visualization, films, television, and games.
Extra
3d_export
$17

Extra 300
...extra 300
3dexport
extra 300
3ddd
$1

Fidel extra
...fidel extra
3ddd
новый стиль
новый стиль - fidel extra
3ddd
$1

RAPSODY extra
...rapsody extra
3ddd
новый стиль
новый стиль - rapsody extra
3ddd
$1

Столик Extra
...столик extra
3ddd
giannini
столик extra от giannini, италия.
3ddd
free

Extra Long
...ики fantoni, италия. имеет подсветку ( зеленая или белая). передняя панель выполнена из аккустических панелей.
текстуры в архиве.
3ddd
$1
Grammer / Extra
...ло , стул
офисное кресло extra фирмы grammer office. подробнее на www.grammer-office.com
turbosquid
$30
Extra Dimension
... available on turbo squid, the world's leading provider of digital 3d models for visualization, films, television, and games.
3ddd
$1

Hennesy Paradis Extra
... алкоголь , коньяк
бутылка коньяка hennesy paradis extra
design_connected
$9
Extra Chair Leather
...xtra chair leather
designconnected
cappellini extra chair leather chairs computer generated 3d model. designed by fabien baron.
turbosquid
$30

Extra Beetle Lowpolys
...d model extra beetle lowpolys 3d for download as unitypackage on turbosquid: 3d models for games, architecture, videos. (1483177)