Thingiverse
Dagoma Discoeasy 200 - dual head mod by iLouis
by Thingiverse
Last crawled date: 4 years, 1 month ago
EDIT 1 : Placing the belt is a pain in the *ss. If you are a better 3D designer as i am (which should be easy) just take a look and update a better version.
EDIT 2 : use this thing https://www.thingiverse.com/thing:2317181 to let x end stop do his job.
EDIT 3 : Feel free to test with a Cyclops head https://www.thingiverse.com/thing:2440523
First, this a definitely not a plug and play package. Yf your are not clever enough to manage printing, compiling arduino, setting up your machine and soldering, DO NOT TRY ! Your warranty would be lost . Do not try to compile Dagoma's Marlin with two extruders if you don't have them plugged on Mks. Don't forget you will have to setup again your Discoeasy with four times more problems to manage :D
If still there, here are the full bunch to get dual extrusion on Dagoma Discoeasy 200.
A slightly modified extruder from https://www.thingiverse.com/thing:275593 to use default Dagoma's extruder wheel, i really liked to use a skate bearing :)
Who says dual extrusion means dual filament so need another support : https://www.thingiverse.com/thing:1686007 works perfect.
I wanted to have second extruder on the same rear plate, but didn't used it ... yet at least.
It's quite difficult to manage playing with Mks when it's under the printer ... now it is on printer's top
As well control screen is clipsed on printer's top or stand ont the table.
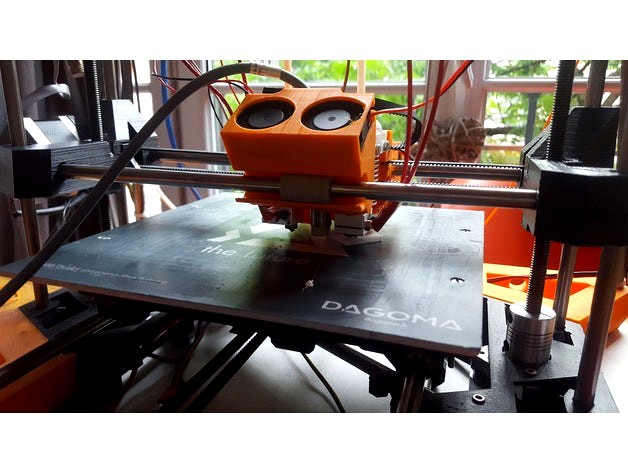
Of course, the dual head, just a copy and paste on tinkercad from gillywings great work https://www.thingiverse.com/thing:2163320
In a perfect world get two identical hotends (used 12 euros e3d v6 Amazn one)
Attached zip is Marlin RC6 dedicated for Discoeasy 200 you will have to update your second extruder x/y offsets. Be prepared to heavily calibrate (meaning compile Marlin each time) : https://www.thingiverse.com/thing:124450 , https://www.thingiverse.com/thing:1321475 and https://www.thingiverse.com/thing:832453 helped more than a lot :)
I didn't thought possible but i needed an ATX power supply to heat both hotend, with default power supply Marlin just hung and bugged :(
A. Print everything you need, once printer will be dismantled it will be too late.
B. Assemble dual head and extruder, move Mks and control panel, add ATX.
C. Place filament support where you can
D. Compile Marlin after adjusting your offsets
E. Test cablirate, test calibrate, ...
I used S3d to manage dual printing.
Improvements : many - Of course get a better calibration unless perfect, test, test, test - Add a cleaning head code to gcode - Use a real dual head using same block - Create an ATX support under the table to hide this ugly thing - ...
Have fun & happy moding.
https://www.youtube.com/watch?v=D9yxpbgNSfc
EDIT 2 : use this thing https://www.thingiverse.com/thing:2317181 to let x end stop do his job.
EDIT 3 : Feel free to test with a Cyclops head https://www.thingiverse.com/thing:2440523
First, this a definitely not a plug and play package. Yf your are not clever enough to manage printing, compiling arduino, setting up your machine and soldering, DO NOT TRY ! Your warranty would be lost . Do not try to compile Dagoma's Marlin with two extruders if you don't have them plugged on Mks. Don't forget you will have to setup again your Discoeasy with four times more problems to manage :D
If still there, here are the full bunch to get dual extrusion on Dagoma Discoeasy 200.
A slightly modified extruder from https://www.thingiverse.com/thing:275593 to use default Dagoma's extruder wheel, i really liked to use a skate bearing :)
Who says dual extrusion means dual filament so need another support : https://www.thingiverse.com/thing:1686007 works perfect.
I wanted to have second extruder on the same rear plate, but didn't used it ... yet at least.
It's quite difficult to manage playing with Mks when it's under the printer ... now it is on printer's top
As well control screen is clipsed on printer's top or stand ont the table.
Of course, the dual head, just a copy and paste on tinkercad from gillywings great work https://www.thingiverse.com/thing:2163320
In a perfect world get two identical hotends (used 12 euros e3d v6 Amazn one)
Attached zip is Marlin RC6 dedicated for Discoeasy 200 you will have to update your second extruder x/y offsets. Be prepared to heavily calibrate (meaning compile Marlin each time) : https://www.thingiverse.com/thing:124450 , https://www.thingiverse.com/thing:1321475 and https://www.thingiverse.com/thing:832453 helped more than a lot :)
I didn't thought possible but i needed an ATX power supply to heat both hotend, with default power supply Marlin just hung and bugged :(
A. Print everything you need, once printer will be dismantled it will be too late.
B. Assemble dual head and extruder, move Mks and control panel, add ATX.
C. Place filament support where you can
D. Compile Marlin after adjusting your offsets
E. Test cablirate, test calibrate, ...
I used S3d to manage dual printing.
Improvements : many - Of course get a better calibration unless perfect, test, test, test - Add a cleaning head code to gcode - Use a real dual head using same block - Create an ATX support under the table to hide this ugly thing - ...
Have fun & happy moding.
https://www.youtube.com/watch?v=D9yxpbgNSfc