Thingiverse
Customizable Plant Tags by Lyl3
by Thingiverse
Last crawled date: 3 years ago
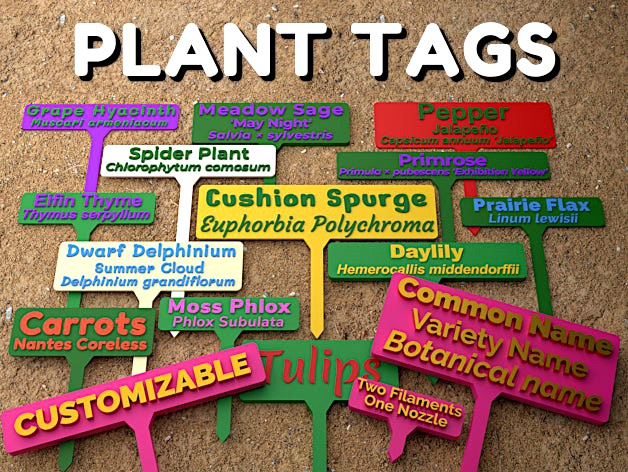
Customizable Plant Tags
This is a simple OpenSCAD customizer for creating a plant tag. Print them for your flower garden, your vegetable garden, and your indoor houseplants.
There is a small selection of font families to choose from and you can also use any other fonts. You can specify the tag dimensions and font size. You can specify the common name, the variety name, and the botanical name and the placement will automatically adjust if you don't enter all of those names. Depending on the font, the placement might not be very good, so you can fine tune the placement if needed.
2021-03-14 update: V1.1 has parameter for specifying the length of the stake (stick).
Running the Customizer
When last checked, the Thingiverse customizer works only on the Firefox browser. More importantly, Thingiverse hasn't run their customizer queue since Jul 10, 2020 so until they fix that issue, you will have to install and run OpenSCAD (free software) on your own computer to process the code to create your own customized models. See DrLex's instructions linked below for further details.
How to Run Customizer on Your Own Computer
You can use any font available on your system. The OpenSCAD "Help/Font List" menu item shows what fonts are available. Most of the fonts listed in the drop-down selection for this thing can be downloaded from:Google Fonts repository
To make a font available to OpenSCAD you have two options:
1) Install the font to the system.
2) Add the font to the folder that contains the OpenSCAD file that you want to use the fonts. You will also have to add to the OpenSCAD file the 'use' command substituting the filename of the font for "fontname.ttf".
For additional details, see the Using Fonts and Styles section on the following page:https://en.m.wikibooks.org/wiki/OpenSCAD_User_Manual/Text
Dual Colors with a Single Extruder
Printing multiple colors with a single extruder is really easy.
I printed my dual-color prints with a single extruder by pausing the printer after the colored backround part had completed and then swapping in a spool of white filament. My printer doesn't support the M600 pause command so I have to pause it manually. The printer shows me the height it's at while it's printing and as soon as it finishes tag body (the layer at 1.0 mm, by default) I pause it using the menu on the printer control panel.
Most printers support the M600 G-code command, so you may be able to add pauses in using your slicer program. You may find the Colorprint tool useful if your printer supports the M600 command, but your slicer doesn't support adding pauses: https://www.prusaprinters.org/color-print/
After switching filament colors, the nozzle may not be primed and the first bit printed may be under-extruded, so to compensate for this, I always add in a little cylindrical tower and get the slicer to start the layers on that tower. For Cura, the settings that control this are Layer Start X and Layer Start Y, which are in the Travel section. I put the cylinder above the top right corner and set Layer Start X and Layer Start Y to a high number like 500. I've included a 6 mm tall swap tower, which can be used for any tags with a body less than 6 mm in thickness.
SWAPPING FILAMENTS: When changing filament, I never yank the old filament out as that seems like such a harsh action to inflict on my printer and if I'm doing it while the printer is paused mid-print I don't want the extruders moved even the slightest. Instead, I cut the filament off where it enters the extruder and just start a load filament process on the printer. It extrudes the filament left inside the extruder and I just feed in the new spool of filament following it. If you use this method be very careful to not cut any wires.
Slicer Settings
For the best looking tags, you'll want the top infill area of the tag body part of the model to be a single continuous solid print from one corner to the other, instead of going around the areas where the letters will be added in later layers. To accomplish this in Cura, set the Skin Expand Distance to a high number like 10.
Some of My Designs
Click an image below (opens in a new tab) or go to my designs page and see them all.
If you see some thing that you like , please click the Like button and turn that heart red .
This is a simple OpenSCAD customizer for creating a plant tag. Print them for your flower garden, your vegetable garden, and your indoor houseplants.
There is a small selection of font families to choose from and you can also use any other fonts. You can specify the tag dimensions and font size. You can specify the common name, the variety name, and the botanical name and the placement will automatically adjust if you don't enter all of those names. Depending on the font, the placement might not be very good, so you can fine tune the placement if needed.
2021-03-14 update: V1.1 has parameter for specifying the length of the stake (stick).
Running the Customizer
When last checked, the Thingiverse customizer works only on the Firefox browser. More importantly, Thingiverse hasn't run their customizer queue since Jul 10, 2020 so until they fix that issue, you will have to install and run OpenSCAD (free software) on your own computer to process the code to create your own customized models. See DrLex's instructions linked below for further details.
How to Run Customizer on Your Own Computer
You can use any font available on your system. The OpenSCAD "Help/Font List" menu item shows what fonts are available. Most of the fonts listed in the drop-down selection for this thing can be downloaded from:Google Fonts repository
To make a font available to OpenSCAD you have two options:
1) Install the font to the system.
2) Add the font to the folder that contains the OpenSCAD file that you want to use the fonts. You will also have to add to the OpenSCAD file the 'use
For additional details, see the Using Fonts and Styles section on the following page:https://en.m.wikibooks.org/wiki/OpenSCAD_User_Manual/Text
Dual Colors with a Single Extruder
Printing multiple colors with a single extruder is really easy.
I printed my dual-color prints with a single extruder by pausing the printer after the colored backround part had completed and then swapping in a spool of white filament. My printer doesn't support the M600 pause command so I have to pause it manually. The printer shows me the height it's at while it's printing and as soon as it finishes tag body (the layer at 1.0 mm, by default) I pause it using the menu on the printer control panel.
Most printers support the M600 G-code command, so you may be able to add pauses in using your slicer program. You may find the Colorprint tool useful if your printer supports the M600 command, but your slicer doesn't support adding pauses: https://www.prusaprinters.org/color-print/
After switching filament colors, the nozzle may not be primed and the first bit printed may be under-extruded, so to compensate for this, I always add in a little cylindrical tower and get the slicer to start the layers on that tower. For Cura, the settings that control this are Layer Start X and Layer Start Y, which are in the Travel section. I put the cylinder above the top right corner and set Layer Start X and Layer Start Y to a high number like 500. I've included a 6 mm tall swap tower, which can be used for any tags with a body less than 6 mm in thickness.
SWAPPING FILAMENTS: When changing filament, I never yank the old filament out as that seems like such a harsh action to inflict on my printer and if I'm doing it while the printer is paused mid-print I don't want the extruders moved even the slightest. Instead, I cut the filament off where it enters the extruder and just start a load filament process on the printer. It extrudes the filament left inside the extruder and I just feed in the new spool of filament following it. If you use this method be very careful to not cut any wires.
Slicer Settings
For the best looking tags, you'll want the top infill area of the tag body part of the model to be a single continuous solid print from one corner to the other, instead of going around the areas where the letters will be added in later layers. To accomplish this in Cura, set the Skin Expand Distance to a high number like 10.
Some of My Designs
Click an image below (opens in a new tab) or go to my designs page and see them all.
If you see some thing that you like , please click the Like button and turn that heart red .
Similar models
thingiverse
free

Customizable Christmas Name Ornament by Lyl3
...o my designs page and see them all.
if you see some thing that you like , please click the like button and turn that heart red .
thingiverse
free

XT60 Caps by OsiViper
...using a pause command or filament change (varies from machine to machine).
tested prints with pla, nylon and both of them worked.
thingiverse
free

Monoprice Select Mini Filament Spool Spinner by ahutton1972
...-code command in the g-code file at the appropriate layers. use your slicer to figure out which layers are right for your print.
thingiverse
free

Safe Distance Sign - Confused by Lyl3
...ere the letters will be added in later layers. to accomplish this in cura, set the skin expand distance to a high number like 10.
thingiverse
free

Panda magnet bicolor
... is a hole on the back to glue a 8mm*3mm magnet. i recommend to rub the magnet a little with sandpaper to ease the glue to stick.
thingiverse
free

Door Tag GAMING IN PROGRESS by vbldv
...use print at layer 11 or 12 to change filament.
i'm attaching screenshots of setup for cura automated filament change.
enjoy.
thingiverse
free

Star Trek Badge pin and two-color for M600 by gqx
...hange the color before the bridge part and once again to insert a pin. start with primary color and print it upside down, pin up.
thingiverse
free

Safe Distance Sign - Together by Lyl3
...ere the letters will be added in later layers. to accomplish this in cura, set the skin expand distance to a high number like 10.
thingiverse
free
![Depth Gauge [with Fusion 360 source] by gportelli](/t/8065898.jpg)
Depth Gauge [with Fusion 360 source] by gportelli
...it would work with the original slic3r in a similar way setting up prusa slicer in prusa slicer go...
thingiverse
free

Meeting in Progress Door Handle Tag by vbldv
...n pause and change filament at layer 5 (five), otherwise, you can determine the layers yourself by using the preview mode.
enjoy
Lyl3
thingiverse
free

PlantTag stabilized by Crissidanic
...stabilized by crissidanic thingiverse i stabelized the planttag by lyl3 ...
thingiverse
free

Customizable Hexagon Monogram Coasters by Lyl3
...o my designs page and see them all.
if you see some thing that you like , please click the like button and turn that heart red .
thingiverse
free

Customizable Round Rod Hooks by Lyl3
...o my designs page and see them all.
if you see some thing that you like , please click the like button and turn that heart red .
thingiverse
free

FlashForge Creator Pro Spool Holder by Lyl3
...hogonal to the spindle.
the freecad file that i used to create the model is also included in case you want to make modifications.
thingiverse
free

Lego_Prénom by yannsa
...la 3d je fait mon premier post. merci a lyl3 pour la...
thingiverse
free

Customizable Engraved Rings by Lyl3
...o my designs page and see them all.
if you see some thing that you like , please click the like button and turn that heart red .
thingiverse
free

One Euro Tokens with Hidden Internal Lithophanes by Lyl3
... that the lithophane prints correctly. you'll need to print with a light colored filament to allow the light to pass through.
thingiverse
free

Customizable Flexible Christmas Tree by Lyl3
...o my designs page and see them all.
if you see some thing that you like , please click the like button and turn that heart red .
thingiverse
free

Customizable Tiny Secret Books by Lyl3
...o my designs page and see them all.
if you see some thing that you like , please click the like button and turn that heart red .
Tags
turbosquid
$1
dog tags
...id
royalty free 3d model dog tags for download as ma and obj on turbosquid: 3d models for games, architecture, videos. (1403450)
turbosquid
$2

Name Tag
... available on turbo squid, the world's leading provider of digital 3d models for visualization, films, television, and games.
turbosquid
$1

entrance tag
... available on turbo squid, the world's leading provider of digital 3d models for visualization, films, television, and games.
3ddd
$1
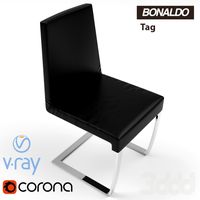
Стул BONALDO TAG
... файле модель с настроенными материалами для corona render.http://www.bonaldo.it/en/products/chairs/tag/mauro-lipparini
3d_ocean
$6

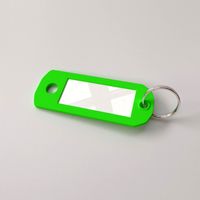
Key Tags
... of key tags. included id mask with png file without background only shadow. in easy way you can put yuor own logo or text on it.
3d_export
$15
Key Tag 3D Model
...older fob keyfob tagging split carabiner label name paper desk office stationery supplies
key tag 3d model firdz3d 88149 3dexport
3ddd
free
TAG stool design Ichiro Iwasaki
... ichiro iwasaki , tag
tag stool design ichiro iwasaki
поликов 72044
turbosquid
$100

TAG sur zone
... available on turbo squid, the world's leading provider of digital 3d models for visualization, films, television, and games.
3d_export
$200
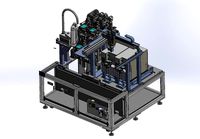
sticker-automatic tagging machine
...
the device is a tagged device with four-axis robots, three-axis robotic arms and different labels. you are welcome to download.
3d_ocean
$6

Key Tags 2
...sk with png file without background only shadow. in easy way you can put yuor own logo or text on it, change background or color.
Customizable
3d_export
$10
customizable sd port
...customizable sd port
3dexport
customizable sd port
turbosquid
$99
Customizable character
...alty free 3d model customizable character for download as max on turbosquid: 3d models for games, architecture, videos. (1152525)
turbosquid
$1

Customizable Mug
... available on turbo squid, the world's leading provider of digital 3d models for visualization, films, television, and games.
turbosquid
$1
Customizable Spider Mech
... free 3d model customizable spider mech for download as blend on turbosquid: 3d models for games, architecture, videos. (1462055)
turbosquid
$20
Customizable Egyptian Pillar
...zable egyptian pillar for download as ma, obj, fbx, and blend on turbosquid: 3d models for games, architecture, videos. (1307376)
turbosquid
$75
Fully Customizable Hospital
... available on turbo squid, the world's leading provider of digital 3d models for visualization, films, television, and games.
turbosquid
$20

Customizable Caste Pieces
... available on turbo squid, the world's leading provider of digital 3d models for visualization, films, television, and games.
turbosquid
$15
Customizable Tea Cup
... available on turbo squid, the world's leading provider of digital 3d models for visualization, films, television, and games.
turbosquid
free
Water Bottle(Customizeable)
... available on turbo squid, the world's leading provider of digital 3d models for visualization, films, television, and games.
3d_export
$49
Book customizable 3D Model
...3dexport
book booshelf novel teach library learn read pages cover fairy tales
book customizable 3d model guitargoa 74240 3dexport
Plant
3d_ocean
$6
plant
...plant
3docean
plant textured
textured plant in c4d and obj format
3d_ocean
$6
plant
...plant
3docean
plant textured
textured plant in c4d and obj format
3d_ocean
$6
plant
...plant
3docean
plant textured
textured plant in c4d and obj format
3d_export
$15

plant
...plant
3dexport
plant
3d_export
$5

plants
...plants
3dexport
plants
3d_export
$5

plant
...plant
3dexport
this is a plant
3ddd
$1

plant
...plant
3ddd
plant
3ddd
$1
plant
...plant
3ddd
plant
3ddd
$1

plant
...plant
3ddd
plant
3ddd
$1

plant
...plant
3ddd
plant