Thingiverse

Customizable LEGO compatible Text Brick Key Fobs by Lyl3
by Thingiverse
Last crawled date: 3 years, 3 months ago
Customizable LEGO compatible Text Brick Key Fobs
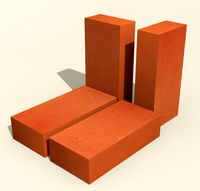
This is a customizer for creating LEGO® compatible rectangular bricks with text engraved on the sides (all 4 sides) and a half ring on one end to attach a key ring. You can of course also use it to create bricks without any text. It can create bricks as small as 1x1x1 (plate height) or as large as 48x48x18 (6 normal bricks high).
The customizer, by default, creates LEGO-sized bricks only. All dimensions are accurate, but it has a tolerance parameter so the dimensions can be tuned to your printer/filament so that they have a perfect fit with one another and with real LEGO® blocks. Real LEGO blocks have a horizontal play of 0.2 mm so that they can be connected to one another. So a 4x2 brick is 31.8x15.8 mm and a 6x2 brick is 47.8x15.8 mm, for example. The tolerance is in addition to the required 0.2 mm play and is subtracted from both sides of all walls so that the default tolerance of 0.05 would make the previously mentioned bricks 31.7x15.7 mm and 47.7x15.7 mm.
All LEGO dimensions are adjustable parameters, so if you are having trouble with the fit and need more control than the tolerance parameter provides, you can override any of the LEGO dimensions.
This is a simple remix of my Customizable LEGO compatible Text Bricks
2020-10-28 Update. I added the option for raised text in addition to the original recessed text.
Printing Recommendations
If a brick will be connected to other bricks you don't want it to have an elephant's foot. I usually have the initial layer horizontal expansion parameter in Cura set to -0.2 mm to prevent elephant's feet, but for the LEGO bricks with a default tolerance of 0.5 mm this must be reduced to -0.14 in order for the under-tubes to be printed on the first layer.
For the best looking brick, you'll want the top surface of the brick part of the model to be a single continuous print from one corner to the other instead of going around the areas where the studs will be added in later layers. To accomplish this in Cura, set the Skin Expand Distance to 2.2.
Running the Customizer
When last checked, the Thingiverse customizer works only on the Firefox browser. More importantly, Thingiverse hasn't run their customizer queue since Jul 10, 2020 so until they fix that issue, you will have to install and run OpenSCAD on your own computer to process the code to create your own customized models. See DrLex's instructions linked below for further details.
How to Run Customizer on Your Own Computer
If you are running the code on your own machine using OpenSCAD, you will need to install the font(s) on your system. The fonts are available to download from the Google Fonts repository. The default font is available at:
https://fonts.google.com/specimen/Roboto
There are two choices for adding a font to OpensSCAD:
1) Install the font to the system. The procedure for adding system fonts is dependant on what operating system and what version you are using (Ubuntu Linux 16.01, Ubuntu Linux 20.04, Windows 7, Windows 10, Mac OS 9, Mac OS X, etc. ). If you don't know how to install a font on your system then search the web for instructions.
2) Add the font to the folder that contains the OpenSCAD file that you want to use the fonts. You will also have to add to the OpenSCAD file the 'use' command substituting the filename of the font for "fontname.ttf".
For additional details, see the Using Fonts and Styles section on the following page:
https://en.m.wikibooks.org/wiki/OpenSCAD_User_Manual/Text
Some of My Designs
Click an image below (opens in a new tab) or go to my designs page and see them all.
If you see some thing that you like , please click the Like button and turn that heart red .
This is a customizer for creating LEGO® compatible rectangular bricks with text engraved on the sides (all 4 sides) and a half ring on one end to attach a key ring. You can of course also use it to create bricks without any text. It can create bricks as small as 1x1x1 (plate height) or as large as 48x48x18 (6 normal bricks high).
The customizer, by default, creates LEGO-sized bricks only. All dimensions are accurate, but it has a tolerance parameter so the dimensions can be tuned to your printer/filament so that they have a perfect fit with one another and with real LEGO® blocks. Real LEGO blocks have a horizontal play of 0.2 mm so that they can be connected to one another. So a 4x2 brick is 31.8x15.8 mm and a 6x2 brick is 47.8x15.8 mm, for example. The tolerance is in addition to the required 0.2 mm play and is subtracted from both sides of all walls so that the default tolerance of 0.05 would make the previously mentioned bricks 31.7x15.7 mm and 47.7x15.7 mm.
All LEGO dimensions are adjustable parameters, so if you are having trouble with the fit and need more control than the tolerance parameter provides, you can override any of the LEGO dimensions.
This is a simple remix of my Customizable LEGO compatible Text Bricks
2020-10-28 Update. I added the option for raised text in addition to the original recessed text.
Printing Recommendations
If a brick will be connected to other bricks you don't want it to have an elephant's foot. I usually have the initial layer horizontal expansion parameter in Cura set to -0.2 mm to prevent elephant's feet, but for the LEGO bricks with a default tolerance of 0.5 mm this must be reduced to -0.14 in order for the under-tubes to be printed on the first layer.
For the best looking brick, you'll want the top surface of the brick part of the model to be a single continuous print from one corner to the other instead of going around the areas where the studs will be added in later layers. To accomplish this in Cura, set the Skin Expand Distance to 2.2.
Running the Customizer
When last checked, the Thingiverse customizer works only on the Firefox browser. More importantly, Thingiverse hasn't run their customizer queue since Jul 10, 2020 so until they fix that issue, you will have to install and run OpenSCAD on your own computer to process the code to create your own customized models. See DrLex's instructions linked below for further details.
How to Run Customizer on Your Own Computer
If you are running the code on your own machine using OpenSCAD, you will need to install the font(s) on your system. The fonts are available to download from the Google Fonts repository. The default font is available at:
https://fonts.google.com/specimen/Roboto
There are two choices for adding a font to OpensSCAD:
1) Install the font to the system. The procedure for adding system fonts is dependant on what operating system and what version you are using (Ubuntu Linux 16.01, Ubuntu Linux 20.04, Windows 7, Windows 10, Mac OS 9, Mac OS X, etc. ). If you don't know how to install a font on your system then search the web for instructions.
2) Add the font to the folder that contains the OpenSCAD file that you want to use the fonts. You will also have to add to the OpenSCAD file the 'use
For additional details, see the Using Fonts and Styles section on the following page:
https://en.m.wikibooks.org/wiki/OpenSCAD_User_Manual/Text
Some of My Designs
Click an image below (opens in a new tab) or go to my designs page and see them all.
If you see some thing that you like , please click the Like button and turn that heart red .
Similar models
thingiverse
free

Customizable Tiny Secret Books by Lyl3
...o my designs page and see them all.
if you see some thing that you like , please click the like button and turn that heart red .
thingiverse
free

Adjustable-tolerance LEGO-compatible brick customizer by xmbrst
...wing tolerances give the best fit:
studs: -0.2 (yes, you can use negative numbers to make the fit tighter.)
walls: 0.2
posts: 0.1
thingiverse
free

Customizable Engraved Rings by Lyl3
...o my designs page and see them all.
if you see some thing that you like , please click the like button and turn that heart red .
thingiverse
free

Business Card Holder (Customizable) by Cort
... is for visualization and not for printing. use customizer to create your own stl, or download the scad file for use in openscad.
thingiverse
free

Customizable round lego brick (single) by Rejutka
....
diameter (and other parameters) are changeable, so you can create a custom lego brick that still supports the common connector.
thingiverse
free

Customizable Futurama Rocket With Alien Text by Ferjerez
...ngiverse.com/thing:2081823
also included the font files. (free font downloaded from www.dafont.com)
hope you enjoy it.
have fun!!
thingiverse
free
Customizable Label for Harbor Freight Apache Cases
...ogle fonts. if you want to use it you will need customize with openscad and have the courier new font installed on your computer.
thingiverse
free

ID Card/Badge holder/armor - Customizable by frol
... such as helvetica. in addition you may specify font style in the logo text font parameter like this:
helvetica:style=bold italic
grabcad
free

Lego with Parameters
...2 within the parameters for the brick to change size rather than having to build each brick individually with its own dimensions.
thingiverse
free

Deckbox (Customizable) by Dendrowen
...mment if you have a question.
the icons won't work in the customizer. you will need to edit and render the scad file locally.
Lyl3
thingiverse
free

PlantTag stabilized by Crissidanic
...stabilized by crissidanic thingiverse i stabelized the planttag by lyl3 ...
thingiverse
free

Customizable Hexagon Monogram Coasters by Lyl3
...o my designs page and see them all.
if you see some thing that you like , please click the like button and turn that heart red .
thingiverse
free

Customizable Round Rod Hooks by Lyl3
...o my designs page and see them all.
if you see some thing that you like , please click the like button and turn that heart red .
thingiverse
free

FlashForge Creator Pro Spool Holder by Lyl3
...hogonal to the spindle.
the freecad file that i used to create the model is also included in case you want to make modifications.
thingiverse
free

Lego_Prénom by yannsa
...la 3d je fait mon premier post. merci a lyl3 pour la...
thingiverse
free
Customizable Engraved Rings by Lyl3
...o my designs page and see them all.
if you see some thing that you like , please click the like button and turn that heart red .
thingiverse
free

One Euro Tokens with Hidden Internal Lithophanes by Lyl3
... that the lithophane prints correctly. you'll need to print with a light colored filament to allow the light to pass through.
thingiverse
free

Customizable Flexible Christmas Tree by Lyl3
...o my designs page and see them all.
if you see some thing that you like , please click the like button and turn that heart red .
thingiverse
free
Customizable Tiny Secret Books by Lyl3
...o my designs page and see them all.
if you see some thing that you like , please click the like button and turn that heart red .
thingiverse
free

Customizable Plant Tags by Lyl3
...o my designs page and see them all.
if you see some thing that you like , please click the like button and turn that heart red .
Fobs
turbosquid
free

key fob
... available on turbo squid, the world's leading provider of digital 3d models for visualization, films, television, and games.
turbosquid
$39

Car Key Fob
... available on turbo squid, the world's leading provider of digital 3d models for visualization, films, television, and games.
turbosquid
$29

Generic Car Key Fob
... available on turbo squid, the world's leading provider of digital 3d models for visualization, films, television, and games.
3d_export
$10
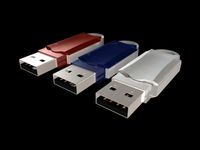
USB Memory Stick 3D Model
...el
3dexport
usb memory stick computer peripheral gb flash drive fob key bytestor
usb memory stick 3d model moofunk 33456 3dexport
3d_export
$32
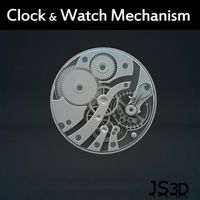
Clock Watch Mechanism 3D Model
...h timepiece antique vintage fob chain visible mechanism detailed gears clock
clock watch mechanism 3d model js-3d 36864 3dexport
3d_export
$15
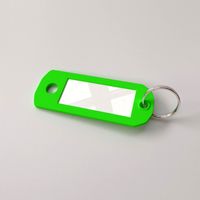
Key Tag 3D Model
...older fob keyfob tagging split carabiner label name paper desk office stationery supplies
key tag 3d model firdz3d 88149 3dexport
3d_export
$10
Tubular Key 3D Model
...rel pin tumbler computer laptop
tubular key 3d model download .c4d .max .obj .fbx .ma .lwo .3ds .3dm .stl firdz3d 104083 3dexport
3ddd
free

Коллекция плитки PETRACERS
...ux (100x200мм)
5.riga grande oro 24kt su borderaux (200x200мм)
3ds max 2011 , fob , obj.
материалы corona , текстуры в комплекте.
thingiverse
free
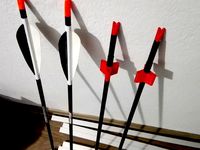
Fob for arrow by Qjr
...fob for arrow by qjr
thingiverse
fob for arrow.
~8mm tube with castorama
thingiverse
free

Honda key fob
... it will fit fob models from 2016-2019. for a tight fit i used a hair dryer to soften the plastic and get the fob to go in tight.
Customizable
3d_export
$10
customizable sd port
...customizable sd port
3dexport
customizable sd port
turbosquid
$99
Customizable character
...alty free 3d model customizable character for download as max on turbosquid: 3d models for games, architecture, videos. (1152525)
turbosquid
$1

Customizable Mug
... available on turbo squid, the world's leading provider of digital 3d models for visualization, films, television, and games.
turbosquid
$1
Customizable Spider Mech
... free 3d model customizable spider mech for download as blend on turbosquid: 3d models for games, architecture, videos. (1462055)
turbosquid
$20
Customizable Egyptian Pillar
...zable egyptian pillar for download as ma, obj, fbx, and blend on turbosquid: 3d models for games, architecture, videos. (1307376)
turbosquid
$75
Fully Customizable Hospital
... available on turbo squid, the world's leading provider of digital 3d models for visualization, films, television, and games.
turbosquid
$20

Customizable Caste Pieces
... available on turbo squid, the world's leading provider of digital 3d models for visualization, films, television, and games.
turbosquid
$15
Customizable Tea Cup
... available on turbo squid, the world's leading provider of digital 3d models for visualization, films, television, and games.
turbosquid
free
Water Bottle(Customizeable)
... available on turbo squid, the world's leading provider of digital 3d models for visualization, films, television, and games.
3d_export
$49
Book customizable 3D Model
...3dexport
book booshelf novel teach library learn read pages cover fairy tales
book customizable 3d model guitargoa 74240 3dexport
Lego
3ddd
$1
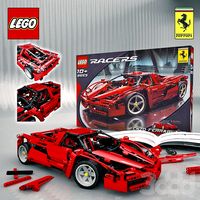
Lego
...lego
3ddd
lego , конструктор
lego
3ddd
$1
Lego
...lego
3ddd
lego , конструктор , машина
lego
3ddd
$1
Lego
...lego
3ddd
lego , конструктор , машина
lego
3ddd
free
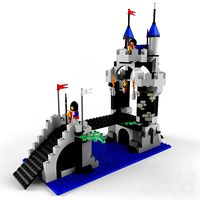
Lego
...lego
3ddd
конструктор , lego , замок
lego
3ddd
$1
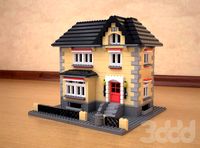
Lego
...lego
3ddd
lego , конструктор
домик из lego
3d_export
$5
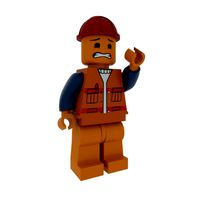
lego
...lego
3dexport
lego man
3d_ocean
$5
Lego
...lego
3docean
basic children cube games lego low poly toy
basic lego tile.
3ddd
$1
Lego человески
...lego человески
3ddd
lego
человечки lego
3ddd
$1
Lego полицейский
...lego полицейский
3ddd
lego
lego полицейский
3ddd
$1
LEGO Duplo
...lego duplo
3ddd
lego , конструктор
lego duplo
Text
3d_export
$5

text learning
...text learning
3dexport
text learning
3d_ocean
$2
Grunge Text
...grunge text
3docean
c4d grunge text wallpaper
grunge text great for banners and wallpapers. easy to edit and fun to use.
3d_ocean
$5

Transforming text
...n c4d intro
here is a very easy to use transforming text. real easy to edit and add even more text. great for banners and intro’s
3d_ocean
$4
Text 3D Envato
... cinema 4d version r12 c4d+obj font used is free and can be downloaded from here : http://www.1001fonts.com/fff-forward-font.html
turbosquid
free

Text animation
...e 3d model text animation for download as fbx, blend, and dae on turbosquid: 3d models for games, architecture, videos. (1472947)
turbosquid
$100

Metal text
... available on turbo squid, the world's leading provider of digital 3d models for visualization, films, television, and games.
turbosquid
$1

Coffee text
... available on turbo squid, the world's leading provider of digital 3d models for visualization, films, television, and games.
turbosquid
free
Trailer Text
... available on turbo squid, the world's leading provider of digital 3d models for visualization, films, television, and games.
3d_ocean
$2

3D Car type text
...n
3d bold c4d text wallpaper
rounded text . bold text that is used for cars. added 10 text materials and 8 backgrounds materials.
3ddd
$1

Text Map
...text map
3ddd
michael tompsett
michael tompsett
Brick
turbosquid
$1

Brick-a-Brick
... available on turbo squid, the world's leading provider of digital 3d models for visualization, films, television, and games.
3d_export
$5
brick
...brick
3dexport
brick
turbosquid
$20
Stone Brick Brick
... available on turbo squid, the world's leading provider of digital 3d models for visualization, films, television, and games.
3d_export
$5

brick
...brick
3dexport
photo-scanned brick wall
3d_export
$5

brick
...brick
3dexport
photo-scanned brick wall
3ddd
$1
brick
...brick
3ddd
панель
mosque brick pattern
3ddd
free
brick
...brick
3ddd
кирпич , кладка
model brick vray 2014
design_connected
$11
Brick
...brick
designconnected
way design brick computer generated 3d model. designed by lattoog.
3d_export
$5

Brick
...brick
3dexport
brick 4k low poly model. tested in unreal engine 4.27.1 .
3d_ocean
$4
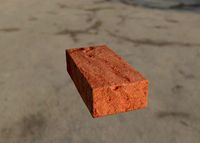
Red brick
...red brick
3docean
brick low poly red
red brick
Compatible
turbosquid
$3

Genesis 8 Clothing 1 dForce Compatible
... available on turbo squid, the world's leading provider of digital 3d models for visualization, films, television, and games.
turbosquid
free

Genesis 8 Clothing Top 1 dForce Compatible
...nesis 8 clothing top 1 dforce compatible (2) for download as on turbosquid: 3d models for games, architecture, videos. (1217671)
turbosquid
$50
Screwdriver Latch Type CSC Torx compatible with Straumann
...sc torx compatible with straumann for download as obj and stl on turbosquid: 3d models for games, architecture, videos. (1370064)
3d_export
$9
cad compatible casual woman hand model f1p3d1v1hand
...s: stl, obj, fbx<br>models with quad-topology (1100 quads) are also included (f1p3d1v1hand_quad.obj, f1p3d1v1hand_quad.fbx)
3d_export
$38

uzaki rigify
...uzaki rigify 3dexport compatible-blender ...
3d_export
$5

cloud lowpoly 3d
...cloud lowpoly 3d 3dexport lowpoly 3d format fbx compatible with unreal and...
3d_export
$5

flower lowpoly 3d
...flower lowpoly 3d 3dexport lowpoly 3d format fbx compatible with unreal and...
3d_export
$5

rocks lowpoly 3d
...rocks lowpoly 3d 3dexport lowpoly 3d format fbx compatible with unreal and...
3d_export
$10
pots
...pots
3dexport
pots<br>modeled in blender<br>compatable with evee and cycels
3d_ocean
$95
Mr Techny
...for 3ds max 2010 and later – biped (2010 compatible and cat (2011 compatible) versions incluided. for maya 2012...
Key
archibase_planet
free
Key
...key
archibase planet
bunch of keys key
key n190510 - 3d model (*.gsm+*.3ds) for interior 3d visualization.
3d_export
$5
key
...key
3dexport
key
archibase_planet
free
Key
...key
archibase planet
key
key n080710 - 3d model (*.3ds) for interior 3d visualization.
3d_ocean
$2
Key
...key
3docean
door key lock open unlock
a key facecount: 617 (2x subsurfed: 9872)
archibase_planet
free
Key
...key
archibase planet
key
key n240713 - 3d model (*.gsm+*.3ds) for interior 3d visualization.
archibase_planet
free
Key
...key
archibase planet
key
key 2 n080710 - 3d model (*.gsm+*.3ds) for interior 3d visualization.
turbosquid
$3
Keys With Key Chain
... chain 3d model for download as blend, dae, stl, obj, and fbx on turbosquid: 3d models for games, architecture, videos. (1673644)
archibase_planet
free

Key
...key
archibase planet
key
key ancient strike plate n130912 - 3d model (*.3ds) for interior 3d visualization.
archibase_planet
free
Key
...key
archibase planet
key
key stephan mette n300412 - 3d model (*.gsm+*.3ds) for interior 3d visualization.
3d_export
free
key
...key
3dexport
a simple key obj, fbx, blend