Thingiverse
custom D-bot bottom corner by Rexipus
by Thingiverse
Last crawled date: 3 years ago
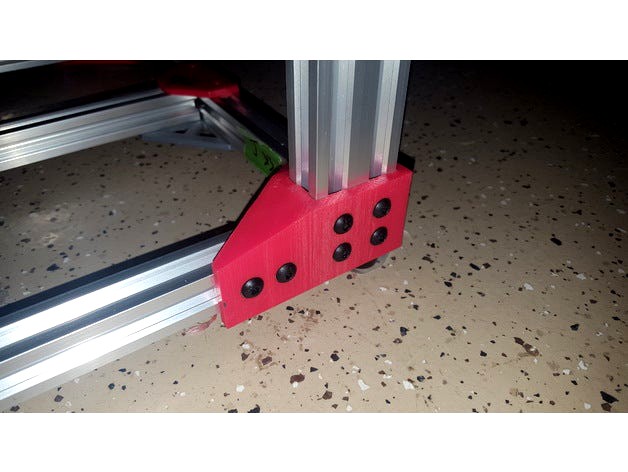
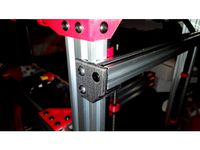
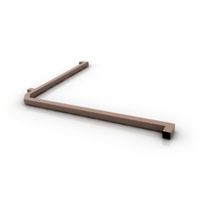
This is a corner piece for the D-bot bottom corner vertices. It uses the parameterized corner piece here: http://www.thingiverse.com/thing:1543523
The original had 70mm of rail covered in each direction. I used I think 40mm instead. The original parameterized corner piece was monstrously large, so I trimmed it down to something more reasonable. I also made it so in each direction two screws were used instead of one in each rail slot.
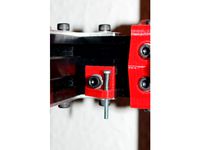
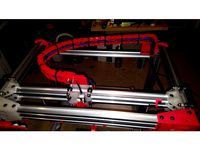
The attached photos show this corner piece printed out in red eSun PETG and attached to my D-bot printer, and the remaining three photos show the original corner bracing that was put on the printer following the original D-bot plans. I was looking for a stiffer corner bracing for these corners that would also help with 90-degree alignment of the rails coming into the corner. This one-piece corner brace joins these rails into the corners with a nice tight joint that is much stiffer and stronger than the original bracing, and which enforces the 90 degree angles coming into the corner.
This file will make a brace that fits the left rear and front right corners of the D-bot. Use the mirror feature in Cura or your slicer of choice to make a mirror image of this that will fit the left front and right rear corners.
I printed this with:
.5mm nozzle
.24mm layer height
eSun PETG filament
245 C nozzle temp.
70 C bed temp
glass bed with a fairly old application of hairspray
Print speeds of 30mm/s for all walls and infill should be fine.
Update: I should mention that since these braces require that the rails slide into the holes in the brace, the exact build order that is shown in the D-bot build guide may need to be modified somewhat. I had already built my frame with the original D-bot corner braces, so after printing out these one-piece corner braces I had to partially disassemble my D-bot framework in order to retrofit it with these braces. Given how I did it after the fact I don't have a good description for the best build order. Print them out and think about it and I'm sure it'll be pretty clear how to order the construction to make this work well.
The original had 70mm of rail covered in each direction. I used I think 40mm instead. The original parameterized corner piece was monstrously large, so I trimmed it down to something more reasonable. I also made it so in each direction two screws were used instead of one in each rail slot.
The attached photos show this corner piece printed out in red eSun PETG and attached to my D-bot printer, and the remaining three photos show the original corner bracing that was put on the printer following the original D-bot plans. I was looking for a stiffer corner bracing for these corners that would also help with 90-degree alignment of the rails coming into the corner. This one-piece corner brace joins these rails into the corners with a nice tight joint that is much stiffer and stronger than the original bracing, and which enforces the 90 degree angles coming into the corner.
This file will make a brace that fits the left rear and front right corners of the D-bot. Use the mirror feature in Cura or your slicer of choice to make a mirror image of this that will fit the left front and right rear corners.
I printed this with:
.5mm nozzle
.24mm layer height
eSun PETG filament
245 C nozzle temp.
70 C bed temp
glass bed with a fairly old application of hairspray
Print speeds of 30mm/s for all walls and infill should be fine.
Update: I should mention that since these braces require that the rails slide into the holes in the brace, the exact build order that is shown in the D-bot build guide may need to be modified somewhat. I had already built my frame with the original D-bot corner braces, so after printing out these one-piece corner braces I had to partially disassemble my D-bot framework in order to retrofit it with these braces. Given how I did it after the fact I don't have a good description for the best build order. Print them out and think about it and I'm sure it'll be pretty clear how to order the construction to make this work well.
Similar models
thingiverse
free

D-BOT - Rails - T-Slot - aluminum corners by ahntorage
...2020 piece instead of a 2040 for the x gantry.this is why there is no middle indent for the t-slot, so it would work with either.
thingiverse
free

Tevo Black Widow Lower Corner Brace 60x60x80 by AutoWiz
...m width of the extrusion. it should be printed with a higher infill amount for the sake of rigidity and i printed mine with petg.
thingiverse
free

Gas holder by Sjekkie
...gas holder by sjekkie
thingiverse
printed with esun pla+
nozzle 0,4
nozzle temp 210c bed temp 50c
thingiverse
free
vertical Z endstop screw holder for D-BOT by printerboon
...e, because i used some metal corners instead of printed parts), so i created my own vertical z endstop screw holder for my d-bot.
thingiverse
free

Adjustable Cooling Nozzle for PLA or ABS/PETG- WIP by romp99
...the idea, please do! i am sure anyone of you talented people can do better than i did. i just wanted to get the idea out there.
thingiverse
free

Corner 45 degree brace for 4040 lite by Radem
...s a corner brace on a large format 3d printer frame. these are much easier to print than the 1 piece 90 degree corner that i made
thingiverse
free

D-Bot Rear Print Carriage w/ Eccentric Spacer holes by hejman08
...ed it for myself and it works great, although i had to drill out the eccentric spacer holes just a touch to make them fit snugly.
thingiverse
free

Wire Rack Holder Brace by Mochery
...rack clip.
print in a material with a little flex!!! petg ideally. i used raptor pla and i had a heck of a time snapping it on.
thingiverse
free

Rear inside corner bracket for C-bot. by ian_in_the_midlands
...otor so made these. i also found the two pairs of screws closest to the corner interfered with each other, so i removed one pair.
thingiverse
free
Cable chain anchor mounts for D-bot by Rexipus
... exact settings will be up to the individual and their printer to decide, but my recommendation is to make them stiff and strong.
Rexipus
thingiverse
free
2020 extrusion overlapping corner bracket by Rexipus
...se corner brackets printed out in carbon fiber/petg. this is not necessary, but i wanted to try it out. it's extremely stiff.
thingiverse
free
remixed mount for LED strip by Rexipus
...d plate, this remix allows the led strip to intrude into my build space about a centimeter or so less than the original part did.
thingiverse
free
Cable chain anchor mounts for D-bot by Rexipus
... exact settings will be up to the individual and their printer to decide, but my recommendation is to make them stiff and strong.
thingiverse
free

Igus pad for narrow-slotted 2080 aluminum rails by arminj
...narrow-slotted 2080 aluminum rails by arminj thingiverse remix of rexipus#39; igus pads. the trapezoid block has been narrowed to...
thingiverse
free
XT60 heat plate mount for strain relief by Rexipus
... wants to fix or tweak this in whatever way.
edit 8 march 2017: just added step file versions of the sources for these two parts.
thingiverse
free
D-bot stepper mounts with zip tie slots by Rexipus
...his however you would print the stock d-bot stepper mounts. i used petg, 100% infill, 260 c/70 c, on my d-bot, printed at 50mm/s.
thingiverse
free

D-Bot's Z axis setup using Igus-filament by 1sPiRe
...by 1spire thingiverse not tested cross over between the rexipus#39;s igus-filament sliders and my d-bot's z axis...
thingiverse
free

Mount for AC power plug and fuzed switch combo unit by Rexipus
...ended. i added 4mm to the interior cut to correct this. the back wall is now thinner, and the internal empty volume is increased.
thingiverse
free
Duet Wifi controller box attaches to 2020 extrusion by Rexipus
...to the control box, and to keep those wires separated by function at their entry into the box, four holes simply made more sense.
Bot
turbosquid
$19

Bot
... available on turbo squid, the world's leading provider of digital 3d models for visualization, films, television, and games.
turbosquid
free

Bot
... available on turbo squid, the world's leading provider of digital 3d models for visualization, films, television, and games.
3d_export
$10

scanner bot
...scanner bot
3dexport
cool scanner bot who scans for fixing things...
3d_ocean
$9

Apc Bot
...n bot games toys
an all-purpose-constructo-bot. for cartoon purposes. the model is not rigged. please use vray adv for rendering.
3d_export
$75
Bot 3D Model
...bot 3d model
3dexport
robot bot man kiborg character
bot 3d model evgen 19504 3dexport
turbosquid
free

Eye Bot
...eye bot
turbosquid
free 3d model eye bot for download as fbx on turbosquid: 3d models for games, architecture, videos. (1514059)
turbosquid
$29
Gorill-bot
...bosquid
royalty free 3d model gorill-bot for download as fbx on turbosquid: 3d models for games, architecture, videos. (1239456)
turbosquid
$25

Lamp Bot
...bosquid
royalty free 3d model lamp bot for download as blend on turbosquid: 3d models for games, architecture, videos. (1230121)
turbosquid
$10
Spectre Bot
...osquid
royalty free 3d model spectre bot for download as fbx on turbosquid: 3d models for games, architecture, videos. (1616378)
turbosquid
$8
Ultra Bot
...urbosquid
royalty free 3d model ultra bot for download as ma on turbosquid: 3d models for games, architecture, videos. (1330752)
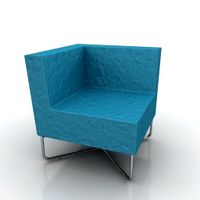
Corner
archibase_planet
free
Corner
...corner
archibase planet
nook corner
corner n030708 - 3d model (*.gsm+*.3ds) for interior 3d visualization.
archibase_planet
free
Corner
...corner
archibase planet
corner post rack
fp corner wh - 3d model (*.gsm+*.3ds) for interior 3d visualization.
3ddd
$1
Country Corner
...country corner , комод , прованс
country corner
3ddd
$1
Corner 8140
... corner
corner 8140 - 16,5 x 17,4 (cm)
corner 8141 - 16,5 x 29,5 (cm)
corner 8142 - 16,5 x 41,5 (cm)
corner 8143 - 28 x 28 (cm)
archibase_planet
free
Corner
...corner
archibase planet
seat easy chair furniture
havanna corner - 3d model (*.gsm+*.3ds) for interior 3d visualization.
3ddd
$1

Country corner
... country corner , romance
рамка country corner, romance,
артикул cc0141
3ddd
$1

Country corner
...country corner
3ddd
country corner , журнальный
country corner pbth размеры 169*69*49
3d_export
$5

Corner
...corner
3dexport
3ddd
$1
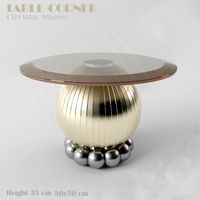
Table-Corner
...table-corner
3ddd
круглый
table,corner
3ddd
$1
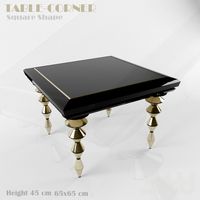
Table,Corner
...table,corner
3ddd
журнальный
table,corner
Bottom
turbosquid
$6
Wooden Bottom
...3d model wooden bottom for download as dae, fbx, obj, and stl on turbosquid: 3d models for games, architecture, videos. (1631844)
turbosquid
$40

Bottom Quark
... available on turbo squid, the world's leading provider of digital 3d models for visualization, films, television, and games.
turbosquid
$18
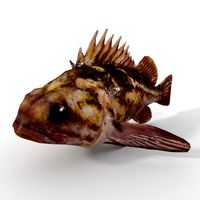
Bottom Fish
...del bottom fish for download as 3ds, fbx, blend, dae, and stl on turbosquid: 3d models for games, architecture, videos. (1400208)
turbosquid
$15
Pillar Bottom
... available on turbo squid, the world's leading provider of digital 3d models for visualization, films, television, and games.
turbosquid
$8
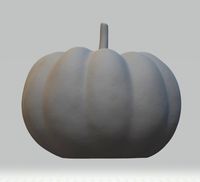
Pumpkin, Flat Bottom
...oyalty free 3d model pumpkin, flat bottom for download as stl on turbosquid: 3d models for games, architecture, videos. (1348299)
turbosquid
$8
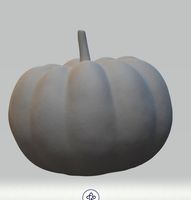
Pumpkin, Flat Bottom
...oyalty free 3d model pumpkin, flat bottom for download as stl on turbosquid: 3d models for games, architecture, videos. (1348289)
turbosquid
$45

Fancy flared bottom
...free 3d model fancy flared bottom for download as max and pac on turbosquid: 3d models for games, architecture, videos. (1471223)
turbosquid
$9

Bottom Bouncer and Worm
... available on turbo squid, the world's leading provider of digital 3d models for visualization, films, television, and games.
3d_export
$10
Tank Top Bottoms 3D Model
...tank top bottoms 3d model
3dexport
tank top bottoms
tank top bottoms 3d model bkl1989 63245 3dexport
cg_studio
$69

The bottom of the lake scene3d model
...3d model
cgstudio
.max - the bottom of the lake scene 3d model, royalty free license available, instant download after purchase.
Custom
3ddd
free
Customized
...customized
3ddd
комод
customized, chest, cabinet
3d_export
$50
Custom motorcycle
...custom motorcycle
3dexport
custom motorcycle
3d_export
$21
Funko custom
...funko custom
3dexport
funko custom
turbosquid
$2

Customs
... available on turbo squid, the world's leading provider of digital 3d models for visualization, films, television, and games.
turbosquid
$2
Customs
... available on turbo squid, the world's leading provider of digital 3d models for visualization, films, television, and games.
turbosquid
$10

Custom Car
...turbosquid
royalty free 3d model custom car for download as on turbosquid: 3d models for games, architecture, videos. (1584212)
3d_export
$7
Custom glasses
...custom glasses
3dexport
3d custom glasses;<br>textured with non overlapping<br>rigged: yes
turbosquid
$80

Custom sportbike
...d
royalty free 3d model custom sportbike for download as fbx on turbosquid: 3d models for games, architecture, videos. (1313435)
turbosquid
$30
custom truck
...squid
royalty free 3d model custom truck for download as max on turbosquid: 3d models for games, architecture, videos. (1329357)
turbosquid
$10
custom alien
...squid
royalty free 3d model custom alien for download as fbx on turbosquid: 3d models for games, architecture, videos. (1244065)