Thingiverse
Custom Closed Belt How To UPDATED by MatGyver85
by Thingiverse
Last crawled date: 3 years ago
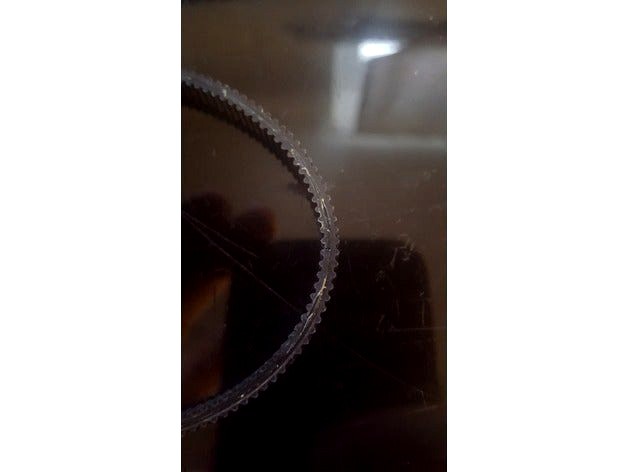
I needed a custom sized GT2 Belt for my printer. Here is how I made one...
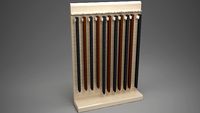
1 > Cut Belt to Specific length plus your desired overlap (I used six "belt humps")
2 > Cut belt in half ,laterally, along belt cords to desired overlap (use extremely sharp razor blade)
3 > Remove the front half of the belt on one end, the back half on the other
4 > Apply rubber cement to each end of belt
5 > wait 15 minutes
6 > Press ends together
7 > I'd wait several hours for glue to set up completely.
8 > Use Belt!
They are actually pretty strong when done. Enjoy.
EDIT - After prolonged use the stress on the thinnest part of the lap joint can stretch causing skips in operation. I found a new system for creating closed loop belts as follows.
1 > cut length of belt to desired size.
2 > cut second length of belt slightly longer than piece cut in step 1 (about 10mm longer).
3 > apply rubber cement to back side of both belt lengths.
4 > wait 10 - 15 minutes.
5 > press pieces together, starting by aligning the end of inside belt to middle of outer belt. (this allows for the most overlap, creating one solid belt, essentially.
6 > Pictures of double belt design has been added to the photos of this process.
Similar models
thingiverse
free

GT2 Belt Splicer Joiner by MaleBuffy
...t until its ready
the more teeth you cut, the longer the glueing area so the stronger the belt
use elastic glue if possible
enjoy
grabcad
free

What are the commonly used materials for flat belts? Flat belts are usually made of leather, rubber and fabric.
...er) thereby ideal for flat belts. to achieve the desired thickness of belt, number of layers of belt material is cemented togethe
thingiverse
free

Thomas TrackMaster Half Curve by xyleborus
...th curved piece is too big to print. i cut it in half so that i can print two and together they are the size of one normal curve!
thingiverse
free

GT2 belt joiner - super small and strong by kiwimike
...3d plastic cover just fits the belts inside, there is no room for them to lift and part. so it's actually a very strong join.
thingiverse
free

Circular Knitting Needles (size 20) by milestorm
...of the needle, and press the two sides together.
fix the glued needle with some support and let dry.
repeat for the second needle
thingiverse
free

1986 Nerf Boomerang Grommet Weight by billpealer
.... no raft, no supports needed. i would use 15-25% in-fill. or change that to alter the way your nerf boomerang flies.
cheers
thingiverse
free

12" Writing Tablet Case 15 pcs (Fixed) by TheNewGamer1762
...r. please do not use glue on the two completed haves!
if there are any issues please comment.
this thing was made with tinkercad.
thingiverse
free
Belt Tension Tester For 2020 Extrusion by nee3d
...length. this length of spring should roughly equate to similar tension on adjacent or similar routed belts. edit: slight...
thingiverse
free

Velleman Vertex K8400 - GT2 Belt Clamp by immutef
...p with the two original m3 screws, and snug the other end in (now you can tune the belt length). use a belt tightener afterwards.
grabcad
free

Shrivastava Hydraulic Shear Machine- 9098894533
... sensors are used for measuring the length of sheet . it will detect the by sensing the appropriate length that how much we want.
Matgyver85
thingiverse
free
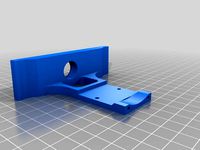
Engenius WAP Mount by MatGyver85
...engenius wap mount by matgyver85
thingiverse
an alternate mount for engenius devices
thingiverse
free

RIDGED ShopVac Filter Nut by MatGyver85
...ridged shopvac filter nut by matgyver85
thingiverse
enjoy!
thingiverse
free

100mm Calibration Test by MatGyver85
...100mm calibration test by matgyver85
thingiverse
use this to help calibrate your steps per mm
thingiverse
free

Simplisafe Entry Sensor Spacer by MatGyver85
...simplisafe entry sensor spacer by matgyver85
thingiverse
spacer for simplisafe entry sensor
thingiverse
free

Pool Skimmer Cover Guard by MatGyver85
...guard by matgyver85
thingiverse
this is a guard to prevent a pool cover from being suctioned to the top of the skimmer.
-enjoy!
thingiverse
free

Ultimate Filament Colorer by MatGyver85
...lors your filament without printing any parts.
here is my adapter for bowden printers!:
https://www.thingiverse.com/thing:4722221
thingiverse
free
Zero Clearance X-axis Endstop by MatGyver85
...zero clearance x-axis endstop by matgyver85
thingiverse
this is a snap-on endstop holder for the accredited x-ends.
thingiverse
free

ROTOR RIOT Case for Iphone 6S by MatGyver85
...rotor riot case for iphone 6s by matgyver85
thingiverse
its a case for iphone 6s with rotor riot eblem
thingiverse
free
Quick Fit Laser Holder by MatGyver85
... holder by matgyver85
thingiverse
this is a laser diode holder with a 30mm fan mount for the j-tech photonics laser upgrade kit.
thingiverse
free
Ford Fuel Line Retainer Clip by MatGyver85
...ford fuel line retainer clip by matgyver85
thingiverse
this is the retainer clip for fuel lines on my ford truck (1991)
Belt
turbosquid
$9
Belt conveyor belt
...t conveyor belt for download as 3ds, ige, obj, stl, and sldas on turbosquid: 3d models for games, architecture, videos. (1226546)
3d_export
$6
belt
...d then comes off and fastens at the front of the seat. version: 2015 units: millimetres x-form: yes polys: 120 950 verts: 163 944
3d_export
$7
belt grinder
...belt grinder
3dexport
belt grinder
3d_export
$5
Belt conveyor
...belt conveyor
3dexport
belt conveyor
3ddd
$1
column belt
...column belt
3ddd
колонна
column belt
turbosquid
$5
Belt
... available on turbo squid, the world's leading provider of digital 3d models for visualization, films, television, and games.
3d_ocean
$5
Leather Belt
...ather belt is created in 3dsmax 2011 and rendered with vray 1.5 and it has all the texture included with the multiple obj format.
3d_ocean
$5

Belt Ring
...belt ring
3docean
belt jewelry ring
belt ring 3d model. total weight 3.5 gram & 1.1 stone size. 3dm and obj file format.
design_connected
$11
Belt Round
...belt round
designconnected
meridiani belt round computer generated 3d model. designed by parisio, andrea.
design_connected
$11
Belt Oval
...belt oval
designconnected
meridiani belt oval computer generated 3d model. designed by parisio, andrea.
Updated
turbosquid
$5

orthographic room (updated)
...ee 3d model orthographic room (updated) for download as blend on turbosquid: 3d models for games, architecture, videos. (1375451)
turbosquid
$95

Romantic Bedroom - Updated
... available on turbo squid, the world's leading provider of digital 3d models for visualization, films, television, and games.
turbosquid
$39

Sofa. Updated release
... available on turbo squid, the world's leading provider of digital 3d models for visualization, films, television, and games.
turbosquid
$15

Procedurally updating cartoon crystal
...l procedurally updating cartoon crystal for download as blend on turbosquid: 3d models for games, architecture, videos. (1525853)
3d_export
$5

10 Surfboard s UPDATE
...10 surfboard s update
3dexport
3d_export
$10
chair updated rocking
...chair updated rocking
3dexport
armchair renewed plywood 18 mm. for cnc machines. layout in the stp archive.
turbosquid
free

Marble Table Updated
...el marble table for download as 3ds, obj, fbx, blend, and dae on turbosquid: 3d models for games, architecture, videos. (1201300)
turbosquid
$35
Mauser 1930the model is updated with the kits
... available on turbo squid, the world's leading provider of digital 3d models for visualization, films, television, and games.
turbosquid
$145

Contemporary Bedroom Collection Vol 1 - Updated
... available on turbo squid, the world's leading provider of digital 3d models for visualization, films, television, and games.
turbosquid
$16

B&B Mart Armchair MPRN (Updated)
...art armchair mprn (updated) for download as max, obj, and fbx on turbosquid: 3d models for games, architecture, videos. (1284355)
How
3ddd
$1

Vitra / How High the Moon
...ow high the moon" японского дизайнера shiro kuramata для vitra, 1986 год.
материал - вытяжная сетка из никелированной стали.
3ddd
$1

Howe London Captain's Bar Stool
... барный
howe london captain's bar stool
dimension : w49.5 x d54.5 cm
seat height : 85 cm
base diameter : 45.8 cm
3d_export
$5
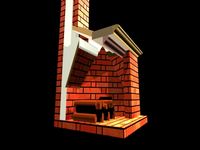
How a fireplace works in transformation animation 3D Model
...on animation 3d model
3dexport
fireplace
how a fireplace works in transformation animation 3d model first3dstudio 100328 3dexport
3d_export
$5

Toy How to Train Your Dragon 3D Model
...how to train your dragon 3d model
3dexport
toy howtotrainyourdragon
toy how to train your dragon 3d model sprut007 96434 3dexport
3d_export
free

How to Get a defind jawline
... other muscle in our body,the jaw muscles grow when stimulated by targeted training.jawline impacts facial beauty and attraction.
3d_export
free

table
...table 3dexport how poly...
3d_export
$10

broken eggs
...broken eggs 3dexport to see for yourself how refraction works, just rotate the model, paying attention to...
3d_export
$10

donut
...donut 3dexport a nice donut for u pls tell how is...
3d_export
$6

heart in cage
...heart in cage 3dexport a 3d representation of how a emotional barriers look...
3d_export
free

chair loft
...chair loft 3dexport chair loft. how poly and low poly...
Custom
3ddd
free
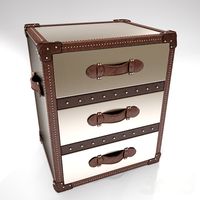
Customized
...customized
3ddd
комод
customized, chest, cabinet
3d_export
$50
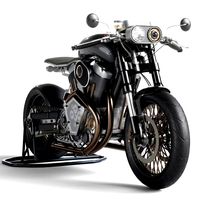
Custom motorcycle
...custom motorcycle
3dexport
custom motorcycle
3d_export
$21
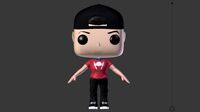
Funko custom
...funko custom
3dexport
funko custom
turbosquid
$2

Customs
... available on turbo squid, the world's leading provider of digital 3d models for visualization, films, television, and games.
turbosquid
$2
Customs
... available on turbo squid, the world's leading provider of digital 3d models for visualization, films, television, and games.
turbosquid
$10

Custom Car
...turbosquid
royalty free 3d model custom car for download as on turbosquid: 3d models for games, architecture, videos. (1584212)
3d_export
$7
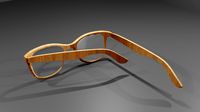
Custom glasses
...custom glasses
3dexport
3d custom glasses;<br>textured with non overlapping<br>rigged: yes
turbosquid
$80

Custom sportbike
...d
royalty free 3d model custom sportbike for download as fbx on turbosquid: 3d models for games, architecture, videos. (1313435)
turbosquid
$30
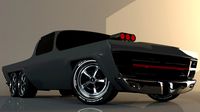
custom truck
...squid
royalty free 3d model custom truck for download as max on turbosquid: 3d models for games, architecture, videos. (1329357)
turbosquid
$10
custom alien
...squid
royalty free 3d model custom alien for download as fbx on turbosquid: 3d models for games, architecture, videos. (1244065)
Closed
turbosquid
$35

Closed
... available on turbo squid, the world's leading provider of digital 3d models for visualization, films, television, and games.
turbosquid
$10

Closed baskets
...osquid
royalty free 3d model closed baskets for download as on turbosquid: 3d models for games, architecture, videos. (1683282)
turbosquid
$2

closed to dust
...uid
royalty free 3d model closed to dust for download as stl on turbosquid: 3d models for games, architecture, videos. (1403703)
turbosquid
$29

hands close
...e 3d model hands close for download as 3ds, obj, c4d, and fbx on turbosquid: 3d models for games, architecture, videos. (1442051)
turbosquid
$29

Closed Pinecone
... available on turbo squid, the world's leading provider of digital 3d models for visualization, films, television, and games.
turbosquid
$10

CLOSED~1.3DS
... available on turbo squid, the world's leading provider of digital 3d models for visualization, films, television, and games.
turbosquid
$1

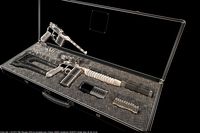
Briefcase Closed
... available on turbo squid, the world's leading provider of digital 3d models for visualization, films, television, and games.
3d_export
$20

bank vault close
...bank vault close
3dexport
bank vault close
3d_export
$8

road closed sign
...road closed sign
3dexport
road closed sign
3d_export
$5

closed hand wheel
...closed hand wheel
3dexport
closed hand wheel