Thingiverse
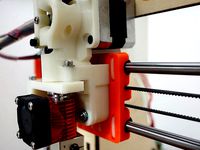
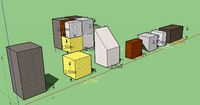
Cube Gen 2 E3D (v2) by ShadowedR
by Thingiverse
Last crawled date: 3 years ago
2018-04-02 - Updated Version: I quickly realised a few problems with the first design and have since updated the following:
Filament Feed Alignment
Spring Tension Placement - old version caused the finger the wander out of alignment
Stronger Frame
New version has been working better than expected, so much so I might upgrade the printer further with a heat bed.
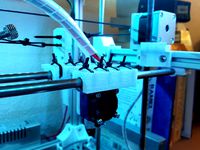
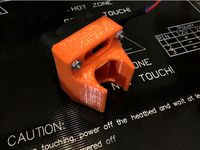
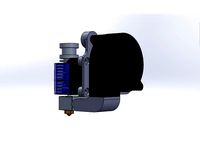
For those, like me, that still have an old cubify cube gen 2 lying around, here is an upgrade to to get rid of the default print head assembly and replace it with a E3D V6 setup.
This upgrade came after I destroyed the old main board on purpose and replaced it with a TEVO TARANTULA MOTHERBOARD MKS BASE V1.4 since it can handle a 24V supply.
This is designed to re-use the existing stepper with the drive gear fitted in place.
The overall design would be better with a new stepper motor, as the gear is a little close to the stepper.
What you will need
E3D V6 Hotend Assembly
One stiff spring. I used the springs that came with the bed leveling kits
3x M3 30mm bolts
4x M3 20mm bolts
7x M3 nuts
one U -Groove ball bearing and appropriate screw to keep in place : U604ZZ 4x13x4
EDIT: Old parts list, just get a few M3 40mm bolts,nuts and washers. That and one M4 40mm bolt, nut and washer for the spring at the rear of the finger. And one M4 20mm Hex Head bolt + nut + washer for the u-groove bearing
2020-02-28 Update: buddybu was kind enough to play around with the print. Please see his comments and attached picture. The bottom two screws should be 25mm M3
Assembly
Assembly is easy.
Strip the old cube head entirely, removing the metal frame that the stepper motor is bolted to.
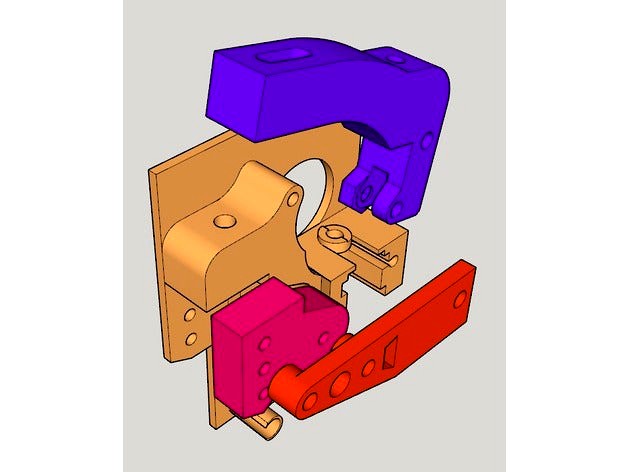
Print all of the parts and assemble as such:
Main Body to the cube print head
Insert the support plate
Insert the rigid plate
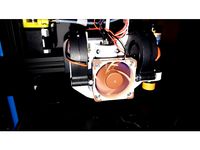
Insert the E3D cooling tower
Bolt the stepper in place, through the main body, support and rigid plate
Assemble the bearing unto the finger and affix to the main body
Insert the spring at the top - I used an 20mm bolt to keep the spring in place. It sits snugly on top of an M3 hex nut.
For cooling I printed one of these E3D v6 Hotend - 40mm Fan Duct as I had a 24V 40mm fan spare.
Filament Feed Alignment
Spring Tension Placement - old version caused the finger the wander out of alignment
Stronger Frame
New version has been working better than expected, so much so I might upgrade the printer further with a heat bed.
For those, like me, that still have an old cubify cube gen 2 lying around, here is an upgrade to to get rid of the default print head assembly and replace it with a E3D V6 setup.
This upgrade came after I destroyed the old main board on purpose and replaced it with a TEVO TARANTULA MOTHERBOARD MKS BASE V1.4 since it can handle a 24V supply.
This is designed to re-use the existing stepper with the drive gear fitted in place.
The overall design would be better with a new stepper motor, as the gear is a little close to the stepper.
What you will need
E3D V6 Hotend Assembly
One stiff spring. I used the springs that came with the bed leveling kits
3x M3 30mm bolts
4x M3 20mm bolts
7x M3 nuts
one U -Groove ball bearing and appropriate screw to keep in place : U604ZZ 4x13x4
EDIT: Old parts list, just get a few M3 40mm bolts,nuts and washers. That and one M4 40mm bolt, nut and washer for the spring at the rear of the finger. And one M4 20mm Hex Head bolt + nut + washer for the u-groove bearing
2020-02-28 Update: buddybu was kind enough to play around with the print. Please see his comments and attached picture. The bottom two screws should be 25mm M3
Assembly
Assembly is easy.
Strip the old cube head entirely, removing the metal frame that the stepper motor is bolted to.
Print all of the parts and assemble as such:
Main Body to the cube print head
Insert the support plate
Insert the rigid plate
Insert the E3D cooling tower
Bolt the stepper in place, through the main body, support and rigid plate
Assemble the bearing unto the finger and affix to the main body
Insert the spring at the top - I used an 20mm bolt to keep the spring in place. It sits snugly on top of an M3 hex nut.
For cooling I printed one of these E3D v6 Hotend - 40mm Fan Duct as I had a 24V 40mm fan spare.
Similar models
thingiverse
free
E3D v6 X Carriage Extended by bkapps
...sion
-4 m3 nuts
-2 m3 x 16mm bolts
-2 x m3 x 30mm bolts (25mm should work)
-4 x m3 washers
-4 x lm8uu bearings.
-8 small zip ties
thingiverse
free

Titan Extruder mount for Lulzbot Taz 6 with E3D V6 Hotend by StephS
... housing (digikey pn: wm2525-nd)
20x male crimp connectors (digikey pn: wm2517-nd)
misc m3 screws for fan mounting.
printed parts
thingiverse
free

Dual 40mm Cooling Fan Ring for E3D V6 Exruder by roadie3rd
...g fan ring for e3d v6 exruder
requires:
2x 40mm fans,
1x 30mm fan,
10x m3 x 16 screws
4x m3 x 8mm
2x m3 nylock nuts
2x m3 washers
thingiverse
free

E3D V6 40mm Triple Fan Blower Duct by wooddragon48
...mm long m3 screw, nut and washers for extra clamping. the center fan can be either 10mm or 20mm thick if extra cooling is needed.
thingiverse
free

Mounting the E3D v6 on a Mendel90 (bowden version) by RalphHilton
...the print cooling fan is printed in 2 parts which clip together and can be glued after the 4 m3 nuts are placed in their holders.
thingiverse
free

Tevo Tornado E3D V6 30mm & 40mm All in One Fan Duct & Clamp by DemolitionX
...he 40mm version though.
i've also added a picture of a stress test done with the fan duct to show what its like at bridging .
thingiverse
free
E3D v6 40mm Fan Shroud by superwoodle
...r your e3d v6!
for the noctua 40mm fan and no guard, you will need:
2 x 25mm m3
2 x ~12mm m3
2 x m3 nuts
print without supports.
thingiverse
free
CR-10 E3D V6 mount Dual FAN Mesh by chips777
... socket head bolts (please use treadlock glue for the extruder carrier)
2x m4 socket head bolts
2x m4 washers
2x m4 x 20mm screws
thingiverse
free
Unified Prusa i3 Extruder for Mk8 drive gear, e3d v6 hotend, and BLTouch sensor. by inornate
...have some rubbery material, place it between the stepper motor and carriage. this will greatly reduce the vibration during print.
thingiverse
free
Radial nozzle fan assembly for E3D V6 by Jim_Jams_3rd
...
2 x m4 lock nuts
4 x m3 20mm bolts (low profile socket button/dome head)
glue (for attaching radial fan duct to the radial fan)

Gen
turbosquid
$15

gen
... available on turbo squid, the world's leading provider of digital 3d models for visualization, films, television, and games.
turbosquid
$2
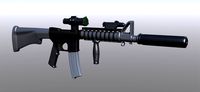
Gen. Rifle
...bosquid
royalty free 3d model gen. rifle for download as fbx on turbosquid: 3d models for games, architecture, videos. (1374075)
3d_export
$8

pokemon sprite voxel 1 gen
...pokemon sprite voxel 1 gen
3dexport
pokemon voxel 1 gen
turbosquid
$45

Chest Next-Gen
... available on turbo squid, the world's leading provider of digital 3d models for visualization, films, television, and games.
turbosquid
$39

Nano 6th Gen
... available on turbo squid, the world's leading provider of digital 3d models for visualization, films, television, and games.
3d_export
$8

pokemon sprite voxel 7 gen
...pokemon sprite voxel 7 gen
3dexport
pokemon sprite voxel 7 gen
3d_export
$8

pokemon sprite voxel 5 gen
...pokemon sprite voxel 5 gen
3dexport
pokemon sprite voxel 5 gen
3d_export
$8

pokemon sprite voxel 3 gen
...pokemon sprite voxel 3 gen
3dexport
pokemon sprite voxel 3 gen
3d_export
$8

pokemon sprite voxel 4 gen
...pokemon sprite voxel 4 gen
3dexport
4 gen pokemon voxel sprites
3d_export
$8

pokemon sprite voxel 2 gen
...pokemon sprite voxel 2 gen
3dexport
pokemon sprite voxel 2 gen
E3D
turbosquid
$23

E3D - Google Home
... 3d model e3d - google home for download as max, obj, and c4d on turbosquid: 3d models for games, architecture, videos. (1192509)
cg_studio
free

e3d model
...e3d model
cgstudio
- e 3d model, royalty free license available, instant download after purchase.
turbosquid
$2

Syringe C4D (E3D Ready)
...lty free 3d model syringe c4d (e3d ready) for download as c4d on turbosquid: 3d models for games, architecture, videos. (1336720)
turbosquid
$12

Microphone USB E3D and C4D
...ree 3d model microphone usb e3d & c4d for download as c4d on turbosquid: 3d models for games, architecture, videos. (1568216)
turbosquid
$29

E3D - OnePlus 6 Black
...model e3d - oneplus 6 black for download as max, obj, and c4d on turbosquid: 3d models for games, architecture, videos. (1358534)
turbosquid
$29

E3D - Motorola One 2018
...del e3d - motorola one 2018 for download as max, obj, and c4d on turbosquid: 3d models for games, architecture, videos. (1358533)
turbosquid
$29

E3D - Disney MagicBands 2
...l e3d - disney magicbands 2 for download as max, obj, and c4d on turbosquid: 3d models for games, architecture, videos. (1355515)
turbosquid
$29

E3D - Samsung Z4 Smartphone
...e3d - samsung z4 smartphone for download as max, obj, and c4d on turbosquid: 3d models for games, architecture, videos. (1182179)
turbosquid
$23

E3D - Razer Phone model
...del e3d - razer phone model for download as max, obj, and c4d on turbosquid: 3d models for games, architecture, videos. (1231207)
turbosquid
$23

E3D - Alcatel Idol 5
... model e3d - alcatel idol 5 for download as max, obj, and c4d on turbosquid: 3d models for games, architecture, videos. (1212799)
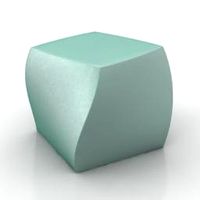
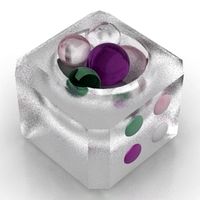
Cube
3d_ocean
$5
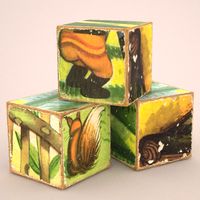
Cubes
...cubes
3docean
children cube cubes model paint toy toys wooden
old wooden children’s cubes.
3d_export
$5
cube
...cube
3dexport
cube
3d_export
$5

cube
...cube
3dexport
cube
3d_export
free

Chemistry cube - cube chimique
...chemistry cube - cube chimique
3dexport
chemistry cube - cube chimique
3d_export
$10

Cube
...cube
3dexport
cube deco
3d_export
free

cube
...cube
3dexport
invented the cube
archibase_planet
free

Cube
...cube
archibase planet
cube
g4 cube - 3d model for interior 3d visualization.
3d_export
$6
cube
...cube
3dexport
cube gamel location
archibase_planet
free
Cube
...cube
archibase planet
home furniture cube
cube - 3d model (*.gsm+*.3ds) for interior 3d visualization.
archibase_planet
free
Cube
...cube
archibase planet
cube block die
cube eazelcom n050113 - 3d model (*.gsm+*.3ds) for interior 3d visualization.
V2
3d_export
free

Lamp v2
...lamp v2
3dexport
lamp v2 with solar panel
3d_export
$5

hammerhead v2
...hammerhead v2
3dexport
razer hammerhead v2 headphones, modeled in cinema 4d, render in corona
3d_export
$5

manometer v2
...manometer v2
3dexport
3d_export
$5

potato v2
...potato v2
3dexport
turbosquid
$52

Lifebuoys v2
...squid
royalty free 3d model lifebuoys v2 for download as fbx on turbosquid: 3d models for games, architecture, videos. (1560870)
turbosquid
$2

Mask v2
...turbosquid
royalty free 3d model mask v2 for download as stl on turbosquid: 3d models for games, architecture, videos. (1527741)
turbosquid
free

Flashlight V2
...d
free 3d model flashlight v2 for download as , obj, and fbx on turbosquid: 3d models for games, architecture, videos. (1663559)
turbosquid
$29

Thanos v2
...
royalty free 3d model thanos v2 for download as ztl and obj on turbosquid: 3d models for games, architecture, videos. (1651077)
turbosquid
$29

Titan v2
...d
royalty free 3d model titan v2 for download as ztl and obj on turbosquid: 3d models for games, architecture, videos. (1540228)
turbosquid
$29

Frieza v2
...
royalty free 3d model frieza v2 for download as ztl and obj on turbosquid: 3d models for games, architecture, videos. (1701238)
2
design_connected
$11

No 2
...no 2
designconnected
sibast no 2 computer generated 3d model. designed by sibast, helge.
turbosquid
$6

Cliff Rock 2-2
...uid
royalty free 3d model cliff rock 2-2 for download as obj on turbosquid: 3d models for games, architecture, videos. (1619161)
turbosquid
$29

Book variation 2 2
...3d model book variation 2 2 for download as max, obj, and fbx on turbosquid: 3d models for games, architecture, videos. (1366868)
turbosquid
$22

Classic baluster (2) (2)
...assic baluster (2) (2) for download as max, obj, fbx, and stl on turbosquid: 3d models for games, architecture, videos. (1483789)
turbosquid
$99

Smilodon 2 Pose 2
... available on turbo squid, the world's leading provider of digital 3d models for visualization, films, television, and games.
turbosquid
$20

Barrel Barricade 2-2
... available on turbo squid, the world's leading provider of digital 3d models for visualization, films, television, and games.
turbosquid
$6

Wall Trophy (2) (2)
... available on turbo squid, the world's leading provider of digital 3d models for visualization, films, television, and games.
turbosquid
free

Tire label 2 of 2
... available on turbo squid, the world's leading provider of digital 3d models for visualization, films, television, and games.
3ddd
$1

Кровать, 2 тумбочки, 2 светильника
...кровать, 2 тумбочки, 2 светильника
3ddd
кровать, 2 тумбочки, 2 светильника
нормальное качество
формат 3ds max
без текстур
3ddd
free

Кровать, 2 тумбочки, 2 светильника
...кровать, 2 тумбочки, 2 светильника
3ddd
кровать, 2 тумбочки, 2 светильника
нормальное качество
формат 3ds max
без текстур