Thingiverse

Creator Pro Fan for Right Extruder by progers123
by Thingiverse
Last crawled date: 4 years ago
So there is the obvious flaw with this printer and that the extruder fan only hits the left extruder and its not a good duct regardless. I know there are already some solutions for different ducts that hit both the extruders, but that is then splitting the flow or air. There is also the issue that the current fan is not adjustable and it just has a single power setting. I wanted to come up with a solution to both of these problems.
Supplied you will need.
-2x M3 nut and screw
-24V turbo fan (https://www.amazon.com/gp/product/B07DQ7F1T7/ref=ppx_yo_dt_b_asin_title_o07_s00?ie=UTF8&psc=1)
-24V Power Adaptor (https://www.amazon.com/gp/product/B07QVXYBDC/ref=ppx_yo_dt_b_asin_title_o03_s00?ie=UTF8&psc=1)
-electrical tape
-extra wire
I set out to develop a second fan that could be mounted onto the carriage and cool the right extruder filament. The support structure is fairly self explanatory I think. Glue some nuts into the slots for them and then its best to use some super glue in attaching the two pieces for the slot is not 100% structurally sound. Once the fan support is assembled, simply remove the old fan cover and add this one on and then attach the fan to it.
Before attaching the fan to the support, remove the adaptor from the wires and extend them by about 1ft (or more depending on your set up). This will give some slack for the fan to travel around without pulling on the cords. Then connect them to the power supply, or a breadboard like I did. On mine, I also added a LED (included 10k resistor) in parallel to indicate if the fan was on or off. You will also want to attach the duct to the fan at this point. I designed the duct to be a tight fit so might take some force, be careful not to break the fan, plastic is week.
Once this is done, attach the fan to the support structure, and plug everything in and test.
IMPORTANT
-verify that the duct lines up with extruder and is not lower than it. This has not happened to me, but would be bad if somehow was.
-Done use the full 24V currently. The duct is not able to support that amount of air flow and will cause additional stress on the fan motor. I find that around 16V is currently a good point. I am working on the duct system for this.
-Do not print with duct attached and fan not running. This will likely melt the duct.
-you might need to print at a slightly higher temp due to the increased cooling on the extruder
Initial testing
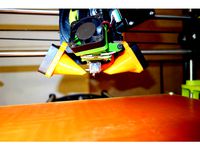
The pictures above are of some overhang tests that I did with my adapter and what I consider to be the next best solution (https://www.thingiverse.com/thing:1675208) and the results are good. The overhang stays relatively stable up to 70 degrees with my adapter compared to about 55 degrees with the dual adapter. This is printing with standard settings using Flashprint.
Bridge testing- I did one bridge test and it bridge 6in VERY well. When I get to it I will test a 8.5" brige (mx of my printer) and test that and report results. It does seam that with this adapter, supports will be needed much much less.
So it does look like this will provide an improvement over the dual fan adapter that is currently used by most for dual extruding projects. It will take some time and fine tuning to figure out the best settings and fan speeds.
FUTURE WORK
I am working on a better duct system. This takes some thought and consideration into what the best design will be. Maybe multiple types of ducts will be needed depending on the project. If anyone has thoughts on this I will be happy to hear them. While this system is good, I think it has the potential to be a substantial upgrade to these printers.
Dont forget that tip designer button exists. This upgrade will certainly save you some prints in the future and when fully working, might even enable some prints that were not previously possible. Worth a $3 beer to the creator if you ask me :)
Check out my friends Indie Game Companyhttp://www.piedraven.com/
Similar models
thingiverse
free

E3D Dual Extruder Fan Duct by Epickilz
...le 40mm fan. 3mm screws are used to attach the fan to the duct.
*this was tested with abs so might be loose with other materials.
thingiverse
free

Dual ED3 V6 extruder mount for Prusa i3 MK8 by aes92000
...n back plate and fan duct
pictures to come soon of full assembly
working on additional attachments for some type of led lighting.
thingiverse
free

Dual Extruder Fan Duct by ChrisX35
...6/1/17 just added two new pictures of my third fan duct. had no problems printing without support in where it cannot be removed.
thingiverse
free

K8400 Vertex bottom dual fan duct by tgaertner80
...ted parts with no support and glue them together. (i did not try this, but as far i've seen with my print, this should work.)
thingiverse
free

Replicator 1 Cooling Fan by jer
...is designed to support a 40mm 24v cooling fan, similar to the stock replicator fans and blow air onto...
thingiverse
free
Taz 6 print cooling fan ducts by AKADAP
...ch. left and right are mirror images. the design is currently symmetric, so this will only come into play if you offset the fans.
thingiverse
free

FlyingBear P905 Dual Extruder Fan Duct by pbeyl
...port touching the build plate. the design should allow bridging while printing the rest of the duct without the need for support.
thingiverse
free
Fan Duct for Raise 3D N2/N2+, Single Extruder by socke
...support needed for printing if you lay it on the surface where the fan is mounted. i printed mine with esun epc and 100% infill.
thingiverse
free
Sunlu S8 Dual 4010 Blower Fan Duct by __Plasma__
...ed squirrel one and modified it to take one at each side. print with supports touching the build plat only and around 20% infill.
grabcad
free

MakerGear M2 80mm Bed Fan mount and duct.
...op of ca superglue to bond them together. the 40mm flange glues into the duct. i used jb weld for that. ca might work as well.
Progers123
thingiverse
free

Adjustable Height Keyboard (dell) by progers123
... into the office to test but it should work. stay safe everyone.
check out my friends indie game companyhttp://www.piedraven.com/
thingiverse
free

D&D Dice Tray (Table Clamp) by progers123
...f easily and it still works, better than printing with supports.
check out my friends indie game companyhttp://www.piedraven.com/
Creator
3ddd
$1

CREATOR
... молдавия
круглая кровать молдавской мастерской creator.диаметр спального места - 1900мм,материалы настроены.
turbosquid
$75

Creators Realm
... available on turbo squid, the world's leading provider of digital 3d models for visualization, films, television, and games.
3ddd
$1

LEGO Creator Part 2
...
lego , конструктор , машина
lego creator №6753
turbosquid
free

Game Creator Pack
... available on turbo squid, the world's leading provider of digital 3d models for visualization, films, television, and games.
3ddd
$1
LEGO Creator №6753 Part 3
...
lego , конструктор , машина
lego creator №6753
3ddd
$1

LEGO Creator №6753 Part 1
...
lego , конструктор , машина
lego creator №6753
turbosquid
$29

Train Track Creator Pro
... available on turbo squid, the world's leading provider of digital 3d models for visualization, films, television, and games.
3d_ocean
$39

Train Track Creator Pro
...n tracks, for video game or rendering in a matter of minutes. all the models in this pack are low poly with high resolution te...
turbosquid
$7

FPS Creator Reloaded Rock Pack 1
... available on turbo squid, the world's leading provider of digital 3d models for visualization, films, television, and games.
3ddd
$1
Декоративные элементы BV Decor CREATOR III часть
...ментов и декорирования стен.
множество вариантов для вашей фантазии.https://bvdecor.com/es/category/list/cat/creator-es
Extruder
3ddd
$1
Extruded Chair
...extruded chair
3ddd
extruded , tom dixon
inspired by tom dixon extruded chair
turbosquid
$2
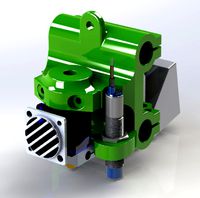
3D Printer Extruder
...d
royalty free 3d model 3d printer extruder for download as on turbosquid: 3d models for games, architecture, videos. (1537359)
turbosquid
$1
Zombie extruded text
...oyalty free 3d model zombie extruded text for download as obj on turbosquid: 3d models for games, architecture, videos. (1322198)
turbosquid
$4
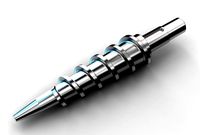
Extruder conical screw
...el extruder conical screw for download as sldpr, ige, and stl on turbosquid: 3d models for games, architecture, videos. (1524433)
turbosquid
$50
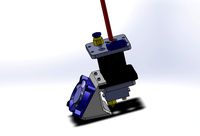
3d PRINTER - Extruder
... available on turbo squid, the world's leading provider of digital 3d models for visualization, films, television, and games.
3d_export
$5

world earth extrude map
...world earth extrude map
3dexport
3ddd
$1

Simply Elegant Extruded Tree Coffee Table Design
...ble by link studios. the silhouette of a tree is visible at one angle, extruded from the surface to create the support structure.
3d_export
$13
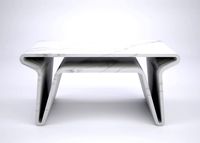
extruded table
...ed to give you the highest possible quality for up to 4k renders. there is no post-production used on any of the renders you see.
3d_export
$13
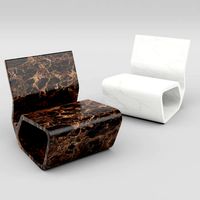
extruded chair
...for high-quality render results. no extra plugins are required for this model. lights and cameras are not included in the scenes.
3d_export
$13
extruded table 2
...for high-quality render results. no extra plugins are required for this model. lights and cameras are not included in the scenes.
Fan
3d_export
$5
fan
...fan
3dexport
fan 3d model, table fan, fan, electric fan, ventilator
archibase_planet
free
Fan
...fan
archibase planet
fan large fan
fan out n260707 - 3d model for interior 3d visualization.
archibase_planet
free
Fan
...fan
archibase planet
fan ceiling fan ventilator
fan stealth n300615 - 3d model (*.gsm+*.3ds) for interior 3d visualization.
3d_export
$15

fan
...fan
3dexport
is an ancient fan
3ddd
$1
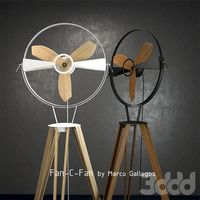
Fan-C-Fan by marco gallegos
...n-c-fan by marco gallegos
3ddd
вентилятор , marco gallegos
fan-c-fan by marco gallegos
3d_export
$10
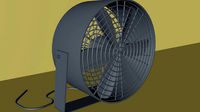
fan
...fan
3dexport
a detailed fan designed for home or space blowing is now available for only 19.99!
turbosquid
$1
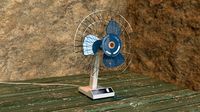
Fan
...fan
turbosquid
free 3d model fan for download as on turbosquid: 3d models for games, architecture, videos. (1427865)
3ddd
$1
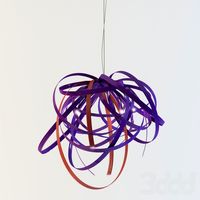
Светильник Fan
...светильник fan
3ddd
fan , italamp
светильник fan, производитель italamp
turbosquid
$25
Fan
...fan
turbosquid
royalty free 3d model fan for download as c4d on turbosquid: 3d models for games, architecture, videos. (1483246)
turbosquid
$10

Fan
...fan
turbosquid
royalty free 3d model fan for download as max on turbosquid: 3d models for games, architecture, videos. (1645418)
Right
turbosquid
$6

To the right
...squid
royalty free 3d model to the right for download as max on turbosquid: 3d models for games, architecture, videos. (1200265)
turbosquid
$5

Pass Right
... available on turbo squid, the world's leading provider of digital 3d models for visualization, films, television, and games.
3d_export
$14
southern right whale
...southern right whale
3dexport
detailed model of southern right whale
3d_export
$10

Tibet right
...tibet right
3dexport
dimensions of the pencil case 404/1982/380 mm
3d_export
free
right arrow
...e <br> file contains the <br> and <br> formats.<br>you can use it for presentation slides or 3d printing.
design_connected
$16

Feng Chaise Right
... chaise right
designconnected
ligne roset feng chaise right lounge chairs computer generated 3d model. designed by didier gomez.
3d_export
$5

Right arrow 3D Model
...right arrow 3d model
3dexport
right turn sign signal signage direction
right arrow 3d model ryisnelly100 88745 3dexport
turbosquid
free

Keep Right Sign
...rbosquid
free 3d model keep right sign for download as blend on turbosquid: 3d models for games, architecture, videos. (1522189)
turbosquid
$5

No Right/Left Turn
... available on turbo squid, the world's leading provider of digital 3d models for visualization, films, television, and games.
turbosquid
$7

Right or Wrong
...d
royalty free 3d model cross and tick for download as blend on turbosquid: 3d models for games, architecture, videos. (1239700)
Pro
turbosquid
$29
Pro
...ree 3d model mac pro for download as obj, c4d, fbx, and blend on turbosquid: 3d models for games, architecture, videos. (1505782)
3d_export
$5

iphone 13 pro max and pro
...3 pro max and 13 pro the model is made in four colors (graphite, gold, silver, and blue), all of which are attached in the files.
3d_export
free
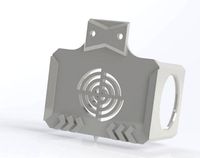
sapphire pro
...sapphire pro
3dexport
sapphire pro 3d printer head mask
3d_export
$4

macbook pro
...macbook pro
3dexport
macbook pro 13" inch 2020 years model
3ddd
free
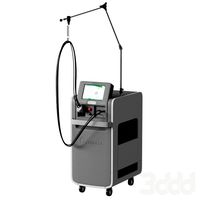
GentleLase Pro
... syneron , candela
gentlelase pro аппарат для лазерной эпиляции
turbosquid
$25

PRO frame
...rbosquid
royalty free 3d model pro frame for download as max on turbosquid: 3d models for games, architecture, videos. (1148329)
turbosquid
$5

Alien pro
...osquid
royalty free 3d model alien pro for download as blend on turbosquid: 3d models for games, architecture, videos. (1678446)
turbosquid
$5

iphone11 pro
...uid
royalty free 3d model iphone11 pro for download as blend on turbosquid: 3d models for games, architecture, videos. (1562707)
3ddd
$1
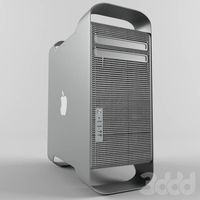
Mac Pro (appel)
...mac pro (appel)
3ddd
компьютер , apple
mac pro
3ddd
$1
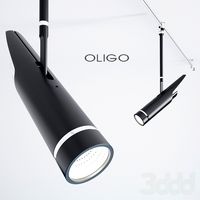
Aviation PRO
... aviation
http://www.oligo.de/en/products/system-luminaires/prod/st-aviation-pro-1.html
