Thingiverse
Creality Fan Shroud (yes another one) by lewtwo
by Thingiverse
Last crawled date: 3 years ago
Well I got another printer. It is an 'refurbished' Hictop CR-10 (I thought I was ordering a CR-10S ... oops, my mistake). So while assembling it I tried to mount my dual leg fan shroud ... no joy: https://www.thingiverse.com/thing:2805046
The CR-10 uses the old style Creality four-fin heat sink (as opposed to the current 9 fin version). Turns out the problem was actually the socket head screw head sticking out of the heat sink. The newer model uses a proper grub set screw that does not stick out. Simple solution is to replace it. The problem being I do not happen to have a set screw the right size. Time to start a new fan shroud design that can be used on either model as well as with or without part cooling fans and level sensor.
Step one:
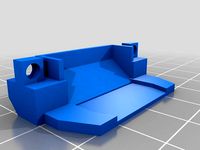
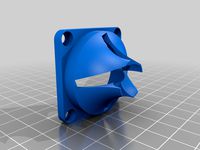
First up is a minimal shroud for the standard 40mm x 10mm axial cooling fan. I tried downloading several of these but found none totally suited to my task. Most also need supports and/or a lot of clean up. This stroud was designed from the start to require NO SUPPORT when printed face down. I am not going to tell you how many days I worked on this or the amount of prototypes that would up in the recycle bin before I got something that I was satisfied with.
The fan mounting face is exactly 26mm from the vertical centerline of the nozzle.The top and bottom fit tightly against the heat sink and there is a notch for the screw head on the old style nozzle. You might also use this for the central fan along with one of the numerous dual fang part cooler strouds.
You will need two M3x20mm socket head cap screws to mount this shroud. I also like to use two M3x0.5mm thick brass washers between the screw heads and the shroud. You need a nice firm mount for the nozzle. Those two screws are the ONLY thing that keeps the nozzle aligned vertically to the world. I printed this in ABS without any supports. Note that you need to leave this part on the bed until fully cooled. Elsewise you will get a convex face.
This part weighs: 6.3 grams
Creality's metal shroud weighs: 48 grams
Step Two (7 May 2018):
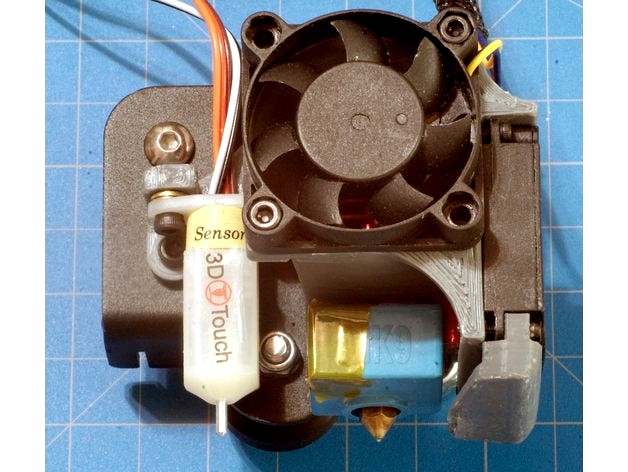
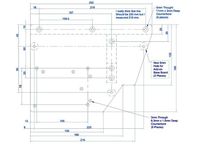
This adds a provision for a Creality style 40mm x 10mm centrifugal part cooling fan and maintains the same location for the part cooling fan that the stock Creality aluminum mount uses. In this way one can use any of the available nozzles that have been created for the CR-10 or Ender-2 or the stock nozzle if you have not lost it like I did. The advantage here is that this fan stroud leaves enough room on the left side to mount a Greentech Touch sensor using the two remaining M3 inserts. Flat washers are used to adjust the height of the sensor. It is designed for a M3 x 8mm long socket head cap screws and 3 M3 x 0.5 mm thick brass washers on each side. M3 x 8mm screws are also used for mounting the bracket to the carriage.
Much to my dismay, I found the only way I could get clean faces for the mounting holes of the stroud was to use two custom supports. These have been designed to pop off easily and require NO cleanup.
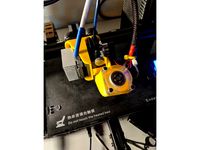
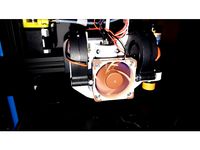
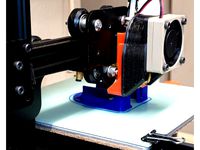
The picture show prototype parts mount to a CR-10 carriage. I can not claim to have actually printed anything with this yet as I now have to work out the modifications to the Marlin Firmware for the Ender-2 PCB I am using.
Fan Stroud weigh: 13 grams
Sensor Mount Weight: 2.6 grams
Sensor Offset: X = -26.75 mm, Y = -4.0 mm
This is a work in progress. When the project is complete I will also release the source DWG files (I mean DXF files because Thingiverse can not deal with DWG files).
All of the referenced files are the exclusive work product of the author and placed into the Public Domain by the author 24 April 2018 without any warranty expressed or implied.
The CR-10 uses the old style Creality four-fin heat sink (as opposed to the current 9 fin version). Turns out the problem was actually the socket head screw head sticking out of the heat sink. The newer model uses a proper grub set screw that does not stick out. Simple solution is to replace it. The problem being I do not happen to have a set screw the right size. Time to start a new fan shroud design that can be used on either model as well as with or without part cooling fans and level sensor.
Step one:
First up is a minimal shroud for the standard 40mm x 10mm axial cooling fan. I tried downloading several of these but found none totally suited to my task. Most also need supports and/or a lot of clean up. This stroud was designed from the start to require NO SUPPORT when printed face down. I am not going to tell you how many days I worked on this or the amount of prototypes that would up in the recycle bin before I got something that I was satisfied with.
The fan mounting face is exactly 26mm from the vertical centerline of the nozzle.The top and bottom fit tightly against the heat sink and there is a notch for the screw head on the old style nozzle. You might also use this for the central fan along with one of the numerous dual fang part cooler strouds.
You will need two M3x20mm socket head cap screws to mount this shroud. I also like to use two M3x0.5mm thick brass washers between the screw heads and the shroud. You need a nice firm mount for the nozzle. Those two screws are the ONLY thing that keeps the nozzle aligned vertically to the world. I printed this in ABS without any supports. Note that you need to leave this part on the bed until fully cooled. Elsewise you will get a convex face.
This part weighs: 6.3 grams
Creality's metal shroud weighs: 48 grams
Step Two (7 May 2018):
This adds a provision for a Creality style 40mm x 10mm centrifugal part cooling fan and maintains the same location for the part cooling fan that the stock Creality aluminum mount uses. In this way one can use any of the available nozzles that have been created for the CR-10 or Ender-2 or the stock nozzle if you have not lost it like I did. The advantage here is that this fan stroud leaves enough room on the left side to mount a Greentech Touch sensor using the two remaining M3 inserts. Flat washers are used to adjust the height of the sensor. It is designed for a M3 x 8mm long socket head cap screws and 3 M3 x 0.5 mm thick brass washers on each side. M3 x 8mm screws are also used for mounting the bracket to the carriage.
Much to my dismay, I found the only way I could get clean faces for the mounting holes of the stroud was to use two custom supports. These have been designed to pop off easily and require NO cleanup.
The picture show prototype parts mount to a CR-10 carriage. I can not claim to have actually printed anything with this yet as I now have to work out the modifications to the Marlin Firmware for the Ender-2 PCB I am using.
Fan Stroud weigh: 13 grams
Sensor Mount Weight: 2.6 grams
Sensor Offset: X = -26.75 mm, Y = -4.0 mm
This is a work in progress. When the project is complete I will also release the source DWG files (I mean DXF files because Thingiverse can not deal with DWG files).
All of the referenced files are the exclusive work product of the author and placed into the Public Domain by the author 24 April 2018 without any warranty expressed or implied.
Similar models
thingiverse
free

Creality CR-10s Pro Velocity Stack Cooling Fan Shroud
...found under: creality cr-10s pro fan duct
print suggestions:
.28 and lower layer hight.
50 zig zag support
adaptive layers {on}
thingiverse
free

Creality CR-10 Auto Bed Leveling Sensor Mount by fcanozkan
... plate.
this is a sensor mount for m18 inductive or capacitive sensors like lj18a3-8-z.
you need two m3x6 screws for connection.
thingiverse
free

CR-10S/E3D-V6 Parts cooling fan using stock OEM fan by remberto
...11) very nicely.
anyways, if you've given several cr-10s part cooling fan shrouds a try with no luck like me - try this one!
thingiverse
free

CR-10S Fan washer by danialkt
..., was because of a rattling noise from the cooling fan would go away. i think they made the noise quieter.
hope it works for you.
thingiverse
free
Creality/CR-10/Ender3 Titan Aero part cooling fan shroud by SecretAgent
...
remixed to fit creality type printers. using with mount by cnckitchen: https://www.thingiverse.com/thing:2756792
fits 40mm fan.
thingiverse
free

SV01 Fan Shroud
...ing to the frame
1 x m3-20 (you could use 18 also) for attaching the fan
1 x m3 hex nut to go with the m3-20
hope you enjoy this.
thingiverse
free

Creality CR-10 & Ender3 Type Extruder Mount for Anet A8 and Alike!
...ed two 6mmx6mm square holes in the side of the fan shroud under the cooling fan support to let wires pass under the mount easier.
grabcad
free

Zack's Aquila Hotend Shroud R1
...for cr touch only)
2x m3 heat set inserts (for cr touch only)
(0x, 2x, 0r 4x) m3 washers for cr touch spacing (for cr touch only)
thingiverse
free
Creality cr-10 fan by nuggyblake
...).
i updated this to a better version below with a focussed air flow toward nozzle tip.
https://www.thingiverse.com/thing:2573333
thingiverse
free
CR-10 E3D V6 mount Dual FAN Mesh by chips777
... socket head bolts (please use treadlock glue for the extruder carrier)
2x m4 socket head bolts
2x m4 washers
2x m4 x 20mm screws
Lewtwo
thingiverse
free

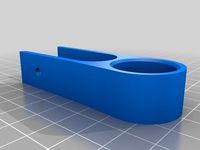
"Hanger" for 3/4 Conduit by lewtwo
... 3/4 conduit by lewtwo
thingiverse
simple hanger for 3/4 inch conduit. this is intended to hang the conduit under a 1 x ? board.
thingiverse
free
Hanger for 1/2 PVC Conduit by lewtwo
...onduit along the bottom edge of a 1x2. this should be a loose (not sloppy) fit as there is an extra 1/2mm on the inside diameter.
thingiverse
free

18650 Battery Size Gauge by lewtwo
...requires about eight hours on ender-2 printer.
update:
i needed bit more range so i created one with 16 holes from 18.00 to 18.75
thingiverse
free
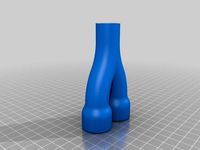
"Y" Split for 1/2 inch conduit by lewtwo
...extrusion factor.
this is a variation of my design for a “s” bend for 1/2 inch conduit: https://www.thingiverse.com/thing:2958303
thingiverse
free

"S" Bend for 1/2 inch conduit by lewtwo
...ps://www.thingiverse.com/thing:2959008
"y" split for 3/4 to 1/2 inch conduit: https://www.thingiverse.com/thing:2959940
thingiverse
free

18650 Battery Frame by lewtwo
...the author and placed into the public domain by the author 10 march 2018 without any warranty expressed or implied. --- enjoy ---
thingiverse
free
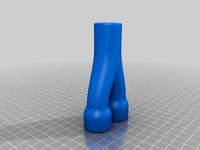
"Y" Split for 3/4 to 1/2 inch conduit by lewtwo
...extrusion factor.
this is a variation of my design for a “s” bend for 1/2 inch conduit: https://www.thingiverse.com/thing:2958303
thingiverse
free
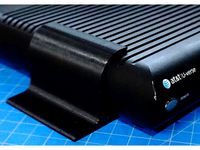
Wall Mount Bracket: At&T Set Top Box by lewtwo
...iles are the exclusive work product of the author, lewis balentine, who has placed them in the public domain on 17 february 2018.
thingiverse
free
Creality Ender-2 Base Plate by lewtwo
... the author and placed into the public domain by the author 5 april 2018 without any warranty expressed or implied. --- enjoy ---
thingiverse
free
Cooling Fan Shroud for Creality Ender-2 by lewtwo
...product of the author and placed into the public domain by the author 22 february 2018 without any warranty expressed or implied.
Shroud
3d_export
$500

Centrifugal pump volute casing with impeller
...casing with impeller 3dexport volute casing with impeller and shroud ...
3d_export
$35
The Holy Face base relief 3D Model
...the holy face base relief 3d model 3dexport shroud turin veronica veronica's veil gospel ikon jesus holy face...
3d_export
$20
present car cloth presentation transport transportation shape concepts show celebration cover showro
...transportation shape concepts show celebration cover showroom covered revealin shroudd cover covering tarp draped fabric cloth showroom reveal revealing...
3d_export
$5

Lockheed F-117 Nighthawk lowpoly stealth bomber
...initial operating capability status in 1983. the aircraft was shroudd in secrecy until it was revealed to the public...
3d_export
$49

kriss vector gen 2 sub-d
...rear flip sight.<br>- vector ejection port.<br>- vector crb square shroud / 16"" sliencer.<br>- ds150 stock.<br>- .ma (maya 2020 ascii)<br>-...
3d_export
$10

vichy dining table
...in oak, sycamore and walnut marquetry.<br>even if the restaurant shroud the vichy in a long table cloth, two slender...
3d_export
$500

us navy pcu sterett ddg-104 arleigh burke class destroyer flight iia max
...the position has been shifted.<br>q. where are the exhaust shroud for the stacks?<br>a. since ddg-89, the exhaust system was...
thingiverse
free

shroud by samshay317
...shroud by samshay317
thingiverse
shroud
thingiverse
free

Fan Shroud
...fan shroud
thingiverse
this is a fan shroud for a 140mm fan
thingiverse
free
40mm fan shroud
...40mm fan shroud
thingiverse
40mm fan shroud
Creality
turbosquid
$7

filament roller single print creality
...del filament roller single print creality for download as stl on turbosquid: 3d models for games, architecture, videos. (1619309)
3d_export
free

Creality ender enclosure webcam mount
...e creality enclosure. sure is better than a tripod. change it up if it helps. i printed pla with 50% infill on my dd ender 3 pro.
3d_export
free

ender 3 frame cavity covers
...3 inserts,<br>made these inserts for the framework of the creality ender 3 - makes it look a bit more...
3d_export
$42

excavator
...width is the original size. 0.12 mm printing surface creality ender-5...
3d_export
free

ender 3 3d print bed clips
...glass bed + normal aluminium bed frame of the creality ender 3 = 6mm (b) these clips are designed...
3d_export
free

ender 3 enclosure corners
...that i could build my enclosure frame for my creality ender 3 - so i printed them in a...
thingiverse
free

Toolbox Creality
...ingiverse
this is a toolbox for tools that comes with creality printers, with a guide to cut capricorn ptfe with a cutter blade.
thingiverse
free

Creality Hotend Plate
... from creality themselves as the ender 3 is open source. this means i did not create this design and all credit goes to creality.
thingiverse
free
Creality Cat by alexander125
...creality cat by alexander125
thingiverse
this is the cat that comes on the sd card for all creality 3d printers.
thingiverse
free

Creality Dog by alexander125
...creality dog by alexander125
thingiverse
this is the dog that comes on the sd card for all creality 3d printers.
Another
turbosquid
$15
ANOTHER BATHROOM
...quid
royalty free 3d model another bathroom for download as on turbosquid: 3d models for games, architecture, videos. (1171460)
turbosquid
$24

Another World
... available on turbo squid, the world's leading provider of digital 3d models for visualization, films, television, and games.
turbosquid
$39
Another Red Curb
...ee 3d model another red curb for download as ma, obj, and fbx on turbosquid: 3d models for games, architecture, videos. (1182913)
turbosquid
$9
Another Deberenn Sofa
...model another deberenn sofa for download as max, obj, and fbx on turbosquid: 3d models for games, architecture, videos. (1497850)
turbosquid
$2

Another picnic table
... model another picnic table for download as max, obj, and fbx on turbosquid: 3d models for games, architecture, videos. (1426381)
turbosquid
$15

door to another world
...oor to another world for download as 3ds, obj, fbx, and blend on turbosquid: 3d models for games, architecture, videos. (1334842)
3d_export
free

another hacksaw
...another hacksaw
3dexport
. . . 3d model of a hacksaw. 3d model files: - 3ds max 2017 (scanline) - obj (low poly) . . .
turbosquid
$12
Another Country Side Table
... another country side table for download as max, obj, and fbx on turbosquid: 3d models for games, architecture, videos. (1496053)
turbosquid
$29
Furniture - "Another country" modern sofa
...another country" modern sofa for download as obj and c4d on turbosquid: 3d models for games, architecture, videos. (1186189)
3d_ocean
$29

Another Tron Light Cycle with the Rider and Trail
...ther tron light cycle with the rider and the light trail. high quality 3d model,all the materials and lights are included. the...
Yes
3ddd
$1

Статуэтка YES-NO
...статуэтка yes-no
3ddd
статуэтка
фигура двух сторонняя yes-no настольная
design_connected
$16

Dr. Yes
...dr. yes
designconnected
kartell dr. yes computer generated 3d model. designed by starck, philippe.
design_connected
$13
Say Yes Pendant
...say yes pendant
designconnected
baxter say yes pendant computer generated 3d model. designed by studio pepe.
turbosquid
$10

DA-YE 10x19x450
...id
royalty free 3d model da-ye 10x19x450 for download as fbx on turbosquid: 3d models for games, architecture, videos. (1623954)
turbosquid
$20

Dr.-Yes-chair
... available on turbo squid, the world's leading provider of digital 3d models for visualization, films, television, and games.
3d_export
$10

Ring Yes 3D Model
...ring yes 3d model
3dexport
ring yes 3d model wintik174 96485 3dexport
humster3d
$75

3D model of YES! Roadster 3.2 2006
...ailed 3d model of yes! roadster 3.2 2006 in various file formats. all our 3d models were created maximally close to the original.
3ddd
$1

Kartell - Dr Yes Chair - by - Philippe Starck
...ржания в чистоте и обширной цветовой гаммой, предлагаемой потребителю.
материалы
модифицированный, цветной,
цельный полипропилен
3ddd
free

Комплект стул, тумбочка и светильник "YES"
... торшер
сборник двух стульев, тумбочки и светильника. придаст вашему интерьеру креативность и вдохновения.
3d_export
$1

wall molding
...wall molding version: 3ds max 2013 rendrer: vray3 xform: yes lowpoly: yes export: yes maps:...
Fan
3d_export
$5

fan
...fan
3dexport
fan 3d model, table fan, fan, electric fan, ventilator
archibase_planet
free

Fan
...fan
archibase planet
fan large fan
fan out n260707 - 3d model for interior 3d visualization.
archibase_planet
free

Fan
...fan
archibase planet
fan ceiling fan ventilator
fan stealth n300615 - 3d model (*.gsm+*.3ds) for interior 3d visualization.
3d_export
$15

fan
...fan
3dexport
is an ancient fan
3ddd
$1

Fan-C-Fan by marco gallegos
...n-c-fan by marco gallegos
3ddd
вентилятор , marco gallegos
fan-c-fan by marco gallegos
3d_export
$10

fan
...fan
3dexport
a detailed fan designed for home or space blowing is now available for only 19.99!
turbosquid
$1

Fan
...fan
turbosquid
free 3d model fan for download as on turbosquid: 3d models for games, architecture, videos. (1427865)
turbosquid
$14

Fan
...fan
turbosquid
royalty free 3d model fan for download as on turbosquid: 3d models for games, architecture, videos. (1415642)
3ddd
$1

Светильник Fan
...светильник fan
3ddd
fan , italamp
светильник fan, производитель italamp
turbosquid
$25

Fan
...fan
turbosquid
royalty free 3d model fan for download as c4d on turbosquid: 3d models for games, architecture, videos. (1483246)
One
turbosquid
$2
one plus one
... available on turbo squid, the world's leading provider of digital 3d models for visualization, films, television, and games.
3ddd
$1
One
...one
3ddd
стул
офисный стул one
3ddd
free

one
...
palazetti one ,http://palazzetti.ca/index.php/component/virtuemart/seating/armchairs-lounges/one-chair-detail?itemid=0
turbosquid
$35

One A
... available on turbo squid, the world's leading provider of digital 3d models for visualization, films, television, and games.
turbosquid
free

One
... available on turbo squid, the world's leading provider of digital 3d models for visualization, films, television, and games.
3ddd
$1
Стул One
...стул one
3ddd
one , magis
кресло magis s.p.a , one
3ddd
$1
Стул One
...стул one
3ddd
one , magis
кресло one chair (4star), magis s.p.a.
3d_export
$20

xbox one
...xbox one
3dexport
xbox one
3ddd
$1

xbox one
... консоль , джойстик
xbox one + kinect + gamepad
3ddd
free

One
...nstantin grcic
артикул ct-284 (cosmorelax.ru)
размер l36xw41xh82.5, sh 77cm
цвет черный, красный
материал алюминий
вес 2,5 кг