Thingiverse

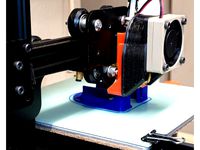
Creality Ender-2 Base Plate by lewtwo
by Thingiverse
Last crawled date: 3 years ago
Revised 8 April 2018
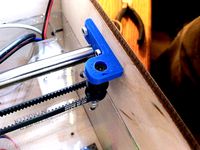
My problem with the “Y” AXIS turned out to be the location of the “Y” end stop sensor switch. I had it in the top slot of the “Y” AXIS extrusion. It belongs in the bottom slot. It is the back wheel of the carriage that is supposed to trigger the micro-switch. This is a complete rework. My mistake, my ignorance, my apologies.
Moving on ....
I still want to put a larger base on the bottom because my printer sits on top of four vibration
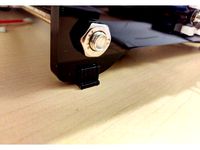
dampening pads to reduce the noise (around 25 db at this point) and is just a bit tipsy when I hang a full spool of filament. In working on this project I managed to strip the socket of one of the 5mm button head mounting screws. In order to remove that screw I had to totally disassemble the entire printer down to the bare acrylic base plate. The add on board will also allow enough thickness to replace the 5mm button head screws with proper 5mm x 10mm long socket head cap screws. It should be obvious but never assume: the two drawing are from the bottom looking up.
I am attaching a piece of 8mm thick compressed bamboo plywood (3 plies). I selected three points for 5mm mounting bolts and use 5mm diameter by 8mm long “T” nuts in the plywood. This allows me to bolt the printer to the “add-on” board from the top. The clearance holes in the plywood will be “match drilled” to the acrylic plate. The location of these pads was chosen to allow the printer to sit on top of a wooden box that houses the power supply. I got the anti-vibration pads via Amazon.
Vibration pads, 1-1/2 diameter x 1/2 inches: https://www.amazon.com/dp/B019O5OUUM
5mm x 8mm long "T" nuts: https://www.amazon.com/dp/B075ZYYFFB
I am old, senile (as demonstrated by mistakes on the first version) and must be going blind as well. I made this as close as I could measure but I certainly would not bet the farm on it. I included the PCB holes but I do not have enough confidence in them to include full dimensions.
All of the referenced files are the exclusive work product of the author and placed into the Public Domain by the author 5 April 2018 without any warranty expressed or implied. --- Enjoy ---
My problem with the “Y” AXIS turned out to be the location of the “Y” end stop sensor switch. I had it in the top slot of the “Y” AXIS extrusion. It belongs in the bottom slot. It is the back wheel of the carriage that is supposed to trigger the micro-switch. This is a complete rework. My mistake, my ignorance, my apologies.
Moving on ....
I still want to put a larger base on the bottom because my printer sits on top of four vibration
dampening pads to reduce the noise (around 25 db at this point) and is just a bit tipsy when I hang a full spool of filament. In working on this project I managed to strip the socket of one of the 5mm button head mounting screws. In order to remove that screw I had to totally disassemble the entire printer down to the bare acrylic base plate. The add on board will also allow enough thickness to replace the 5mm button head screws with proper 5mm x 10mm long socket head cap screws. It should be obvious but never assume: the two drawing are from the bottom looking up.
I am attaching a piece of 8mm thick compressed bamboo plywood (3 plies). I selected three points for 5mm mounting bolts and use 5mm diameter by 8mm long “T” nuts in the plywood. This allows me to bolt the printer to the “add-on” board from the top. The clearance holes in the plywood will be “match drilled” to the acrylic plate. The location of these pads was chosen to allow the printer to sit on top of a wooden box that houses the power supply. I got the anti-vibration pads via Amazon.
Vibration pads, 1-1/2 diameter x 1/2 inches: https://www.amazon.com/dp/B019O5OUUM
5mm x 8mm long "T" nuts: https://www.amazon.com/dp/B075ZYYFFB
I am old, senile (as demonstrated by mistakes on the first version) and must be going blind as well. I made this as close as I could measure but I certainly would not bet the farm on it. I included the PCB holes but I do not have enough confidence in them to include full dimensions.
All of the referenced files are the exclusive work product of the author and placed into the Public Domain by the author 5 April 2018 without any warranty expressed or implied. --- Enjoy ---
Similar models
thingiverse
free

CoreXY Z Axis Top for 8mm lead screw by Sean_c_roberts
...provides a way to remove the z-axis 6mm rods (for maintenance or whatever) without having to remove the top plate from the frame.
thingiverse
free

Thumb wheel, 4mm Socket head screw by mikej_w
...head of a socket screw. i use this for the z-axis adjustment on my printer. i have a lot better control over the first layer now.
thingiverse
free

Down Holder for Geeetech Prusa i3 stabilisers by agentsmith1612
...of 12,4mm long, the head 8mm diameter and the thread has diameter of 6,3 mm.
feel free to ask questions or to modify the holders.
thingiverse
free

Dampening Pad Silicone Mold for 3D Printer by sciguy987
...ad cap screws to hold it on to the 2020 aluminum extrusion frame.
here is the recipe: https://www.youtube.com/watch?v=7fwyta5r2mw
thingiverse
free

Machine Feet (50x50x20, 40mm hole spacing) by hesperaux
...zon.com/du-bro-514-protective-foam-rubber/dp/b0006natdy/ref=sr_1_2?ie=utf8&qid=1505606380&sr=8-2&keywords=du-bro+foam
thingiverse
free
HICTOP Vibration Damper Feet by Tsu01
...educed noise and vibrations onto my desk and have eliminated my printer almost walking off the desk after a long overnight print.
thingiverse
free
Support bracket for Y idler on ToM by tomlombardi
...
also, i'm not implying that this is a defect in mbis design, the acrylic may be happy with this for years without problems.
thingiverse
free
Adjustable XY End stop for Ender 2 by BBop2
...mum out of printing area.
you need to cut a m3 thread in the y-plate for the pcb.
support no
wall 5mm
top & bottom layers 5mm
thingiverse
free
Reach 3D setup tools by jwass
...ugh i would have to think that with bed leveling it would be close enough as it got my column to within .015" over 13".
thingiverse
free

I3 Printer Anti-vibration by Noumcreation
...um)
a couple of m4x15 screw and nuts
some wood screw to fix the base plate
fusion 360 file attached, feel free to modify/use it !
Lewtwo
thingiverse
free

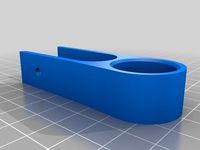
"Hanger" for 3/4 Conduit by lewtwo
... 3/4 conduit by lewtwo
thingiverse
simple hanger for 3/4 inch conduit. this is intended to hang the conduit under a 1 x ? board.
thingiverse
free
Hanger for 1/2 PVC Conduit by lewtwo
...onduit along the bottom edge of a 1x2. this should be a loose (not sloppy) fit as there is an extra 1/2mm on the inside diameter.
thingiverse
free

18650 Battery Size Gauge by lewtwo
...requires about eight hours on ender-2 printer.
update:
i needed bit more range so i created one with 16 holes from 18.00 to 18.75
thingiverse
free
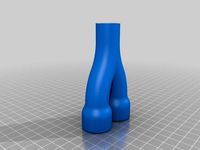
"Y" Split for 1/2 inch conduit by lewtwo
...extrusion factor.
this is a variation of my design for a “s” bend for 1/2 inch conduit: https://www.thingiverse.com/thing:2958303
thingiverse
free

"S" Bend for 1/2 inch conduit by lewtwo
...ps://www.thingiverse.com/thing:2959008
"y" split for 3/4 to 1/2 inch conduit: https://www.thingiverse.com/thing:2959940
thingiverse
free

18650 Battery Frame by lewtwo
...the author and placed into the public domain by the author 10 march 2018 without any warranty expressed or implied. --- enjoy ---
thingiverse
free
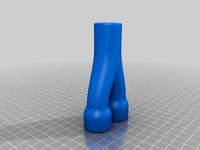
"Y" Split for 3/4 to 1/2 inch conduit by lewtwo
...extrusion factor.
this is a variation of my design for a “s” bend for 1/2 inch conduit: https://www.thingiverse.com/thing:2958303
thingiverse
free
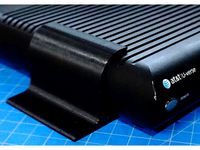
Wall Mount Bracket: At&T Set Top Box by lewtwo
...iles are the exclusive work product of the author, lewis balentine, who has placed them in the public domain on 17 february 2018.
thingiverse
free
Cooling Fan Shroud for Creality Ender-2 by lewtwo
...product of the author and placed into the public domain by the author 22 february 2018 without any warranty expressed or implied.
Creality
turbosquid
$7

filament roller single print creality
...del filament roller single print creality for download as stl on turbosquid: 3d models for games, architecture, videos. (1619309)
3d_export
free

Creality ender enclosure webcam mount
...e creality enclosure. sure is better than a tripod. change it up if it helps. i printed pla with 50% infill on my dd ender 3 pro.
3d_export
free

ender 3 frame cavity covers
...3 inserts,<br>made these inserts for the framework of the creality ender 3 - makes it look a bit more...
3d_export
$42

excavator
...width is the original size. 0.12 mm printing surface creality ender-5...
3d_export
free

ender 3 3d print bed clips
...glass bed + normal aluminium bed frame of the creality ender 3 = 6mm (b) these clips are designed...
3d_export
free

ender 3 enclosure corners
...that i could build my enclosure frame for my creality ender 3 - so i printed them in a...
thingiverse
free

Toolbox Creality
...ingiverse
this is a toolbox for tools that comes with creality printers, with a guide to cut capricorn ptfe with a cutter blade.
thingiverse
free

Creality Hotend Plate
... from creality themselves as the ender 3 is open source. this means i did not create this design and all credit goes to creality.
thingiverse
free
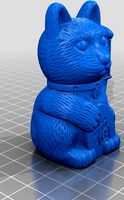
Creality Cat by alexander125
...creality cat by alexander125
thingiverse
this is the cat that comes on the sd card for all creality 3d printers.
thingiverse
free

Creality Dog by alexander125
...creality dog by alexander125
thingiverse
this is the dog that comes on the sd card for all creality 3d printers.
Ender
3ddd
$1

Enders / Elegance
...enders / elegance
3ddd
обогреватель
уличный газовый обогреватель enders elegance
высота: 2200 мм
3d_export
free
ender 3 frame cavity covers
... of the creality ender 3 - makes it look a bit more attractive it just slides into the open channels of the aluminium framework
turbosquid
$1

pen support for ender 3
...y free 3d model pen support for ender 3 for download as blend on turbosquid: 3d models for games, architecture, videos. (1611282)
3d_ocean
$9

Ender Dragon Minecraft
...ojang obj poly videogames
ender dragon minecraft created with cinema 4d r15 formats included: max 2013 – fbx 2012 – c4d r15 – obj
3d_export
free
Creality ender enclosure webcam mount
...e creality enclosure. sure is better than a tripod. change it up if it helps. i printed pla with 50% infill on my dd ender 3 pro.
3d_export
free
ender 3 enclosure corners
...er corners and 4 upper corners, using 25mmx25mm angled aluminium pieces that gets covered on inside of the frame with plexiglass
3d_export
free
ender 3 3d print bed clips
...ed + normal aluminium bed frame of the creality ender 3 = 6mm (b) these clips are designed for glass plate + aluminium bed = 4mm
3d_export
$5

GRUMPY CAT
...grumpy cat 3dexport grumpy cat to print in ender ...
3d_export
$5

Logs fire
...with one multi material for corona and vray r ender. albedo, normal, uvmap, roughness format jpg 4096x4096 models:...
3d_export
$42
excavator
...is the original size. 0.12 mm printing surface creality ender5 ...
Plate
archibase_planet
free

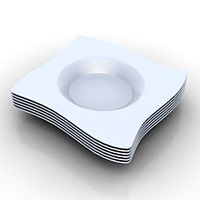
Plates
...plates
archibase planet
plates and dishes plate
plates - 3d model (*.gsm+*.3ds) for interior 3d visualization.
3d_export
$5

plate
...plate
3dexport
plate
archibase_planet
free
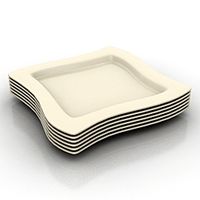
Plates
...plates
archibase planet
plates and dishes plate kitchen ware
plates - 3d model (*.gsm+*.3ds) for interior 3d visualization.
archibase_planet
free
Plates
...plates
archibase planet
plate plates and dishes crockery
plates 2 - 3d model (*.gsm+*.3ds) for interior 3d visualization.
archibase_planet
free

Plate
...plate
archibase planet
dinner-plate plate kitchen ware
plate n070808 - 3d model (*.gsm+*.3ds) for interior 3d visualization.
3d_export
$6

plate
...plate
3dexport
design of plate
3d_export
$5

plate
...plate
3dexport
plate lowpoly
archibase_planet
free
Plates
...plates
archibase planet
plate dish kitchen-ware
plate - 3d model for interior 3d visualization.
3ddd
$1

Plates
...plates
3ddd
полка , тарелка
african plates
archibase_planet
free
Plate
...plate
archibase planet
plate kitchen ware
plate - 3d model (*.gsm+*.3ds) for interior 3d visualization.
Base
archibase_planet
free
Base
...base
archibase planet
base column column base
base 1 - 3d model (*.gsm+*.3ds) for interior 3d visualization.
archibase_planet
free

Base
...base
archibase planet
base column base column
base 5 - 3d model (*.gsm+*.3ds) for interior 3d visualization.
archibase_planet
free
Base
...base
archibase planet
base column column base
base 7 - 3d model (*.gsm+*.3ds) for interior 3d visualization.
archibase_planet
free
Base
...base
archibase planet
base column column base
base 2 - 3d model (*.gsm+*.3ds) for interior 3d visualization.
archibase_planet
free

Base
...base
archibase planet
base column column base
base 3 - 3d model (*.gsm+*.3ds) for interior 3d visualization.
archibase_planet
free
Base
...base
archibase planet
base column column base
base 4 - 3d model (*.gsm+*.3ds) for interior 3d visualization.
archibase_planet
free
Base
...base
archibase planet
base column base column
base 6 - 3d model (*.gsm+*.3ds) for interior 3d visualization.
archibase_planet
free
Base
...base
archibase planet
foundation base
column base ionic - 3d model (*.gsm+*.3ds) for interior 3d visualization.
archibase_planet
free
Base
...base
archibase planet
foundation base
column base tuscan - 3d model (*.gsm+*.3ds) for interior 3d visualization.
design_connected
$18
Base
...base
designconnected
tom dixon base computer generated 3d model. designed by dixon, tom.
2
design_connected
$11

No 2
...no 2
designconnected
sibast no 2 computer generated 3d model. designed by sibast, helge.
turbosquid
$6

Cliff Rock 2-2
...uid
royalty free 3d model cliff rock 2-2 for download as obj on turbosquid: 3d models for games, architecture, videos. (1619161)
turbosquid
$29

Book variation 2 2
...3d model book variation 2 2 for download as max, obj, and fbx on turbosquid: 3d models for games, architecture, videos. (1366868)
turbosquid
$22

Classic baluster (2) (2)
...assic baluster (2) (2) for download as max, obj, fbx, and stl on turbosquid: 3d models for games, architecture, videos. (1483789)
turbosquid
$99

Smilodon 2 Pose 2
... available on turbo squid, the world's leading provider of digital 3d models for visualization, films, television, and games.
turbosquid
$20

Barrel Barricade 2-2
... available on turbo squid, the world's leading provider of digital 3d models for visualization, films, television, and games.
turbosquid
$6

Wall Trophy (2) (2)
... available on turbo squid, the world's leading provider of digital 3d models for visualization, films, television, and games.
turbosquid
free

Tire label 2 of 2
... available on turbo squid, the world's leading provider of digital 3d models for visualization, films, television, and games.
3ddd
$1

Кровать, 2 тумбочки, 2 светильника
...кровать, 2 тумбочки, 2 светильника
3ddd
кровать, 2 тумбочки, 2 светильника
нормальное качество
формат 3ds max
без текстур
3ddd
free

Кровать, 2 тумбочки, 2 светильника
...кровать, 2 тумбочки, 2 светильника
3ddd
кровать, 2 тумбочки, 2 светильника
нормальное качество
формат 3ds max
без текстур