Thingiverse
Creality-Compatible Filament Spool Load Cell Bracket and Spindle by erudioCAD
by Thingiverse
Last crawled date: 3 years ago
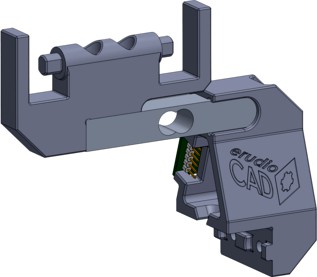
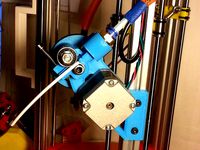
This is an adapter to carry an HX711 breakout board and a (relatively) standard 5 kg load cell that you can get for <$10 on Amazon on the standard T-slot top bar on Creality printers. It needs some fasteners, and you'll have to crimp on some connectors to the leads from the load cell if you want to be able to swap things out, but by and large it's pretty easy to set up. Additionally, you will need this Octoprint plugin, or at least that's what I use, to read this data.
Requires
I assumed using standard SHCS or Socket Head Cap Screws for all fasteners here.
M[fastener diameter]-[fastener length], both in millimeters and assuming you're using the standard rather than the fine pitch for the given size.
Fasteners to attach spindle to load cell
a. 2x M4-20
b. 2x M4 washers (to make sure you don't break the printed spindle)
Fasteners to attach load cell to bracket
a. 2x M5-14 (max length 16 mm)
b. 2x M5 washers (probably not necessary but spreads out the load nicely, this area is high load too so why not)
Fasteners to attach HX711 to bracket
a. 2x M3-12 (10 mm also acceptable, but any shorter and you won't get enough thread engagement)
b. 2x M3 nuts (sit in the pockets inside the bracket, no printed threads or interference fit holes here!)
Fasteners to attach the bracket to the frame
a. M4-10 (12 mm might work here, but it's cutting it close with the spacing inside to make sure the bolt doesn't run into the T-slot extrusion)
b. M4 washers (keep stress on the printed bracket low)
c. M4 T-nuts (lock the bracket into the T-slot extrusion, might not be necessary but definitely a good idea)
Bearings for the Spindle (probably not necessary but I like them and I designed for them so why not)
a. 2x 608 bearings
Dupont pin headers and connectors
a. 1x 6-pin straight header (board-side load cell connection)
b. 1x 6-pin connector (attaches to load cell wires)
c. 1x 4-pin right-angle header (nicety, keeps the wires close to the back of the board as shown in the images above)
d. 1x 4-pin connector (connector to load cell from Raspberry Pi)
e. 2x 2-pin connector (connector to Raspberry Pi pairs of pins for power and data from load cell amplifier)
If you don't have T-nuts handy (and I know I didn't) you can print pretty much anyone's design and it should work well enough.
Features
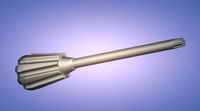
It has an interference fit with the t-slot thanks to those little tabs on the interior side so it might not even need fasteners to attach it, but I use them anyway to make sure stuff doesn't fall apart. There are crush ribs in the cavity where the load cell fits as well to keep the fit fairly loose but tight enough to keep things from sliding around too much while installing fasteners. I think having the amplifier attached is a nice touch, keeps things nice and tidy. The spindle has integrated bearing mounts of course, and that's been designed to be friendly to printers (no curved bottoms: flat faces have been cut to make it work nicely with supports). Really, the biggest upside is that you don't have to use those startlingly unreliable filament runout sensors. I always wondered what the advantage was of your printer stopping when it ran out of filament when... it was already going to do that anyway? Maybe if you want to swap in a new spool, but I've never had luck with that. Better I think to know exactly how much filament you have left.
However, do note that my load cell might be malfunctioning in the screenshot above, whoops!
Requires
I assumed using standard SHCS or Socket Head Cap Screws for all fasteners here.
M[fastener diameter]-[fastener length], both in millimeters and assuming you're using the standard rather than the fine pitch for the given size.
Fasteners to attach spindle to load cell
a. 2x M4-20
b. 2x M4 washers (to make sure you don't break the printed spindle)
Fasteners to attach load cell to bracket
a. 2x M5-14 (max length 16 mm)
b. 2x M5 washers (probably not necessary but spreads out the load nicely, this area is high load too so why not)
Fasteners to attach HX711 to bracket
a. 2x M3-12 (10 mm also acceptable, but any shorter and you won't get enough thread engagement)
b. 2x M3 nuts (sit in the pockets inside the bracket, no printed threads or interference fit holes here!)
Fasteners to attach the bracket to the frame
a. M4-10 (12 mm might work here, but it's cutting it close with the spacing inside to make sure the bolt doesn't run into the T-slot extrusion)
b. M4 washers (keep stress on the printed bracket low)
c. M4 T-nuts (lock the bracket into the T-slot extrusion, might not be necessary but definitely a good idea)
Bearings for the Spindle (probably not necessary but I like them and I designed for them so why not)
a. 2x 608 bearings
Dupont pin headers and connectors
a. 1x 6-pin straight header (board-side load cell connection)
b. 1x 6-pin connector (attaches to load cell wires)
c. 1x 4-pin right-angle header (nicety, keeps the wires close to the back of the board as shown in the images above)
d. 1x 4-pin connector (connector to load cell from Raspberry Pi)
e. 2x 2-pin connector (connector to Raspberry Pi pairs of pins for power and data from load cell amplifier)
If you don't have T-nuts handy (and I know I didn't) you can print pretty much anyone's design and it should work well enough.
Features
It has an interference fit with the t-slot thanks to those little tabs on the interior side so it might not even need fasteners to attach it, but I use them anyway to make sure stuff doesn't fall apart. There are crush ribs in the cavity where the load cell fits as well to keep the fit fairly loose but tight enough to keep things from sliding around too much while installing fasteners. I think having the amplifier attached is a nice touch, keeps things nice and tidy. The spindle has integrated bearing mounts of course, and that's been designed to be friendly to printers (no curved bottoms: flat faces have been cut to make it work nicely with supports). Really, the biggest upside is that you don't have to use those startlingly unreliable filament runout sensors. I always wondered what the advantage was of your printer stopping when it ran out of filament when... it was already going to do that anyway? Maybe if you want to swap in a new spool, but I've never had luck with that. Better I think to know exactly how much filament you have left.
However, do note that my load cell might be malfunctioning in the screenshot above, whoops!
Similar models
thingiverse
free

Filament Weight measure using HX711 Load Cell with Spool holder by ADMC
...ink to load cell weight sensor hx711 module:https://www.aliexpress.com/item/32949395083.html?spm=a2g0s.9042311.0.0.27424c4d4utje7
thingiverse
free

Filler Guide with Integrated Loadcell by jas6191
...arm of the ender 3. the pin that holds the board in this case is a tight fit and i had to file the opening on the case slightly
thingiverse
free

Filament Holder W/Scale by dieki
...l, changing the reading.
nonetheless in my experiments i've found it to be accurate +/- 40g, which is more than good enough.
thingiverse
free

Load Cell Spool Holder by Porkybutt
... style spool holder mount, if this gets off the ground i will design other styles as i am sure others will run with the idea too.
thingiverse
free

Dipole Balun by phcsys
...m4 35mm threaded rod (i use brass)
6x m4 hex nut
2x m4 wing nut
some lock washers
4x m3x8 screws (may differ)
1x n-type connector
grabcad
free

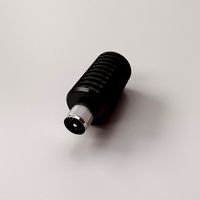
Load cell sensor 5 kg
...m * 13mm * 13mm. m4 and m5 threads
pin assignment when connected to the hx711 module.
white a-, green a +, red e +, black e-
thingiverse
free
My version of YRUDS bowden extruder for RichRap's 3DR delta by GigaBajcior
...-rubber-timing-belt-65-tooth-b195-3m-05bng.htm
pipe connector:
for od 6mm id 4mm pipe (i have connectors with 13mm od thread)
thingiverse
free

Filament Guide - 2020 Extrusion Mounted by mnijph
...tfe connector or
1x pc4-m10 ptfe connector
note: if you have a dd setup, this thing is a handy connector mount for the other end.
thingiverse
free

Belt tensioner pulley for Tevo Tarantula by Banholm
...e belt tensioner to 2040 extrusion with m4x10 screws and m4 t-nuts.
use the turnwheel to adjust the belt tension.
start printing!
thingiverse
free

Filament Scale by mcgeehd
... weight
library dependencies (for platformio) are:
hx711 by bogde
esp8266_ssd1306 by daniel eichhorn
onebutton by matthias hertel
Erudiocad
thingiverse
free

Beer Bottle Holster by erudioCAD
...in. streamed here: https://youtu.be/uy5benpkv7s
let me know what you think, and post your makes if you make one yourself, thanks!
thingiverse
free

Hobie Cat Trampoline Cupholder by erudioCAD
...to a collection. i'm especially curious to see how the four overhangs by the nut pockets fare on other people's printers.
thingiverse
free

TS100 Hip Flask Case by erudioCAD
...o print them just fine, though i am running a petsfang v2 and have pretty well tuned temperatures for short bridges of that sort.
thingiverse
free

Pinecil Flask Case (TS100 Flask Case Revised) by ReSummit
...but i had a pinecil instead. therefore, i adjusted erudiocad#39;s design a bit to hold a pinecil as well...
Spindle
3d_export
$5

simple spindle
...simple spindle
3dexport
simple spindle
design_connected
$7
Spindle shade
...spindle shade
designconnected
rothschild&bickers spindle shade computer generated 3d model.
design_connected
$9

Spindle Table
...spindle table
designconnected
ligne roset spindle table computer generated 3d model. designed by ascalon, brad.
design_connected
free

Spindle Clock
...spindle clock
designconnected
vitra spindle clock free models computer generated 3d model. designed by george nelson.
turbosquid
$10

Spindle Table
... available on turbo squid, the world's leading provider of digital 3d models for visualization, films, television, and games.
turbosquid
$9

DVD Spindle
... available on turbo squid, the world's leading provider of digital 3d models for visualization, films, television, and games.
turbosquid
$9
Spindle-chair
... available on turbo squid, the world's leading provider of digital 3d models for visualization, films, television, and games.
3d_export
$15

Spike Spindle 3D Model
...s procession spindled spindling spiking spearing spear document bill hole paperwork
spike spindle 3d model firdz3d 90192 3dexport
turbosquid
$15

Nelson Spindle Clock
... available on turbo squid, the world's leading provider of digital 3d models for visualization, films, television, and games.
turbosquid
$2

Vitra Spindle Clock
... available on turbo squid, the world's leading provider of digital 3d models for visualization, films, television, and games.
Creality
turbosquid
$7

filament roller single print creality
...del filament roller single print creality for download as stl on turbosquid: 3d models for games, architecture, videos. (1619309)
3d_export
free

Creality ender enclosure webcam mount
...e creality enclosure. sure is better than a tripod. change it up if it helps. i printed pla with 50% infill on my dd ender 3 pro.
3d_export
free

ender 3 frame cavity covers
...3 inserts,<br>made these inserts for the framework of the creality ender 3 - makes it look a bit more...
3d_export
$42

excavator
...width is the original size. 0.12 mm printing surface creality ender-5...
3d_export
free

ender 3 3d print bed clips
...glass bed + normal aluminium bed frame of the creality ender 3 = 6mm (b) these clips are designed...
3d_export
free

ender 3 enclosure corners
...that i could build my enclosure frame for my creality ender 3 - so i printed them in a...
thingiverse
free

Toolbox Creality
...ingiverse
this is a toolbox for tools that comes with creality printers, with a guide to cut capricorn ptfe with a cutter blade.
thingiverse
free

Creality Hotend Plate
... from creality themselves as the ender 3 is open source. this means i did not create this design and all credit goes to creality.
thingiverse
free
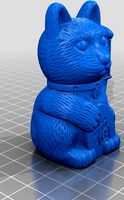
Creality Cat by alexander125
...creality cat by alexander125
thingiverse
this is the cat that comes on the sd card for all creality 3d printers.
thingiverse
free

Creality Dog by alexander125
...creality dog by alexander125
thingiverse
this is the dog that comes on the sd card for all creality 3d printers.
Cell
archibase_planet
free

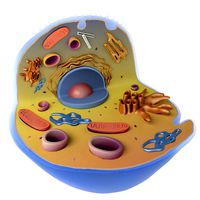
Cell
...cell
archibase planet
cage cell
cell n050510 - 3d model (*.gsm+*.3ds) for interior 3d visualization.
3d_export
$14

Blood Cells
...poiesis and found in the blood. major types of blood cells include; red blood cells (erythrocytes) white blood cells (leukocytes)
3d_export
$5

cell
...cell
3dexport
turbosquid
$89
Cell
...
royalty free 3d model cell for download as max, obj, and fbx on turbosquid: 3d models for games, architecture, videos. (1225448)
turbosquid
$19

Cell
...
royalty free 3d model cell for download as max, fbx, and obj on turbosquid: 3d models for games, architecture, videos. (1528922)
3d_ocean
$5
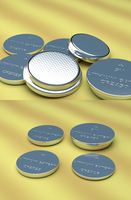
Lithium Cells
...cr2032 cr2450 lithium lithium battery lithium cell power
some lithium cells. cr2032, cr2025, cr2016, cr2450 faces: ca. 65000 each
turbosquid
$45

cell
...yalty free 3d model cell for download as ma, ma, fbx, and obj on turbosquid: 3d models for games, architecture, videos. (1650714)
3d_export
$5

Blood cells
...blood cells
3dexport
blood cells 3d model
3ddd
$1
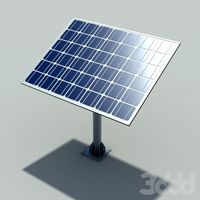
solar cell
...solar cell
3ddd
солнечная батарея
solar cell
turbosquid
$60

Cell
... available on turbo squid, the world's leading provider of digital 3d models for visualization, films, television, and games.
Spool
3ddd
$1

spool c53301
...spool c53301
3ddd
spool
spool c53301 650х350х145
turbosquid
$3

Cable Spool
...royalty free 3d model cable spool for download as max and fbx on turbosquid: 3d models for games, architecture, videos. (1457009)
turbosquid
free

Pallets and Spool
... available on turbo squid, the world's leading provider of digital 3d models for visualization, films, television, and games.
turbosquid
$10

Spool of String
...ol of string pink for download as c4d, 3ds, fbx, obj, and stl on turbosquid: 3d models for games, architecture, videos. (1647892)
3ddd
$1
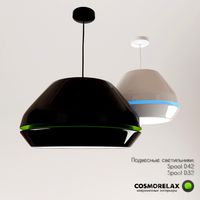
Подвесные светильники Spool
...ye/podvesnoy_svetilnik_spool_d320/ http://www.cosmorelax.ru/catalog/podvesnyye/podvesnoy_svetilnik_spool_d420/
3ddd
free

Spool 001 sofa
...spool 001 sofa
3ddd
roda
roda
collection spool
design rodolfo dordoni
dimensions:
lenght 90 cm
depth 94 cm
height 79 cm
turbosquid
$15

Roda Spool Sofa
...ee 3d model roda spool sofa for download as max, obj, and fbx on turbosquid: 3d models for games, architecture, videos. (1502650)
turbosquid
$95
wire spools 3ds
... available on turbo squid, the world's leading provider of digital 3d models for visualization, films, television, and games.
turbosquid
$20
spool of TV wire
... available on turbo squid, the world's leading provider of digital 3d models for visualization, films, television, and games.
turbosquid
$3

Simple and Fast Spool Holder
...ree 3d model simple and fast spool holder for download as stl on turbosquid: 3d models for games, architecture, videos. (1548546)
Load
3ddd
$1
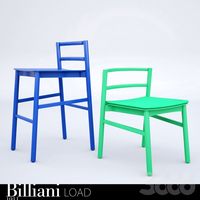
Billiani Load
...billiani load
3ddd
billiani , load
стулья load итальянской фабрики load
turbosquid
$5

Wheelbarrow loaded
...id
royalty free 3d model wheelbarrow loaded for download as on turbosquid: 3d models for games, architecture, videos. (1615308)
turbosquid
$15
Dummy Load
...odel dummy load for download as 3ds, obj, fbx, blend, and dae on turbosquid: 3d models for games, architecture, videos. (1363932)
turbosquid
$3

Load-limitroadsign
...oad-limitroadsign for download as 3ds, dae, fbx, obj, and stl on turbosquid: 3d models for games, architecture, videos. (1532902)
3d_export
$79

iveco daily loading
...iveco daily loading
3dexport
iveco daily loading 3d model. include max, obj, fbx files.
3d_export
$9

automatic loading and unloading punch
...automatic loading and unloading punch
3dexport
automatic loading and unloading punch
3d_export
$19
concrete loading ramp
...te loading ramp
3dexport
concrete loading ramp 3d model. real-time ready, multiple import formats<br>thank you for reading
turbosquid
$1
Front Load Dumpster
...free 3d model front load dumpster for download as obj and fbx on turbosquid: 3d models for games, architecture, videos. (1694510)
turbosquid
$45
AGV to Container Load
... model agv to container load for download as ma, obj, and fbx on turbosquid: 3d models for games, architecture, videos. (1589627)
turbosquid
$20

Pelican Loading Center
... available on turbo squid, the world's leading provider of digital 3d models for visualization, films, television, and games.
Compatible
turbosquid
$3

Genesis 8 Clothing 1 dForce Compatible
... available on turbo squid, the world's leading provider of digital 3d models for visualization, films, television, and games.
turbosquid
free

Genesis 8 Clothing Top 1 dForce Compatible
...nesis 8 clothing top 1 dforce compatible (2) for download as on turbosquid: 3d models for games, architecture, videos. (1217671)
turbosquid
$50
Screwdriver Latch Type CSC Torx compatible with Straumann
...sc torx compatible with straumann for download as obj and stl on turbosquid: 3d models for games, architecture, videos. (1370064)
3d_export
$9
cad compatible casual woman hand model f1p3d1v1hand
...s: stl, obj, fbx<br>models with quad-topology (1100 quads) are also included (f1p3d1v1hand_quad.obj, f1p3d1v1hand_quad.fbx)
3d_export
$38

uzaki rigify
...uzaki rigify 3dexport compatible-blender ...
3d_export
$5

cloud lowpoly 3d
...cloud lowpoly 3d 3dexport lowpoly 3d format fbx compatible with unreal and...
3d_export
$5

flower lowpoly 3d
...flower lowpoly 3d 3dexport lowpoly 3d format fbx compatible with unreal and...
3d_export
$5

rocks lowpoly 3d
...rocks lowpoly 3d 3dexport lowpoly 3d format fbx compatible with unreal and...
3d_export
$10
pots
...pots
3dexport
pots<br>modeled in blender<br>compatable with evee and cycels
3d_ocean
$95

Mr Techny
...for 3ds max 2010 and later – biped (2010 compatible and cat (2011 compatible) versions incluided. for maya 2012...
Bracket
archibase_planet
free

Bracket
...bracket
archibase planet
bracket corbel holder
bracket 1 - 3d model (*.gsm+*.3ds) for interior 3d visualization.
archibase_planet
free

Bracket
...bracket
archibase planet
bracket corbel console
bracket 5 - 3d model (*.gsm+*.3ds) for interior 3d visualization.
archibase_planet
free

Bracket
...bracket
archibase planet
corbel holder bracket
bracket 6 - 3d model (*.gsm+*.3ds) for interior 3d visualization.
archibase_planet
free

Bracket
...bracket
archibase planet
bracket corbel console
bracket 8 - 3d model (*.gsm+*.3ds) for interior 3d visualization.
archibase_planet
free

Bracket
...bracket
archibase planet
bracket corbel holder
bracket n280911 - 3d model (*.gsm+*.3ds) for interior 3d visualization.
archibase_planet
free

Bracket
...bracket
archibase planet
holder corbel bracket
bracket 9 - 3d model (*.gsm+*.3ds) for interior 3d visualization.
archibase_planet
free

Bracket
...bracket
archibase planet
corbel holder bracket
bracket 10 - 3d model (*.gsm+*.3ds) for interior 3d visualization.
archibase_planet
free

Bracket
...bracket
archibase planet
corbel console bracket
bracket 11 - 3d model (*.gsm+*.3ds) for interior 3d visualization.
archibase_planet
free

Bracket
...bracket
archibase planet
holder console bracket
bracket 12 - 3d model (*.gsm+*.3ds) for interior 3d visualization.
archibase_planet
free

Bracket
...bracket
archibase planet
bracket corbel holder
bracket 13 - 3d model (*.gsm+*.3ds) for interior 3d visualization.
Filament
3ddd
$1

Filament Cage
...filament cage
3ddd
лофт , filament cage
модель бра, делалась по фото!
turbosquid
$3

FILAMENT COUNTER
...d
royalty free 3d model filament counter for download as stl on turbosquid: 3d models for games, architecture, videos. (1563049)
3d_export
$5

Filament lamp 3D Model
...filament lamp 3d model
3dexport
filament lamp 3d model kevin 54161 3dexport
3d_export
$5

Filament bulb candle 3D Model
...filament bulb candle 3d model
3dexport
filament bulb-candle
filament bulb candle 3d model kevin 54163 3dexport
3d_export
$5

Filament led light bulb
...filament led light bulb
3dexport
realistic 3d model of filament light bulb with v-ray materials.
3d_export
$5

Filament led light bulb
...filament led light bulb
3dexport
realistic 3d model of filament light bulb with v-ray materials.
3d_export
$5

Filament led light bulb
...filament led light bulb
3dexport
realistic 3d model of filament light bulb with v-ray materials.
3d_export
$5

Filament led light bulb
...filament led light bulb
3dexport
realistic 3d model of filament light bulb with v-ray materials.
3d_export
$5

Filament led light bulb
...filament led light bulb
3dexport
realistic 3d model of filament light bulb with v-ray materials.
3ddd
$1

Factory filament metal shade
...factory filament metal shade
3ddd
restoration hardware
restoration hardware. 20th c. factory filament metal shade.