Thingiverse

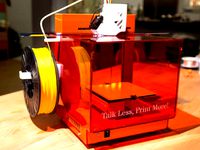
CR 10 S Enclosure - metal frame cabinet by Costa_D
by Thingiverse
Last crawled date: 3 years, 1 month ago
CR 10 S ENCLOSURE METAL FRAME CABINET
If you build this project, and you are happy with the final part, do not forget to buy me a roll of filament - in order for me to be able continue to test and improve these projects or to design new ones! If you are not happy with this design or you have problem with your printed parts - send me a message, we will try to fix it together! :) If you do not want or you can't afford to buy me a roll of filament ... its ok, I still hope you enjoy printing my designs! Pace!
See also: https://www.thingiverse.com/thing:3233857 or https://www.thingiverse.com/thing:3230158
SQUARE PIPE 40X40X1.5mm
STANDARD CR 10 S - No alteration to original - out of the box design!
UPDATE 31 OCT 2018
Since it is warm like in an oven - inside the enclosure, I will find a solution to have the spool move in; it will make obsolete the use of a spool enclosure and will keep the filament warm and dry!
Probably only the spools made of recycled PLA will need to be keep out, since it can reach the PLA - plastic deformation temperature in the enclosure!
Coming soon! Stay tuned!
28 OCT
I mounted a thermometer inside of my print enclosure: during a print with ABS - bed set to 100C on the enclosure temperature was 68C (update 31 OCT).
During ASA - bed set to 110C it it was 72C (update 29 OCT).
And my ABS print - GREAT!
In case you wonder, the enclosure walls are made of:
one layer of 4mm poly-carbonate (two walls)
two layers of 20mm - Extruded Polystyrene (40mm total)
one layer of 4mm poly-carbonate (two walls)
So... a thickness about 48mm - great sound and heat barrier!
Exception the side window - two layers of 4mm Plexiglas - with a gap of 40mm between them.
https://www.amazon.co.uk/slp/4mm-polycarbonate-sheet/mptaukczdx9a3yhhttps://www.greenbuildingsolutions.org/blog/performance-across-the-board/
25 OCT !
WAW! Print was great, noise reduction...
I miss the noise my printer use do do! :)
Inside is warm as an oven.
I don't know how the printers with electronics mounted on frame, survive...the manufacturers say that is ok to have your printer in an enclose cabinet?!? The life of a printer what have to work on those conditions is seriously reduced!
To have the electronics and the power source on same location - as the printer... a fire hazard!
24 OCT
My new incubator! I Fill up the frame with extruded foam - 2X20mm ( I do not find 40mm!) and add a new layer of poly-carbonate (4mm & two walls) - on the inside.
Noise and heat lost... reduce to minimum!
And finally... a window... 4mm Plexiglas... I have two layers... the outside one, a little to small, however it not bother me!
I will see if any improvement on reduced time for heat bed... and print quality!
And of coure the first print, the calibration gouges, to see how printer perform under the new conditions!!
9TH OCT
The enclosure manage to keep an environment print - friendly, took 28 - 30 minutes to heat and start the print process - to 110 Celsius. I am currently printing on ASA with 245C nozzle and 110C bed.
I find out a little trick... is faster to jump start your printer...if you just from settings - have your printer on warm up faze... with 1-2 degree above your target, on both - bed and nozzle ! It will warm faster than the regular - print part - warm up! Then, when the temperature was reached, start to print the part... and voila... in less than one minute - print process start!
I do not know if this will work for everyone, however, it work for me!
And if your printer take too long to worm up... just cover the print bed with two sheets of paper A4. It will worm up faster. Remove them when print process start! However, is not a guaranty for the quality of the adhesion of part to the print bed! Warning ! This is a fire hazard!
RECOMMENDATION : If you build the cabinet, best position for control box support is below the cable window - on my build is below filament window!
If you consider to buy in the future - a bigger printer, make sure the space bellow can accommodate it... therefore you will have an enclosure already build. Have already the hinges weld in place!!! - remaining to have the door frame made when you decide to upgrade to a bigger printer! See pictures of my frame - do not weld - lower section - front and left middle - profile! Build the filament and cable window also! (cable window - if you have plans to buy a printer with external control box - eg. CR class) . Try to come close to the future printer size/shape you may buy !!!
7th OCT Everything looks fine! The enclosure manage to keep an environment print - friendly, took 13-14 minutes to heat and start the print process - to 90 Celsius.
The ABS fumes are keep inside - no bad odor coming from my cabinet ! :)
And a plus - noise reduction.
Still frustrating not to be able to see the print process - Plexiglas update coming soon...
6th OCT Enclosure is complete, and first print in progress. I will have to replace the poly-carbonate sheet for front door with some Plexiglas, however I was curios to see how is working. Current job is on ABS !
One door seems to be ok (front door)!
Measure your final location access door, to ensure the cabinet can pass!. The CR10 control box support can be made detachable in case you have problem with the build size!
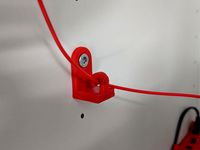
Some limitation on Z axis due to length of the cable. If this is a problem - X cables can be fit via " filament window" .
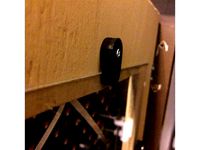
For "filament window" I use two strips of linear brushes.
1ST OCT Frame is done. And already painted! Unfortunately I weld the hinges for the front door on the "diamond" (contact surface) of the 2nd door. Therefore I will have only one door! :)
So... if you want the 2nd door, weld the hinges for the 1st door on the left side (door will become left hand door).
SEPT 29
Use the design as a guide line.
The filament spool is mounted outside. Same goes for the controller.
I use this type of profile since I have some left from other project. Feel free to use different profile size; if so... recalculate accordingly!
4 X 1500
6 X 620
11 X 640
4 X 540
6 X 650
2 X 720
1 X 180
2 X 310
1 X 160
Use metal hinges to connect the doors.
Use poly-carbonate sheet to make the enclosure.
Use wheels for mobility.
Fell free to support my projects!
https://pinshape.com/items/44114-3d-printed-cr-10-s-enclosure
If you build this project, and you are happy with the final part, do not forget to buy me a roll of filament - in order for me to be able continue to test and improve these projects or to design new ones! If you are not happy with this design or you have problem with your printed parts - send me a message, we will try to fix it together! :) If you do not want or you can't afford to buy me a roll of filament ... its ok, I still hope you enjoy printing my designs! Pace!
See also: https://www.thingiverse.com/thing:3233857 or https://www.thingiverse.com/thing:3230158
SQUARE PIPE 40X40X1.5mm
STANDARD CR 10 S - No alteration to original - out of the box design!
UPDATE 31 OCT 2018
Since it is warm like in an oven - inside the enclosure, I will find a solution to have the spool move in; it will make obsolete the use of a spool enclosure and will keep the filament warm and dry!
Probably only the spools made of recycled PLA will need to be keep out, since it can reach the PLA - plastic deformation temperature in the enclosure!
Coming soon! Stay tuned!
28 OCT
I mounted a thermometer inside of my print enclosure: during a print with ABS - bed set to 100C on the enclosure temperature was 68C (update 31 OCT).
During ASA - bed set to 110C it it was 72C (update 29 OCT).
And my ABS print - GREAT!
In case you wonder, the enclosure walls are made of:
one layer of 4mm poly-carbonate (two walls)
two layers of 20mm - Extruded Polystyrene (40mm total)
one layer of 4mm poly-carbonate (two walls)
So... a thickness about 48mm - great sound and heat barrier!
Exception the side window - two layers of 4mm Plexiglas - with a gap of 40mm between them.
https://www.amazon.co.uk/slp/4mm-polycarbonate-sheet/mptaukczdx9a3yhhttps://www.greenbuildingsolutions.org/blog/performance-across-the-board/
25 OCT !
WAW! Print was great, noise reduction...
I miss the noise my printer use do do! :)
Inside is warm as an oven.
I don't know how the printers with electronics mounted on frame, survive...the manufacturers say that is ok to have your printer in an enclose cabinet?!? The life of a printer what have to work on those conditions is seriously reduced!
To have the electronics and the power source on same location - as the printer... a fire hazard!
24 OCT
My new incubator! I Fill up the frame with extruded foam - 2X20mm ( I do not find 40mm!) and add a new layer of poly-carbonate (4mm & two walls) - on the inside.
Noise and heat lost... reduce to minimum!
And finally... a window... 4mm Plexiglas... I have two layers... the outside one, a little to small, however it not bother me!
I will see if any improvement on reduced time for heat bed... and print quality!
And of coure the first print, the calibration gouges, to see how printer perform under the new conditions!!
9TH OCT
The enclosure manage to keep an environment print - friendly, took 28 - 30 minutes to heat and start the print process - to 110 Celsius. I am currently printing on ASA with 245C nozzle and 110C bed.
I find out a little trick... is faster to jump start your printer...if you just from settings - have your printer on warm up faze... with 1-2 degree above your target, on both - bed and nozzle ! It will warm faster than the regular - print part - warm up! Then, when the temperature was reached, start to print the part... and voila... in less than one minute - print process start!
I do not know if this will work for everyone, however, it work for me!
And if your printer take too long to worm up... just cover the print bed with two sheets of paper A4. It will worm up faster. Remove them when print process start! However, is not a guaranty for the quality of the adhesion of part to the print bed! Warning ! This is a fire hazard!
RECOMMENDATION : If you build the cabinet, best position for control box support is below the cable window - on my build is below filament window!
If you consider to buy in the future - a bigger printer, make sure the space bellow can accommodate it... therefore you will have an enclosure already build. Have already the hinges weld in place!!! - remaining to have the door frame made when you decide to upgrade to a bigger printer! See pictures of my frame - do not weld - lower section - front and left middle - profile! Build the filament and cable window also! (cable window - if you have plans to buy a printer with external control box - eg. CR class) . Try to come close to the future printer size/shape you may buy !!!
7th OCT Everything looks fine! The enclosure manage to keep an environment print - friendly, took 13-14 minutes to heat and start the print process - to 90 Celsius.
The ABS fumes are keep inside - no bad odor coming from my cabinet ! :)
And a plus - noise reduction.
Still frustrating not to be able to see the print process - Plexiglas update coming soon...
6th OCT Enclosure is complete, and first print in progress. I will have to replace the poly-carbonate sheet for front door with some Plexiglas, however I was curios to see how is working. Current job is on ABS !
One door seems to be ok (front door)!
Measure your final location access door, to ensure the cabinet can pass!. The CR10 control box support can be made detachable in case you have problem with the build size!
Some limitation on Z axis due to length of the cable. If this is a problem - X cables can be fit via " filament window" .
For "filament window" I use two strips of linear brushes.
1ST OCT Frame is done. And already painted! Unfortunately I weld the hinges for the front door on the "diamond" (contact surface) of the 2nd door. Therefore I will have only one door! :)
So... if you want the 2nd door, weld the hinges for the 1st door on the left side (door will become left hand door).
SEPT 29
Use the design as a guide line.
The filament spool is mounted outside. Same goes for the controller.
I use this type of profile since I have some left from other project. Feel free to use different profile size; if so... recalculate accordingly!
4 X 1500
6 X 620
11 X 640
4 X 540
6 X 650
2 X 720
1 X 180
2 X 310
1 X 160
Use metal hinges to connect the doors.
Use poly-carbonate sheet to make the enclosure.
Use wheels for mobility.
Fell free to support my projects!
https://pinshape.com/items/44114-3d-printed-cr-10-s-enclosure
Similar models
thingiverse
free
Plexiglas enclosure for the up! plus / Afinia 3d printer by gillespinault
...c and extuder outside the heat retention chamber.
the design can probably be refined to keep the rear step motor outside as well.
thingiverse
free
Ikea Lack raiser, window holder, door hinges, filament guide and door lock by verdulero
...ch an overhang with support proved to be a challenge.. printing it on the side with support only on the heated bed did the trick.
thingiverse
free

Enclosure plexiglas clips by Tommybear1979
...iglas plates to the outside of my ikea lack enclosure. clip gap is now 6mm. but openscad attached if you'd like to change it.
grabcad
free

Cetus 3D Printer heated bed electronics enclosure
...s 3d printer. see the link below for more detials.
https://capolight.wordpress.com/2018/08/02/diy-heated-bed-for-cetus-3d-printer
thingiverse
free

CR-6 SE bed handle with camera mount by Z3R0-1989
...ld the glass bed to the heating base.
attached is also the freecad file in case you want to modify it for your own setup/printer.
thingiverse
free
IKEA Stuva Enclosure - Filament Guide
...is is part of my project to build an enclosure for my ender 3 pro out of an ikea stuva cabinet. click here to view my collection.
thingiverse
free
Lack plexiglas window holder by elcool0r
...resolution.
i've designed them to fit a 4mm thick window so if you need them a smaller or bigger one just fire up openscad :)
thingiverse
free
2mm window hold down clip by RubDub
... down anything that is 2mm thick. i used it to hold down a piece of plexiglas for a window on the door of my 3d printer cabinet.
thingiverse
free
FYSETC Magnetic Heated Bed cable holder by franpoli
...connections with one layer kapton tape before mounting this holder.
i printed my model in carbon fiber-reinforced nylon filament.
thingiverse
free

AWTRIX one-part LED grid with diffuser and one-part frame
...yers of the rgb grid are printed with white filament.after that continue with black filament. a perfect first layer is mandatory.
Costa
turbosquid
$120

Costa Diadema
...quid
royalty free 3d model costa diadema for download as skp on turbosquid: 3d models for games, architecture, videos. (1230356)
3ddd
free

Renato Costa комод (Испания)
...renato costa комод (испания)
3ddd
renato costa , комод
renato costa комод (испания)
3ddd
$1
Grohe Sink mixer Costa L
...grohe sink mixer costa l
3ddd
grohe , costa
grohe sink mixer costa l
3d_export
$5
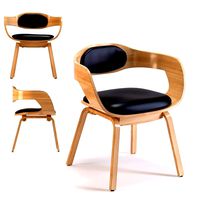
chair with armrest costa walnut
...chair with armrest costa walnut
3dexport
chair with armrest costa walnut kare design
3d_export
$5
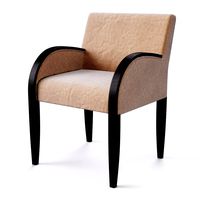
chair with armrest costa beech
...chair with armrest costa beech
3dexport
chair with armrest costa beech kare desgn
turbosquid
$19

Costa Dining Table
... free 3d model costa dining table for download as max and fbx on turbosquid: 3d models for games, architecture, videos. (1407295)
turbosquid
$29

Soccerball Costa Rica
... available on turbo squid, the world's leading provider of digital 3d models for visualization, films, television, and games.
turbosquid
$29

Soccerball Costa Rica
... available on turbo squid, the world's leading provider of digital 3d models for visualization, films, television, and games.
turbosquid
$19
Armchair Costa coffee
... available on turbo squid, the world's leading provider of digital 3d models for visualization, films, television, and games.
3ddd
$1

Costa Del Sol / Adonis Pauli
...............costa del sol
style ....................deco
a country ............england
dimensions .........120х120
fbx+obj+3dsmax
Cr
turbosquid
$15
Creazioni CR-673 CR-4461
... available on turbo squid, the world's leading provider of digital 3d models for visualization, films, television, and games.
3ddd
$1
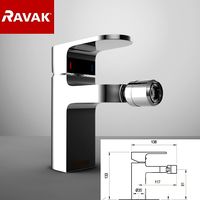
Ravak CR 055.00
...ravak cr 055.00
3ddd
ravak , смеситель
ravak cr 055.00
turbosquid
$100

CR-002
...
turbosquid
royalty free 3d model cr-002 for download as stl on turbosquid: 3d models for games, architecture, videos. (1686037)
3ddd
$1

Ravak CR 012.00
...ravak cr 012.00
3ddd
ravak , смеситель
смеситель ravak cr 012.00
3ddd
free
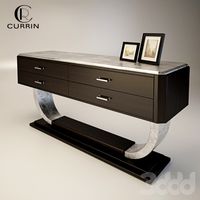
Консоль CR Currin
...ь , cr currin
консоль cr currin
ширина - 1675 мм
глубина - 510 мм
общая высота - 810 мм
3ddd
$1
CR 39444
...0
диаметр: 100
тип патрона: gu5,3 gu10
количество ламп: 1
мощность: 35w
цвет: золото хрусталь
материал: металл хрусталь exclusive
3d_ocean
$89
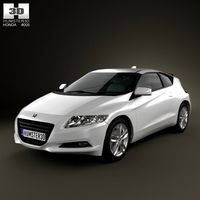
Honda CR-Z
...www.youtube.com/watch?v=rrbb4d4lypk ` he honda cr-z‘s exterior styling is formed around a “one-motion wedge” concept with a lo...
3ddd
$1

Creazoni / STEFY CR-8901
...creazoni / stefy cr-8901
3ddd
creazoni
creazioni stefy cr-8901
turbosquid
$60

Chain-CR-001
...squid
royalty free 3d model chain-cr-001 for download as stl on turbosquid: 3d models for games, architecture, videos. (1680536)
turbosquid
$99

Honda CR-Z
... available on turbo squid, the world's leading provider of digital 3d models for visualization, films, television, and games.
Enclosure
3d_export
free

electrical enclosure
...l enclosure where electrical devices like (relays, contactors, busbars ) are kept in order to protect from hazardous environment.
turbosquid
$100

GPU Enclosure
...yalty free 3d model gpu enclosure for download as obj and stl on turbosquid: 3d models for games, architecture, videos. (1381061)
3d_export
$5

Electrical Enclosure
...ed. also has tower lights attaced on the top.<br>file format that are available:<br>.step<br>.obj<br>.stl
archive3d
free

Enclosure 3D Model
...closure 3d model
archive3d
shower enclosure-acquarius- 3d model for interior 3d visualization.
archive3d
free

Enclosure 3D Model
...enclosure 3d model
archive3d
shower enclosure-omega- 3d model for interior 3d visualization.
archive3d
free

Enclosure 3D Model
...enclosure 3d model
archive3d
shower enclosure-vega - 3d model for interior 3d visualization.
archive3d
free

Enclosure 3D Model
...enclosure 3d model
archive3d
shower enclosure-zenith - 3d model for interior 3d visualization.
turbosquid
$20

shower enclosure
... available on turbo squid, the world's leading provider of digital 3d models for visualization, films, television, and games.
turbosquid
$14

Dumpster Enclosure
... available on turbo squid, the world's leading provider of digital 3d models for visualization, films, television, and games.
turbosquid
$25

3d printer enclosure
... model 3d printer enclosure for download as ipt, skp, and fbx on turbosquid: 3d models for games, architecture, videos. (1634310)
Cabinet
3d_ocean
$5
Cabinet
...cabinet
3docean
cabinet furniture
a lowpoly cabinet .
3d_ocean
$5

Cabinet
...cabinet
3docean
cabinet furniture
a lowpoly cabinet.
3d_ocean
$5
Cabinet
...cabinet
3docean
cabinet furniture
a lowpoly cabinet .
3d_ocean
$6
Cabinet
...cabinet
3docean
cabinet furniture
a high quality cabinet .
3d_ocean
$5
Cabinet
...cabinet
3docean
cabinet furniture
a high quality cabinet .
3d_ocean
$5
Cabinet
...cabinet
3docean
cabinet furniture
a high quality cabinet ready to use .
3ddd
free
cabinet
...cabinet
3ddd
cabinet
3d_ocean
$12
Cabinet
...cabinet
3docean
cabinet furniture
a high quality cabinet with high quality textures.
3ddd
$1
cabinet
...cabinet
3ddd
тумба
cabinet
3ddd
$1
The cabinet
...the cabinet
3ddd
тумба
the cabinet
Frame
archibase_planet
free

Frame
...frame
archibase planet
frame photo frame
frame n190813 - 3d model (*.gsm+*.3ds) for interior 3d visualization.
archibase_planet
free

Frame
...frame
archibase planet
frame photo frame
frame n071113 - 3d model (*.gsm+*.3ds) for interior 3d visualization.
3ddd
$1

Frame
...frame
3ddd
frame
3ddd
free

Frame
...frame
3ddd
frame
archibase_planet
free

Frame
...frame
archibase planet
frame mirror frame ornament
frame n260113 - 3d model (*.gsm+*.3ds) for interior 3d visualization.
archibase_planet
free

Frame
...frame
archibase planet
frame photo frame
frame photo n190813 - 3d model (*.gsm+*.3ds) for interior 3d visualization.
archibase_planet
free

Frame
...frame
archibase planet
frame window window frame
frame 1 - 3d model (*.gsm+*.3ds) for interior 3d visualization.
archibase_planet
free

Frame
...frame
archibase planet
frame window frame window
frame 3 - 3d model (*.gsm+*.3ds) for interior 3d visualization.
archibase_planet
free

Frame
...frame
archibase planet
frame wall frame decoration
frame 1 - 3d model (*.gsm+*.3ds) for interior 3d visualization.
archibase_planet
free

Frame
...frame
archibase planet
frame window window frame
frame 2 - 3d model (*.gsm+*.3ds) for interior 3d visualization.
10
turbosquid
$25

10
... available on turbo squid, the world's leading provider of digital 3d models for visualization, films, television, and games.
turbosquid
$10

a-10
... available on turbo squid, the world's leading provider of digital 3d models for visualization, films, television, and games.
3ddd
$1

EX 10
...ex 10
3ddd
samsung , фотоаппарат
ex 10
3ddd
$1

Bed 10
...bed 10
3ddd
постельное белье
bed 10
evermotion
$25

Scene 10 Archinteriors vol. 10
...dering design interior
take a look at textured and shadered visualization scene ready to be rendered.. evermotion 3d models shop.
3ddd
$1

Curtains 10
...curtains 10
3ddd
curtains 10
3ds max 2011,fbx + textures
polys: 100355
3ddd
free

PLANTS 10
...plants 10
3ddd
цветок , горшок
plants 10,, with 3 different color planter boxes
turbosquid
$24

Chandelier MD 89310-10+10 Osgona
... chandelier md 89310-10+10 osgona for download as max and fbx on turbosquid: 3d models for games, architecture, videos. (1218762)
design_connected
$29

Nuvola 10
...nuvola 10
designconnected
gervasoni nuvola 10 computer generated 3d model. designed by navone, paola.
design_connected
$22

Kilt 10
...kilt 10
designconnected
zanotta kilt 10 computer generated 3d model. designed by progetti, emaf.
Metal
3d_ocean
$10

Metal Barrel
...metal barrel
3docean
barrel barrels metal metal barrel wood barrel
metal barrel
turbosquid
$14

Metals
...als
turbosquid
royalty free 3d model metals for download as on turbosquid: 3d models for games, architecture, videos. (1486252)
3d_ocean
$18
Metal Furniture
...metal furniture
3docean
design desk indoor industrial metal metal furniture restoration table
metal furniture 3d model
3d_export
$5
metal table
...metal table
3dexport
metal table.blend
3d_export
$5
Metal Shelf
...metal shelf
3dexport
metal shelf
3d_export
free

metal detector
...metal detector
3dexport
metal detector
3ddd
$1
metal lux
...metal lux
3ddd
dedalo , metal lux
люстра и бра metal lux коллекция dedalo.
3ddd
$1
bonded metal
...bonded metal
3ddd
https://www.forms-surfaces.com/bonded-metal
boded tiled metal
3ddd
$1
Metal
...metal
3ddd
1280-1024 бесшовный 8-)
3d_export
$5

cgaxis metal
...cgaxis metal
3dexport
notebook cgaxis metal