Thingiverse
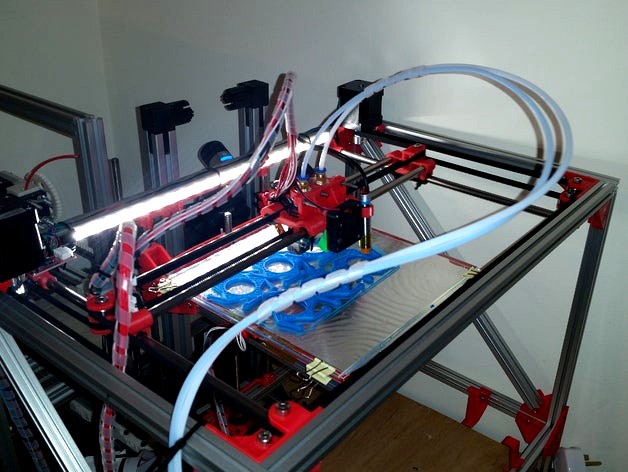
CoreXY 3d Printer based on FuseBox by alessandroL
by Thingiverse
Last crawled date: 4 years, 4 months ago
UPDATE Dec 2015
I created a new dual extruder that lift the unused head.
you can find the description, drawing and skp file at. http://www.thingiverse.com/thing:1218361
I also added a custom g-code M801 to easy the slicer process.
This printer works very well.
All credit to the original design http://www.thingiverse.com/thing:1047193
I modified it to host a dual extrude and auto-leveling.
I am working on an improved dual extrude that will move vertically the unused hotend, and will have a better position for the high sensor.
I have uploaded the STL of the modified files and the Modified SketchUP file to include the new parts.
I have used the LCD case http://www.thingiverse.com/thing:87250 . I created a simple holder for it (included).
I use Octopi as print server (http://octoprint.org) and I like to turn off\on my printer remotely. Therefore I have added a dual relay circuit connected to the RAMP 1.4 standard PS_ON pin ( can get for less then $4 http://www.amazon.co.uk/gp/product/B009P04ZKC ).
I added space for a Raspberry Pi 2 B and for a small 5V powersupply (for the RPi). I use a Samsung phone 2A USA plug powers supply. I added a IEC320 power and fuse connector (http://www.amazon.co.uk/gp/product/B00HGA1F60)
and a momentary switch to turn on the printer if it is off and you dont have the Raspberry Pi . (http://cpc.farnell.com/webapp/wcs/stores/servlet/ProductDisplay?catalogId=15002&langId=69&urlRequestType=Base&partNumber=SW05293&storeId=10180)
I added the PowerBox stl as well. All component are in the Sketchup file. Look a the component description for URL of where I got it from.
I am not particular proud of the PowerBox but it is functional.
For your information, once the RAMPS 1.4 is powered up by the Raspberry Pi USB, it will magnetize the relay by default (so it goes on).
sending g-code M80 and M81 you can turn on off the printer. there are many great example online, search Ramps PS_ON, or Octoprint M80....
Notice that the dual Extruder uses short linear bearing LM8UU (so replace 2 LM8LUU with 4 LM8UU).
I don't like the location of the sensor, this adds an additional obstacle. therefore reducing your effective printing volume. not a huge issue but I will try to improve it in my next "release"
I added a Fan Externder to my RAMPS 1.4 (http://www.ebay.co.uk/itm/252106458206) . You need to change the Marlin pis_out file to drive this two output. simply task you can find introductions online. Sames goes for the autoleveling part.
I have set one fan to cool both extruders once the temperature is above 50C (100% PWM)
the other output is attached to the 40 mm Fan that cools the printed filament. I did create a different Fan conduct.
I got these Extruders http://www.ebay.co.uk/itm/181696987926 for about $10
I replaced the Z screw with this http://www.ebay.co.uk/itm/321843276976 . it costed $8 included the Nut. it works so much better than a normal Screw!! Highly recommended.