Thingiverse
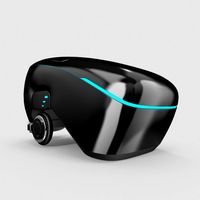
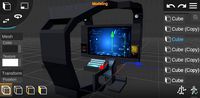
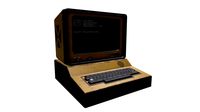
Computer HUD by pazu
by Thingiverse
Last crawled date: 3 years ago
UPDATE
I have been working on this for a while now and have finally finished my version 2.
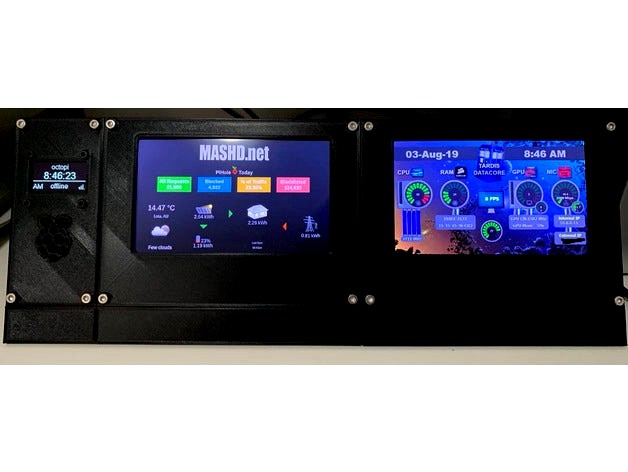
Right screen remains the same, but the left screen has been upgraded to a RasperyPi with a 5" screen as well. I've redone the website as well to display PiHole activity, weather and my solar system.
I then added a third screen on the far left using the brilliant OctoMonitor setup here: https://github.com/Qrome/printer-monitor
New STL's have been uploaded with 'HUD_V2' on them. I haven't bothered with the web stuff, but if people are interested I can upload (its not pretty, but it works).
I posted this up on reddit and few people asked for the STLs and more info on it.
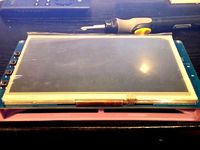
From the 3D printing side of things, this uses a cheap 5" LCD from ebay with HDMI inputs and a Raspberry PI with a 3.5" backpack - the part list below is just for the screen setup.
Parts list is:
20 x 5mm M3 Bolts
2 x 20mm M3 Bolts
2 x M3 nuts
1 x Raspberry Pi (I used a 2, but any version would work)
1 x WiFi Dongle
1 x 3.5" LCD Screen, like this (https://www.aliexpress.com/item/32965280840.html) - note that I pulled the touch screen off
1 x 5" LCD Screen like this (https://www.aliexpress.com/item/32786838470.html) - note that I pulled the touch screen off
2 x Micro USB connectors and wire for power
1 x 90 Degree HDMI Connector to minimise footprint needed
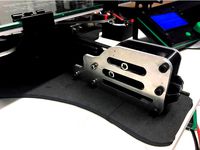
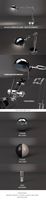
All the parts are fairly straight forward to print, you will probably need to adjust the supports for the raspberry pi and LCD, I printed these to suit the units I have, but I suspect with the cheaper LCDs there will be some differences. That is why you will note there is no mounting holes for the supports - I positioned those then drilled them manually.
I had a lot of people ask about the way I had everything configured, so here is a more detailed information. Note that I won't do my own tutorials or information on stuff that already has a heap of information out there (like setting up Apache etc...), but I'll make note of it.
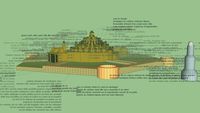
Overall, the Raspberry Pi Webserver runs a SQL database that collects the stats, a bash script running on the router sends stats to the SQL Database. We can then present and read the data from there.
Please refer to the Logical Diagram in the files for reference to the below steps.
1) Sophos UTM
I use Sophos UTM as my home router, its a basic PC with the Sophos image running on it, its an awesome router/firewall setup, very easy to use and very flexible.
More information is available here: https://www.sophos.com/en/products/free-tools/sophos-utm-home-edition.aspx
I won't go into detail into how to set it up as there are plenty of guides out there, but for the following information you will need it setup and working with SSH for loginuser enabled and know the root password. You will also need to save an SSH connection to the destination server - plenty of information around on that.
The Raspberry WebServer runs an SQLLite Database to record the stats for the webserver. I had used flat files originally, but I had issues with file locking when trying to write and read the data, so I switched to a basic SQL database setup.
a) Login to the UTM Box via SSH, you should be at /home/login/, but just make sure.
b) Create a BASH script using nano and copy/paste the content from Serverstats_bash in the files section. Update USERNAME@IPOFSERVER to the username and IP address of the Raspberry Pi in step 2 below. Save and exit, making sure the file name is serverstats
c) run Sudo crontab -e
d) Copy/paste the line from crontab in the file section.
e) Once step 2 below is complete, this should start sending stats to the DB
2) Raspberry Pi Webserver
This is a headless Raspberry Pi Server running Apache, PHP and SQLLite. Guides are available here:
Apache2/PHP: https://www.raspberrypi.org/documentation/remote-access/web-server/apache.md
SQLLite: http://raspberrywebserver.com/sql-databases/set-up-an-sqlite-database-on-a-raspberry-pi.html
I have a number of websites setup as VHosts, you can configure it however you want. The important bit is that the SQL Database is called serverstats.bd and sits in the same folder as the website and php files.
Look at the ZIP file called WebServer for all the respective files. The PHP file pulls the data from the SQL DB and presents it to the browser.
If all goes to plan, you should see stats and the traffic lights should also change colours depending on the load. Note that this is configured with my crappy internet speed, you will need to edit the traffic light conditions to trigger when you want them to. If you are still following at this point, it should be pretty easy to work out :)
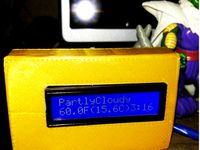
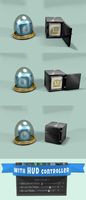
3) Local Router LCD
So my router has a local 1602 LCD, power by an Arduino with an Ethernet shield to present the local stats on the router, Arduino code is attached, I won't go into to much detail with this one, but it needs physical RGB LEDs to show the load, and an I2C 1602 LCD. Code is commented so should be easy to follow and edit.
File is UTMDisplayV5.ino
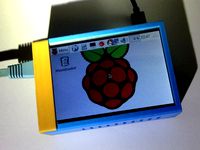
4) Raspberry Pi Powered LCD Screen
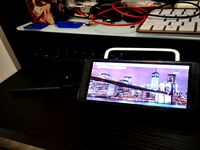
At this point, you should be able to browse to the Raspberry Webserver above and see the stats presented, so the next step is to setup a Raspberry Pi with an LCD back pack that can see the website.
For my LCD, I needed to use the following Raspbian image: http://osoyoo.com/2016/09/13/install-raspberry-pi-3-5-touch-screen-driver-for-raspbian-jessie/
I had issues running Kiosk mode properly, so I'm using Firefox for Raspbian, autostarting that with the right website URL and then using a full screen plugin for firefox to accomplish the same thing.
I then used Unclutter to hide the mouse cursor - https://ubuntu-tutorials.com/2008/07/07/auto-hide-your-mouse-pointer-when-idle-with-unclutter/
Job done :)
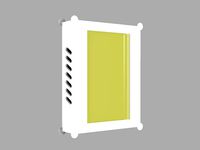
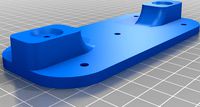
5) 3D Printed casing - instructions at the very top :)
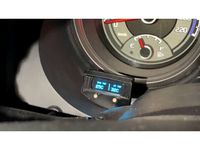
6) This is the 5" LCD that is actually a 3rd Monitor (I run dual screen) from my PC. This is very straight forward, needs 5V power (Like the raspberry pi), and an HDMI feed from the PC.
I then use Aida64 to setup something to display on it - https://www.aida64.com/
I know I have covered the setup very quickly and probably missed out a few things, but the point of this guide was to demonstrate the theory and articulate what was possible, I'm not an expert in these sort of technologies, just a lot of googling to make it work, but it works well - happy to discuss in comments.
EDIT: A few people wanted to edit the model itself, so I have shared out the Fusion Designs via these links:
Base: http://a360.co/2v5cNYU
Lid: http://a360.co/2hw2QyZ
I have been working on this for a while now and have finally finished my version 2.
Right screen remains the same, but the left screen has been upgraded to a RasperyPi with a 5" screen as well. I've redone the website as well to display PiHole activity, weather and my solar system.
I then added a third screen on the far left using the brilliant OctoMonitor setup here: https://github.com/Qrome/printer-monitor
New STL's have been uploaded with 'HUD_V2' on them. I haven't bothered with the web stuff, but if people are interested I can upload (its not pretty, but it works).
I posted this up on reddit and few people asked for the STLs and more info on it.
From the 3D printing side of things, this uses a cheap 5" LCD from ebay with HDMI inputs and a Raspberry PI with a 3.5" backpack - the part list below is just for the screen setup.
Parts list is:
20 x 5mm M3 Bolts
2 x 20mm M3 Bolts
2 x M3 nuts
1 x Raspberry Pi (I used a 2, but any version would work)
1 x WiFi Dongle
1 x 3.5" LCD Screen, like this (https://www.aliexpress.com/item/32965280840.html) - note that I pulled the touch screen off
1 x 5" LCD Screen like this (https://www.aliexpress.com/item/32786838470.html) - note that I pulled the touch screen off
2 x Micro USB connectors and wire for power
1 x 90 Degree HDMI Connector to minimise footprint needed
All the parts are fairly straight forward to print, you will probably need to adjust the supports for the raspberry pi and LCD, I printed these to suit the units I have, but I suspect with the cheaper LCDs there will be some differences. That is why you will note there is no mounting holes for the supports - I positioned those then drilled them manually.
I had a lot of people ask about the way I had everything configured, so here is a more detailed information. Note that I won't do my own tutorials or information on stuff that already has a heap of information out there (like setting up Apache etc...), but I'll make note of it.
Overall, the Raspberry Pi Webserver runs a SQL database that collects the stats, a bash script running on the router sends stats to the SQL Database. We can then present and read the data from there.
Please refer to the Logical Diagram in the files for reference to the below steps.
1) Sophos UTM
I use Sophos UTM as my home router, its a basic PC with the Sophos image running on it, its an awesome router/firewall setup, very easy to use and very flexible.
More information is available here: https://www.sophos.com/en/products/free-tools/sophos-utm-home-edition.aspx
I won't go into detail into how to set it up as there are plenty of guides out there, but for the following information you will need it setup and working with SSH for loginuser enabled and know the root password. You will also need to save an SSH connection to the destination server - plenty of information around on that.
The Raspberry WebServer runs an SQLLite Database to record the stats for the webserver. I had used flat files originally, but I had issues with file locking when trying to write and read the data, so I switched to a basic SQL database setup.
a) Login to the UTM Box via SSH, you should be at /home/login/, but just make sure.
b) Create a BASH script using nano and copy/paste the content from Serverstats_bash in the files section. Update USERNAME@IPOFSERVER to the username and IP address of the Raspberry Pi in step 2 below. Save and exit, making sure the file name is serverstats
c) run Sudo crontab -e
d) Copy/paste the line from crontab in the file section.
e) Once step 2 below is complete, this should start sending stats to the DB
2) Raspberry Pi Webserver
This is a headless Raspberry Pi Server running Apache, PHP and SQLLite. Guides are available here:
Apache2/PHP: https://www.raspberrypi.org/documentation/remote-access/web-server/apache.md
SQLLite: http://raspberrywebserver.com/sql-databases/set-up-an-sqlite-database-on-a-raspberry-pi.html
I have a number of websites setup as VHosts, you can configure it however you want. The important bit is that the SQL Database is called serverstats.bd and sits in the same folder as the website and php files.
Look at the ZIP file called WebServer for all the respective files. The PHP file pulls the data from the SQL DB and presents it to the browser.
If all goes to plan, you should see stats and the traffic lights should also change colours depending on the load. Note that this is configured with my crappy internet speed, you will need to edit the traffic light conditions to trigger when you want them to. If you are still following at this point, it should be pretty easy to work out :)
3) Local Router LCD
So my router has a local 1602 LCD, power by an Arduino with an Ethernet shield to present the local stats on the router, Arduino code is attached, I won't go into to much detail with this one, but it needs physical RGB LEDs to show the load, and an I2C 1602 LCD. Code is commented so should be easy to follow and edit.
File is UTMDisplayV5.ino
4) Raspberry Pi Powered LCD Screen
At this point, you should be able to browse to the Raspberry Webserver above and see the stats presented, so the next step is to setup a Raspberry Pi with an LCD back pack that can see the website.
For my LCD, I needed to use the following Raspbian image: http://osoyoo.com/2016/09/13/install-raspberry-pi-3-5-touch-screen-driver-for-raspbian-jessie/
I had issues running Kiosk mode properly, so I'm using Firefox for Raspbian, autostarting that with the right website URL and then using a full screen plugin for firefox to accomplish the same thing.
I then used Unclutter to hide the mouse cursor - https://ubuntu-tutorials.com/2008/07/07/auto-hide-your-mouse-pointer-when-idle-with-unclutter/
Job done :)
5) 3D Printed casing - instructions at the very top :)
6) This is the 5" LCD that is actually a 3rd Monitor (I run dual screen) from my PC. This is very straight forward, needs 5V power (Like the raspberry pi), and an HDMI feed from the PC.
I then use Aida64 to setup something to display on it - https://www.aida64.com/
I know I have covered the setup very quickly and probably missed out a few things, but the point of this guide was to demonstrate the theory and articulate what was possible, I'm not an expert in these sort of technologies, just a lot of googling to make it work, but it works well - happy to discuss in comments.
EDIT: A few people wanted to edit the model itself, so I have shared out the Fusion Designs via these links:
Base: http://a360.co/2v5cNYU
Lid: http://a360.co/2hw2QyZ
Similar models
thingiverse
free

Raspberry Pi Zero W Case for 16x2 LCD Screen by carolinedunn
...e pi.
the full tutorial is located on tom's hardware - https://www.tomshardware.com/how-to/raspberry-pi-work-status-indicator
thingiverse
free
LulzBot Mini TFT Screen Mounting bracket by eirikso
...pberry pi: http://www.banggood.com/3_5-inch-320-x-480-tft-lcd-display-touch-board-for-raspberry-pi-2-model-b-rpi-b-p-1023432.html
thingiverse
free

Raspberry Pi Home Bookshelf Stereo by gmelenka
...pi gpio pins to the lcd pins. i connected the pins using two 0.1" 20 pin headers (https://www.dipmicro.com/store/hdr20x1fl)
thingiverse
free
3D printed body for 5.5 inch AMOLED touch screen for Raspbian
... for raspbian.
https://youtu.be/cu7w8eu6xey
5.5 inch waveshare amoled touch screen 1080 x 1920
raspberry pi 3b+
5v fan with case
thingiverse
free
SainSmart 7 inch TFT LCD Touch Screen Display Frame by kwh32901
...t-lcd-800-480-touch-screen-display-for-raspberry-pi-b-pi2.html
this is the first step towards making an enclosure for the screen.
thingiverse
free
Case for 5inch lcd touch screen raspberry pi by ChrisHerman
...h lcd touch screen raspberry pi by chrisherman
thingiverse
case for waveshare's 5inch lcd touch screen for the raspberry pi
thingiverse
free
BT7200+Raspberry-Pi-3b+LCD Screen
...bt7200+raspberry-pi-3b+lcd screen
thingiverse
bt7200+raspberry-pi-3b+lcd screen
thingiverse
free
Raspberry Pi with 3.5 TFT LCD Touch Screen Case by Rexchen
...emo is raspberry pi 3 with waveshare 3.5" lcd touch screen.
if your lcd not match pitftcase.stl, you can try pitftcase2.stl.
grabcad
free

Raspberry Pi HwLevel LCD-PI32 (Touch-screen)
...ouch-screen)
grabcad
3d cad model of the raspberry pi hwlevel lcd-pi32 (touch-screen)
- http://www.hwlevel.com/pi32/index.html
thingiverse
free
Case for Raspberry Pi 2 / B+ 1602 LCD by Nfarrow
...d 1602 lcd screen.
https://github.com/veggievampire/i2c-1602-lcd/
https://www.instagram.com/p/bbzzlftymds/?taken-by=veggievampire
Pazu
thingiverse
free
Seaflo 125PSI Accumulator Mount by pazu
...iverse
seaflo 125psi pressurized accumulator tank mount.
this will mount the accumulator in line with the 42 series seaflo pumps
thingiverse
free

Idle Pulley by pazu
...gs.
to make one pulley you will need:
2 x printed brackets
2 x mr115zz bearings
1 x 3mm motor screw (comes with printer normally)
thingiverse
free
Belt tensioner pulley for Tevo Tarantula - Y Axis (Alloy sides) by pazu
... you will still need to print out the mechanism parts using banholm's design.
i had these cut in 4mm and they work very well.
thingiverse
free

Belt tensioner pulley for Tevo Tarantula - X Axis (Alloy sides) by pazu
... you will still need to print out the mechanism parts using banholm's design.
i had these cut in 4mm and they work very well.
thingiverse
free
Pajero Temp Guard by pazu
...ht for cabling, i'm using cat5e as the cable run for the leds and oled - rear cover should just clip in.
any questions - ask!
thingiverse
free
Knurled surface finishing library by aubenc
...by mikeq http://www.thingiverse.com/thing:12871 knurled "topper" for stepper motors by pazu http://www.thingiverse.com/thing:13978 ultimaker hobbed bolt release by bkubicek http://www.thingiverse.com/thing:14505 hobbed...
grabcad
free

pazu kol kası sehpası ( barbell curl )
... esnasında ikinci bir kişi olmaksızın ayak ile kola destek verilebilir. mekanizma temel prensib düzendir, geliştirelebilir.
3dwarehouse
free
Laputa
...secret of laputa, a castle in the sky that pazu#39;s father tried to find for years. they begin a...
3dwarehouse
free

Air Pirate's car
...dola, henri louie and charles were aftering sheeta with pazu as a fugitive during train chase, and the enemy...
Hud
turbosquid
$20

hud-a.dwg
... available on turbo squid, the world's leading provider of digital 3d models for visualization, films, television, and games.
3d_export
$29
HeadUp Display HUD 3D Model
...d-up display helmet virtual virtuality fantastic people game protection pilot
high detailed model of the head-up display
turbosquid
$35

HUD Pyramidal Infographics
...y free 3d model hud_pyramidalinfographics for download as max on turbosquid: 3d models for games, architecture, videos. (1599970)
3d_export
$65

c4d octane render cyberpunk city skyscrapers hud robot airplane japan hongkong cbd building future
...irplane japan hongkong cbd building future octane render gpu:2080ti polygon:5957473 vertices:6451016 non-overlapping polygon mesh
3d_export
$50

c4d octane render cbd cyberpunk city scifi city future city hud neo japan manhattan robot building
...ity hud neo japan manhattan robot building octane render gpu:2080ti polygon:5601766 vertices:7137656 non-overlapping polygon mesh
3d_ocean
$6
Cube Products Lockers
...cube products lockers 3docean box door glass hud lock locker lockers make-up product realistic rotation features: 1....
3d_export
$5

Hand spec 3D Model
...hand spec 3d model 3dexport hand hands hud руки hand spec 3d model vampirnik77 97539...
3d_export
$8

alfa romeo carabo 1968-2045 varlkiria upgrade
...simlabcomposer<br>texture size:<br>body: 256px<br>interior seat leather: 1024px<br>hud speedometer: 1024x378px<br>hud navigator: 1024x79px<br>hud multimedia: 1920px<br>logo carabo: 500x270px<br>prew in...
3d_export
$30

Fighter pilot 3D Model
...generic stilized fighter pilot cockpit ejection seat figure man hud airplane fighter pilot 3d model tartino 18789...
3d_ocean
$35
Rigged Cinema 4D Lamp
...base materials, ready to animate. easy to animated with hud (base rotation | shoulder rotation | arm down/up |...
Computer
3d_export
$6
computer
...computer
3dexport
high-tech computer, for space environment #computer
3d_export
$5

Computer
...computer
3dexport
it's just a computer
3d_export
$5
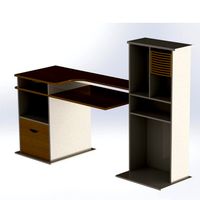
computer table
...computer table
3dexport
computer table, computer cabinet, table, cabinet, wooden computer table
3d_ocean
$10
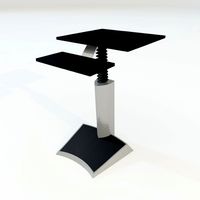
computer desk
...computer desk
3docean
computer desk
high computer desk for in showrooms
turbosquid
$10

Computer
...bosquid
royalty free 3d model computer for download as blend on turbosquid: 3d models for games, architecture, videos. (1242095)
turbosquid
free
Computer
...urbosquid
royalty free 3d model computer for download as c4d on turbosquid: 3d models for games, architecture, videos. (1234779)
turbosquid
$45
Computer
...d
royalty free 3d model computer for download as obj and fbx on turbosquid: 3d models for games, architecture, videos. (1300432)
3d_export
free

Computer
...computer
3dexport
turbosquid
$4

computer
...ty free 3d model computer for download as blend, fbx, and obj on turbosquid: 3d models for games, architecture, videos. (1703278)
turbosquid
$3

Computer
...alty free 3d model computer for download as obj, stl, and fbx on turbosquid: 3d models for games, architecture, videos. (1664791)