Thingiverse
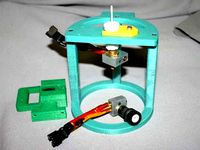
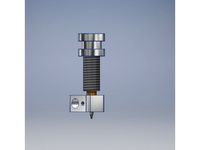
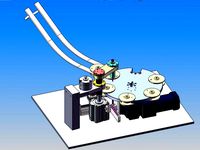
Complete Rostock Max V3 E3D Hotend Assembly by Djkirkendall
by Thingiverse
Last crawled date: 3 years ago
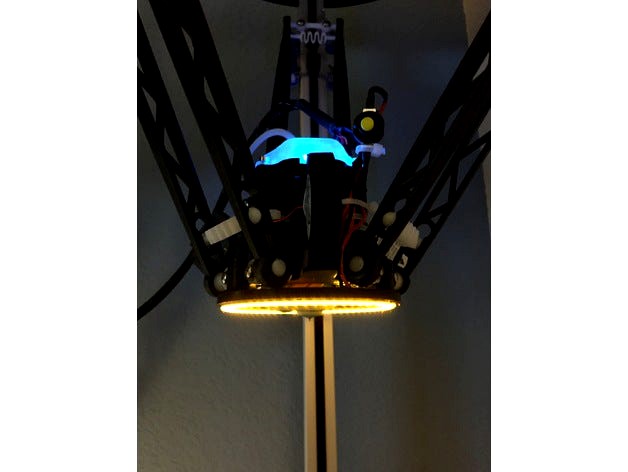
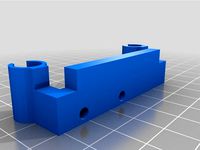
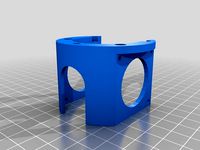
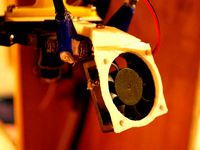
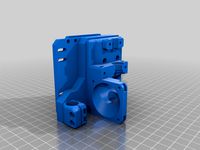
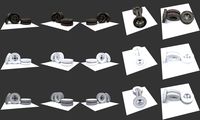
This is a remix/consolidation of everything I used to create the pictured hotend. The integrated effector and HE280 are not my design. The clip-on light ring, however, is my design.
Effector source/credit: http://www.thingiverse.com/thing:1284511
HE280 board cover credit: seemecnc github
Here's the BOM:
(5) M3 x 20mm cap screws
(2) M3 nuts
(6) #4-24 3/4" Machine Screws
(3) #6-32 1/2" Machine Screws
(1) E3D Complete Bowden Assy
(3) Nylon ball arms
(1) HE280 Accelerometer board
(3) BFB0312HA-A Brushless DC Box Fans (layer fans)
(1) 80mm LED ring (https://www.amazon.com/gp/product/B015Z7B42A/ref=oh_aui_detailpage_o01_s00?ie=UTF8&psc=1)
(3) M3 6mm cap screws
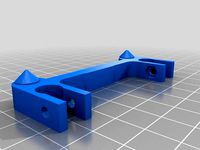
(1) rostock_max_effectorplatform-_fan_shroud_combo_alt printed in Nylon-X
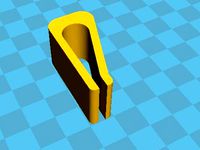
(1) light_ring_1.0 Rev D_repaired printed in Nylon-X
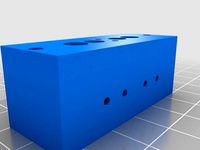
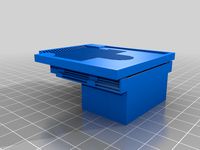
(1) HE280 Assembly - 71258 Cover for Mount for HE280 PCB-1 printed in clear Form 2 resin (available here: https://www.3dprinteddebris.com/listing/499879672/rostock-max-v3-clearfrosted-pcb-top)
I'm still waiting on the light ring to arrive to mount it up, so I left the 12VDC accesory line hanging in the wind for now. 5 bucks says I get shocked before the part arrives.
Going forward, I'm going to add a latching switch on top of the PCB cover (https://www.amazon.com/gp/product/B01MZ45WV3/ref=oh_aui_detailpage_o00_s00?ie=UTF8&psc=1) and wire it to the LED ring so I can turn it on and off.
UPDATE 2/27/17: Installed light ring and switch. It's a little dimmer than I would have hoped, but it gets the job done. I wound up leaving the switch to float in the open so that I can switch it off mid-print without disturbing the hotend.
Summary: This mod is effective, looks cool (in my opinion) and is worth the time/cash invested in terms of improvement in print quality.
Effector source/credit: http://www.thingiverse.com/thing:1284511
HE280 board cover credit: seemecnc github
Here's the BOM:
(5) M3 x 20mm cap screws
(2) M3 nuts
(6) #4-24 3/4" Machine Screws
(3) #6-32 1/2" Machine Screws
(1) E3D Complete Bowden Assy
(3) Nylon ball arms
(1) HE280 Accelerometer board
(3) BFB0312HA-A Brushless DC Box Fans (layer fans)
(1) 80mm LED ring (https://www.amazon.com/gp/product/B015Z7B42A/ref=oh_aui_detailpage_o01_s00?ie=UTF8&psc=1)
(3) M3 6mm cap screws
(1) rostock_max_effectorplatform-_fan_shroud_combo_alt printed in Nylon-X
(1) light_ring_1.0 Rev D_repaired printed in Nylon-X
(1) HE280 Assembly - 71258 Cover for Mount for HE280 PCB-1 printed in clear Form 2 resin (available here: https://www.3dprinteddebris.com/listing/499879672/rostock-max-v3-clearfrosted-pcb-top)
I'm still waiting on the light ring to arrive to mount it up, so I left the 12VDC accesory line hanging in the wind for now. 5 bucks says I get shocked before the part arrives.
Going forward, I'm going to add a latching switch on top of the PCB cover (https://www.amazon.com/gp/product/B01MZ45WV3/ref=oh_aui_detailpage_o00_s00?ie=UTF8&psc=1) and wire it to the LED ring so I can turn it on and off.
UPDATE 2/27/17: Installed light ring and switch. It's a little dimmer than I would have hoped, but it gets the job done. I wound up leaving the switch to float in the open so that I can switch it off mid-print without disturbing the hotend.
Summary: This mod is effective, looks cool (in my opinion) and is worth the time/cash invested in terms of improvement in print quality.
Similar models
thingiverse
free

Ender 3 Voltage Regualtion box with switch
...3_s00?ie=utf8&psc=1
jst-xh: https://www.amazon.com/gp/product/b07x9mj8g2/ref=ppx_yo_dt_b_asin_title_o04_s02?ie=utf8&psc=1
thingiverse
free

Turntable
...amp;psc=1
m3 screws m3x6 or m3x8https://www.amazon.com/gp/product/b07twz7x38/ref=ppx_yo_dt_b_asin_title_o03_s00?ie=utf8&psc=1
thingiverse
free
12 Function Deep Dish Button Box by coyoteyz13
..._title_o03_s00?ie=utf8&psc=1
https://www.amazon.com/gp/product/b07vhcb1q4/ref=ppx_yo_dt_b_search_asin_title?ie=utf8&psc=1
thingiverse
free

Gatton CNC Z Axis Limit Switch Brackets by oldenglishworkshop
...1
i used m2.5 screws to attach them,
https://www.amazon.com/gp/product/b012te25qq/ref=oh_aui_detailpage_o01_s00?ie=utf8&psc=1
thingiverse
free

Y-6 Multicopter Frame by ashkip
...azon.com/gp/product/b00tf8uy9a/ref=oh_aui_detailpage_o00_s01?ie=utf8&psc=1
soldering iron, supplies and a lot of patience :-)
thingiverse
free

Gatton CNC X Axis Limit Switch Brackets by oldenglishworkshop
...1
i used m2.5 screws to attach them,
https://www.amazon.com/gp/product/b012te25qq/ref=oh_aui_detailpage_o01_s00?ie=utf8&psc=1
thingiverse
free

Desk Fan by NebNorse
...lpages04?ie=utf8&psc=1
motor control: https://www.amazon.com/gp/product/b01cnl6imc/ref=od_aui_detailpages04?ie=utf8&psc=1
thingiverse
free

Gatton CNC Y Axis Limit Switch Brackets by oldenglishworkshop
..._o01_s00?ie=utf8&psc=1
the adjustable screw is a 10-24. the bumper for the head of the screw is hot glued on and sanded flat.
thingiverse
free

Sonoff Enclosure by JeffLZ
...title_o00_s00?ie=utf8&psc=1
https://www.amazon.com/gp/product/b00qvb6qpu/ref=ox_sc_saved_title_1?smid=atvpdkikx0der&psc=1
grabcad
free

S&W FPC Safety Selector Switch
...=utf8&psc=1
m2 screws from: https://www.amazon.com/gp/product/b09zhhsy92/ref=ppx_yo_dt_b_search_asin_title?ie=utf8&psc=1
Djkirkendall
thingiverse
free

Master Spool Adapter for Filabot Spooler by Djkirkendall
... for the filabot spooler to grip the master spool v4.
i printed mine in colorfabb xt cf-20, but i'm sure anything will work.
thingiverse
free

Print Farm Service Placards by Djkirkendall
... in prusaslicer for the color change, or just do it manually.
use a heat gun on the center to create the angle you want.
enjoy!!
thingiverse
free

Jeep Hitch Cover - Fixed by Djkirkendall
...it, but please do not use my photos for commercial purposes. print it yourself, and take photos of your work; do not use mine.
-d
thingiverse
free

3DS Game Case by Djkirkendall
...91676736/game-case-for-nintendo-ds-and-3ds-games
update 3/19/17: added a 5 slot make to the project at a commenter's request.
thingiverse
free

Decepticon 2" Trailer Hitch Cover by Djkirkendall
...scaled to fit 2" trailer hitch receivers.
you may use the file however you see fit, but please do not use my photos.
enjoy!
thingiverse
free
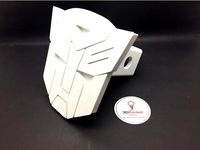
Autobot 2" Trailer Hitch Cover by Djkirkendall
...d is already scaled to fit a 2" receiver.
you may use the file however you see fit, but please do not use my photos.
enjoy!
thingiverse
free
Polysher Wedge by Djkirkendall
... was spit in half (20/20), and the model rotated to 180 degrees to coat the other side. this is a must for tall, vertical models!
thingiverse
free

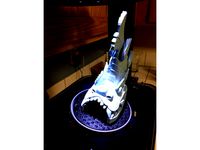
Stand for APC (Scaled to 15" long) by Djkirkendall
...a copy of this print from my etsy store: https://www.etsy.com/listing/475095319/uscm-m577-armored-personnel-carrier-apc?
thanks!!
thingiverse
free

EEZYbotARM Rotating Claw Servo Mount by Djkirkendall
...g claw parts from the old mount to the new.
here's a video of it in action:https://www.youtube.com/watch?v=b-0gvr1dbs0
enjoy!
thingiverse
free

Pololu Mini Maestro Enclosure for EEZYbotARM by Djkirkendall
... enclosure pictured is friction welded at the 3 points of contact with the base support (2 corner bottom, and top center).
enjoy!
Rostock
thingiverse
free
Endstop for Rostock by Raz0neR
...endstop for rostock by raz0ner
thingiverse
endstop for rostock.
thingiverse
free

Rostock Cooling by nobicore
...rostock cooling by nobicore
thingiverse
rostock cooling
thingiverse
free
ROSTOCK PARTS by OC3D
...rostock parts by oc3d
thingiverse
parts for our modified rostock extruder assembly
thingiverse
free
Rostock squirrel fan by MarioPanic
...rostock squirrel fan by mariopanic
thingiverse
rostock squirrel fan
thingiverse
free
FC Hansa Rostock by ron86
...fc hansa rostock by ron86
thingiverse
fc hans rostock logo
thingiverse
free

rostock mini carriage by cjol
...rostock mini carriage by cjol
thingiverse
carriage for my rostock mini project
thingiverse
free

Rostock and Rostock Mini Dual Extruder Mount by westonshakespear
...ht.
sorry about the pictures, my filament jammed for part of the print and i am waiting for a new part to print a better version.
thingiverse
free
Rostock mini clip by Scott_Chen
...rostock mini clip by scott_chen
thingiverse
rostock mini clip for printer base glass
thingiverse
free
Rostock Board holder by drewan
...rostock board holder by drewan
thingiverse
this is a clip for using a rostock board as a print surface.
thingiverse
free
Rostock Fan Bracket by ImprisonedByTime
...rostock fan bracket by imprisonedbytime
thingiverse
this bracket is for a 40mm fan to attach to the rostock 3d printer
Hotend
thingiverse
free
hotend by fablab_lueneburg
...hotend by fablab_lueneburg
thingiverse
hotend model
thingiverse
free
Hotend for Graber
...hotend for graber
thingiverse
hotend complement pastes for graber printerhttps://youtu.be/0koxhnsuhdy
thingiverse
free
Hotend adapter by antaviana
...hotend adapter by antaviana
thingiverse
hotend adapter
thingiverse
free
hotend fan by mming1106
...hotend fan by mming1106
thingiverse
hotend fan
thingiverse
free

Hotend schema by ione
...hotend schema by ione
thingiverse
hotend project schema
thingiverse
free
Fabtotum XY Hotend holder for E3D Hotend
...s with integrated supports.
more for the project you can see here: https://kf-designs.com/2019/09/07/fabtotum-printer-conversion/
thingiverse
free
HotEnd Stand by onepointdiy
...tend, when you make your new hotend or repair your j-head or mg-plus hotend.
the hole of 16mm, please adjust using a reamer, etc.
thingiverse
free

fast magnetic hotend changer for Chimera Hotend by Draman
...chimera hotend !
and new basis (the hole from original is to small)
it is a remix form skimmy's fast magnetic hotend changer
thingiverse
free

Hotend Fan Adapter for MicroSwiss All Metal Hotend by jo_schi_man
...
thingiverse
little change for the hotend fan adapter to hold the microswiss all metal hotend (slightly longer and sharp edges).
thingiverse
free
Merlin Hotend by Alejanson
...merlin hotend by alejanson
thingiverse
this is a 1:1 drawing of the classic merlin hotend.
E3D
turbosquid
$23

E3D - Google Home
... 3d model e3d - google home for download as max, obj, and c4d on turbosquid: 3d models for games, architecture, videos. (1192509)
cg_studio
free

e3d model
...e3d model
cgstudio
- e 3d model, royalty free license available, instant download after purchase.
turbosquid
$2

Syringe C4D (E3D Ready)
...lty free 3d model syringe c4d (e3d ready) for download as c4d on turbosquid: 3d models for games, architecture, videos. (1336720)
turbosquid
$12

Microphone USB E3D and C4D
...ree 3d model microphone usb e3d & c4d for download as c4d on turbosquid: 3d models for games, architecture, videos. (1568216)
turbosquid
$29

E3D - OnePlus 6 Black
...model e3d - oneplus 6 black for download as max, obj, and c4d on turbosquid: 3d models for games, architecture, videos. (1358534)
turbosquid
$29

E3D - Motorola One 2018
...del e3d - motorola one 2018 for download as max, obj, and c4d on turbosquid: 3d models for games, architecture, videos. (1358533)
turbosquid
$29

E3D - Disney MagicBands 2
...l e3d - disney magicbands 2 for download as max, obj, and c4d on turbosquid: 3d models for games, architecture, videos. (1355515)
turbosquid
$29

E3D - Samsung Z4 Smartphone
...e3d - samsung z4 smartphone for download as max, obj, and c4d on turbosquid: 3d models for games, architecture, videos. (1182179)
turbosquid
$23

E3D - Razer Phone model
...del e3d - razer phone model for download as max, obj, and c4d on turbosquid: 3d models for games, architecture, videos. (1231207)
turbosquid
$23

E3D - Alcatel Idol 5
... model e3d - alcatel idol 5 for download as max, obj, and c4d on turbosquid: 3d models for games, architecture, videos. (1212799)
V3
3d_export
$5

Poison-v3
...poison-v3
3dexport
poison-v3
3ddd
$1

Curtain v3
...curtain v3
3ddd
полупрозрачная штора v3
turbosquid
free

v3
... available on turbo squid, the world's leading provider of digital 3d models for visualization, films, television, and games.
3d_export
$5

potato v3
...potato v3
3dexport
turbosquid
$69

Skeletor v3
...royalty free 3d model skeletor v3 for download as ztl and obj on turbosquid: 3d models for games, architecture, videos. (1712713)
turbosquid
$49

Zombie v3
...
royalty free 3d model zombie v3 for download as obj and ztl on turbosquid: 3d models for games, architecture, videos. (1342458)
turbosquid
$2

Bitcoin v3
...
royalty free 3d model bitcoin v3 for download as c4d and prj on turbosquid: 3d models for games, architecture, videos. (1182845)
turbosquid
$29
Turret V3
...alty free 3d model turret v3 for download as ma, obj, and fbx on turbosquid: 3d models for games, architecture, videos. (1217498)
turbosquid
$20
Radiators v3
... free 3d model radiators v3 for download as max, max, and obj on turbosquid: 3d models for games, architecture, videos. (1607437)
turbosquid
$10
Wheel V3S
...e 3d model wheel v3s for download as 3ds, obj, fbx, and blend on turbosquid: 3d models for games, architecture, videos. (1344250)
Assembly
3d_export
$7
Electronic product assembly machine assembly machine
...electronic product assembly machine assembly machine
3dexport
electronic product assembly machine assembly machine
3d_export
$15
generator assembly line
...ced and assembled in the form of module block. it is a demonstration project of generator assembly. welcome to download and learn
3d_export
$10
elevator traction machine assembly line motor assembly process
... traction machine assembly line motor assembly process
3dexport
elevator traction machine assembly line (motor assembly process)
3d_export
$16
pin assembly machine
...pin assembly machine
3dexport
pin assembly machine
3d_export
$7
tower-crane-assembly
...tower-crane-assembly
3dexport
tower-crane-assembly
turbosquid
$100

Engine Assembly
...id
royalty free 3d model engine assembly for download as stl on turbosquid: 3d models for games, architecture, videos. (1658296)
turbosquid
$100

Engine Assembly
...id
royalty free 3d model engine assembly for download as stl on turbosquid: 3d models for games, architecture, videos. (1658293)
turbosquid
$100

Engine Assembly
...id
royalty free 3d model engine assembly for download as stl on turbosquid: 3d models for games, architecture, videos. (1658291)
turbosquid
$75
Platform Assembly
...royalty free 3d model platform assembly for download as blend on turbosquid: 3d models for games, architecture, videos. (1472939)
turbosquid
$15
generator assembly
...y free 3d model generator assembly for download as and sldas on turbosquid: 3d models for games, architecture, videos. (1469469)
Complete
turbosquid
$35
complete plan
...quid
royalty free 3d model complete plan for download as max on turbosquid: 3d models for games, architecture, videos. (1221693)
turbosquid
$10

COMPLETE WASHROOM
...
royalty free 3d model complete washroom for download as max on turbosquid: 3d models for games, architecture, videos. (1413853)
turbosquid
$1

Complete Office
...id
royalty free 3d model complete office for download as max on turbosquid: 3d models for games, architecture, videos. (1323641)
vizpark
$509

VP COMPLETE
...e is the ultimate collection of 3d archviz assets, including 900 3d models, 50 hdris, 100 tileable textures and pattern software.
turbosquid
$15
excercise complete
... available on turbo squid, the world's leading provider of digital 3d models for visualization, films, television, and games.
turbosquid
$1
complete cabinet
... available on turbo squid, the world's leading provider of digital 3d models for visualization, films, television, and games.
turbosquid
free

complete Desk.lwo
... available on turbo squid, the world's leading provider of digital 3d models for visualization, films, television, and games.
3d_export
$5

Complete Wall Pack
...complete wall pack
3dexport
a complete set of 14 walls
3d_ocean
$12

Complete Model
... any other purpose. model includes, tree, street light, bench with urn, horse model. total poly and verts are 282,036 and 334,...
turbosquid
$80

sasuke complete susanoo
...oyalty free 3d model sasuke complete susanoo for download as on turbosquid: 3d models for games, architecture, videos. (1693376)