Thingiverse
Commodore PET Replacement Keyboards by charlesmouse
by Thingiverse
Last crawled date: 3 years, 3 months ago
Commodore PET Replacement Keyboards (under construction)
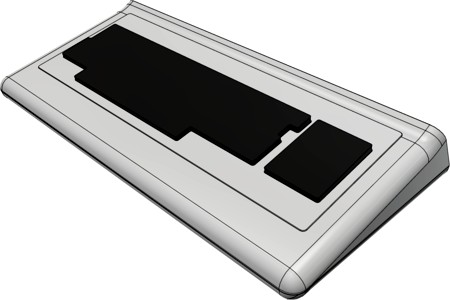
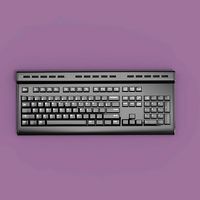
1) "SK" Keyboard Shell 3D Models
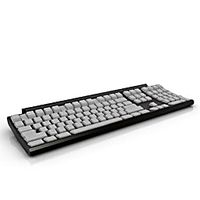
2) "SK" or Business Keyboard
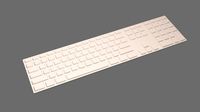
3) "GFX" or Standard Keyboard
The Commodore PET is a part of computing history, one of the "trinity" of home computers from 1977... at least if you are American.
A working PET in one of it's many guises is quite the machine to have if you are in to retro computing. But there are two recurring hurdles for functioning PET Nivarna:
-PET keyboards are bloody crap and get more unreliably crap as the years roll on
-The groovy "SK" models have a detachable keyboard that is commonly missing
Having a bought a cheap PET 8096SK + matching floppy drive, but without keyboard, I have spent years looking for one without success - that's why keyboardless "SK" PETs are cheaper than comlete ones.
It's true that most 8bit Commodore computers use much the same connection so it's possible to butcher a Vic-20 or C=64 keyboard to do the job. But in my opinion it dosen't look right and if you are a keyboardless "SK" owner the best you can hope for is an ugly mess of wires.
Having had enough of this situation and utterly shocked that no one seems to have beaten me to it I decided to sort my lack of a keyboard once and for all by designing a drop-in replacement for the "SK" mechanism using modern components along with the 3D models required to construct an OEM acurate housing.Having gotten the bit between my teeth, and knowing how increasigly rubbish old PET keyboards are I also designed a drop-in replacement for the more common "GFX" mechanism.
Now there is finally a way to have a functioning and reliable PET keyboard it's only right that I should shareNo I'm not going to do a replacement "chicklet" keyboard as found on the very first PETs. Frustratingly the most awful PET keyboard is the most reliable anyway.
Instructions:
1) As you are most likely reading this on Thingyverse let's start with the 3D Models for the "SK" keyboard shell.
-PET_SK_Keyboard_Top.stl and PET_GFX_Keyboard_Bottom.stl are the models for the upper and lower halves of the shell
-PET_SK_Keyboard_Shell.123dx is the 123D Design file provided should you wish to edit the design further
Note:
Lacking both a "SK" keyboard of my own and the original Commodore design making this model has been quite the SOB. Having said that I believe it's pretty darn accurate and with some effort should make for a pretty convincing replacement...
...having said that I have not seen the inside of the "SK" keyboard housing so I very much doubt my internals resemble those of Commodore's.
Construction:
As far as printing the parts I'm afraid that's up to you. The .stl files are likely far too big to fit in most 3D printers so you have two options:
i) Slice up the models in your, er, slicer and print out in lots of bits.
-If doing so I'd strongly advise ABS as the parts can be permanently "glued" using Acetone slurry or having some epoxy on hand to make solid and sandable bonds.
-The Keyboard PCB can be used as a convenient method for holding the upper shell together while gluing, the lower shell can then be matched to the upper during it's assembly.
-DIY printing and assembling is going to take one hell of a long time and use a lot of plastic - be warned! It's also important to realise that once glued you will need to spend a good deal of time with filler, sand paper, primer, filler, sand paper, primer, filler, primer, paint, sand paper, paint, paint if you even remotely hope to get a good result.
Tip: A small sponge roller with some thick primer once you are happy with the shape is a good way to replicate the texture of the computer's plastics.
ii) Just send it off for commercial printing!
-Many of the problems become someone else's but it's going to be very expensive. Get some quotes!
-There will be much less finishing work to do but for this kind of project the results are entirely down to the work you put in.
The Keyboard Mechanisms:
2) 3)
Both designs are my own work based off available Comodore reference material. They are both intended to be a drop-in replacement for the OEM mechanisms.
Note:
As I don't have the means to make the metal parts my "SK" keyboard housing is designed to mount the bare keyboard PCB directly; mine or Commodore's. If you are intending to use either of my designs as a replacements for knackered Commodore units remember to keep the metal bits for fitment to Commodore's cases!
My "SK" keyboard should be a near-perfect fit as I found the original design files. The "GFX" keyboard should also fit with regard to key placement but the PCB may be a little out as I had to take an educated guess - it should be fine but a little faffing may be required
Both Keyboards:
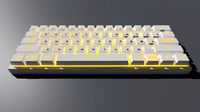
-An accurate reproduction of the Commodore's originals using Cherry MX switches and key caps.
-There are two extra CRSR keys located either side of the Space Bar for convenience, and also the PET's Space Bar is longer than any commonly available today.
-The "old school" locking SHIFT LOCK key has no modern analogue available. I have implemented two solutions:
i) Quick 'n dirty: The SHIFT LOCK key can be configured to act as a normal SHIFT key.
ii) Awesome: The PCBs include an optional circuit to implement shift-locking electronically and an indicator LED. If used a 5v line will need to be brought from the computer's motherboard to the keyboard. I have re-purposed the unused "Key" pad at the keyboard end for this job.
-I did consider adding diodes to the keys to reduce ghosting issues but in the end decided against it:
i) Who cares? It's a retro system, any foibles within reason are part of it's charm, all of it's ancient software will will be written with this in mind.
ii) Given Commodore's habit of building kludgey solutions in to it's hardware I don't want to risk breaking the highly dodgy mapping system, especially where modifiers are concerned.
The "SK" Keyboard:
-The layout has been further altered to reflect the C=64 as some of the PET's keys are in really awkward places.
The Keyboard Circuitboards:
Designed in Eagle because that's the industry standard even though it's an unintuitive bastard to use. Still, I've done my time learning it so don't ask for versions using other CAD software! My original Eagle files are included as well as .png files of the schematics.
For those who just want to get on with it the files you will be most interested in are:
-...BOM.txt - a list of parts required to build the Keyboard - if in doubt use a search engine.
-PET_SK_Keyboard.zip - an archive of the Gerber files required to have the "SK" Keyboard PCB made.
-PET_GFX_Keyboard.zip - an archive of the Gerber files required to have the "GFX" Keyboard PCB made.
...Now don't come over all sweaty!
Assuming someone else has done all the hard work, in this case me, getting a PCB made is really, really, really, easy.
a) Select a DIY PCB fab house, there's lots to choose from. These days I use Seeed Fusion because their quality is really good and they are damn cheep!
b) You will likely need to know the dimensions (in mm) of the PCB you want making. Although many services sort this auto-magically it's worth checking the numbers are correct. The measurements are listed at the start of the BOM.txt file for each keyboard.
c) Go to the design upload page, upload the .zip file containing the Gerber files (the layout specifics of the PCB you are having made) and choose how many boards you want.
PCB's are usually made in batches so you will find ordering more than one is expected and it's not a bad idea to order the maximum for the price-breaks offered. eg: Many companies have a default of 3, Seeed tends to make a calculation based on PCB size so it's worth a fiddle before you hit "send".
d) It's highly likely that all the rest of the info can be left at the defaults. The "standard" PCB thickness is 1.6mm and I'd stick with that. Do be sure all the cheapest options are selected - you don't want to be ordering gold on flexi-PCB for example as that will cost you an arm and a leg and a wobbly PET keyboard is of no use at all!
e) This is a TWO-sided PCB design. I guess if you had nothing better to do with your life you could go through the pain of routing these as a single-sided designs to save a little money... personally I see no reason to do this unless you want bonus points for etching your own PCB from single-sided copper clad. Fun if you are in to that kind of thing.
f) You will likely have a veritable rainbow of PCB colours to choose from. Try to resist the temptation to order anything other than "green". You are only the current keeper of your classic computer, do consider the sensibilities of future custodians!
g) Once happy hit send and fill in whatever details are required for payment and postage.
Note:
Most of the cheaper / better Fab houses are in the Far East - be very careful to be sure you selected a cheaper postage option. Yes that will take a while but it's time you can use to collect parts. Overnight delivery from the far East will come with an eye-watering bill!
h) Once your PCB and parts have arrived take a good look at everything, note the helpful writing on the PCB to guide you, and go solder up your monster. I strongly advise dry-fitting everything to be sure you are happy with how things go together BEFORE attacking it with a soldering iron!!!
PS
Chances are you ended up with more parts than you need as well as more than one PCB. That's ok, it's nice to have spares in case of cock-ups. Also the savvy will build more than one as the spares can be sold on to recover costs. ;-)
Yes, yes, I know... The SHIFT LOCK circuit is done with mostly surface mount parts. There's really not many to solder and it's really not hard to do, it just requires patience. Look up some Youtube videos if you need guidance. Practice first!
If you really, really, don't want to face it that's fine. I included a jumper pad to bypass the whole thing - your SHIFT LOCK key will function as another SHIFT.
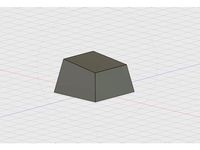
Key Caps:
Cherry MX keys so there's plenty to choose from. The ...BOM.txt files should help with specifics, they are all standard size keys. Both keyboards use a x7 length Space Bar because that's the longest available.
Do try to get key caps that are somewhat like the Commodore originals... would you want to see your granny wearing your sister's clubbing outfit..?
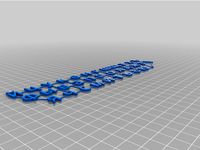
Decals:
A keyboard isn't much use if all the keys are blank. It's really up to you how you go about making those key caps useful. My prefered option is to:
-Download the required images, just do a search
-Print them out on to water soluable decal paper
-Apply the decals
-A light blow-over with some satin lacquer
Note:
If you are applying more than one decal to a key, such as the PETSCII decals on the front of "GFX" keys, I would suggest doing one at a time followed by waiting for the lacquer to properly dry before adding the next one.
Connections:
If you are going to use my designs to replicate an "SK" keyboard it's entirety likely you don't have the connection cable, me too! :-(
Happily suitable multi-core cables (preferably curly) are readily available, as is the required connector at the computer end - search engine. Just make sure you choose a cable with one extra core for that 5v line if you intend to use my SHIFT LOCK circuit.
The connector for the keyboard PCB is a Commodore only item so you won't find one new. Two options are to solder the cable direct to the keyboard (I have included pads) or reuse a connector from a dead Vic20 or C64 mechanism.
I have included a wiring diagrams for the "SK" cable, the "GFX" connection is pretty straightforward and there's plenty of info on line if you are stuck.
Finally:
I hope you have fun building your PET SK keyboard, if you find this "thing" useful or interesting do please share. There are a lot of PET owners out there who would kill for a replacement keyboard, it amazes me that as far as I can tell I'm the first to publish a full set of DIY instructions and files.
PS
If you're thinking "I wonder if I can persuade CharlesMouse to make one for me?" the answer is "No!, don't ask!"
-I do these projects for my own amusement and needs
-I like to share because it's nice to be nice, and I hope to encourage others to get stuck in
-Going in to production opens a tedious can of worms that I have absolutely no interest in.
Q & A:
Q: Are there any mistakes in these files?
A: Very likely, although I have thoroughly checked everything. Sadly the world we live in requires me to state that I accept absolutely no responsibility for the suitability of any of the provided material.
Q: What am I allowed to do with these files?
A: If it's for your own personal use whatever you like and I hope you find them useful.
A: If you intend to make stuff for others that's very generous of you, all the best.
A: If you intend to use to manufacturer for profit items based on these designs or derivatives of these designs I expect to be credited.
Otherwise best of luck but please don't go ripping people off - I have been known to manufacture boards of my own design to sell at minimal cost just to publicly embarrass / put out of business anyone I find using my material to make silly money.
You have been warned! If I am prepared to give away my hard work for free the least you can do is not take unreasonable advantage of people.
Q: Feedback?
A: As the years go by I get increasingly jaded as there's always a vocal minority who seem to feel it's their duty to rain on other's parade, but do feel free to leave comments here:
-Kind comments are always welcome
-Suggestions are always welcome
-Constructive criticism is always welcome
-If you think you could have done better then do so, I don't need to hear about it
-Pissy comments will be met with a suggestion to go -f- yourself if I bother to respond at all
Q: Will you be making / selling any boards yourself?
A: Never say never but assume the answer is absolutely not!
Q: Why?
A: I do this kind of thing for my own amusement and release what I do in the hope others may benefit.
-Manufacturing runs of electronic devices is no fun at all
-I just can't be bothered with the flack one inevitably receives from selfish idiots as a result of going in to production...
...unless it's to teach carpet-baggers charging too much for my designs a lesson!
Q: Support?
A: If you have a question feel free to ask but while I try to give full and helpful answers I'm rarely about so don't answer often.
Q: Why are you such a misery?
A: Too many years of too many unreasonable responses to my attempts at being helpful. As a result I remain helpful but only on my own terms.
Do have fun, I sincerely hope lots of people find these designs useful.
CharlesMouse.
1) "SK" Keyboard Shell 3D Models
2) "SK" or Business Keyboard
3) "GFX" or Standard Keyboard
The Commodore PET is a part of computing history, one of the "trinity" of home computers from 1977... at least if you are American.
A working PET in one of it's many guises is quite the machine to have if you are in to retro computing. But there are two recurring hurdles for functioning PET Nivarna:
-PET keyboards are bloody crap and get more unreliably crap as the years roll on
-The groovy "SK" models have a detachable keyboard that is commonly missing
Having a bought a cheap PET 8096SK + matching floppy drive, but without keyboard, I have spent years looking for one without success - that's why keyboardless "SK" PETs are cheaper than comlete ones.
It's true that most 8bit Commodore computers use much the same connection so it's possible to butcher a Vic-20 or C=64 keyboard to do the job. But in my opinion it dosen't look right and if you are a keyboardless "SK" owner the best you can hope for is an ugly mess of wires.
Having had enough of this situation and utterly shocked that no one seems to have beaten me to it I decided to sort my lack of a keyboard once and for all by designing a drop-in replacement for the "SK" mechanism using modern components along with the 3D models required to construct an OEM acurate housing.Having gotten the bit between my teeth, and knowing how increasigly rubbish old PET keyboards are I also designed a drop-in replacement for the more common "GFX" mechanism.
Now there is finally a way to have a functioning and reliable PET keyboard it's only right that I should shareNo I'm not going to do a replacement "chicklet" keyboard as found on the very first PETs. Frustratingly the most awful PET keyboard is the most reliable anyway.
Instructions:
1) As you are most likely reading this on Thingyverse let's start with the 3D Models for the "SK" keyboard shell.
-PET_SK_Keyboard_Top.stl and PET_GFX_Keyboard_Bottom.stl are the models for the upper and lower halves of the shell
-PET_SK_Keyboard_Shell.123dx is the 123D Design file provided should you wish to edit the design further
Note:
Lacking both a "SK" keyboard of my own and the original Commodore design making this model has been quite the SOB. Having said that I believe it's pretty darn accurate and with some effort should make for a pretty convincing replacement...
...having said that I have not seen the inside of the "SK" keyboard housing so I very much doubt my internals resemble those of Commodore's.
Construction:
As far as printing the parts I'm afraid that's up to you. The .stl files are likely far too big to fit in most 3D printers so you have two options:
i) Slice up the models in your, er, slicer and print out in lots of bits.
-If doing so I'd strongly advise ABS as the parts can be permanently "glued" using Acetone slurry or having some epoxy on hand to make solid and sandable bonds.
-The Keyboard PCB can be used as a convenient method for holding the upper shell together while gluing, the lower shell can then be matched to the upper during it's assembly.
-DIY printing and assembling is going to take one hell of a long time and use a lot of plastic - be warned! It's also important to realise that once glued you will need to spend a good deal of time with filler, sand paper, primer, filler, sand paper, primer, filler, primer, paint, sand paper, paint, paint if you even remotely hope to get a good result.
Tip: A small sponge roller with some thick primer once you are happy with the shape is a good way to replicate the texture of the computer's plastics.
ii) Just send it off for commercial printing!
-Many of the problems become someone else's but it's going to be very expensive. Get some quotes!
-There will be much less finishing work to do but for this kind of project the results are entirely down to the work you put in.
The Keyboard Mechanisms:
2) 3)
Both designs are my own work based off available Comodore reference material. They are both intended to be a drop-in replacement for the OEM mechanisms.
Note:
As I don't have the means to make the metal parts my "SK" keyboard housing is designed to mount the bare keyboard PCB directly; mine or Commodore's. If you are intending to use either of my designs as a replacements for knackered Commodore units remember to keep the metal bits for fitment to Commodore's cases!
My "SK" keyboard should be a near-perfect fit as I found the original design files. The "GFX" keyboard should also fit with regard to key placement but the PCB may be a little out as I had to take an educated guess - it should be fine but a little faffing may be required
Both Keyboards:
-An accurate reproduction of the Commodore's originals using Cherry MX switches and key caps.
-There are two extra CRSR keys located either side of the Space Bar for convenience, and also the PET's Space Bar is longer than any commonly available today.
-The "old school" locking SHIFT LOCK key has no modern analogue available. I have implemented two solutions:
i) Quick 'n dirty: The SHIFT LOCK key can be configured to act as a normal SHIFT key.
ii) Awesome: The PCBs include an optional circuit to implement shift-locking electronically and an indicator LED. If used a 5v line will need to be brought from the computer's motherboard to the keyboard. I have re-purposed the unused "Key" pad at the keyboard end for this job.
-I did consider adding diodes to the keys to reduce ghosting issues but in the end decided against it:
i) Who cares? It's a retro system, any foibles within reason are part of it's charm, all of it's ancient software will will be written with this in mind.
ii) Given Commodore's habit of building kludgey solutions in to it's hardware I don't want to risk breaking the highly dodgy mapping system, especially where modifiers are concerned.
The "SK" Keyboard:
-The layout has been further altered to reflect the C=64 as some of the PET's keys are in really awkward places.
The Keyboard Circuitboards:
Designed in Eagle because that's the industry standard even though it's an unintuitive bastard to use. Still, I've done my time learning it so don't ask for versions using other CAD software! My original Eagle files are included as well as .png files of the schematics.
For those who just want to get on with it the files you will be most interested in are:
-...BOM.txt - a list of parts required to build the Keyboard - if in doubt use a search engine.
-PET_SK_Keyboard.zip - an archive of the Gerber files required to have the "SK" Keyboard PCB made.
-PET_GFX_Keyboard.zip - an archive of the Gerber files required to have the "GFX" Keyboard PCB made.
...Now don't come over all sweaty!
Assuming someone else has done all the hard work, in this case me, getting a PCB made is really, really, really, easy.
a) Select a DIY PCB fab house, there's lots to choose from. These days I use Seeed Fusion because their quality is really good and they are damn cheep!
b) You will likely need to know the dimensions (in mm) of the PCB you want making. Although many services sort this auto-magically it's worth checking the numbers are correct. The measurements are listed at the start of the BOM.txt file for each keyboard.
c) Go to the design upload page, upload the .zip file containing the Gerber files (the layout specifics of the PCB you are having made) and choose how many boards you want.
PCB's are usually made in batches so you will find ordering more than one is expected and it's not a bad idea to order the maximum for the price-breaks offered. eg: Many companies have a default of 3, Seeed tends to make a calculation based on PCB size so it's worth a fiddle before you hit "send".
d) It's highly likely that all the rest of the info can be left at the defaults. The "standard" PCB thickness is 1.6mm and I'd stick with that. Do be sure all the cheapest options are selected - you don't want to be ordering gold on flexi-PCB for example as that will cost you an arm and a leg and a wobbly PET keyboard is of no use at all!
e) This is a TWO-sided PCB design. I guess if you had nothing better to do with your life you could go through the pain of routing these as a single-sided designs to save a little money... personally I see no reason to do this unless you want bonus points for etching your own PCB from single-sided copper clad. Fun if you are in to that kind of thing.
f) You will likely have a veritable rainbow of PCB colours to choose from. Try to resist the temptation to order anything other than "green". You are only the current keeper of your classic computer, do consider the sensibilities of future custodians!
g) Once happy hit send and fill in whatever details are required for payment and postage.
Note:
Most of the cheaper / better Fab houses are in the Far East - be very careful to be sure you selected a cheaper postage option. Yes that will take a while but it's time you can use to collect parts. Overnight delivery from the far East will come with an eye-watering bill!
h) Once your PCB and parts have arrived take a good look at everything, note the helpful writing on the PCB to guide you, and go solder up your monster. I strongly advise dry-fitting everything to be sure you are happy with how things go together BEFORE attacking it with a soldering iron!!!
PS
Chances are you ended up with more parts than you need as well as more than one PCB. That's ok, it's nice to have spares in case of cock-ups. Also the savvy will build more than one as the spares can be sold on to recover costs. ;-)
Yes, yes, I know... The SHIFT LOCK circuit is done with mostly surface mount parts. There's really not many to solder and it's really not hard to do, it just requires patience. Look up some Youtube videos if you need guidance. Practice first!
If you really, really, don't want to face it that's fine. I included a jumper pad to bypass the whole thing - your SHIFT LOCK key will function as another SHIFT.
Key Caps:
Cherry MX keys so there's plenty to choose from. The ...BOM.txt files should help with specifics, they are all standard size keys. Both keyboards use a x7 length Space Bar because that's the longest available.
Do try to get key caps that are somewhat like the Commodore originals... would you want to see your granny wearing your sister's clubbing outfit..?
Decals:
A keyboard isn't much use if all the keys are blank. It's really up to you how you go about making those key caps useful. My prefered option is to:
-Download the required images, just do a search
-Print them out on to water soluable decal paper
-Apply the decals
-A light blow-over with some satin lacquer
Note:
If you are applying more than one decal to a key, such as the PETSCII decals on the front of "GFX" keys, I would suggest doing one at a time followed by waiting for the lacquer to properly dry before adding the next one.
Connections:
If you are going to use my designs to replicate an "SK" keyboard it's entirety likely you don't have the connection cable, me too! :-(
Happily suitable multi-core cables (preferably curly) are readily available, as is the required connector at the computer end - search engine. Just make sure you choose a cable with one extra core for that 5v line if you intend to use my SHIFT LOCK circuit.
The connector for the keyboard PCB is a Commodore only item so you won't find one new. Two options are to solder the cable direct to the keyboard (I have included pads) or reuse a connector from a dead Vic20 or C64 mechanism.
I have included a wiring diagrams for the "SK" cable, the "GFX" connection is pretty straightforward and there's plenty of info on line if you are stuck.
Finally:
I hope you have fun building your PET SK keyboard, if you find this "thing" useful or interesting do please share. There are a lot of PET owners out there who would kill for a replacement keyboard, it amazes me that as far as I can tell I'm the first to publish a full set of DIY instructions and files.
PS
If you're thinking "I wonder if I can persuade CharlesMouse to make one for me?" the answer is "No!, don't ask!"
-I do these projects for my own amusement and needs
-I like to share because it's nice to be nice, and I hope to encourage others to get stuck in
-Going in to production opens a tedious can of worms that I have absolutely no interest in.
Q & A:
Q: Are there any mistakes in these files?
A: Very likely, although I have thoroughly checked everything. Sadly the world we live in requires me to state that I accept absolutely no responsibility for the suitability of any of the provided material.
Q: What am I allowed to do with these files?
A: If it's for your own personal use whatever you like and I hope you find them useful.
A: If you intend to make stuff for others that's very generous of you, all the best.
A: If you intend to use to manufacturer for profit items based on these designs or derivatives of these designs I expect to be credited.
Otherwise best of luck but please don't go ripping people off - I have been known to manufacture boards of my own design to sell at minimal cost just to publicly embarrass / put out of business anyone I find using my material to make silly money.
You have been warned! If I am prepared to give away my hard work for free the least you can do is not take unreasonable advantage of people.
Q: Feedback?
A: As the years go by I get increasingly jaded as there's always a vocal minority who seem to feel it's their duty to rain on other's parade, but do feel free to leave comments here:
-Kind comments are always welcome
-Suggestions are always welcome
-Constructive criticism is always welcome
-If you think you could have done better then do so, I don't need to hear about it
-Pissy comments will be met with a suggestion to go -f- yourself if I bother to respond at all
Q: Will you be making / selling any boards yourself?
A: Never say never but assume the answer is absolutely not!
Q: Why?
A: I do this kind of thing for my own amusement and release what I do in the hope others may benefit.
-Manufacturing runs of electronic devices is no fun at all
-I just can't be bothered with the flack one inevitably receives from selfish idiots as a result of going in to production...
...unless it's to teach carpet-baggers charging too much for my designs a lesson!
Q: Support?
A: If you have a question feel free to ask but while I try to give full and helpful answers I'm rarely about so don't answer often.
Q: Why are you such a misery?
A: Too many years of too many unreasonable responses to my attempts at being helpful. As a result I remain helpful but only on my own terms.
Do have fun, I sincerely hope lots of people find these designs useful.
CharlesMouse.
Similar models
thingiverse
free
Keyboard Key Base by CraftingWorks
...put a symbol or letter on it. if you need one specifically made with a letter, and don't have fusion360, feel free to ask. :)
3dwarehouse
free

Commodore PET 2001-32 N (1979)
...cbm #commodore_computer #classic #computer #domestic #educational #electronics #floppy #keyboard #rare #retro #system #technology
thingiverse
free

Commodore Logo CapsLock key by DigitalMonk
...ront_legend() works just like legend() but puts it on the front face of the key instead of the top).
hope some of you enjoy it!
thingiverse
free
PocketCHIP "Mechanical" Keyboard by callmelightningjunior
... shift. the pale yellow key is the one normal character key in the row.
all in all, i'm very pleased with how this turned out
thingiverse
free
Russian Keyboard "Overlay"
...ill flexible enough. i do not suggest using pla as it will be too rigid and you will not be able to press a single key at a time.
thingiverse
free
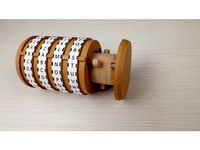
Cryptex by Obi-Don
...a glue stick to put the letters on, but this made the paper stretch a bit, so i made the strips of letters smaller to compensate.
thingiverse
free

DBPower Spare keyboard foot by mrjanus1
...'s foor if you have one. if not, it's a super small, really quick print so it's not a big deal if it doesn't fit.
thingiverse
free

C64 keyboard pin by notameadow
...lutely perfect but with this level of detail you have to be aware that we are close to physical limits of what printing can do :)
thingiverse
free

Gaming Laptop Cooling Fan - Hinge by tallonedakiller
...ys slits to conduct the airflow on the dissipation bar, increasing the fresh air flow pulled in by the laptop's built-in fan.
thingiverse
free
Microsoft Comfort Curve 2000 Enter Key by badiozam
...out and print my own key.
unlikely that anyone else will need one but i figured i'd shared the design because you never know!
Charlesmouse
thingiverse
free
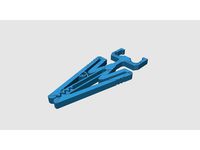
2020 Croc Clip by charlesmouse
...t for the life of me find the original! if you recognise your work here please contact me so i can include the appropriate kudos.
thingiverse
free
ANYCUBIC Kossel Delta Three PointS Filament Cooler - Remix by charlesmouse
...o print it in pla, oops, and it got a bit saggy. so if you're as daft as me here's a version with a bit of extra support.
thingiverse
free

Bong_Bong_Aircon by charlesmouse
...y on the eye, easy on the mind, and easy on the wallet. feel free to test it out and tell me if it's an utter failure or not.
thingiverse
free

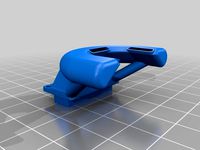
Mr Toothy - A cooling duct for the Anycubic Kossel Linear Plus by charlesmouse
...er blower thingy)
so...
i thought i'd do a duct that looks a little disturbing, if not necessarily better than the stock one.
thingiverse
free

Atari 800 PI Case by charlesmouse
...e created...
...among other options.
or you could just print the whole thing as one piece at whatever size you like and paint it.
thingiverse
free

Toilet Duct for Anycubic Kossel by charlesmouse
...d access, but life would be very dull if we all had the same point of view so i did my best spin on the close-ring duct type too.
thingiverse
free

Filament Bearing for Anycubic Kossel by charlesmouse
...less, a few minutes of 'twiddling' will be needed to get them to run smoothly.
i hope you kossel owners find this useful.
thingiverse
free
Geeetech Octogon by charlesmouse
...39;s own settings should prove a useful guide.
don't forget such a setup needs three of everything, including the fillament.
thingiverse
free
Anycubic Kossel Tentacle Cooling Duct by charlesmouse
...d with a better blower. eg: see my better blower thingy.
i hope it proves useful to someone, do let me know. suggestions welcome.
thingiverse
free

Colander Cooling Duct Anycubic Kossel LInear Plus by charlesmouse
...ing, version but sadly it wouldn't fit with the hot end heat probe in place - a bit of an issue i'm sure you'l agree.
Commodore
3d_ocean
$15

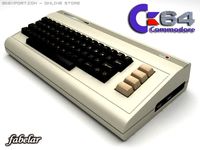
Commodore 64
...64 commodore commodore 64 cult games home computer old retro vintage
the famous c64. this is the version that was released first.
3d_ocean
$15
Commodore 64
...bm 64 or vic-64, is an 8-bit home computer introduced in january 1982 by commodore international. it is listed in the guinness...
turbosquid
$199

Commodore 64
... available on turbo squid, the world's leading provider of digital 3d models for visualization, films, television, and games.
turbosquid
$99

Commodore 64
... available on turbo squid, the world's leading provider of digital 3d models for visualization, films, television, and games.
turbosquid
$39

Holden Commodore
... available on turbo squid, the world's leading provider of digital 3d models for visualization, films, television, and games.
cg_studio
$79

Commodore C643d model
...commodore c643d model
cgstudio
.max - commodore c64 3d model, royalty free license available, instant download after purchase.
3d_export
$79
Commodore C64 3D Model
... game retro photorealistic toy atari computer people play console nostalgia classic
commodore c64 3d model fabelar 29273 3dexport
turbosquid
free

Holden Commodore Custom
... available on turbo squid, the world's leading provider of digital 3d models for visualization, films, television, and games.
turbosquid
free

Commodore Vic 64
... available on turbo squid, the world's leading provider of digital 3d models for visualization, films, television, and games.
humster3d
$15

3D model of Commodore Armchair
... detailed 3d model of commodore armchair in various file formats. all our 3d models were created maximally close to the original.
Keyboards
3d_ocean
$9
Keyboard
...odels computer electronics keyboard peripheral / part
computer keyboard 3d models. it’s computer keyboard. render ready keyboard.
archibase_planet
free
Keyboard
...keyboard
archibase planet
input keyboard keyboard office equipment
pro keyboard - 3d model for interior 3d visualization
3d_export
$5
keyboard
...keyboard
3dexport
computer keyboard
3d_export
$11
Keyboard
...keyboard
3dexport
gaming keyboard with backlight 1:1
3d_export
free
keyboard
...keyboard
3dexport
keyboard blender stl obj fbx
archibase_planet
free
Keyboard
...keyboard
archibase planet
keyboard pc equipment
keyboard apple n130315 - 3d model (*.gsm+*.3ds) for interior 3d visualization.
3d_export
free
keyboard gaming
...keyboard gaming
3dexport
keyboard gaming include: 1 x keyboard gaming.blend 3 x keyboard gaming.png
archibase_planet
free
Keyboard
...keyboard
archibase planet
keyboar pc equipment
keyboard - 3d model (*.gsm+*.3ds) for interior 3d visualization.
3d_ocean
$9

keyboard USB
...models computer electronics keyboard peripheral / part
keyboard for computer 3d models. high detailed model of computer keyboard.
turbosquid
$24

Keyboard
...urbosquid
royalty free 3d model keyboard for download as max on turbosquid: 3d models for games, architecture, videos. (1710291)
Pet
3d_export
$5

PET Bottle
...pet bottle
3dexport
this is a pet bottle of clorina, deagreaser, glass cleaner of something similar
turbosquid
$35
Caxinha Pet
...osquid
royalty free 3d model caxinha pet for download as skp on turbosquid: 3d models for games, architecture, videos. (1178810)
turbosquid
$14

Pet Shoes
...rbosquid
royalty free 3d model pet shoes for download as max on turbosquid: 3d models for games, architecture, videos. (1332619)
turbosquid
$8
Pet Shop In
...bosquid
royalty free 3d model pet shop in for download as ma on turbosquid: 3d models for games, architecture, videos. (1388224)
turbosquid
$5

Pet Bowl
...urbosquid
royalty free 3d model pet bowl for download as max on turbosquid: 3d models for games, architecture, videos. (1709411)
turbosquid
$1

Bed Pet
...turbosquid
royalty free 3d model bed pet for download as ige on turbosquid: 3d models for games, architecture, videos. (1537522)
3d_export
$10

Wood Pet House Pet
...~ 100,000 model parts: 1 texture format: .png .jpg resolution: 1024*1024 pbr in substance painter formats: .obj .gltf .fbx .blend
3d_export
$5

pet house 001
...pet house 001
3dexport
house for pets: cat or small dog breeds.
turbosquid
$18
Pet feeder
...ee 3d model pet feeder for download as max, max, fbx, and obj on turbosquid: 3d models for games, architecture, videos. (1559898)
3d_ocean
$4

Pet Bottle
...max 2013. rendering, material and lighting varay. the polygon counting 450797. no extra material used. it is a house hold things.
Replacement
3d_export
$12

replaceable bristle
...replaceable bristle
3dexport
this is 3d printable replaceable bristle toothbrush.
3d_export
$34
Knee Replacement
...h meets the lower leg. ... during a total knee replacement, the end of the femur bone is removed and replaced with a metal shell.
3d_export
$44
Hip Replacement
...omponents. the damaged femoral head is removed and replaced with a metal stem that is placed into the hollow center of the femur.
turbosquid
$59

Hip replacement
...el hip replacement for download as ma, c4d, lwo, lxo, and obj on turbosquid: 3d models for games, architecture, videos. (1520195)
turbosquid
$10

Module replacment station
...alty free 3d model module replacment station for download as on turbosquid: 3d models for games, architecture, videos. (1271271)
3d_export
$8
tool replacement gearbox
...tool replacement gearbox
3dexport
eccentric lifting mechanism, you can process according to available drawings.
turbosquid
$7

Globe Oil Atomizer Replacement Housing
... oil atomizer replacement housing for download as ige and stl on turbosquid: 3d models for games, architecture, videos. (1253839)
turbosquid
free

SLICE Ceramic Scapel (Replaceable Blade)
... (replaceable blade) for download as obj, fbx, blend, and dae on turbosquid: 3d models for games, architecture, videos. (1363525)
3d_export
$19
Knee Replacement Implant
...ntimeter<br>__________________________<br>poly count :<br>polygon count - 217440<br>vertex count - 108776
turbosquid
$19

(Project) Bad odor filtering sytem with support rail and pulley that assure a comfortable gel filter element replacement.
... available on turbo squid, the world's leading provider of digital 3d models for visualization, films, television, and games.