Thingiverse
CNC XY réglage zéro (version d'angle) / homing tool (angle version) by paflviet
by Thingiverse
Last crawled date: 4 years, 5 months ago
Version française
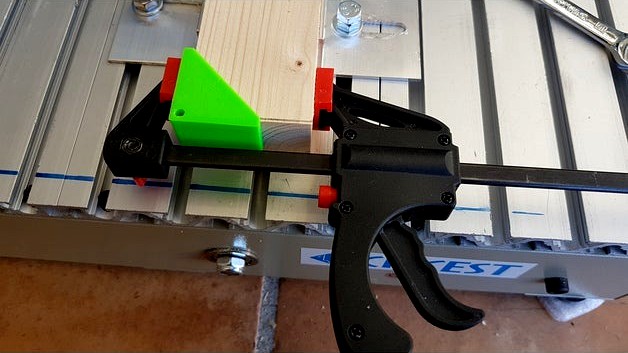
Ce petit outil aide à fixer le zéro des axes X et Y d'une CNC avant gravure :
attachez l'outil à l'angle (0, 0) de la pièce
IMPORTANT : ne mettez pas la fraise en rotation ou vous allez graver l'outil...
amenez la fraise manuellement ou avec les commandes de déplacement jusqu'à la faire rentrer dans le trou de l'outil. La fraise doit tourner librement à la main une fois dans le trou.
fixez les axes X et Y à 0 ("Zero X" et "Zero Y" dans Mach3)
remontez un peu la broche
enlevez l'outil
déplacez la fraise au-dessus de la pièce
placez une feuille de papier (70/80g) sur la pièce
abaissez la fraise jusqu'à tout juste agripper le papier, comme pour calibrer l'axe Z en impression 3D
fixez l'axe Z à 0 ("Zero Z" dans Mach3)
si vous effectuez un déplacement au zéro ("Goto Zero"), le placement devrait être parfait.
ATTENTION : sélectionnez la version adaptée au diamètre de la fraise utilisée, ou utilisez le "customizer" pour l'adapter à vos besoins.
English version
This little tool helps homing the X and Y axis of a CNC before milling :
attach the tool to the (0, 0) angle of the stock
IMPORTANT : don't start the spindle or you'll mill the tool...
jog or move manually the bit until it can plunge into the hole of the tool. The bit should move freely by hand once in the hole.
set X and Y to 0 ("Zero X" and "Zero Y" within Mach3)
raise somewhat the spindle
remove the tool
move the spindle to somewhere over the stock
place a sheet of paper (70/80g) on the stock
lower the spindle until the bit can barely grip the paper, like for 3D printing Z homing
set Z to 0 ("Zero Z" within Mach3)
if you move to zero ("Goto Zero"), it should be perfect.
IMPORTANT : select the version which fits your bit diameter, or use the "customizer" to adapt it to your needs.