Thingiverse
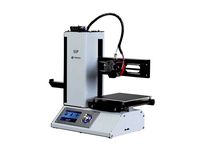
clip glass prusa MK2 by Dakanzla
by Thingiverse
Last crawled date: 3 years ago
I love my prusa mk2 and I wanted to print on glass with it, so I checked out techtiptricks video on youtube about that: https://www.youtube.com/watch?v=VQNCvE2OLhA
The gcode to do this is available on prusamk2.com: http://www.prusamk2.com/printing-on-glass-with-youre-prusa-i3-mk2-ohhh-so-smooth/
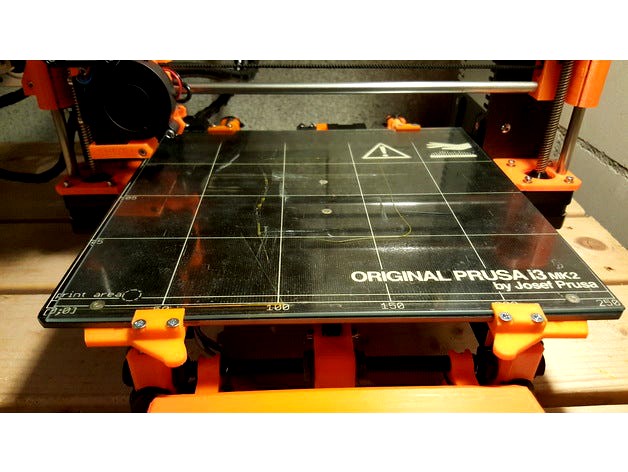
Unfortunately all my clips to hold the glass didn't work verry well and were often been pulled away by the extruder, like in techtipricks video. So I created my own clips that can be integrated into the heatbed and don't desturbe the extruder.
Heres the manual how you install them on your prusa mk2 (compare the pictures):
unscrew all the 6 screws (2 front, 2 back, 2 middle) that hold the heatbed to the printer
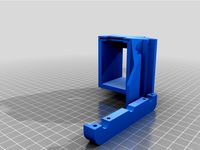
put the 4 hex-nut-pieces into the four bottom-clip-parts (FL,FR,BL,BR). Make sure that they are under the bottom-clip-parts!
clean the top-clip parts and put some M3x16 screws through them. let them stand out a little bit like shown on the pictures
combine all the bottom-clip-parts and the top-clip-parts exept the BL-part by screwing them together. let some space between both parts.
put on the clips together with the already entered hex-nut-parts under the hex-nuts of the heatbed. Make sure the hex-nut-parts are NOT on top (compare pictures). the clips are labled: FL (front left), FR (front right), BL (back left), BR (back right).
tighten all the screws to the heatbed again. ATTENTION: Make sure the white cable from under the heatbed doesn't get jammed by the BL-clip (should go right around it)!
now put the top-clip-part and the BL-clip together with the screws.
put the glass on the heatbed and close all clips. Then tighten all screws until the clips hold the glass tight an can be removed easely. Make shure the screws dont poke out from the top-clip parts, especially not on the FL- and the FR-parts! If they poke out to much, they can get in contact with the extruder.
GCODE: This is the gcode I use on my printer for the starting procedure. Make sure you adapt it for yours:
G1 Z2.0 : Enter the thickness of your glass in this line of code (in this example 2.0 millimeters)
You got 2 minutes to insert the glass (beep after the first minute)
G21 ; set units to millimeters
G90 ; use absolute positioning
M82 ; absolute extrusion mode
M104 S{material_print_temperature} ; set extruder temp
M140 S{material_bed_temperature} ; set bed temp
M190 S{material_bed_temperature} ; wait for bed temp
M109 S{material_print_temperature} ; wait for extruder temp
G92 E0.0 ; reset extruder distance position
G80 ; mesh bed leveling
G1 Y-3.0 F1000.0 ; go outside printing area
G1 F600 Z+30
G4 P30000 ; pause for 1 minute
M300 S1567 P240 ; Play a Beep
M117 One minute remaining ; One minute remaining warning
G4 P30000 ; pause 1 more minute
G1 Z2.0 ; consider glass thickness Measure your glass thickness first
G92 Z0 ; Set absolute positioning for remaining print
G1 X60.0 E9.0 F1000.0 ; intro line
G1 X100.0 E12.5 F1000.0 ; intro line
G92 E0.0 ; reset extruder distance position
Thats it :-) Now you got a mk2 with mounted clips that are not influenced by the extruder and can be removed easely to take out the glass. Have fun! :-)
The gcode to do this is available on prusamk2.com: http://www.prusamk2.com/printing-on-glass-with-youre-prusa-i3-mk2-ohhh-so-smooth/
Unfortunately all my clips to hold the glass didn't work verry well and were often been pulled away by the extruder, like in techtipricks video. So I created my own clips that can be integrated into the heatbed and don't desturbe the extruder.
Heres the manual how you install them on your prusa mk2 (compare the pictures):
unscrew all the 6 screws (2 front, 2 back, 2 middle) that hold the heatbed to the printer
put the 4 hex-nut-pieces into the four bottom-clip-parts (FL,FR,BL,BR). Make sure that they are under the bottom-clip-parts!
clean the top-clip parts and put some M3x16 screws through them. let them stand out a little bit like shown on the pictures
combine all the bottom-clip-parts and the top-clip-parts exept the BL-part by screwing them together. let some space between both parts.
put on the clips together with the already entered hex-nut-parts under the hex-nuts of the heatbed. Make sure the hex-nut-parts are NOT on top (compare pictures). the clips are labled: FL (front left), FR (front right), BL (back left), BR (back right).
tighten all the screws to the heatbed again. ATTENTION: Make sure the white cable from under the heatbed doesn't get jammed by the BL-clip (should go right around it)!
now put the top-clip-part and the BL-clip together with the screws.
put the glass on the heatbed and close all clips. Then tighten all screws until the clips hold the glass tight an can be removed easely. Make shure the screws dont poke out from the top-clip parts, especially not on the FL- and the FR-parts! If they poke out to much, they can get in contact with the extruder.
GCODE: This is the gcode I use on my printer for the starting procedure. Make sure you adapt it for yours:
G1 Z2.0 : Enter the thickness of your glass in this line of code (in this example 2.0 millimeters)
You got 2 minutes to insert the glass (beep after the first minute)
G21 ; set units to millimeters
G90 ; use absolute positioning
M82 ; absolute extrusion mode
M104 S{material_print_temperature} ; set extruder temp
M140 S{material_bed_temperature} ; set bed temp
M190 S{material_bed_temperature} ; wait for bed temp
M109 S{material_print_temperature} ; wait for extruder temp
G92 E0.0 ; reset extruder distance position
G80 ; mesh bed leveling
G1 Y-3.0 F1000.0 ; go outside printing area
G1 F600 Z+30
G4 P30000 ; pause for 1 minute
M300 S1567 P240 ; Play a Beep
M117 One minute remaining ; One minute remaining warning
G4 P30000 ; pause 1 more minute
G1 Z2.0 ; consider glass thickness Measure your glass thickness first
G92 Z0 ; Set absolute positioning for remaining print
G1 X60.0 E9.0 F1000.0 ; intro line
G1 X100.0 E12.5 F1000.0 ; intro line
G92 E0.0 ; reset extruder distance position
Thats it :-) Now you got a mk2 with mounted clips that are not influenced by the extruder and can be removed easely to take out the glass. Have fun! :-)
Similar models
thingiverse
free
SVO2 Purge Bucket and GCODE by RedSquirrelHobbies
... positioning on
g1 z-1 f1000 ; lower nozzle by 1mm
g90 ; absolute positioning on
m400 ; wait for finish
thingiverse
free
Prusa Mini / Mini+ Dragon Hotend Mount by Spodesta
...it uses the standard x carriage
print both on abs, pc, nylon, asa or other temp resistant filament, personally i will use cf-abs.
thingiverse
free
Geeetech A10t Purge Bucket with removable bucket by 123TaDa
...ipe
g0 x0 f2000 ; return
m211 s1 ; turn on soft stops once more
g1 e-0.5 ; try to prevent pips
g92 e0
; start extruder script end
thingiverse
free
Custom start Gcode by monopriceman
... a priming/wiping line to the rear)
g0 z3
g0 y0
g0 z0
g1 x-1;(move a little closer to the print area)
g1 e15 f250;(small retract)
thingiverse
free

Dual material Y joiner remix by hackwell
...ustom gcode
g92 e0 t1
g91
g1 t1 e-140 f3500; unload filament
g90
g92 e0 t1
g0 x{prime_tower_position_x} y{prime_tower_position_y}
thingiverse
free

Purge Bucket for A10M (cleaned up) by carterlewellyn
... e0 ;reset extruder positioning
g1 e-2 f5000 ;retract filament to resting spot
g92 e0 ;reset extruder positioning
i hope it helps
thingiverse
free

Palette+ Teflon Tube Clip for Prusa i3 MK2 by rorech
...ech
thingiverse
this is a tube holder for the palette+ at the prusa i3 mk2. it will just snap in on top of the prusa extruder.
thingiverse
free

A10M A20M Purge extension (Aibecy hotend) by deakbannok
...91 ; switch from absolute positioning to relative positioning
g1 z-0.4 f800 ;
g90 ; return to absolute
g1 e6.5 f3600.0 ;
g92 e0 ;
thingiverse
free

E3(Pro) Glass Build Plate Corner Caps by kai_to_makes
... ;move to side a little
g1 x10.4 y20 z0.28 f1500.0 e30 ;draw the second line
g92 e0 ;reset extruder
g1 z2.0 f3000 ;move z axis up
thingiverse
free

Mini dual Y adapter for E3D V6 style hotend with bowden extruders by gimle
...r
slic3r custom tool change gcode:
t[previous_extruder]
g92 e0
g1 e-110 f4200
g92 e0
t[next_extruder]
g92 e0
g1 e110 f4200
g92 e0
Dakanzla
thingiverse
free
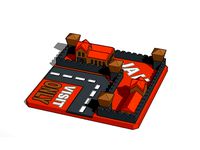
jail by Dakanzla
...verse
overview: https://www.thingiverse.com/thing:2893324
open design in tinkercad: https://www.tinkercad.com/things/5fezh5g6gb0
thingiverse
free

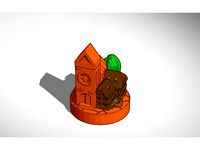
start by Dakanzla
...verse
overview: https://www.thingiverse.com/thing:2893324
open design in tinkercad: https://www.tinkercad.com/things/4xtoe11fm8i
thingiverse
free

gold by Dakanzla
...iew: https://www.thingiverse.com/thing:3072272
print 2 ore
open design in tinkercad: https://www.tinkercad.com/things/3srax43ofkx
thingiverse
free

hotel by Dakanzla
...thingiverse.com/thing:2893324
print 12 hotels for the game
open design in tinkercad: https://www.tinkercad.com/things/jbvibq1evpl
thingiverse
free

house by Dakanzla
...thingiverse.com/thing:2893324
print 32 houses for the game
open design in tinkercad: https://www.tinkercad.com/things/9spnu3bb0m4
thingiverse
free
settlement by Dakanzla
...erse.com/thing:2525047
print 5 settlements for each player
open design in tinkercad: https://www.tinkercad.com/things/anztrd1nr0x
thingiverse
free

crossing by Dakanzla
...verse.com/thing:2525047
print 10 crossings for each player
open design in tinkercad: https://www.tinkercad.com/things/izzkptm0xlw
thingiverse
free

road by Dakanzla
...ingiverse.com/thing:2525047
print 15 roads for each player
open design in tinkercad: https://www.tinkercad.com/things/bzisnjkafex
thingiverse
free

city by Dakanzla
...ingiverse.com/thing:2525047
print 4 cities for each player
open design in tinkercad: https://www.tinkercad.com/things/ectp1wisgli
thingiverse
free

chance by Dakanzla
...iverse.com/thing:2893324
print 3 chance-parts for the game
open design in tinkercad: https://www.tinkercad.com/things/hgyi19uivzr
Mk2
turbosquid
$4

Mk2
...
royalty free 3d model mk2 for download as max, obj, and fbx on turbosquid: 3d models for games, architecture, videos. (1305687)
turbosquid
$9
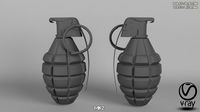
Mk2 Grenade
...osquid
royalty free 3d model mk2 grenade for download as fbx on turbosquid: 3d models for games, architecture, videos. (1175401)
turbosquid
$4

Mk2 Grenade
...quid
royalty free 3d model mk2 grenade for download as blend on turbosquid: 3d models for games, architecture, videos. (1228888)
turbosquid
$2

GRENADE MK2
...osquid
royalty free 3d model grenade mk2 for download as fbx on turbosquid: 3d models for games, architecture, videos. (1202615)
turbosquid
$2

Grenade Mk2
...osquid
royalty free 3d model grenade mk2 for download as max on turbosquid: 3d models for games, architecture, videos. (1658201)
turbosquid
$2

mk2 Grenade
...osquid
royalty free 3d model mk2 grenade for download as fbx on turbosquid: 3d models for games, architecture, videos. (1329079)
turbosquid
$75

Lanchester Mk2
...alty free 3d model lanchester mk2 for download as 3ds and max on turbosquid: 3d models for games, architecture, videos. (1497085)
turbosquid
$10

Grenade MK2
...royalty free 3d model grenade mk2 for download as max and fbx on turbosquid: 3d models for games, architecture, videos. (1146970)
turbosquid
$10

MK2 helmet
...
royalty free 3d model mk2 helmet for download as max and obj on turbosquid: 3d models for games, architecture, videos. (1371428)
turbosquid
free

MK2 Grenade
...
free 3d model mk2 grenade for download as png, obj, and fbx on turbosquid: 3d models for games, architecture, videos. (1225336)
Prusa
turbosquid
$2

Frame Filament Guide Clip-On for Prusa Mk3
...rame filament guide clip-on for prusa mk3 for download as stl on turbosquid: 3d models for games, architecture, videos. (1634730)
3d_export
free

prusa i3 mk3s laser mount for opt lasers
...to learn more about the blue laser technology that conceived the cutting and engraving laser heads from opt lasers, please visit:
turbosquid
free

Prusa small printer adapter holder
...er for download as ipt, skp, dwg, dxf, fbx, ige, obj, and stl on turbosquid: 3d models for games, architecture, videos. (1642936)
3d_export
$30

geisha by jonathan adler
...** i did a 3d printing test in the prusa software, you can find it among the attached images.<br>exchange:<br>.blend...
thingiverse
free

Prusa without Prusa (rc2) by madless
...prusa without prusa (rc2) by madless
thingiverse
just the main part of prusa rc2 faceshield, without writing.
enjoy :)
thingiverse
free

Prusa by acejbc
...prusa by acejbc
thingiverse
prusa knob info
m3 8mm screw
thingiverse
free

Prusa house
...prusa house
thingiverse
how prusa house could look like...
thingiverse
free

Prusa Mk2 "Fake Prusa" LCD cover by anraf1001
...r by anraf1001
thingiverse
version of prusa's lcd cover with "fake prusa" instead of "original prusa"
thingiverse
free

Prusa stabilizator by gutiueugen
...prusa stabilizator by gutiueugen
thingiverse
prusa stabilizator
thingiverse
free

Keychain Prusa by rbarbalho
...keychain prusa by rbarbalho
thingiverse
keychain with text prusa.
Clip
archibase_planet
free

Clip
...clip
archibase planet
paper-clip clip office equipment
clip band - 3d model for interior 3d visualization.
3d_export
$5
screw clip
...screw clip
3dexport
screw clip
3d_ocean
$4
Butterfly clip
... a butterfly clip, it comes with a ready to render set for out of the box rendering. obj version and max alones version included.
turbosquid
$2

clip
...
royalty free 3d model clip for download as ma, obj, and fbx on turbosquid: 3d models for games, architecture, videos. (1358622)
turbosquid
$5

Clip
...lty free 3d model clip for download as c4d, 3ds, fbx, and obj on turbosquid: 3d models for games, architecture, videos. (1521355)
turbosquid
$19
Clip
... available on turbo squid, the world's leading provider of digital 3d models for visualization, films, television, and games.
turbosquid
$4
Clips
... available on turbo squid, the world's leading provider of digital 3d models for visualization, films, television, and games.
turbosquid
$3
clip
... available on turbo squid, the world's leading provider of digital 3d models for visualization, films, television, and games.
turbosquid
$2

clips
... available on turbo squid, the world's leading provider of digital 3d models for visualization, films, television, and games.
turbosquid
free

clip
... available on turbo squid, the world's leading provider of digital 3d models for visualization, films, television, and games.
Glass
archibase_planet
free
Glasses
...glasses
archibase planet
glass wine-glass liqueur-glass
glasses- 3d model for interior 3d visualization.
archibase_planet
free

Glass
...archibase planet
glass cocktail glass tall wine glass martini glass
glass - 3d model (*.gsm+*.3ds) for interior 3d visualization.
archibase_planet
free

Glass
...glass
archibase planet
glass wine-glass glass-ware
glass n030209 - 3d model (*.gsm+*.3ds) for interior 3d visualization.
archibase_planet
free

Glass
...glass
archibase planet
glass-ware glass glass ware
glass n141109 - 3d model (*.gsm+*.3ds) for interior 3d visualization.
3d_ocean
$2
Glass
...liquid container low-poly glass nice glass obj r15 water glass
3d model of a beautiful glass. created the model in cinema 4d r15.
archibase_planet
free
Glass
...glass
archibase planet
glass tall wine glass wine-glass
glass n300514 - 3d model (*.gsm+*.3ds) for interior 3d visualization.
archibase_planet
free

Glass
...glass
archibase planet
glass wine-glass tall wine glass
glass n091210 - 3d model (*.gsm+*.3ds) for interior 3d visualization.
archibase_planet
free
Glass
...glass
archibase planet
glass tall wine glass glass-ware
glass n081011 - 3d model (*.gsm+*.3ds) for interior 3d visualization.
3d_ocean
$9
glasses
...glasses
3docean
glasses
max glasses v-ray
archibase_planet
free
Glass
...glass
archibase planet
glass-ware glass
glass - 3d model (*.gsm+*.3ds) for interior 3d visualization.