Thingiverse

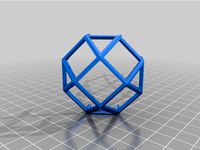
Christmas Moravian star (no support needed) by DeltaPlus
by Thingiverse
Last crawled date: 3 years, 3 months ago
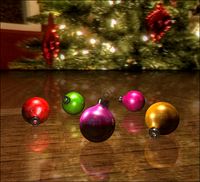
Merry Christmas! Happiness for everyone!
https://en.wikipedia.org/wiki/Moravian_starhttps://www.herrnhuter-sterne.de/en/
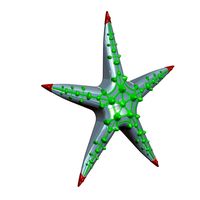
You need to print 27 parts:
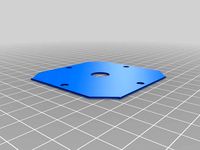
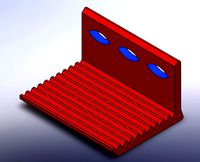
1x frame - base
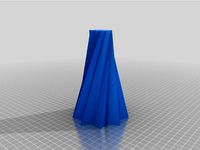
8x point3 - triangular points
17x point4 - square points
1x pointH - top point
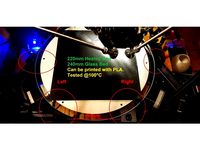
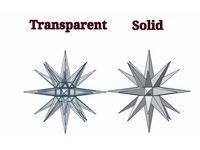
Different star sizes are available. From 16 cm to 73 cm of span between points. Larger stars can of course be printed only on larger 3D printers. Lighting can be installed for medium and large stars. Details are in the tables (among the pictures).
A simple rescaling is not recommended because the dimensions of the individual elements (e.g. the thickness of the walls of the points) were specifically calculated. Only minor changes of scale are allowed and sometimes even necessary, due to the alignment of the points to the holes in frame.
Support is not needed. Print without raft and brim is possible.
It is highly recommended to print the points in vase mode (spiral mode). Prints are faster, use less material and, above all, look much nicer. Vase mode should be used at the top of the point - starting at a certain height (see table). Printing in normal mode is also allowed.
The points are pressed into the frame with some force. The use of glue is not recommended - storing the star (until next Christmas) will be more difficult.
The sizes of the holes and pressed points (and the inclination) were determined experimentally with high accuracy. However, the actual dimensions after printing will also depend on factors, such as the type of filament used (PLA, ABS, other), the 3D printer used, the build plate used and the adhesion of the first layer, or the software used.
The fixed dimensions work well for my 3D printer (Creality), my build plate, slicer Cura, and my PLA filament.
I printed stars with sizes 2, 3, 4, 5, 6 - see photos. For sizes 4, 5, 6 I installed lighting.
Better to print the frame first, before printing the points.
If the points you print do not match, you can either apply glue or change the scale of the printed point slightly, e.g. to 101% or 99%.
You may notice that the top holes in the printed frame are slightly larger than the holes at the bottom. This is a certain feature not of the model, but of the 3D printing.
My Cura setting (nozzle size 0.4):
line_width = 0.4
layer_height = 0.2
layer_height_0 = 0.2
wall_thickness = 1.2
top_bottom_thickness = 0.8
speed_print = 20 (for frame)
speed_print = 15 (for medium frame: size=4 or size=5)
speed_print = 10 (for small frame: size=2 or size=3)
speed_print = 40 (for points)
speed_print = 20 (for small points: size=2 or size=3 ; point3 and pointH)
speed_travel = speed_print
z_seam_type = sharpest_corner (for frame)
z_seam_corner = z_seam_corner_inner (for frame)
magic_spiralize = True (for points in vase mode)
bottom_thickness = 13.8 (for points in vase mode) (different for different sizes, see table)
https://en.wikipedia.org/wiki/Moravian_starhttps://www.herrnhuter-sterne.de/en/
You need to print 27 parts:
1x frame - base
8x point3 - triangular points
17x point4 - square points
1x pointH - top point
Different star sizes are available. From 16 cm to 73 cm of span between points. Larger stars can of course be printed only on larger 3D printers. Lighting can be installed for medium and large stars. Details are in the tables (among the pictures).
A simple rescaling is not recommended because the dimensions of the individual elements (e.g. the thickness of the walls of the points) were specifically calculated. Only minor changes of scale are allowed and sometimes even necessary, due to the alignment of the points to the holes in frame.
Support is not needed. Print without raft and brim is possible.
It is highly recommended to print the points in vase mode (spiral mode). Prints are faster, use less material and, above all, look much nicer. Vase mode should be used at the top of the point - starting at a certain height (see table). Printing in normal mode is also allowed.
The points are pressed into the frame with some force. The use of glue is not recommended - storing the star (until next Christmas) will be more difficult.
The sizes of the holes and pressed points (and the inclination) were determined experimentally with high accuracy. However, the actual dimensions after printing will also depend on factors, such as the type of filament used (PLA, ABS, other), the 3D printer used, the build plate used and the adhesion of the first layer, or the software used.
The fixed dimensions work well for my 3D printer (Creality), my build plate, slicer Cura, and my PLA filament.
I printed stars with sizes 2, 3, 4, 5, 6 - see photos. For sizes 4, 5, 6 I installed lighting.
Better to print the frame first, before printing the points.
If the points you print do not match, you can either apply glue or change the scale of the printed point slightly, e.g. to 101% or 99%.
You may notice that the top holes in the printed frame are slightly larger than the holes at the bottom. This is a certain feature not of the model, but of the 3D printing.
My Cura setting (nozzle size 0.4):
line_width = 0.4
layer_height = 0.2
layer_height_0 = 0.2
wall_thickness = 1.2
top_bottom_thickness = 0.8
speed_print = 20 (for frame)
speed_print = 15 (for medium frame: size=4 or size=5)
speed_print = 10 (for small frame: size=2 or size=3)
speed_print = 40 (for points)
speed_print = 20 (for small points: size=2 or size=3 ; point3 and pointH)
speed_travel = speed_print
z_seam_type = sharpest_corner (for frame)
z_seam_corner = z_seam_corner_inner (for frame)
magic_spiralize = True (for points in vase mode)
bottom_thickness = 13.8 (for points in vase mode) (different for different sizes, see table)
Similar models
thingiverse
free

Wasted Time Vase 5 by LupoFranz
...wasted time vase 5 by lupofranz
thingiverse
simple vase, printed in vase mode (spiralize outer contour) in cura, 0.4 nozzle.
thingiverse
free
9 Pointed Star Vase by AdamsLab
...1 point star, extruding and twisting it, and shrinking the top.
print it using single walls, no top layers and vase mode enabled.
thingiverse
free

my first vase by stonee74
...my own vase.
prints well with vase mode in cura (spiralise outer contour).
printed with both pla and abs with 0.8 and 0.4 nozzle.
thingiverse
free

Christmas Tree Bauble - Vase Mode by 3DBISH
...inter does not support multi profiles:
print 7 mm as solid bottom layers (@0.1 mm = 70 bottom layers)
print the rest in vase mode
thingiverse
free

Star Christmas Tree Topper by Lego_Mandalorian_17
...ended slicer settings
brim
50% sizing (for most trees)
0% infill
low density supports
for the cone/base
use vase mode if possible
thingiverse
free

Hypocycloid Christmas Tree
...zero instead of staying constant.
vase mode is recommended. can be lit with a tea light when printed in vase mode with no bottom.
thingiverse
free

Christmas Star - on top of the tree or as ornament by Bolding
... but feel free to scale it to fit your needs (just remember to scale each part the same).
merry christmas!
(see instructions)
thingiverse
free

Gift Box - All parts printed in vase (spiral) mode by bert_lz
...on-top, the ribbon-top can be printed as well:
vases mod: off, top and bottom layers = 0, wall line count = 1, infill density = 0
thingiverse
free

Christmas Star by Jimbo70
...ing in the prusa slicer to make the star any size you want. the size in the .stl file is about right for use on a christmas tree.
thingiverse
free

Vase Mode Christmas Tree by JiriRM
...ee decoration, printed scaled to 40-50% looked good.
to hang it on the christmas tree you will need to attach a wire loop on top.
Deltaplus
thingiverse
free

Christmas Moravian star by DeltaPlus
...christmas moravian star by deltaplus
thingiverse
see: https://www.thingiverse.com/thing:4682966
thingiverse
free

Reduction - DeltaPlus Venitex M3200 Mars half mask/3M Filters by mikrobi2
...or allows you to use filters from 3m.
rubber seal is about 0.5mm thickness.
printed with abs and "sealed" with acetone.
thingiverse
free

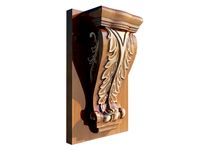
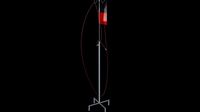
Flames - wall lamp by DeltaPlus
...ill_pattern = zigzag
infill_sparse_density = 8
speed_print = 40
speed_travel = 60
top_bottom_thickness = 0.8
wall_thickness = 0.8
thingiverse
free

Mary from Michelangelo's Pietà; remix, no support by DeltaPlus
...ity = 4 (for scale 100%) , 6 (for scale 75%) , 8 ( for scale 50%,25%) - for back
gradual_infill_steps = 2
infill_pattern = zigzag
thingiverse
free
ANYCUBIC Delta/Kossel Plus 220-240mm HeatedBed supports by enry68
...the original supports in the kit of the anycubic deltaplus obviously these supports can also be used with other...
Moravian
turbosquid
$49

Moravian Workbench
... model moravian workbench for download as blend, fbx, and obj on turbosquid: 3d models for games, architecture, videos. (1284497)
turbosquid
$5

moravian star red
... available on turbo squid, the world's leading provider of digital 3d models for visualization, films, television, and games.
3ddd
$1

RH MORAVIAN STAR PENDANT
...юстра перестанет быть оранжевой. в архиве есть файлы 3’s max 2014, 2011, fbx, obj . всем удачи, красивых картинок и реализаций.
thingiverse
free
Moravian Star by thegamebegins25
...moravian star by thegamebegins25
thingiverse
a beautiful moravian star for the top of your christmas tree, or a small ornament .
thingiverse
free

Selfmade Illumination for Moravian Star
...hingiverse
diy illumination adapter for moravian star. custumizable with freecad.
for: https://www.thingiverse.com/thing:1112376
thingiverse
free
Moravian star pixel plates by didjareally
...n star pixel plates by didjareally
thingiverse
simple plates that allow pixels to be added to 21" moravian star decorations
thingiverse
free

Moravian star - Herrnhuter Stern by jtronics
...ther projects you will find under: mydsgn.jtronics.de
here you will find all my other projects on thingiverse.com/jtronics/things
thingiverse
free
Christmas Moravian star by DeltaPlus
...christmas moravian star by deltaplus
thingiverse
see: https://www.thingiverse.com/thing:4682966
thingiverse
free
Moravian star by mgreiner79
...is is a common christmas decoration in germany. this version is hollow inside, so that you can put an led in it and make it glow!
thingiverse
free

Moravian Star Tree Topper by Apogee_Boost
...vian star.
the base is printed with a wide receiver hole. wrap the top of the tree with masking tape to obtain the desired fit.
Christmas
3d_ocean
$3

Christmas bauble
...christmas bauble
3docean
christmas bauble christmas tree merry christmas
christmas bauble
turbosquid
$2

Christmas Ornament Christmas Ornament
... available on turbo squid, the world's leading provider of digital 3d models for visualization, films, television, and games.
3d_ocean
$5

Christmas
...de in 3ds max 2013 3dsmax with vray render included material and light obj file fbx file hope you like it please don’...
3d_export
free
christmas sphere
...christmas sphere
3dexport
christmas sphere to decorate your christmas pine in 3d
3d_export
free
christmas sphere
...christmas sphere
3dexport
christmas sphere to decorate your christmas pine in 3d
3d_export
$5
christmas balls
...christmas balls
3dexport
christmas balls, great decorations for your 3d christmas tree.
3d_ocean
$5
Christmas Ornaments
... ornaments in cinema 4d. it’s very basic, but extremely nice, especially for christmas. this is perfect for your holiday scene...
3d_ocean
$19

Christmas wreath
...christmas wreath
3docean
christmas decoration wreath
high quality christmas wreath with animated lights
turbosquid
$1

christmas
...rbosquid
royalty free 3d model christmas for download as max on turbosquid: 3d models for games, architecture, videos. (1357407)
3d_export
$5

christmas lollipop
...christmas lollipop
3dexport
christmas lollipop.
Star
3ddd
$1

Rolling Stars Antic Star
...rolling stars antic star
3ddd
rolling stars , вентилятор
rolling stars antic star
turbosquid
$2

Star Shuriken (Throwing Star)
... available on turbo squid, the world's leading provider of digital 3d models for visualization, films, television, and games.
design_connected
$18
Star
...star
designconnected
helen amy murray star computer generated 3d model. designed by murray, helen amy.
3d_ocean
$2
sea star
...sea star
3docean
game star sea star space star
this model is, normally poly model. use for games screen.
3d_export
$2

star gingerbread
...star gingerbread
3dexport
"star" gingerbread in the style of the movie star wars.
turbosquid
$10

STAR
...ar
turbosquid
royalty free 3d model star for download as max on turbosquid: 3d models for games, architecture, videos. (1338162)
turbosquid
$1

Star
...ar
turbosquid
royalty free 3d model star for download as c4d on turbosquid: 3d models for games, architecture, videos. (1564546)
3d_export
$5

star sword
...star sword
3dexport
star sword
3d_export
$5

Star building
...star building
3dexport
star building
3d_export
free

ikosaedr-star
...ikosaedr-star
3dexport
ikosaedr-star
Support
turbosquid
$5

Support
... available on turbo squid, the world's leading provider of digital 3d models for visualization, films, television, and games.
3d_export
$8
Support 3D Model
...support 3d model
3dexport
support cantilever console
support 3d model tasal 73900 3dexport
3d_export
$5
phone support
...phone support
3dexport
phone
turbosquid
$12
Support bars
...squid
royalty free 3d model support bars for download as max on turbosquid: 3d models for games, architecture, videos. (1411542)
turbosquid
$8

support weights
...id
royalty free 3d model support weights for download as max on turbosquid: 3d models for games, architecture, videos. (1411538)
turbosquid
$2
headphone support
...royalty free 3d model headphone support for download as sldpr on turbosquid: 3d models for games, architecture, videos. (1357583)
turbosquid
$2

Support for flowers
...royalty free 3d model support for flowers for download as max on turbosquid: 3d models for games, architecture, videos. (1463543)
turbosquid
$14

Flower Support
...alty free 3d model flower support for download as max and obj on turbosquid: 3d models for games, architecture, videos. (1497066)
turbosquid
$5
serum support
...yalty free 3d model serum support for download as c4d and obj on turbosquid: 3d models for games, architecture, videos. (1551267)
3d_export
$10
spyro joystick support
...spyro joystick support
3dexport
joystick support of spyro dragon
Needed
turbosquid
$15

needs ligth?
... available on turbo squid, the world's leading provider of digital 3d models for visualization, films, television, and games.
3d_export
$5

I need a new job
...i need a new job
3dexport
i need a new job funny sign. include a *.obj file
3d_export
$10
Dog house that doesnt need laundry
...painter available for all software<br>ue4. ue5. blender. maya. 3d max. unity. c4d.<br>formats: .obj .gltf .fbx .blend
3d_export
free

the wall and the sidewalk i give it away for free but in return you need a comment whether it was
...dexport
the wall and the sidewalk, i give it away for free, but in return you need a comment whether it was useful to you or not
turbosquid
$20
3D Animated High Resolution White Liquid 2 Flow Swirl Splash Animation. No Need To Use Realflow Software 3D Animation. It Can Be Used In Virtually Any Animation Software 3D model
...y any animation software 3d model for download as c4d and fbx on turbosquid: 3d models for games, architecture, videos. (1359187)
3d_export
$5
akm - unfinished project
...of akm, needs some work.<br>-no textures<br>-uv mapping needed<br>-geometry fixes needed ...
3d_export
$5

Boots
...
3dexport
does your character need flying boots to make their adventure even more memorable? then this is exactly what you need!
3d_export
$9
marantz sr7013
...; needs an emission shader with a light blue hue and lastly "readout" needs an emission shader in white.<br>enjoy
3d_export
free

nail
...nail 3dexport a nail for what is needed ...
3d_export
$5

oil can
...ort
can container for oil or any liquid. volume = 1200135 mm3 dimensions in mm ping me if need stl or need customize dimensions.